Apr 1, 2013

Minty Garlic Potatoes

This was a recipe I tried out on a whim ages ago. I did not think much of it then. That is, until my child requested for it again. Isn’t it is true that potatoes are so versatile and can work with any flavours, seasonings and is an all time favourite with kids?
Yummilicious Baby Potatoes
I am particularly fond of this recipe since the flavours taste very fresh if you follow this method of preparation. Of course, I have just made it up the way my family likes it. You could tweak, add, change ingredients to suit your favourite flavours too. After all, what is a dish without improvisations? Useful for last minute lunch prep or when guests land up at mealtimes and you need to rustle up more food. I have used baby potatoes because I had them and because they look cute. SmileOf course, normal potatoes boiled and cubed are fine too. Take it forward anyway you like. This could even be a salad with boiled potatoes, pomegranate, some diced tomatoes and use the pudina as a dressing. The results are sure going to be delicious.
What’s good about potatoes?
  • It is popular belief that potatoes are full of starch and fat and offer little else. Potatoes have complex carbohydrates, which are a good source of carbs as opposed to refined flours and refined sugars.
  • It may also be surprising to know potatoes are a good source of several minerals like Magnesium, Potassium, Zinc, Copper.
  • Potatoes are also fair sources of Iron, Vitamin B complex and Vitamin C. Despite losses during cooking potatoes can deliver 2- 5 % of daily requirement of Vitamin B and C.
  • Potatoes are fatty? No way – they are a zero cholesterol food! The total fat in 100 gm. of potatoes is only 0.1 g and that is Omega 3 and Omega 6 fatty acids.
  • While the skin does not have any nutrients, it is the layer of potato just below the skin that has them. The best way to harness all these great vitamins and minerals is to cook/ boil them with skin on. This locks the nutrients in. When we peel potatoes after cooking, instead of before, we save a lot of the nutrients.
  • A lot of vitamins and minerals ‘leach into’ the cooking water. So it is a good practise to cook/boil in just enough water (instead of excess water) to optimise the maximum value of any vegetable, especially so in this recipe.
  • Adding a good bunch of fresh herbs like pudina (mint) and coriander to this recipe enhances it’s iron and fibre content.
I guess we need no more incentive to cook a lovely batch of minty potatoes. So here goes -
You need
  1. Baby potatoes – 500 gms
  2. Onion – 1 small, diced Fresh pudina leaves
  3. Mint leaves (Pudina leaves) – packed, 1 cup
  4. Coriander leaves – remove roots, clean, chop and measure 1/4 cup (optional)
  5. Garlic – 1 medium clove
  6. Juice of half a lemon
  7. Any vegetable oil – 2 tsp
  8. Saunf (fennel seeds) – 1/2 tsp
  9. Jeera – !/2 tsp
  10. Salt – 3/4 tsp
  11. Sugar – a pinch
To Assemble
  1. Immerse the baby potatoes in a water bath for half an hour if you have time. Else, leave in for 5 minutes and clean the skin well. You can boil the potatoes in enough water for 20 minutes or just pressure cook it till 1 whistle.
  2. Leave the boiled potatoes on the chopping board to cool naturally. Peel when sufficiently cool to handle.
    (Why not dunk in cold water? – Because that lets more minerals and vitamins dissolve into the ‘cooling water’ too.)
  3. Make a coarse paste of the following ingredients – half onion, pudina leaves, coriander leaves (if using), juice of half a lemon, sugar and the garlic clove. I used the ‘pulse’ button in my mixer to get the coarse texture. Coarse blend paste
  4. To a pan set on high heat, add the oil, sizzle saunf and jeera. Tip in the other half diced onion, fry until pink.
  5. Add the potatoes, salt and toss well. If you wish to get a nice ‘roasted feel’, let them simmer, scraping and tossing occasionally for 10 – 15 minutes. Salt the frying potatoes
  6. When the potatoes are done, add the coarse ground paste as a final step, toss the pan well to let the paste coat all the potatoes. Switch off flame immediately. Pudina paste - final step
  7. Cover and let flavours rest for 10 minutes. Serve warm with steamed rice and sambar or with hot phulkas.Minty Garlicky Potatoes
Notes
  • Add the crushed garlic to the hot oil instead of adding it to pudina paste if you detest the flavour of raw garlic.
  • Toss boiled potato with cherry tomatoes, (or regular tomato diced) and cucumber with the coarse ground pudina paste, chill and serve as salad.
Ready to dig in..

Mar 25, 2013

Chukkumanam


A very Happy Holi to all readers! I adore this festival for the bonhomie and togetherness it brings about. The internet abounds with recipes you could make on this happy festive day. This recipe is just what you would feel happy to reach out for after gorging on endless plates of Mawa Gujiya, Kachoris, Dahi vada and other absolute indulgences.

So for my post today, I am offering a tongue tickling, slurp worthy, lip-curling,  ... Tamarind Digestive! You can make this ahead. It keeps well for a couple of weeks, maybe more. I have never found out. Batches of these disappear at our home within days of making. Yummy Slurpy Chukkumanam

It is fairly simple, with ingredients you would always find around the house. So what is the tough part? Pounding the tamarind to a gooey pulp! For, this tastes best when hand-pounded in a mortar and pestle. This takes time and will leave you happier for your toned arms after this exercise! Open-mouthed smile

Traditionally Chukkumanam is made at our homes for ‘Sumangali Prarthanai’ (invoking the Blessings of all married women of the family who have passed on). Several married women are invited home, their feet washed, anointed with fragrant sandal, offered auspicious turmeric and red kumkum. They are then fed and how! Over clean wide banana leaves, they are served course upon course, dish after delicious dish, until all the women groan under the gastronomic assault! To help digest their special heavy meal, the Sumangalis are then offered ‘spiced buttermilk’ and this ‘Chukkumanam’. The traditional recipe does not include jaggery, but I have added it for balance.

Enjoy the digestive after your special festive gastronomic journey on Holi, or make it anytime you feel like.

You Need

  1. Cleaned, deseeded, tamarind - 4 heaped tsp
  2. Jaggery, powder and measure - 2 tbsp
  3. Dry ginger powder - 2 tsp
  4. Salt - 1 tsp
  5. Bedige Red chilli - 1/4 of 1 chilli
  6. Ghee - 1/2 tsp


To Assemble -

  1. Clean, deseed and remove fibre and other impurities, if any, from the tamarind. Place in a mortar and pestle or mixer jar.
  2. Add all other ingredients except ghee, pound by hand or use pulse button of mixer to get a uniform mixture. If pounding by hand, it will need about 10 minutes of persistent effort to bring the mixture together. If using the mixer, be very careful while using for the recipe does not have any water, the solids can clog the blade and ruin it.Knead the mixture together with ghee
  3. Remove to plate, add warmed ghee, knead with hand.Roll into Balls with greased hand
  4. Roll into small balls, stick on toothpicks to serve immediately.
  5. Wrap in parchment paper to store for up to two weeks.DSC_0012

DSC_0016

Mar 12, 2013

Lauki raita/ Sorakayi pachadi


Bottle gourd as it is known in English, was not a favourite at our home too, that is until my yoga teacher shared this recipe with me. Bottle gourd is always paired with a protein such as chana dal or tuvar dal or mung dal in traditional Indian recipes. One reason could be that the vegetable has very low protein levels. Thus creating a dish with the vegetable + protein makes it complete!

Of the several Indian recipes such as using it in koftas, avial, kootu, I took an instant liking to using it in raita. Cooling, refreshing, this extremely simple dish can be paired with any entree, any cuisine. The best part is very few ingredients are required and takes little time to put together. Use it as dip, chutney, raita, or to fill in hunger pangs between meals too.

What’s good about Bottle gourd?

  • Bottle gourd has plenty of moisture and dietary fibre. This makes it an ideal summer vegetable to replenish fluids in the body. The fibre keeps constipation, piles, cholesterol and even colon cancer at bay.
  • 100 gm of uncooked bottle gourd has only 12 calories. This makes the vegetable an instant pick me up for weight loss diets.
  • It has no protein or fat content – the only way to add that would be in a recipe that includes some protein and good fat.
  • This humble vegetable is a fair source of Magnesium, Zinc, Potassium and Copper. All minerals needed by teenagers and growing children.
  • Also a very low sodium vegetable, this is very suitable for people with high blood pressure or diabetes too.
  • Do check out this link too. http://www.thehindu.com/health/policy-and-issues/article2571430.ece

So do try out this super simple and soul satisfying recipe this summer.

You needGrated bottle gourd

  1. Bottle gourd/ lauki/ sorakayi – select tender lauki, wash, peel, grate to a medium fineness, measure 3/4 cup.
  2. Thick curd – 1 cup ( I used home made skim milk curd) If you use store bought curd, select fresh probiotic skim milk curd.
  3. Salt – 1/4 tsp.
  4. Sugar – a pinch (optional).
  5. Fresh coriander leaves – chopped fine – 1 tbsp

For seasoning

  1. Oil – 1/2 tsp
  2. Mustard seeds – 1/4 tsp
  3. Asafoetida – a teeny pinch
  4. Green chilli – 1, finely chopped
  5. Curry leaves – 3-4 torn up

To assemble

  1. Combine the grated bottle gourd, whipped curd, salt, and sugar.
  2. Heat oil in a small tadka pan, add oil and other seasoning ingredients in order.
  3. Pour over raita.
  4. Top with chopped coriander leaves.
  5. Chill for an hour before serving.

Cool curd and hot takda

Variations

  1. Omit seasoning.
  2. Add roasted jeera powder and kala namak powder if you like the piquancy.
  3. Add one half onion, finely diced, or few chopped stems of spring onion along with bottle gourd in the raita.
  4. Add grated carrot for colour!

 Chilled Bottle gourd raita

Mar 5, 2013

Sprouts In Palak Gravy

Reposting the recipe as entry to Only Cooking with Legumes event at Nalini’s Kitchen. A great event started by Pari Vashisht at her blog Foodelicious

March is the season of winter in some places, spring in some parts of the world, and summer in several parts too! One season is common to all in India – March is the season of exam fever all over the country! Rising temperatures, portions to complete, revise, projects to submit, cramming before exams, and raging hormones no less, all add to the Indian teenager’s agony. Standing at an important crossroad of life, today’s teenager and the family have a lot of stress to face through these weeks.
At such stressful times, it goes without saying that a healthy body and healthy mind are very crucial to crack the tests and come through happily. Parents are eager to know what can help in improving their children’s health and will do all it takes to better their child’s chances at success. I have had several parents ask me about ideal diet for children during study holidays and examination - time. An ideal diet at these times should include plenty of fibre, vitamins and minerals and less of refined starches. Greasy, spicy foods are best avoided too. Fruits, fresh squeezed citrus fruit juice without too much sugar, other fluids like tender coconut water do wonders to keep the body and mind stable and calm. It also helps to spend some time in playing  a favourite game and / or doing breathing exercises like ‘Pranayama’ (after learning from a qualified teacher).
Let us begin with good food. Food that is nourishing, sustaining, and tasty too! Food that energises without being heavy, food that delivers maximum effect with minimum effort. What can fit this bill better than sprouts?
I am quite fond of sprouts for their power packed nutrient content. Sprouts are an invaluable source of protein in a vegetarian’s diet. Besides the protein punch, sprouts are also chockfull of Vitamins B (better digestion, stronger nerves), Vitamin C ( better immunity, healthier gums). Also present are Minerals like Zinc, Copper, Iron – These are needed for a growing teen for stronger muscles, more blood cells and hence more oxygen to body and brain! Sprouts are low on glycemic index too. They are the perfect food for holistic health – of mind and body.
While it is true that raw sprouts give all the benefits of vitamins, fibre, minerals, yet it is not an easy task to coax children to chew on them frequently.If you can get your teen to chew on a tbsp of raw mung bean sprouts daily, it would be wonderful. However. do not despair if she does not agree. I often choose the middle path – steam the sprouts, or microwave them for a brief while to take the raw offensive flavour out. Steaming sprouts also is good to help elderly or people with compromised immunity to digest it easily.
Eating cooked sprouts is better than not eating them at all. Eating cooked sprouts in a smooth flavourful palak gravy is even better. What say?
Parathas made with multi grain dough flavoured with ajwain paired well with this sprouts in palak gravy. It was school lunch fare and I am so glad to say that other kids at school liked it too. This is an ideal meal for children working hard at their academics at this time of the year.
Bowl of Sprouts in Palak
You need
  1. Mixed sprouts or mung bean sprouts – heaped, 1 cup
  2. Palak leaves – wash in several changes of water, drain, chop and measure – 3 heaped cups
  3. Onion – chopped, 1/4 cup
  4. Garlic – 1 clove, crushed
  5. Tomato – chopped, 1/2 cup
  6. Green chilli – 2
  7. Root ginger – chopped – 1 tbsp
  8. Salt – 1 heaped tsp
  9. Garam masala powder – 1 tsp
  10. Oil – 1 tbsp + 1/2 tsp
  11. Jeera – 1/2 tsp
To Assemble
  1. Pressure cook mixed sprouts or mung bean sprouts for as much time as needed to be just cooked. The cooking time will depend on the bean. Set aside, for pressure to release. Alternately, if you are using only mung bean sprouts, just steaming them for 3-4 minutes would be good too.
  2. Heat 1 tbsp oil in a non stick pan or kadhai.
  3. Add in this order, each at a 30 second interval   – garlic, ginger, green chilli, onion and tomato. Add salt, let the tomatoes mush up. Fry ingredients in oil
  4. Add chopped palak leaves. Toss the palak well in the pan, let it wilt and cook for about 2 minutes. Add chopped palak
  5. Cool and grind to a smooth paste.
  6. To the same pan, add 1/2 tsp oil, Sizzle jeera in it.
  7. Tip in the palak puree and the cooked sprouts, add garam masala. Check for salt, add more if needed. Mix palak puree and cooked sprouts
  8. Simmer for 3-4 minutes, switch off cover and let flavours mingle for 10 minutes or more. DSC_0042
  9. Serve warm with a lime wedge if you like, as accompaniment to hot phulkas or steamed rice. Yum. SmilePower Packed Meal

Feb 19, 2013

Strawberry Jam

Of course, February is the season of Valentine’s Day, of spring and strawberries too.

strawberry

When in season, I cannot resist the beautiful berries and keep including them in as many ways as possible in our meals. We are not lucky to be living near a farm where we could pick our own juicy berries. So when my usual supermarket stocked fresh supplies at the best prices for the season, I grabbed the chance to make this delicious strawberry jam.

I took the recipe from my dear friend Jayasree Satish’s blog. She has compiled so many interesting recipes in her blog and I often revert to her blog for guidance. Jayasree, can’t thank you enough for being support and inspiration to all even after you don’t live among us anymore. Here is the link to her recipe -http://kailaskitchen.blogspot.in/2011/01/easy-strawberry-jam.html?

I really do not believe in the present day hype surrounding Valentine’s day. Surely, any day is good to express love and affection. All the marketing, merchandise and mayhem surrounding February 14th leave me feeling out of breath. So, in keeping with my belief that any day is good to express affection, love and good cheer, this is a recipe that I share with all. A jam I totally love, one that leaves me licking the last micro-drop of jam from the spoon. No preservatives, no artificial colours, no acidity regulators – nothing synthetic. Only pure fruit, sugar and pure love!

What’s good about this jam (or any other, for that matter )Winking smile

  • A good home made jam, besides filling your home with an indescribable aroma of bubbling fruit pulp, makes you feel warm and fuzzy inside,  leaves you feeling like a kid too!
  • You can control the sugar added, add any spice to give it a different dimension, cook it to your preferred degree of doneness. No more jams with more sugar than pulp, or ones that will tear the bread slice apart but will not spread on with any shred of grace or dignity! (Psst, true of several Indian brands)
  • You can entirely do away with the preservatives, nature identical flavouring substances (who wants those, we have real nature bubbling in our pots) and the whole host of added chemicals which are needed in commercial ventures for shelf life, portability etc. True, this jam is likely to last only a few weeks and that too in the fridge, but hey, so what? It tastes so good, it is likely to be devoured in a week or so anyway!
  • The only dampener is that eating real fruit is way more healthier than cooking it up. Boiling/cooking/heat reduces the vitamin and mineral content of the fruits. Yet, making homemade jam is surely healthier than store bought ones – fresher, no chemical additions.

Without further ado, here goes -

You need

  1. Strawberries – 750 gms
  2. Cane sugar -  350 gms
  3. Juice of 1 lemon

To assemble

  1. Wash the strawberries by soaking in a tub of tap water for 10 minutes.
  2. Rinse over a colander with more water, lay out on a towel to dry a little, give about 10 minutes of drying time.
  3. Hull the berries only after the washing step.
  4. Weigh the berries after hulling. This is to estimate sugar needed. I have used sugar at approximately half the weight of berries. You may need more sugar if the berries are more tart. I guess you can add more later, while cooking if required.
  5. Cut into quarters or smaller, drop into a clean stainless steel / glass bowl.
  6. Pour the weighed sugar over the berries. Toss well, keep covered overnight or at least for 4- 5 hours. (I kept it overnight in the fridge)
  7. Place a heavy-bottomed pan over the stove, stir the berry-sugar mixture in it. Add the juice of 1 lemon too. Keep stirring over medium to high heat until the mixture looks homogenous and glossy. Ti took me less than half an hour for this quantity of fruit. Time can differ based on quantity and flame strength.DSCF5356
  8. The sheet test for doneness of jam is to drop a spoon of jam on a chilled plate or saucer. The jam has to fall in a ‘sheet’. The jam on the saucer should develop a ‘skin’ in a minute and appear crinkly when pushed with a finger.

The jam had small chunks of strawberries, I loved it totally. You could puree the fruit and sugar together before heating if you do not like a chunky jam.

DSCF5350

Enjoy licking it off a spoon, over a muffin or spread on a slice of warm toast.

Jan 19, 2013

Cherry tomato Lettuce Salad


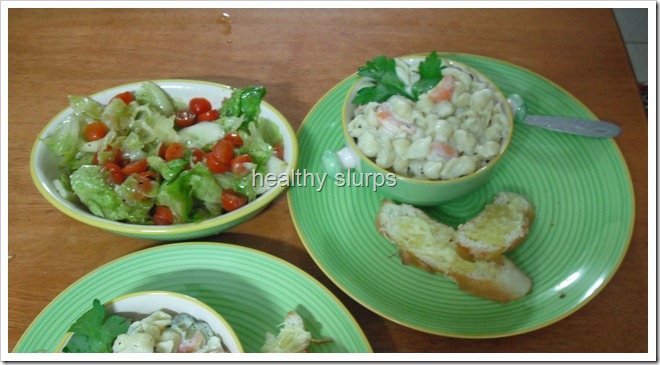
Well, this salad does not even need a recipe. It is such a simple combination of veggies and dressing. In fact, I am sure several of you will have tried out some version of this salad. I made this salad to accompany the Low Fat Creamy Pasta. The salad, pasta and fragrant garlic bread comprised dinner last weekend. Quite a combination of textures, colours, flavours and tastes. It was a very satisfying meal.
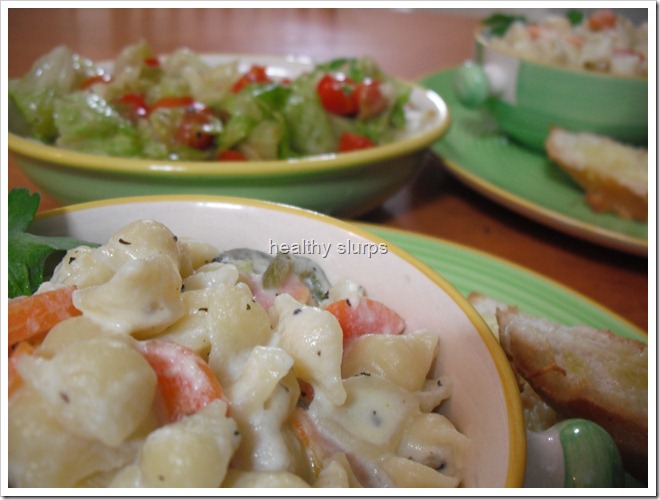
Taking some time to plan, shop and create good meals is so fulfilling. The happiness I feel when I sit down with loving family members eager to sample the latest creations and finding their faces light up with joy and hearing those happy exclamations – these make all the effort of cooking worthwhile. Well let me also admit that I go through my good share of disasters, and food that no one wants to touch. But thankfully, these happen lesser than the former.
As I said, this salad is a simple combination of dressing, veggies and tossing them together.
You need
For the veggies -
  1. Iceberg lettuce – 1 small head
  2. Cherry tomatoes – 22-25 numbers
  3. Cucumber – 1-2 medium (really, your choice)
  4. Ice cold water – enough to dunk the lettuce in (approx. 4 cups)
For the dressing -
  1. Balsamic vinegar – 1 tbsp
  2. Extra virgin Olive Oil – 4 tbsp
  3. Crushed black pepper – 1-2 tsp
  4. Salt – 2 pinches
  5. Sugar – 1 pinch (optional)
To assemble
  1. Wash the lettuce head, tear leaves apart by hand into bite size pieces and keep immersed in ice cold water until needed.
  2. Dunk the cherry tomatoes in a bowl of water for 5 minutes, drain, pat dry and cut into halves. Place in a large mixing bowl.
  3. Rinse the cucumber thoroughly with the peel on . You can retain the peel on the cucumber or partly peel them too. If there are too many seeds along the middle of the cucumber, you may want to discard them. If so, cut into half lengthwise, remove the ‘seedy’ parts and slice into half circles. Else, if the seeds are tender, you can slice the cucumber into thin disks. Place along with the tomatoes in the mixing bowl.Veggies - washed, scrubbed, waiting for their dress!
  4. Pour the balsamic vinegar into a bowl. Pour the Olive oil in a thin drizzle whisking with a fork all the while. Continue to whisk well until all the vinegar and oil have blended into an almost homogenous mixture. Add the crushed pepper and salt now, whisk them in too. Dressing is ready.
  5. Now is the time to drain the lettuce in a colander – drain it well, shake up the colander and coax the last drops of water out! Add the lettuce to the mixing bowl, pour the salad dressing on top and mix well, toss, shake – do whatever except spilling the contents!
  6. Chill the salad for at least half an hour before serving so that it is at the right temperature and the flavours settle well.
Some salad everyday keeps tummy trouble away
Notes
  • You can add pitted black olives, walnuts, coloured peppers (capsicum), rocket leaves or any preferred vegetables to the salad. Use dressing in proportion to the vegetables used.
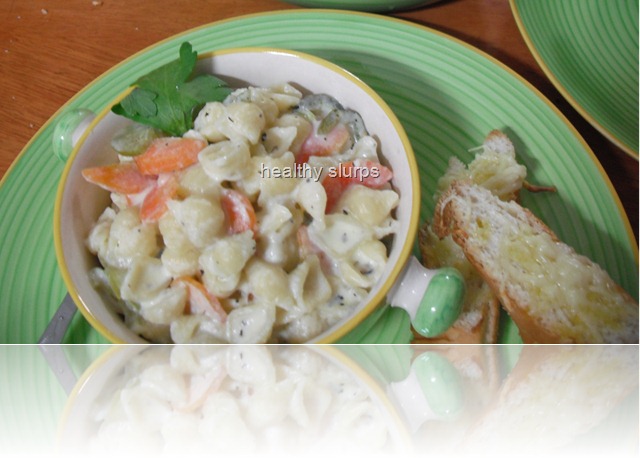
  • Using fresh tender vegetables, and chilling well before serving help to enhance the taste of the salad.

Jan 17, 2013

Low Fat Creamy Pasta

A Happy New Year to all.

As with every year, I have resolved to live healthy, live happy, be grateful for the nice things in life,spend more time with my kids. I am also pushing myself to find healthier food, better recipes, to share with all and do my bit for a better world. Pasta and Italian food are quite a favourite among people all over the world. We love Italian food at our home too. Based on frequent demands from my kids, I try to recreate popular dishes like pasta in bechamel (white) sauce at home. However, the amount of cheese that is required each time sends alarm bells to my nutritionist mind. While some cheese is good for children, as part of milk intake, too much of it is unhealthy.

While watching an episode of Junior Masterchef, I saw one participant using an ingredient which could substitute for part of the cheese in white sauce. I was quite excited by the idea, and tried it out soon. The first attempt was just about edible – I think I scrimped too much on the cheese. The second time, I did not get the proportions right. So this time, I thought through the proportions carefully and tried – this version was by far the best.

I am sure several of us would have started off with New Year Resolutions to reduce weight, eat healthy and so on.. Most resolutions fizzle out because we lack the will power to stick with them. Low fat food, salad – only meals, tasteless food in the name of diets – these are sure fire methods to lose our goals instead of excess weight!

I named my blog ‘Healthy Slurps’ as I firmly believe that healthy food has to be tasty too. I believe in modifying or inventing recipes which optimise the nutrients in ingredients used and are filling and healthy at the same time. This recipe is a great example. So here is my recipe for creamy, oozy, tasty pasta in white sauce minus sin.

I have given measures for 500 gm. uncooked pasta. If you plan to make a smaller batch, reduce proportions accordingly, but you could also make a big batch and freeze the rest for later.


Low calorie pasta

You Need

  • Pasta shells – any shape you have in stock, I used small shell – 500 gm., uncooked.
  • Skim milk – 800 ml to 1000 ml.
  • Whole wheat flour (atta) – 1 heaped tbsp.
  • Butter – 2 tbsp., to be used in parts through the recipe.
  • Processed cheese – 50 gm
  • Carrot – wash peel cut into thin disks – 1 level cup
  • Green or any colour capsicum – cut into thin slices – 1 level cup
  • Cauliflower – 12-15 medium sized florets.
  • Seasonings –1. Dry Oregano and 2. dry basil – 1 tsp each (or to taste) 3. White pepper /black pepper crushed – 1 heaped tbsp, 4. Salt – 2 tbsp.
  • Fresh drinking water – 3 litre or slightly more, if needed.

To Assemble

  • Boil water in a large pot, add a dab of butter, 1 tbsp salt to the boiling water and boil the pasta in it for 7-8 minutes or as per instructions. Drain, rinse and set aside in a colander.
  • Blanch the cauliflower florets, drain. Heat 1/2 tsp butter in a large pan, fry the cauliflower in it for a good 3 minutes, cool and puree to smooth paste in a blender. Set aside.
cauliflower puree
  • Heat 1 tbsp butter in the same  large pan used for cauliflower, stir fry the capsicum first, add carrots next, add a pinch of salt, toss well.sauteing vegetables
  • In a corner of the pan, add the rest of the butter, place the whole wheat flour over the sizzling butter and fry to remove the raw smell. (takes about a minute or less). Now pour the skim milk in a thin stream over the flour, stir briskly to avoid lumps. You could use a whisk too. Mix in the vegetables and the white sauce, let simmer together until the sauce thickens and bubbles evenly. Control the flame as needed throughout.
  • When the sauce thickens and bubbles, add the cauliflower puree, the cheese, and mix all well.
  • After the whole mixture is homogenous, add in the seasonings, taste and adjust as per your taste.
bubbling sauce with seasonings
  • Now the sauce is ready to coat the pasta. Pour in the boiled pasta, toss well to coat. cover, take off the heat and set aside for 10 minutes or so for the flavours to settle. Toss pasta with the sauce
  • Tasty creamy pasta is ready to be served. I served this with warm garlic bread and a lettuce - cherry tomato salad in a balsamic vinaigrette dressing.
Dinner is served

Notes

The amount of cauliflower used for the puree is important – too much and it tastes like cauliflower soup, too little and it does not thicken well enough. Sautéing the cauliflower in butter makes sure that the taste does not overpower the other flavours in the sauce.

You can use the same sauce for lasagne or for a macaroni hot pot – spread some more grated cheese as top layer and bake as you normally would.

You can use more vegetables like broccoli, sweet corn kernels, baby corn, zucchini, even black olives if you like. ( I like black olives with a tangy tomato sauce )

You can sprinkle a tsp. or more of grated cheese on top while serving kids. Grated Parmesan tastes great. While Parmesan is not strictly ‘vegetarian’, use it if you feel comfortable.

Creamy pasta ready to dig in

What’s good about this pasta dish?

The most obvious advantage in this recipe is the limited use of cheese in the sauce. This recipe makes 8 –9 portions of pasta. 50 gms of cheese added here will amount to 6 gms per person – the quantities normally used would range from 30 –35 gms per portion. 

This means that, whatever cheese you have used in your recipe, you can cut down the fat content by 5 –6 times.

Despite cutting down on the cheese, the sauce does not lose out on creaminess, mouth feel or flavours – so we do not feel ‘deprived.’

Adding more vegetables to the dish or serving it with a stir fry or salad, as in my case, makes it a complete meal.

I have used butter optimally without indulging in excess.

I have used whole wheat flour as a thickener too as against refined corn flour or all-purpose flour (maida).

While processed cheese is not the best, I have used it here to show how despite an ordinary cheese, the sauce and the meal does taste great. Also processed cheese is most widely available in India. Feel free to use reduced fat – mozzarella in your recipe.

Do let me know if you liked the recipe, and do come back with your feedback after you have tried it out.