Showing posts with label quick. Show all posts

Nov 17, 2014

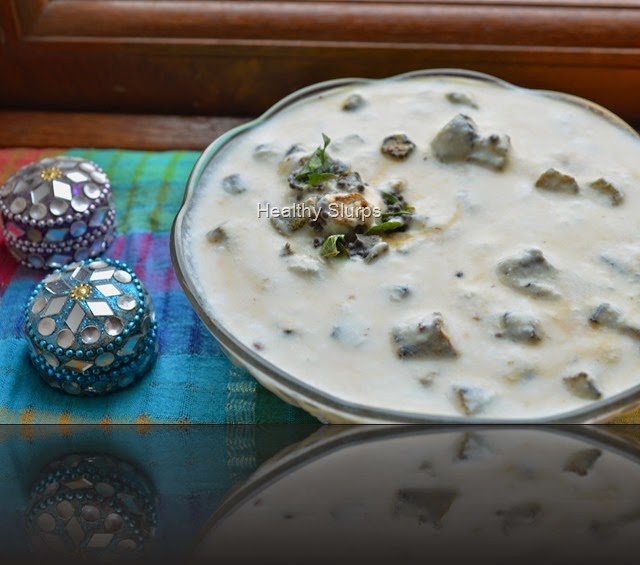
Roasted Brinjal Raita / Eggplant Raita / Roasted Eggplant Dip

The best meals are often the simplest ones. Those which can be rustled up with really few ingredients, in minimum time, and deliver high on nutrition, as well as satisfaction. Quick cooking=happy eating=content tummies.

This raita is one such recipe. Besides, the dish is versatile in that it can be used in many ways. The day I made it at home, we used it as raita, dip, as well as a substitute for mayo in sandwiches! So does it taste like baba ghanoush? Well, not quite. Tzatziki? well, maybe. Punjabi Baingan Bharta? mmm, not that either.

Why don’t we  just delve in and find out? Shall we?

Chilled bowl of smoky raita

The secret to an amazing brinjal raita lies in how it is smoked. While purists will tell you to rub some oil on the skin and roast on all sides over an open flame patiently turning it over and watching lest it char beyond recognition, i am going to let you in on a secret!

Just rinse the brinjal, wipe dry, slit into four long pieces, place in a microwave safe glass bowl and cook on the highest power for 6-7 minutes. Now take each piece and roast them individually over an open flame for just a minute per piece.  Dunk them in a bowl of cold water, peel the charred skin and reserve the pulp. This whole process takes less than 15 minutes. This gives the right amount of smokiness to the pulp without being overpowering. It also frees you up to attend to the rest of the meal while it cooks in the microwave. No need to tend to it constantly. Plus a total reduction in cooking time.

Now that I have simplified it for you, go ahead and make yourself some fragrant raita/dip/sandwich filling/meal by itself.

Come and eat me!

ALLERGY INFORMATION

  • Does NOT contain gluten, nuts, corn, soya, eggs.
  • Has dairy in the form of skim milk curd (yoghurt). Usually tolerated by people with lactose intolerance.

Preparation Time – 15 minutes, Cooking time – 15 minutes, Serves – 4

You Need

Cookware – Knife, Cutting Board, Small Sauce pan / Tadka pan,  Bowl of 1 litre capacity.

Ingredients

  1. 1 Big Violet Brinjal/Eggplant weighing approximately 500gms
  2. 1 cup Fresh curd
  3. 1/2 tsp salt
  4. A pinch sugar
  5. 1/4 tsp mustard seeds
  6. 1 small green chilli
  7. 1/4 tsp cooking oil
  8. a pinch of asafoetida powder
  9. a few curry leaves and coriander leaves for garnish – optional

To Assemble

  1. Prepare the brinjal/ aubergine/eggplant as described earlier. To repeat – wash, wipe dry, slit along length of brinjal into 3 pieces. cook for 6-7 minutes in microwave safe glass bowl at highest power. You may add 2-3 tbsp water to the bowl to help cook without shrinking. I find this method works best for me.
  2. After this, place each piece individually over an open small flame and char the skin. Dunk all of them into a bowl of cold water. When cool enough to handle, peel the skin off and reserve the pulp.
  3. Mash the pulp with potato masher/fork.
  4. Whip curd with sugar and salt. Add the mashed brinjal, and stir in well to combine. Raita just needs seasoning now.
  5. Prepare the seasoning by heating oil in a small sauce pan/tadka pan. Add mustard seeds, when they crackle, add slit green chilli, asafoetida powder. Switch off flame. Pour over the raita. Add the curry leaves and coriander leaves, if using, stir in and let it rest for few minutes.

Your delicious fragrant raita is ready! Serve with hot phulkas, paratha, bisi bele bhath, biryani, filling for sandwich, dip for crudites, wraps. Don’t want to make anything else? Just have it chilled. A bowlful. As it is.

Get me a bowl of this,quick!

Notes -

  • This method of cooking first and smoking next allows for a good desirable smokiness. Even agnostics of smoky flavours will find it appealing.
  • Do not omit the seasoning. It is crucial in bringing all the flavours together.
  • Some chilling will really help in elevating this simple creation. However, if you are in a hurry, don’t worry. Just dig in.

Jun 21, 2014

Five minute Three Pepper Paneer Curry

Check-out Allergy Information.

Every parent with school-going kids has to face the morning or the night before with a very important question – what to pack in the school lunch box? What’s there in my pantry? Also, when you have to feed more than one kid, the agony is doubled, believe me!

If my older one wants muesli for breakfast, the younger one fancies ‘Chocos’. The day the older one thinks of a sandwich for lunch, the younger one would like rice. If one feels like some thing sweet, the other wants a savoury treat right then! The Universe connives with my kids such that, they have exactly opposite moods at any time. At such times, nothing helps - not requests to adjust with each other, not promises to make it tomorrow, not threats, nothing! Trust me.

And, I have an hour to make breakfast for them, make acceptable (read different gourmet meals) lunches, pack them, fill their water bottles, make sure they have brushed, showered, prayed (yes, that is important in my home), combed, attired in mandatory school regalia!, find random books/papers/assignments/stationery that they have forgotten to stuff into their school bags, find their socks, salvage their shoes from the chasm between the shoe racks and the wall, and make sure they reach the school bus on time!

I know I am not alone. Most mothers/parents in my city and maybe, the world over, go through some variation of this vertigo-inducing routine in the morning! Well, after going through this rigmarole for more than 15 years, I have a few tricks up my sleeve. Some recipes which help me assemble quick, hearty, nourishing home-made lunches for my children.

This paneer curry is one such easy-peasy life saver on such insanity-causing weekday mornings!

If you have paneer ready, that is.

And coloured capsicum (bell peppers), and a couple of sauces.

It is versatile, easy to put together, can be used to partner with chapatis, filled into a sandwich, rolled into a kathi roll, or add pizzazz to some fried rice. Most important, when packed in a lunch box, it will come back home empty. Hopefully your child got to eat some of it Smile

Preparation Time – 10 minutes; Cooking time – 5 minutes; Serves – 4-5.

ALLERGY INFORMATION

  • Does NOT contain egg, nuts, corn.
  • Has dairy and lactose. Can be made dairy- and lactose-free by substituting paneer with extra-firm tofu.
  • Has MSG. Not suitable for children below 2 years.

The 3 pepper paneer sandwich

You Need

Cookware – Cutting Board, Knife, Colander, 9” Diameter frying pan / Wok.

Ingredients

  1. Paneer (Or extra firm tofu) – 200 gm
  2. Green, red and yellow capsicum, chopped – 1/3 cup each
  3. Red Onion – 1 big, or measure 1 cup, finely diced
  4. Fresh coriander leaves (Cilantro), chopped fine – 1/4 cup
  5. Schezwan Sauce (any brand) -  2 tsp
  6. Tomato Ketchup – 3-4 tbsp
  7. Salt – a couple of pinches ( if needed)
  8. Any vegetable oil – 2 tsp
  9. Saunf ( fennel seeds) – 1 tbsp*
  10. Honey – 1 tsp OR Sugar – 2 pinches (Optional)

*Do not omit the saunf in this recipe. It adds a unique flavour to the dish.

To Assemble

  1. Rinse paneer or tofu in drinking water. Carefully place it in colander to drain. Then, you can choose to either dice the paneer (or Tofu) or roughly crumble it. I prefer to dice, as then, the diced vegetables and the paneer all look similarly proportioned.
  2. Rinse, and finely dice all the capsicum into the same size. Peel, rinse and finely dice the onion too. Happy day with happy veggies
  3. Set frying pan/wok on fire and heat the oil in it. Add saunf, let it sizzle and release its’ aroma. Inhale - the aroma of saunf
  4. Tip in the onion before the saunf browns. Sauté for a minute. Add a pinch of salt to speed things up.
  5. As soon as the onion looks pink,  tip in the diced capsicum, toss. Sauté for another two minutes.Veggies in a merry sizzle
  6. Now the sauces can go in. The sight of these liquids hitting the hot pan and then the aroma around – I’ll leave you to savour in your kitchen!
  7. A quick mix of the sauces and veggies, and now it is the turn of diced paneer followed by chopped coriander to hit the pan. Switch off flame, mix all contents well, taste and add more salt now if needed. Some paneer will get crumbled while mixing, that is fine. Add the (sugar /honey if you are using), now. Mix through, taste again to make sure the flavours satisfy your palate.*Tri-colour glory
  8. The 5 minute 3 pepper paneer curry is now ready. Use it as filling in whole wheat chapatis – spread 2 tbsp of curry per chapati, roll up, cover in foil and pack for lunch. Or, use as filling for sandwiches. it is a great accompaniment to Chinese fried rice too. Sandwiches in the making

* My family found the play of texture and flavour in this recipe to be very appealing! You could add more or less of the sauces, or add more seasonings as you prefer. Add red chilli paste instead of Shezwan sauce, omit the sugar, try the dish with any one type of capsicum – all these are variations you could try.

Pick-me-up Sandwiches for anytime of the day

We are enjoying these filling, healthy and absolutely lip-smacking sandwiches at our home, in our lunch boxes and as after-school snacks too! Go ahead, make some for yourself, enjoy and let me know if you liked them.

Apr 30, 2014

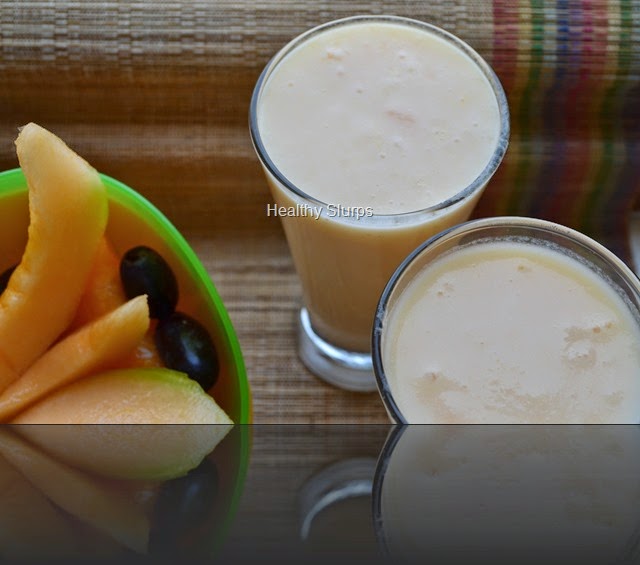
Cantaloupe smoothie


It feels like the worst April ever in my city, unimaginably hot these days.  To add to my woes, I suffered a hit in an amusement park that has left me with a broken rib. I expect it should heal in two months. Added to this are children having summer vacations who keep darting in and out of home in between their endless rounds of play – more thirsty than hungry.  Finding simple recipes to hydrate the children and the rest of the family while trying to ‘bed-rest’ my broken rib is quite a juggle.
In summer, we are naturally inclined to drinking more fluids to overcome thirst, cool the body and keep us sane! I am experimenting with more smoothies, shakes, juices as tasty ideas to rehydration and energy. This Cantaloupe smoothie is the result of one such experiment. When the fruit is made into a smoothie, it is more refreshing and filling. The well ripened fruit gives the drink an amazing flavour and we do not miss the sugar at all.
Cool chilled smoothie
  • Cantaloupe or Musk Melon, as it is called in India, is more available in summer than other seasons. The melon is very rich in Vitamin A, C, Folate, Niacin,  Potassium.
  • These vitamins are important during pregnancy, so the fruit is a good choice along with others for a pregnant woman.
  • The sweet taste of the melon comes from sugars, so diabetics need to work with your nutritionist to find it’s appropriate use in your diet.
  • The fruit’s high moisture content makes it ideal for summers, for rehydration during workouts. The smoothie thus is a very good pre / post workout meal. Made even healthier with addititon of flax powder (Omega 3 and 6 fatty acids) or sabja seeds.
You Need
  1. Skim Milk – 500 ml
  2. Cantaloupe / Musk Melon – Skinned and chopped – 2 heaped cups
  3. Honey – 1 tbsp, optional
  4. Ice cubes – optional
Method
  1. Wash, skin and deseed the melon.
  2. Chop it into largish chunks and blend into a smooth puree in the mixer.
  3. Add 1/2 cup milk, blend again. Pour into a large jug, add the rest of the milk and stir to homogenise. Taste and add honey if needed.
  4. Chill for half an hour before serving. Serve with ice, if you like!
Enjoy the fruit and the smoothie!

Apr 14, 2014

Vendakkai Thair Pachadi / Crispy Okra in Chilled Yoghurt


A very Happy New Year to all who celebrate today. Happy Vishu to all Malayalees across the world! All family members taking time off from busy lives, praying and eating together, tables rich with culinary treats– these surely are some special features of festivals. Celebrations always involve good food. Contrary to popular thought, festive food need not all be time consuming to prepare, nor be calorie-rich.

Today, I would like to share a lip-smacking, simple recipe which you can use to grace the table at any festive menu. This recipe has distinct south Indian flavours, so you can tweak the seasonings to accommodate the demands of your palate or cuisine. (Read notes)

Happy New Year to all

The key point here is how the vendakkai / lady’s finger / bhindi / okra is cooked - crispy ‘fried’ okra is first readied by slicing it thin, drizzling with a quarter tsp cooking oil and grilling it for 10 minutes. This then is lovingly folded into a bowlful of thick skim milk yoghurt, seasoned with salt.The dish is finished off with a fragrant tadka of mustard seeds, curry leaves and pinch of hing in some oil. The grilling ensures that you save fuel, oil and time. The crisp texture encourages even die-hard okra haters to try it out. The chilled yoghurt is just so perfect for this blazing summer season. While this recipe is an accompaniment, you will soon find yourself eating a chilled bowlful on its own. Here is what you need -

You Need

  1. Okra / Lady’s finger / Bhindi / Vendakkai – 200 gm
  2. Skim milk yoghurt – 500 ml
  3. Salt – 1/4 tsp
  4. Sugar – a pinch
  5. Cooking Oil – 1/4 tsp

For seasoning

  1. Cooking oil – 1/4 tsp
  2. Mustard seeds – 1/4 tsp
  3. Curry leaves – 3
  4. Asafoetida Powder (Hing) – a pinch

To Assemble

  1. Wash the vendakkai by immersing in a bowl of water, drain on colander and spread out to dry on a kitchen towel. Snip off the tops and tails, and slice into even thin disks.
  2. Preheat the grill to 250 C.
  3. Place in a single layer on a baking tray. Drizzle 1/4 tsp oil over the disks, and spread in a single layer.
  4. Once the grill is ready, place the tray of vegetables inside, and grill for 10 minutes. Toss and scrape the contents at half time to ensure even browning. By the end of 10 minutes, the Vendakkai would have shrunk to half – size pieces, and would have browned evenly without being charred. You may need to watch the grill in the last minute to ensure correct browning without charring.
  5. Let it cool in the tray. Meanwhile, whip up the skim milk yoghurt with salt and sugar.
  6. Prepare the seasoning by heating oil in a small pan, adding all the ingredients for seasoning in order. Pour over the whipped yoghurt.
  7. Gently fold in the cooled Vendakkai into the yoghurt, chill for half an hour before serving.
  8. Serve with steamed rice, sambar, papads.

Bowl of chilled pachadi flecked with crisp okra

Notes

  • Avoid mixing the grilled vegetable too vigorously into the yoghurt, it will darken the colour of yoghurt.
  • You can experiment with flavours by adding roasted jeera powder, coriander leaves instead of hing and curry leaves.
  • Can be used as a dip for crudites or rolls too by seasoning with a tbsp of chopped, fried onion, a pinch of red chilli powder and a tsp of chopped fresh parsley instead of above seasonings.
  • Grilling the vegetables as opposed to deep frying them helps to cut down on cooking oil used.

Enjoy the cool pachadi!

Dec 3, 2013

Peanut and Peanut Butter


Peanuts / Groundnuts have been used in several cuisines in India and we do have a rich repertoire of dishes with peanuts. Who does not like Sabudana khichdi topped with roasted peanuts? Or peanut sundal or peanut chutney? Or what can beat the joy of munching on a peanut chikki square?

Peanut butter, on the other hand, is a recent entrant in India. United States leads in peanut butter production. Interestingly, India is the second largest producer of peanuts in the world and United States grows just a third of India’s peanut crop!

Health benefits of Peanuts

  • Peanuts have high protein content (highest among nuts). It is a valuable source of protein.
  • Peanuts are good for your heart. They contain anti-oxidants (even more than in fruits) and zero cholesterol.
  • According to a popular myth “peanuts have too much fat.” The fact is more than 75% of the fat in peanuts is “good fat”,(MUFA and PUFA) needed for body functions, keeps heart healthy and maintains normal body weight.
  • Roasted or boiled peanuts are great. However, fried peanuts are not. Fried peanuts have trans fats, hence not advised.
  • High in fibre, higher than other edible nuts such as almond, cashew, pistachio, and walnuts. Also has Vitamins B & E, Manganese, and Magnesium.

Benefits of Peanut Butter

Peanut butter has both health and convenience benefits.

  • Given the health benefits of peanuts, it is healthier than other table spreads such as cheese spread, butter, margarine, and jam.
  • In a vegan / vegetarian diet, peanut butter can help fill in the gap of protein requirement.
  • In a person who has normal body weight and is physically active, peanut butter is a healthy option as part of balanced meal.
  • For sports people, peanut butter is a great energy-protein-fat source.
  • Peanut butter was promoted as a super food in the United States about 100 years ago to feed starving people.

It is convenient in multiple ways. With its creamy spreadable consistency, it satisfies hunger with minimum bulk to a meal. It is a ready-to-eat food available in a jar. It has a long shelf life and needs no refrigeration. Hence it can be used on road trips, outdoor camping, etc. Peanut butter lends itself to several sweet or savoury meal options such as PBJ sandwiches, or as dip when combined with condiments, or as satay sauce, or salad dressing.

Caution before consuming peanuts and peanut butter

! If you are allergic to peanuts or any nuts, DO NOT consume peanuts or peanut butter. It can have mild to serious health consequences.

! If you are on a weight loss diet or on a special diet for kidney ailments, peanut consumption has to be carefully monitored.

! Presence of aflatoxins in peanuts can cause serious digestive disorders. Hence, always purchase peanuts and peanut butter from reliable sources.

Afterword

Recently I attended the “Health Workshop on Peanut Butter” conducted by Agro Tech Foods (makers of Sundrop brand of food products) at Bangalore . Dr. Swarupa Kakani, well-known nutritionist and head of Dietetics Department at Sagar Hospital, Bangalore led the workshop.

This inspired me to independently research nutritional value of peanuts and peanut butter. This post presents my views along with some of the material presented at the workshop.

Here are some recipes shared by Agro Tech foods with us at the workshop.

Apple, peanut butter, Granola sandwich

Ingredients

Any variety apple – 1 cored and sliced horizontally

Peanut Butter – 2 tbsp

Low fat Granola – 1/2 cup

Method

Spread1 tbsp peanut butter over an apple slice. Sprinkle some granola over the peanut butter.Top with another apple slice or serve as open – faced sandwich.

Peanut butter, apple, granola sandwich

Peanut Butter Milk shake

Ingredients

Peanut Butter – 1 tbsp

Jam – 2 tsp (optional)

Milk – 1 cup

Vanilla Ice cream – 1 scoop

Method

Add all ingredients except ice cream to a blender. Whip until frothy.

Transfer to a glass. Top with Ice cream and serve.

Peanut Butter Milkshake

Nov 20, 2013

Sweet Corn and Pomegranate Salad

Colourful Salad
Ingredients for a salad are never fixed at my home. Assembling a salad is a flexible exercise, often involving the bringing together of whatever is available in the fridge, and finishing it off with a dressing, which is most often a citrus-y one. This salad too was created similarly with foods present at hand. Sweet corn kernels and juicy pomegranate do a pretty tango here, with some worthy add-ons such as red onion and grated carrot thrown in to merrily add to the colour riot. I’ve noticed quite often that my kids need no coaxing to try a salad that is as vibrant in colour as this one.
Apart from being loaded with Beta Carotene from the vegetables and anti oxidants from the fruit, salads help to increase the dietary fibre of our daily meal.
As per the recommendations of the National Institute of Nutrition, an adult person must have 40 gm. of fibre in a day, which includes soluble and insoluble fibre. Dietary fibre is needed for
  1. Proper bowel function,
  2. To prevent Haemorrhoids
  3. To prevent Coronary heart disease
  4. To control diabetes and obesity
  5. To reduce plasma cholesterol
  6. To protect against colon cancer.
Salads are the tastiest way to consume fibre in a meal. In addition, they provide colour, texture and variety resulting in a satisfying meal experience.
Go ahead and make this salad for yourself and share it with me too!
You Need
  1. Sweet corn kernels – 1/2 cup
  2. Pomegranate pearls – 1/2 cup
  3. Carrot grated – 1/4 cup
  4. Roma tomato, diced fine – 1 medium tomato
 For the dressing
  1. Salt – 1/4 tsp
  2. Pinch of sugar
  3. Juice of 1 medium lemon
  4. Crushed black pepper – 1/4 tsp OR Green chilli – 1 minced fine
  5. Red onion, diced fine – 2 level tbsp
To Assemble
  1. Steam the sweet corn kernels for 2 minutes in the microwave at high power. Set aside.
  2. Remove the pomegranate pearls from the fruit, keep aside.
  3. Combine all ingredients for dressing, mix well with a fork.
  4. Bring all ingredients for salad together, toss well with the dressing.
  5. Chill for half an hour in the fridge in a covered bowl.
  6. Serve along with warm pulkas or freshly grilled garlic bread or as a side with tadka dal and steamed rice.
Healthy and Radiant


Jun 21, 2013

Corn dalia upma


A few months ago, I was browsing the aisles of my usual supermarket and found a new product. Always one up for trying anything new, I picked it up right away. Toying with several recipe ideas using the product, I finally decided to play safe and use it to make upma. Clicked pictures as usual and then put up a teaser on my facebook page inviting guesses on the ingredient used and the dish made. There were several close guesses. The first person to get the guess totally right was Lubna Karim who blogs at http://www.kitchenflavours.net. She was so happy to guess the correct ingredient with only the picture on the facebook page for a clue. I was awed by her guessing skills.

In honour, I am dedicating this blog post to Lubna Karim.

Lubna is a multi talented person, and so modest about it to boot. Loving wife, caring mom, super cook, amazing photographer, the list goes on…Lubna recently completed five years of food blogging - hearty congrats to you dear! Do head over to her blog for amazing recipes and pictures that entice you to try out each dish right away!

So the ‘new ingredient’ is Corn daliya – or Broken Corn Kernels similar to Broken Wheat. Also called corn grits in several parts of the world, it is either used to make polenta or cooked into a porridge. Here is how I used the corn frits to make upma that day. This quantity serves 5 - 6 people. Halve the measures to serve 2 – 3.

What’s good about Corn dalia?

Corn dalia, is a low cholesterol, low sodium cereal. Being gluten free, this dalia can replace wheat dalia in upma, khichdi, porridge or any dish – a boon for gluten intolerance disorders, such as Celiac diease, or even Malabsorption Syndrome.

Corn is a fair source of Calcium, Phosphorus and Iron too. The cereal has a better contribution to vitamin A and dietary fibre when compared to rice, wheat or oats.

You Need

  1. Corn Dalia – 2 cups Organic Corn Dalia!
  2. Fresh drinking water – 6 cups
  3. Vegetable oil – 2 tbsp
  4. Red onion – 1/2 cup, chopped
  5. Tomato – 1 cup, chopped
  6. Carrot – 1 cup, grated
  7. Green chilli – 3 - 4 finely chopped
  8. Ginger – chopped, 1 tbsp
  9. Curry leaves – 8 -10, torn roughly
  10. Mustard seeds – 1 heaped tsp
  11. Urad dal – 2 heaped tsp
  12. Salt – 2 level tsp

To Assemble

  1. Clean, and prepare vegetables as mentioned in ingredients list.
  2. Measure out 6 cups of water and set to boil.
  3. Heat oil in a broad kadai / heavy bottomed pan.
  4. Add mustard seeds and urad dal. mustard and urad - yin yang
  5. When mustard crackles, add green chilli, ginger, curry leaves, saute for a minute.
  6. Add onions tomatoes and the carrot. Stir fry for a minute on high flame. Seasonings and veg added
  7. Pour the boiling water into the kadai, add salt.
  8. When the water reaches a rolling boil, pour the measured corn dalia in a steady stream into the pan. Keep stirring steadily to avoid any lumps.
  9. After all the dalia is incorporated into the water, simmer and cover the pan with a fitting lid. Let cook on the lowest flame for 12 – 14 minutes. Cover and Cook
  10. Fluff up and serve with onion raita or chutney of choice.

Notes

  • Corn Dalia cooks for longer than wheat dalia, so the same upma can be assembled in a pressure cooker also.
  • Other interesting uses could be in recipes like khichdi, bisi bele bhath, corn bread, porridge, soups.

Glamorous Corn dalia upma

Upma - A closer look at texture

Apr 1, 2013

Minty Garlic Potatoes

This was a recipe I tried out on a whim ages ago. I did not think much of it then. That is, until my child requested for it again. Isn’t it is true that potatoes are so versatile and can work with any flavours, seasonings and is an all time favourite with kids?
Yummilicious Baby Potatoes
I am particularly fond of this recipe since the flavours taste very fresh if you follow this method of preparation. Of course, I have just made it up the way my family likes it. You could tweak, add, change ingredients to suit your favourite flavours too. After all, what is a dish without improvisations? Useful for last minute lunch prep or when guests land up at mealtimes and you need to rustle up more food. I have used baby potatoes because I had them and because they look cute. SmileOf course, normal potatoes boiled and cubed are fine too. Take it forward anyway you like. This could even be a salad with boiled potatoes, pomegranate, some diced tomatoes and use the pudina as a dressing. The results are sure going to be delicious.
What’s good about potatoes?
  • It is popular belief that potatoes are full of starch and fat and offer little else. Potatoes have complex carbohydrates, which are a good source of carbs as opposed to refined flours and refined sugars.
  • It may also be surprising to know potatoes are a good source of several minerals like Magnesium, Potassium, Zinc, Copper.
  • Potatoes are also fair sources of Iron, Vitamin B complex and Vitamin C. Despite losses during cooking potatoes can deliver 2- 5 % of daily requirement of Vitamin B and C.
  • Potatoes are fatty? No way – they are a zero cholesterol food! The total fat in 100 gm. of potatoes is only 0.1 g and that is Omega 3 and Omega 6 fatty acids.
  • While the skin does not have any nutrients, it is the layer of potato just below the skin that has them. The best way to harness all these great vitamins and minerals is to cook/ boil them with skin on. This locks the nutrients in. When we peel potatoes after cooking, instead of before, we save a lot of the nutrients.
  • A lot of vitamins and minerals ‘leach into’ the cooking water. So it is a good practise to cook/boil in just enough water (instead of excess water) to optimise the maximum value of any vegetable, especially so in this recipe.
  • Adding a good bunch of fresh herbs like pudina (mint) and coriander to this recipe enhances it’s iron and fibre content.
I guess we need no more incentive to cook a lovely batch of minty potatoes. So here goes -
You need
  1. Baby potatoes – 500 gms
  2. Onion – 1 small, diced Fresh pudina leaves
  3. Mint leaves (Pudina leaves) – packed, 1 cup
  4. Coriander leaves – remove roots, clean, chop and measure 1/4 cup (optional)
  5. Garlic – 1 medium clove
  6. Juice of half a lemon
  7. Any vegetable oil – 2 tsp
  8. Saunf (fennel seeds) – 1/2 tsp
  9. Jeera – !/2 tsp
  10. Salt – 3/4 tsp
  11. Sugar – a pinch
To Assemble
  1. Immerse the baby potatoes in a water bath for half an hour if you have time. Else, leave in for 5 minutes and clean the skin well. You can boil the potatoes in enough water for 20 minutes or just pressure cook it till 1 whistle.
  2. Leave the boiled potatoes on the chopping board to cool naturally. Peel when sufficiently cool to handle.
    (Why not dunk in cold water? – Because that lets more minerals and vitamins dissolve into the ‘cooling water’ too.)
  3. Make a coarse paste of the following ingredients – half onion, pudina leaves, coriander leaves (if using), juice of half a lemon, sugar and the garlic clove. I used the ‘pulse’ button in my mixer to get the coarse texture. Coarse blend paste
  4. To a pan set on high heat, add the oil, sizzle saunf and jeera. Tip in the other half diced onion, fry until pink.
  5. Add the potatoes, salt and toss well. If you wish to get a nice ‘roasted feel’, let them simmer, scraping and tossing occasionally for 10 – 15 minutes. Salt the frying potatoes
  6. When the potatoes are done, add the coarse ground paste as a final step, toss the pan well to let the paste coat all the potatoes. Switch off flame immediately. Pudina paste - final step
  7. Cover and let flavours rest for 10 minutes. Serve warm with steamed rice and sambar or with hot phulkas.Minty Garlicky Potatoes
Notes
  • Add the crushed garlic to the hot oil instead of adding it to pudina paste if you detest the flavour of raw garlic.
  • Toss boiled potato with cherry tomatoes, (or regular tomato diced) and cucumber with the coarse ground pudina paste, chill and serve as salad.
Ready to dig in..

Mar 12, 2013

Lauki raita/ Sorakayi pachadi


Bottle gourd as it is known in English, was not a favourite at our home too, that is until my yoga teacher shared this recipe with me. Bottle gourd is always paired with a protein such as chana dal or tuvar dal or mung dal in traditional Indian recipes. One reason could be that the vegetable has very low protein levels. Thus creating a dish with the vegetable + protein makes it complete!

Of the several Indian recipes such as using it in koftas, avial, kootu, I took an instant liking to using it in raita. Cooling, refreshing, this extremely simple dish can be paired with any entree, any cuisine. The best part is very few ingredients are required and takes little time to put together. Use it as dip, chutney, raita, or to fill in hunger pangs between meals too.

What’s good about Bottle gourd?

  • Bottle gourd has plenty of moisture and dietary fibre. This makes it an ideal summer vegetable to replenish fluids in the body. The fibre keeps constipation, piles, cholesterol and even colon cancer at bay.
  • 100 gm of uncooked bottle gourd has only 12 calories. This makes the vegetable an instant pick me up for weight loss diets.
  • It has no protein or fat content – the only way to add that would be in a recipe that includes some protein and good fat.
  • This humble vegetable is a fair source of Magnesium, Zinc, Potassium and Copper. All minerals needed by teenagers and growing children.
  • Also a very low sodium vegetable, this is very suitable for people with high blood pressure or diabetes too.
  • Do check out this link too. http://www.thehindu.com/health/policy-and-issues/article2571430.ece

So do try out this super simple and soul satisfying recipe this summer.

You needGrated bottle gourd

  1. Bottle gourd/ lauki/ sorakayi – select tender lauki, wash, peel, grate to a medium fineness, measure 3/4 cup.
  2. Thick curd – 1 cup ( I used home made skim milk curd) If you use store bought curd, select fresh probiotic skim milk curd.
  3. Salt – 1/4 tsp.
  4. Sugar – a pinch (optional).
  5. Fresh coriander leaves – chopped fine – 1 tbsp

For seasoning

  1. Oil – 1/2 tsp
  2. Mustard seeds – 1/4 tsp
  3. Asafoetida – a teeny pinch
  4. Green chilli – 1, finely chopped
  5. Curry leaves – 3-4 torn up

To assemble

  1. Combine the grated bottle gourd, whipped curd, salt, and sugar.
  2. Heat oil in a small tadka pan, add oil and other seasoning ingredients in order.
  3. Pour over raita.
  4. Top with chopped coriander leaves.
  5. Chill for an hour before serving.

Cool curd and hot takda

Variations

  1. Omit seasoning.
  2. Add roasted jeera powder and kala namak powder if you like the piquancy.
  3. Add one half onion, finely diced, or few chopped stems of spring onion along with bottle gourd in the raita.
  4. Add grated carrot for colour!

 Chilled Bottle gourd raita

Aug 7, 2012

Cauliflower Koshimbir


When I heard my friend, Geetanjali tell me about the several koshimbir or salads that she rustles up often at her home, I was all ears. I am always on the look out for newer healthier food options. This salad, apart from new ingredients for koshimbir, also packs in freshness, sweet, tangy and citrusy flavours in.

While Geetanjali’s version had cauliflower as the sole vegetable, and used lemon juice for the tang, I added some carrots for colour, and had to improvise with grated raw mango since I did not have lemon at hand. You could try both versions. They taste just right with steamed rice and dal combo or with hot phulkas too. In fact, you could make a wrap with a hot phulka, some mustard smeared on it, filled in with the koshimbir, rolled up and enjoyed!

What’s good about this dish?

  • Cauliflower is a cruciferous vegetable, similar to cabbage or broccoli.
  • Fresh cauliflower is an excellent source of Vitamin C, Vitamins B1, B3, B5, B6. A great source of minerals like iron, manganese, potassium, too.
  • Di-indolyl methane (DIM), a substance found in this family of vegetables have anti viral, anti bacterial properties and also functions as immune modulator. This property is being used in clinical trials for treating Human Papilloma Virus (the virus that causes cervical cancer)
  • Cauliflower has several other cancer fighting compounds too – they protect against prostrate, cervical, colon, breast, and ovarian cancers. All this makes it a very important vegetable in every woman’s diet.
  • When cooking, wash the head under running water, parboil in salted water, rinse again and use in recipes.

Go on, realise the benefits of this wonder vegetable using it in recipes such as the one below - 

Cauliflower Koshimbir

You need

  1. Cauliflower – 1 medium head
  2. Carrot – 1 medium Or Grated Carrot – 1/2 cup
  3. Raw mango – 1 small OR Grated mango – 1/4 cup
  4. Fresh grated coconut – 2 tsp, optional
  5. Salt- 1/2 tsp or more if needed
  6. Sugar – 1/4 tsp,optional

For seasoning -

  1. Fresh coriander leaves – chopped, 2 tbsp
  2. Oil – 1/2 tsp
  3. Mustard – 1/4 tsp
  4. Asafoetida powder (hing) – a pinch
  5. Green chilli – 2, finely chopped

To assemble

  1. Break the cauliflower head into small florets.
  2. Boil about 1 litre water in a saucepan, add about a tsp of salt to it, drop the florets in the boiling water, turn off the stove, steep for a couple of minutes in the water. Drain, rinse under clean cold water. Now use a steel grater and grate the cauliflower florets into a finer texture.the grated cauliflower - a closer look
  3. Grate the raw mango, and the carrot too.
  4. Toss all the grated veggies together, mix in the coconut, (if using) add salt and sugar and mix well without bruising the vegetables. Add in the chopped coriander too.

tossed salad ingredients

5. Heat the oil in a pan, add the mustard, allow to splutter, tip in the chilli and hing, and pour over the salad.

6.Chill for half an hour before serving.

chilled and portioned koshimbirCauliflower Koshimbir

Jun 22, 2012

Chilled Pasta Salad

Summer bring the best and the worst out of all of us. Think thirsty  parched throats, prickly heat,…and again think tall cool glasses of sherbet, lazy vacation days, at least for school going kids, ice cream, swimming, and of course the season’s best – mangoes! Mango is so rightly called the king of fruits. I am yet to meet a person who does not like this ever so fragrant luscious fruit. Also think chilled salads when you are in no mood to cook your self along with food in a sweltering kitchen. To me, a pasta salad seemed just the answer to a hungry family and a not-ready-to-cook mom, that’s me. Teamed with warm grilled garlic bread, this filling salad left us so happy and content last weekend. I urge you too, do recreate this Indian-Italian piece de resistance in your homes this summer.chilled salad beckons
What’s good about this dish?
  • The meal combines grains(pasta and whole wheat bread), dairy protein (from the curd), fruit and veggies too. Hence it is a complete one pot meal.
  • Ripe mangoes and corn add to the vitamin A, B6, C and E levels of the meal, apart from the natural dietary fibre content. 
  • A good Potassium content in mangoes makes it a good fruit for people with hypertension. To make the dish more suitable for a hypertensive person, halve the salt used in the recipe.
  • Fresh curd is rich in probiotics – the helpful bacteria that are needed for normal functioning and maintenance of stomach and intestines. Fresh curd is also rich in vitamins B and C. Even people with lactose intolerance can usually tolerate curd as the ‘lactose’ sugar is converted to ‘lactic acid’.
Do you need more reasons to try out this fuss-free delicious recipe…. sunday lunch
You need
  1. Small elbow or bow tie pasta – 250 gm ( I used  half of a 500 gm pack)
  2. Sweet corn kernels – 1/2 cup, steamed 
  3. Ripe, firm mango (any variety) – finely dice and measure 1 cup.
For the dressingingredients for dressing
  1. Fresh thick curd, and hung for an hour – 2 cups. Measure the cheese after curd is hung.
  2. Onion – very fine minced, 2 tbsp
  3. Sugar – 1/2 tsp
  4. Black/white pepper powder – 1/2 tsp
  5. Salt – 1 heaped tsp
  6. Mustard – 1 tsp ( I used ‘Fun foods’ brand - English Mustard)
  7. Fresh coriander leaves – finely minced, 2 tbsp
  8. Green capsicum (Bell Pepper) – finely minced, 1 tbsp
  9. Fresh cream – 2 tbsp (optional, I did not use any)
To assemble
  1. Boil pasta for 8-9 minutes. Drain and rinse under cold water. Leave to cool in the colander until dressing is ready.
  2. Steam the sweet corn kernels for 2 minutes in the microwave oven.
  3. Peel and dice the mango as finely as possible without squishing it!
  4. Combine all ingredients for dressing in a mixing bowl. Please do not omit any ingredient ( I did not have capsicum and sorely felt it’s absence). Adding cream is your choice though – it helps to give a smooth mouth feel, but does amp up the calories.
  5. Once the dressing is mixed in well, add the cooked pasta, corn, and mangoes and toss well.mix dressing and pasta welladd corn, mango and pasta to dressing
  6. Chill well before serving. I chilled for an hour before garnishing it with more mango slices and served it up, accompanied with warm, cheesy garlic bread.
warm garlic bread and cold salad
Notes
  • Can use pineapple when mangoes are not in season.
  • Can use other vegetables such as carrots too.
  • Can use fresh or dried parsley or other fresh herb seasoning. Pudina / mint, however will be too overpowering a flavour.
  • Do not omit any ingredient from the ‘dressing’ list. I did not have green bell pepper (capsicum) at the time of assembling this salad and sorely felt it’s need to perk up the dish!
warm garlic bread and chilled pasta salad


May 31, 2012

The Serendipity Sundal


“Mom, what’s for lunch?” Startled, I looked up the clock to see it was just 10 minutes to our lunch time. I was deeply immersed in some cleaning chore and had lost count of time. So here I was with a bowl of boiled sprouted peas and some steamed rice. I had 10 minutes to turn these into lunch!  I work best under pressure. (I mean, when –time–is–running-short kind of pressure, and not the boss-down-my-neck kind of pressure) The sundal I assembled proved this right!  A bowl of yummy goodness was the result. The side dish worked well with chilled curd rice. So why serendipity? I was searching for an idea for a quick side dish and wound up with this filling, tasty, nourishing dish!
 
What’s good about this dish?Peas and  corn
  • Sprouts are real, live, complete, nutrient packed, power houses.
  • Pea sprouts are rich in Vitamin A, B, C, E, the minerals Calcium, iron and all essential amino acids.
  • While pressure cooking does take away some nutrients, sprouting and cooking renders the protein easily digestible, ensures it is well absorbed, and prevents discomfort due to indigestion. So this is a good cooking method for people with IBS, Mal absorption syndrome.
  • Sprouts are vital for teenagers, people engaged in active sports, pregnant and breast feeding mothers, weight-watchers and for body builders.
  • Including sprouts in a vegan /vegetarian diet improves the protein quality of the meal.

You needall dressed up!
  1. Red onions –  dice and measure 1 heaped cup
  2. Capsicum – chop and measure 1/2 cup ( I used green, red or yellow would work well too)
  3. Frozen /Fresh corn kernels – 1/2 cup
  4. White peas sprouts – 1 level cup
  5. Fresh /Frozen coconut – grated, 2 tbsp
  6. Green chilli – 3
  7. Garlic – 1-2 pods
  8. Salt – 1 level tsp
  9. Turmeric powder – 1/2 tsp
For seasoning
  1. Cooking oil – 1 tbsp
  2. Mustard seeds – 1 tsp
  3. Cumin seed – 1 tsp
  4. Coriander leaves – chopped, 2 heaped tbsp
To assemble
  • Pressure cook white peas sprouts until soft, but not mushy.
  • Heat oil in a fry pan / kadhai, add mustard seeds and cumin.
  • When it splutters, add diced onions fry well till light brown (you can add 1/2 tsp of sugar while frying to get the onions taste sweet).
  • Tip in the diced capsicum, corn kernels, toss well.
  • Once the veggies look ‘fried but not wilted’(in about 2 minutes), toss in the cooked peas.
  • Add salt and turmeric powder, mix well. Cover for a minute.
  • Make a  coarse powder of coconut, garlic and green chilli in the mixer. I just used the ‘pulse’ button a couple of times. Add this to the peas and mix in well.
  • Top off with chopped coriander for a very fragrant, healthy dish.

Variations
  • You can add/omit veggies used in this recipe.
  • Add a zing to the dish by squeezing in lemon juice after cooking.
  • Add fennel seeds/saunf to the seasoning to give a nice twist to flavour.
  • Use parboiled peas and corn with raw onion, capsicum and shredded carrots for a colourful salad.
The Serendipity Sundal - up close


Sending this hearty dish to Renuka's ongoing event 'Salad splendour'