Showing posts with label simple. Show all posts

Jun 3, 2014

Peerkangai chutney


I seem to be on a spree to cook with un-glamorous, un-restaurant-y, humble vegetables. Well, why not? Gourds are very easy on the wallet and the waist line, mostly neutral in flavour, lend body to various dishes, have varied nutritional benefits but are ignored despite all these.

Pic Courtesy - Sankalpfarms.com

No South Indian breakfast is complete without chutney. That inevitably means use of fresh coconut. On days when you do not have stock of fresh/frozen coconut, or want to limit it’s use in daily meals, you need some saviour to rescue the day’s chutney. Enter the star of today’s chutney - ridge gourd. I have used it in this recipe to benefit from the nutrients it offers, as much as a coconut-substitute.

  • Ridge gourd is high in moisture and crude fibre (good news for those with chronic constipation).
  • It is a very low calorie vegetable, so great to include in a weight loss diet. It adds plenty of bulk to a meal without adding significant calories! This means, you can eat a whole cupful of ridge gourd and add less than 20 calories to the meal!
  • Ridge Gourd has negligible Sodium and a fair source of Potassium. Hence it is useful for people with high blood pressure or certain kidney ailments where sodium is severely restricted.

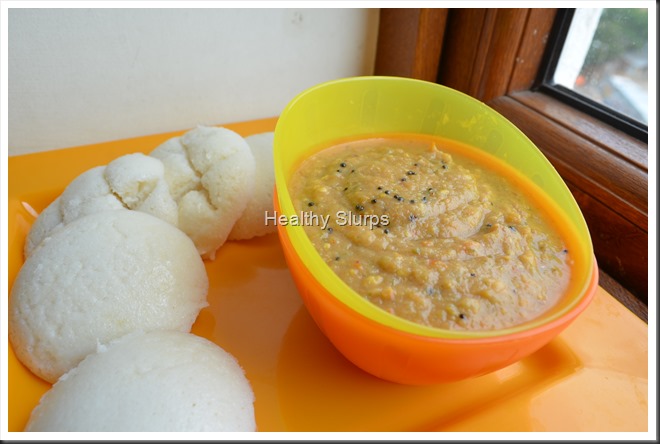
Here is how I made the chutney. We used it to complement soft idlis for breakfast. It was spicy, tangy and declared ‘good’ by my family. Do try it out and let me know how you liked it. The quantity here serves 5-6. Halve to serve 2-3.The chutney can be refrigerated and used within 2 days.

Preparation Time – 15 minutes ; Cooking Time – 5-6 minutes ; Serves – 5 – 6

Allergy Information – Does NOT contain gluten, egg, soya, peanuts, corn, lactose.

You Need

 Cookware  -  A frying pan, mixer grinder or food processor

Ingredients

  1. Red Onion – 1 medium, or measure 1/2 cup after chopping
  2. Roma Tomatoes – 2 medium, or measure 3/4 cup chopped
  3. Ridge Gourd / Peerkangai – 1 big, or measure 1+1/2 cups sliced
  4. Green chilli – 4-5 cut into halves
  5. Chana dal – 2 tbsp
  6. Tamarind – 1/4 tsp*
  7. Salt – 1/2 tsp
  8. Oil – 1/2 tsp
  9. Coriander leaves – 6-7 stalks with leaves (optional)

For Seasoning -

  1. Oil - 1/4 tsp
  2. Mustard seeds – /4 tsp
  3. Hing Powder – a pinch

* Use Tamarind if tomatoes are not tart enough, or add a couple of extra tomatoes and avoid tamarind. You can even omit tamarind entirely if you do not prefer a sour-ish chutney

To Assemble

  1. Prepare the vegetables for frying. To begin,  wash, peel and chop onions. Next, wash peel and chop tomatoes and green chilli. Rinse the ridge gourd well, peel part of the rough skin at the ridges, while leaving some skin on the vegetable. Cut into thick slices.Fry all vegetables for chutney
  2. Heat a small wok / frying pan. Add the half tsp oil, let it heat up. Add the chana dal, fry over medium heat until golden brown. Add all the prepared vegetables, chilli, tamarind and salt. Toss well, (do not add any water), cover and simmer for 2–3 minutes or until you find the tomato skin has shrunk a little bit and the gourd seems to go slightly limp. If you are using  coriander leaves, add at this point, and switch off flame.
  3. Let it cool. Grind to a coarse paste. You will not need any water for grinding. After removing to a bowl, rinse out the mixer jug with a 1/4 cup of water and add to the chutney if you wish to dilute it. Chutney with Seasoning
  4. Heat oil for seasoning. Crackle mustard seeds, add hing powder and pour over the chutney.
  5. Serve as accompaniment to idli, dosa, or over plain steamed rice, as a sandwich spread or as dip for crudites too!

Soft Idlis with Spicy Chutney

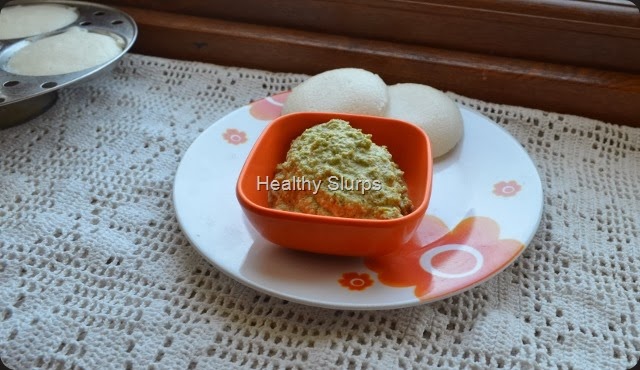
Fresh breakfast for two!

May 22, 2014

Keerai Masyial

 
Few dishes can beat the simplicity of Keerai Masiyal. However, as a child, this was not my favoured dish. I have pretended every ailment to escape eating this ‘ green paste’. Now I am better able to appreciate it’s subtlety of flavour, the health benefits, ease of preparation, and the brilliant hue of this humble dish. When the summer heat is making cooking a painful chore, I urge you to try this out. Can be put together in under 15 minutes, needs very few ingredients, and supremely healthy, what’s not to like?
Steaming Keerai Masiyal
I have used Palak in this dish, but Amaranth, Arai Keerai, Siru Keerai, can also be used. In fact, using different greens in rotation brings each one’s unique health benefits to the table.
  • Agathi Keerai has more than 12 times the Calcium found in Palak and more than 3 times that found in Methi leaves.
  • Radish Leaves, Siru Keerai, Arai Keerai, Manathakkali Keerai and Paruppu Keerai are all very rich in Iron. They have more than 3 times the Iron found in Agathi Keerai or Palak .
  • Amaranth and Agathi Keerai lead in Vitamin C while Palak, Mint and Amaranth lead in Folic Acid content.
  • Paruppu Keerai and Palak have a low Sodium and high Potassium combination which makes it ideal for people with high BP or kidney ailments or gout.
In a survey conducted by the National Nutrition Monitoring Bureau (NNMB), Indians were found to consume far lesser (average - 48gm/day) than the recommended 300 gm vegetables per day.Of this RDA of 300 gm, The National Institute of Nutrition, recommends at least 100 gm greens per person per day.
Here is the Food Pyramid picture as released by the National Institute of Nutrition, 2011. It helps to form a visual idea of what should be on our plate everyday!
 
Pic Courtesy - Dietary Guidelines for Indians, NIN
Finally to the recipe of the day -
You Need-
  1. Palak or any other greens – 4 packed cups of leaves.
  2. Salt – 1/2  tsp to 3/4 tsp ( use as needed)
For seasoning -
  1. Oil – 2 tsp
  2. Mustard seeds – 1/2 tsp
  3. Urad Dal – 2 tbsp
  4. Red Chilli – 2, broken into halves
  5. Grated fresh coconut – 1/2 tsp (optional)
To Assemble -
  1. Pick leaves and tender stems. Discard stems that are thick. Measure 4 packed cups.
  2. Wash well in a colander in several batches. Or fill water in the kitchen sink and submerge the greens in the sink tub. This is a great way to wash quickly and effectively.
  3. Drain well. Chop roughly. Any size and shape will do. It needs to be blended anyway.
  4. Place a large wok on heat, add the greens and let it cook in it’s own juices. If it looks like it is sticking to the bottom of the pan, add half a cup of water. stir through a couple of times so that the greens get cooked uniformly. After 5-7 minutes, the greens should be just cooked enough. Cool and grind to smooth paste with any water that may be left over in the pan.
  5. Return the puree to the wok, place wok over fire, rinse the blender jar with 1/4 cup water, add that too to the wok. Add salt, mix well, taste and add more as/if needed.
  6. To a small seasoning pan, add oil, place over heat, add mustard seeds, urad dal, red chillies. When you hear happy crackles, enjoy the sizzle and the aroma, pour it into the Masiyal before it chars! Smile If using grated coconut, add it to the seasoning pan last, stir around until the coconut turns a golden hue and pour over the Masiyal.
  7. Enjoy hot with steamed rice, sambar and a cucumber carrot salad with lemon dressing.  Vitamin C in the lemon juice helps in better iron absorption.
NOTES -
  • For local and botanical names of all the Greens mentioned in this post, please refer to Glossary of Ingredients Page.
  • To retain nutrients in greens cook in just enough water until just cooked. Do not discard the water, use it up in the recipe.
  • To retain the colour of greens, add half a tsp sugar while cooking, leave pan uncovered, cook quickly over high heat instead of low flame for a longer time.
  • Add a sliced onion and couple of crushed garlic cloves to the seasoning for a twist in flavour.
Enjoy Masiyal with Steamed Rice
 

Apr 30, 2014

Cantaloupe smoothie


It feels like the worst April ever in my city, unimaginably hot these days.  To add to my woes, I suffered a hit in an amusement park that has left me with a broken rib. I expect it should heal in two months. Added to this are children having summer vacations who keep darting in and out of home in between their endless rounds of play – more thirsty than hungry.  Finding simple recipes to hydrate the children and the rest of the family while trying to ‘bed-rest’ my broken rib is quite a juggle.
In summer, we are naturally inclined to drinking more fluids to overcome thirst, cool the body and keep us sane! I am experimenting with more smoothies, shakes, juices as tasty ideas to rehydration and energy. This Cantaloupe smoothie is the result of one such experiment. When the fruit is made into a smoothie, it is more refreshing and filling. The well ripened fruit gives the drink an amazing flavour and we do not miss the sugar at all.
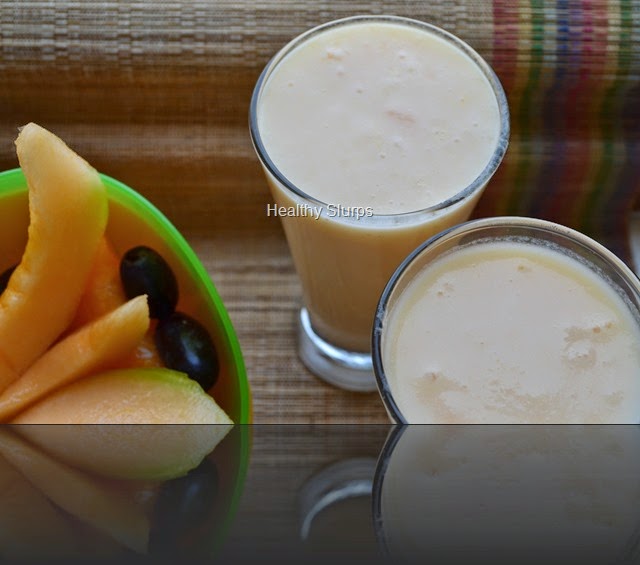
Cool chilled smoothie
  • Cantaloupe or Musk Melon, as it is called in India, is more available in summer than other seasons. The melon is very rich in Vitamin A, C, Folate, Niacin,  Potassium.
  • These vitamins are important during pregnancy, so the fruit is a good choice along with others for a pregnant woman.
  • The sweet taste of the melon comes from sugars, so diabetics need to work with your nutritionist to find it’s appropriate use in your diet.
  • The fruit’s high moisture content makes it ideal for summers, for rehydration during workouts. The smoothie thus is a very good pre / post workout meal. Made even healthier with addititon of flax powder (Omega 3 and 6 fatty acids) or sabja seeds.
You Need
  1. Skim Milk – 500 ml
  2. Cantaloupe / Musk Melon – Skinned and chopped – 2 heaped cups
  3. Honey – 1 tbsp, optional
  4. Ice cubes – optional
Method
  1. Wash, skin and deseed the melon.
  2. Chop it into largish chunks and blend into a smooth puree in the mixer.
  3. Add 1/2 cup milk, blend again. Pour into a large jug, add the rest of the milk and stir to homogenise. Taste and add honey if needed.
  4. Chill for half an hour before serving. Serve with ice, if you like!
Enjoy the fruit and the smoothie!

Apr 14, 2014

Vendakkai Thair Pachadi / Crispy Okra in Chilled Yoghurt


A very Happy New Year to all who celebrate today. Happy Vishu to all Malayalees across the world! All family members taking time off from busy lives, praying and eating together, tables rich with culinary treats– these surely are some special features of festivals. Celebrations always involve good food. Contrary to popular thought, festive food need not all be time consuming to prepare, nor be calorie-rich.

Today, I would like to share a lip-smacking, simple recipe which you can use to grace the table at any festive menu. This recipe has distinct south Indian flavours, so you can tweak the seasonings to accommodate the demands of your palate or cuisine. (Read notes)

Happy New Year to all

The key point here is how the vendakkai / lady’s finger / bhindi / okra is cooked - crispy ‘fried’ okra is first readied by slicing it thin, drizzling with a quarter tsp cooking oil and grilling it for 10 minutes. This then is lovingly folded into a bowlful of thick skim milk yoghurt, seasoned with salt.The dish is finished off with a fragrant tadka of mustard seeds, curry leaves and pinch of hing in some oil. The grilling ensures that you save fuel, oil and time. The crisp texture encourages even die-hard okra haters to try it out. The chilled yoghurt is just so perfect for this blazing summer season. While this recipe is an accompaniment, you will soon find yourself eating a chilled bowlful on its own. Here is what you need -

You Need

  1. Okra / Lady’s finger / Bhindi / Vendakkai – 200 gm
  2. Skim milk yoghurt – 500 ml
  3. Salt – 1/4 tsp
  4. Sugar – a pinch
  5. Cooking Oil – 1/4 tsp

For seasoning

  1. Cooking oil – 1/4 tsp
  2. Mustard seeds – 1/4 tsp
  3. Curry leaves – 3
  4. Asafoetida Powder (Hing) – a pinch

To Assemble

  1. Wash the vendakkai by immersing in a bowl of water, drain on colander and spread out to dry on a kitchen towel. Snip off the tops and tails, and slice into even thin disks.
  2. Preheat the grill to 250 C.
  3. Place in a single layer on a baking tray. Drizzle 1/4 tsp oil over the disks, and spread in a single layer.
  4. Once the grill is ready, place the tray of vegetables inside, and grill for 10 minutes. Toss and scrape the contents at half time to ensure even browning. By the end of 10 minutes, the Vendakkai would have shrunk to half – size pieces, and would have browned evenly without being charred. You may need to watch the grill in the last minute to ensure correct browning without charring.
  5. Let it cool in the tray. Meanwhile, whip up the skim milk yoghurt with salt and sugar.
  6. Prepare the seasoning by heating oil in a small pan, adding all the ingredients for seasoning in order. Pour over the whipped yoghurt.
  7. Gently fold in the cooled Vendakkai into the yoghurt, chill for half an hour before serving.
  8. Serve with steamed rice, sambar, papads.

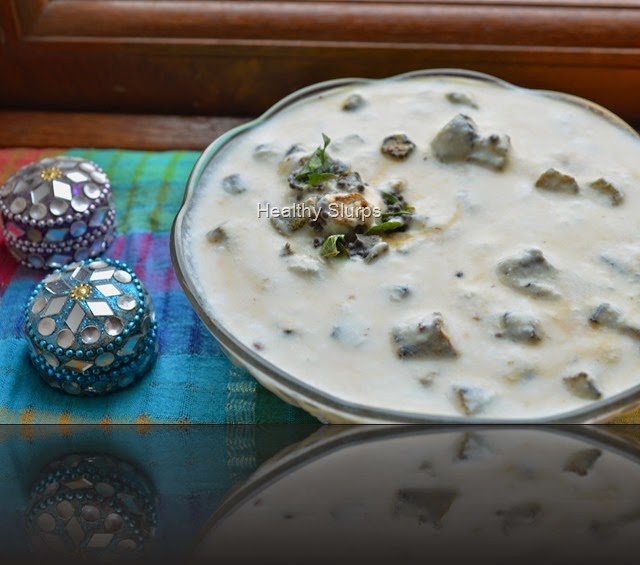
Bowl of chilled pachadi flecked with crisp okra

Notes

  • Avoid mixing the grilled vegetable too vigorously into the yoghurt, it will darken the colour of yoghurt.
  • You can experiment with flavours by adding roasted jeera powder, coriander leaves instead of hing and curry leaves.
  • Can be used as a dip for crudites or rolls too by seasoning with a tbsp of chopped, fried onion, a pinch of red chilli powder and a tsp of chopped fresh parsley instead of above seasonings.
  • Grilling the vegetables as opposed to deep frying them helps to cut down on cooking oil used.

Enjoy the cool pachadi!

Jan 17, 2014

Peanut Chutney

Peanut chutney and idli - power breakfast

My daughter is a total peanut fan.  She eats peanuts roasted, fried, boiled, in salads, asks for them in lemon rice, or if I am not looking, she gobbles them even raw! A jar of peanuts are never safe around her. To the extent that she is called the ‘ Li’l monkey’ of the house. She pouts and sulks when called so, and that tickles her big brother. So he runs her insane by chanting ‘monkey, monkey monkey’. Her dad calls her his fav  cute Li’l monkey – that did not seem to appease her either.
And then one day, I made this peanut chutney. Obviously, you cannot see the peanuts in them cos they are ground! Guess what? Her dad loved the chutney so much, he asked me, “What chutney is this? It pairs so well with idli” . My daughter was delighted. She ran to her dad, and told him “You are my favourite big monkey now, cos you like peanuts too! This is peanut chutney!” All of us had a hearty laugh. And peanut chutney came to stay forever at our home.
There are many versions of peanut chutney made, here is my unique combination of ingredients. I often add some coriander leaves, or mint leaves, a clove of garlic or even curry leaves to the mixture and then blend it up. You could try those variations too.
You Need
  1. Raw peanuts with skin – 1/2 cup
  2. Coconut, grated – 2 tbsp
  3. Onion – 1, medium sliced
  4. Green chilli – 4, cut in halves
  5. Tamarind pulp – 1 tsp
  6. Salt – 1/2 tsp
  7. Vegetable Oil – 1/2 tsp
  8. Drinking water – 1/4 to 1/2 cup for grinding
For Seasoning -
  1. Vegetable Oil – 1/4 tsp
  2. Mustard seeds – 1/4 tsp
  3. Urad dal – 1/4 tsp
  4. Curry Leaves – 4-5
Fry ingredients for chutney
To Assemble
  1. Take oil in a fry pan / wok / kadai, Heat it.
  2. Add whole peanuts to it, fry for 2 –3 minutes.
  3. Next, tip in green chilli cut in halves, followed by onion slices, last comes the tamarind.
  4. Fry well over medium to high flame, for 2-3 minutes more. Do not burn the ingredients. Stop frying when the peanuts look golden brown and the onions turn translucent.
  5. Add salt and grated coconut to this mixture, switch off flame ( cool it if you have time) and blend in a mixie to a coarse-ish smooth paste. You may need to add some water, say 1/4 cup while grinding to get a thinner chutney.
  6. Heat ingredients for seasoning, when the dal gets a warm golden hue, pour on top of chutney.
  7. Enjoy with idli, dosa, use as sandwich spread, or even with hot steamed rice.
Tasty tangy peanut chutney
Please do read the allergy information before trying out this recipe, especially if you have never eaten peanuts in any form before or if you have noticed any other food allergy symptoms too.
IMPORTANT ALLERGY INFORMATION
Some people develop an allergy to several nuts including peanuts. Symptoms may range from itching around mouth or throat, skin reactions, digestive disturbances, or more serious symptoms like breathing trouble too. In such situations, please stay away from peanuts in all forms – whether raw, boiled, roasted or fried. However, refined peanut oil seems to be tolerated even by people with peanut allergy. Still, do consult with your doctor before attempting to include peanuts in your diet.
PEANUT NUTRITION INFORMATION
Peanuts are a high energy food, most of the energy coming from fats and protein. As we know, all fat is not bad fat, peanuts are cholesterol free, have omega 3 and Omega 6 fatty acids.
To give a better picture, the total fats in 100 gms of raw peanuts is 49 gms, of which monounsaturated fats are 24 gms and polyunsaturated fats are 15 gms, while the saturated fats in peanuts are only 6 gms. They also have a high content of Omega 6 fatty acids – 15 gms / 100 gms.This makes it a valuable ‘good fat source’ in vegetarian diets.
Peanuts are also known to prevent cancer, help in weight control in moderate amounts and also have very valuable anti oxidants which have the heart health benefits and also prevent stroke. Regular consumption of peanuts also helps in preventing Alzheimer’s.
Peanuts are an inexpensive, ready to eat protein source, go ahead and enjoy it’s benefits.
Peanut chutney up close!

Jan 2, 2014

Black Eyed Bean Salad


A very Happy New Year to all readers of Healthy Slurps. There is something about the air during New Year which is very invigorating and refreshing. Goodwill, cheer, positivity abound in everyone’s heart during this season. Here is my first recipe for this year which has packed in it, all the love and cheer of this season.
To kick start this New Year with more healthy recipes, here is a salad that I assembled today. As I have mentioned earlier, salads are created with available produce at my home without sticking to any recipe. The reason I am documenting them here is to share the recipe with myself as much as with all of you. For I find myself at a loss to remember all ingredients when I want to recreate that last great salad.

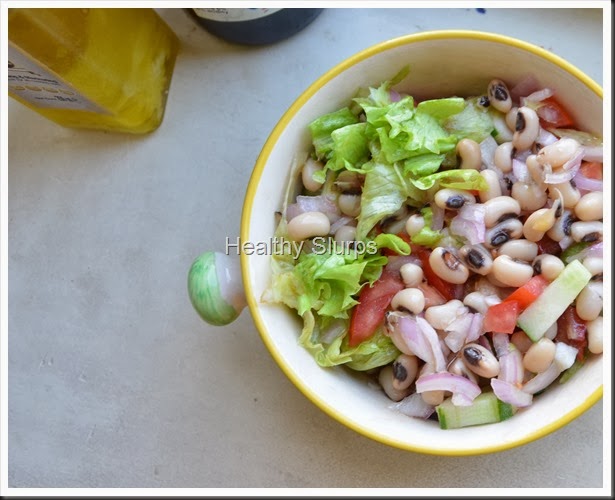
Come, eat me
You Need
  1. Black eyed beans ( Lobia ) – 1 cup, soaked for at least an hour
  2. Cucumber – 1
  3. Red Onion – 1 medium
  4. Roma Tomato – 2 medium
  5. Iceberg Lettuce – Roughly torn and measure 2 cups
For Dressing
  1. Red Wine Vinegar – 2 tbsp
  2. Extra Virgin Olive Oil – 8 tbsp
  3. Crushed Black Pepper – 1 tsp
  4. Salt – 1 tsp
  5. Granulated Sugar – 1 tsp
To Assemble
  1. Whisk all ingredients for dressing together in a bowl.( I used a fork to whisk them,) quite simple really. Set aside.
  2. Peel the lettuce leaves from the head and immerse in ice cold water.
  3. Pressure cook the soaked beans until just done. I pressure cooked them by simmering the flame for 5 minutes after the cooker gave out the first whistle.
  4. Peel and chop the other three salad ingredients in the same shapes – go with dice, slice or cubes. The only rule is to be uniform. That does give the salad a good appearance.
  5. Drain the water from the cooked beans, if any. Do not discard but use in soup, sambar, or as cooking liquid for any vegetable too.
  6. Toss all the ingredients and the dressing together in a suitable large bowl.
  7. Chill for half an hour and serve.
Filling and Tasty Salad
Come, Eat me

Dec 3, 2013

Peanut and Peanut Butter


Peanuts / Groundnuts have been used in several cuisines in India and we do have a rich repertoire of dishes with peanuts. Who does not like Sabudana khichdi topped with roasted peanuts? Or peanut sundal or peanut chutney? Or what can beat the joy of munching on a peanut chikki square?

Peanut butter, on the other hand, is a recent entrant in India. United States leads in peanut butter production. Interestingly, India is the second largest producer of peanuts in the world and United States grows just a third of India’s peanut crop!

Health benefits of Peanuts

  • Peanuts have high protein content (highest among nuts). It is a valuable source of protein.
  • Peanuts are good for your heart. They contain anti-oxidants (even more than in fruits) and zero cholesterol.
  • According to a popular myth “peanuts have too much fat.” The fact is more than 75% of the fat in peanuts is “good fat”,(MUFA and PUFA) needed for body functions, keeps heart healthy and maintains normal body weight.
  • Roasted or boiled peanuts are great. However, fried peanuts are not. Fried peanuts have trans fats, hence not advised.
  • High in fibre, higher than other edible nuts such as almond, cashew, pistachio, and walnuts. Also has Vitamins B & E, Manganese, and Magnesium.

Benefits of Peanut Butter

Peanut butter has both health and convenience benefits.

  • Given the health benefits of peanuts, it is healthier than other table spreads such as cheese spread, butter, margarine, and jam.
  • In a vegan / vegetarian diet, peanut butter can help fill in the gap of protein requirement.
  • In a person who has normal body weight and is physically active, peanut butter is a healthy option as part of balanced meal.
  • For sports people, peanut butter is a great energy-protein-fat source.
  • Peanut butter was promoted as a super food in the United States about 100 years ago to feed starving people.

It is convenient in multiple ways. With its creamy spreadable consistency, it satisfies hunger with minimum bulk to a meal. It is a ready-to-eat food available in a jar. It has a long shelf life and needs no refrigeration. Hence it can be used on road trips, outdoor camping, etc. Peanut butter lends itself to several sweet or savoury meal options such as PBJ sandwiches, or as dip when combined with condiments, or as satay sauce, or salad dressing.

Caution before consuming peanuts and peanut butter

! If you are allergic to peanuts or any nuts, DO NOT consume peanuts or peanut butter. It can have mild to serious health consequences.

! If you are on a weight loss diet or on a special diet for kidney ailments, peanut consumption has to be carefully monitored.

! Presence of aflatoxins in peanuts can cause serious digestive disorders. Hence, always purchase peanuts and peanut butter from reliable sources.

Afterword

Recently I attended the “Health Workshop on Peanut Butter” conducted by Agro Tech Foods (makers of Sundrop brand of food products) at Bangalore . Dr. Swarupa Kakani, well-known nutritionist and head of Dietetics Department at Sagar Hospital, Bangalore led the workshop.

This inspired me to independently research nutritional value of peanuts and peanut butter. This post presents my views along with some of the material presented at the workshop.

Here are some recipes shared by Agro Tech foods with us at the workshop.

Apple, peanut butter, Granola sandwich

Ingredients

Any variety apple – 1 cored and sliced horizontally

Peanut Butter – 2 tbsp

Low fat Granola – 1/2 cup

Method

Spread1 tbsp peanut butter over an apple slice. Sprinkle some granola over the peanut butter.Top with another apple slice or serve as open – faced sandwich.

Peanut butter, apple, granola sandwich

Peanut Butter Milk shake

Ingredients

Peanut Butter – 1 tbsp

Jam – 2 tsp (optional)

Milk – 1 cup

Vanilla Ice cream – 1 scoop

Method

Add all ingredients except ice cream to a blender. Whip until frothy.

Transfer to a glass. Top with Ice cream and serve.

Peanut Butter Milkshake

Nov 20, 2013

Sweet Corn and Pomegranate Salad

Colourful Salad
Ingredients for a salad are never fixed at my home. Assembling a salad is a flexible exercise, often involving the bringing together of whatever is available in the fridge, and finishing it off with a dressing, which is most often a citrus-y one. This salad too was created similarly with foods present at hand. Sweet corn kernels and juicy pomegranate do a pretty tango here, with some worthy add-ons such as red onion and grated carrot thrown in to merrily add to the colour riot. I’ve noticed quite often that my kids need no coaxing to try a salad that is as vibrant in colour as this one.
Apart from being loaded with Beta Carotene from the vegetables and anti oxidants from the fruit, salads help to increase the dietary fibre of our daily meal.
As per the recommendations of the National Institute of Nutrition, an adult person must have 40 gm. of fibre in a day, which includes soluble and insoluble fibre. Dietary fibre is needed for
  1. Proper bowel function,
  2. To prevent Haemorrhoids
  3. To prevent Coronary heart disease
  4. To control diabetes and obesity
  5. To reduce plasma cholesterol
  6. To protect against colon cancer.
Salads are the tastiest way to consume fibre in a meal. In addition, they provide colour, texture and variety resulting in a satisfying meal experience.
Go ahead and make this salad for yourself and share it with me too!
You Need
  1. Sweet corn kernels – 1/2 cup
  2. Pomegranate pearls – 1/2 cup
  3. Carrot grated – 1/4 cup
  4. Roma tomato, diced fine – 1 medium tomato
 For the dressing
  1. Salt – 1/4 tsp
  2. Pinch of sugar
  3. Juice of 1 medium lemon
  4. Crushed black pepper – 1/4 tsp OR Green chilli – 1 minced fine
  5. Red onion, diced fine – 2 level tbsp
To Assemble
  1. Steam the sweet corn kernels for 2 minutes in the microwave at high power. Set aside.
  2. Remove the pomegranate pearls from the fruit, keep aside.
  3. Combine all ingredients for dressing, mix well with a fork.
  4. Bring all ingredients for salad together, toss well with the dressing.
  5. Chill for half an hour in the fridge in a covered bowl.
  6. Serve along with warm pulkas or freshly grilled garlic bread or as a side with tadka dal and steamed rice.
Healthy and Radiant


Jan 19, 2013

Cherry tomato Lettuce Salad


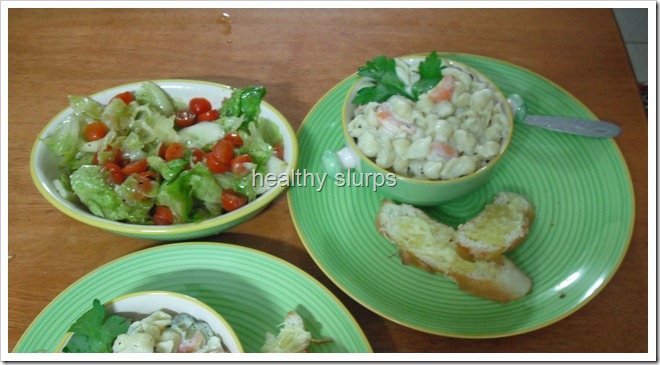
Well, this salad does not even need a recipe. It is such a simple combination of veggies and dressing. In fact, I am sure several of you will have tried out some version of this salad. I made this salad to accompany the Low Fat Creamy Pasta. The salad, pasta and fragrant garlic bread comprised dinner last weekend. Quite a combination of textures, colours, flavours and tastes. It was a very satisfying meal.
Taking some time to plan, shop and create good meals is so fulfilling. The happiness I feel when I sit down with loving family members eager to sample the latest creations and finding their faces light up with joy and hearing those happy exclamations – these make all the effort of cooking worthwhile. Well let me also admit that I go through my good share of disasters, and food that no one wants to touch. But thankfully, these happen lesser than the former.
As I said, this salad is a simple combination of dressing, veggies and tossing them together.
You need
For the veggies -
  1. Iceberg lettuce – 1 small head
  2. Cherry tomatoes – 22-25 numbers
  3. Cucumber – 1-2 medium (really, your choice)
  4. Ice cold water – enough to dunk the lettuce in (approx. 4 cups)
For the dressing -
  1. Balsamic vinegar – 1 tbsp
  2. Extra virgin Olive Oil – 4 tbsp
  3. Crushed black pepper – 1-2 tsp
  4. Salt – 2 pinches
  5. Sugar – 1 pinch (optional)
To assemble
  1. Wash the lettuce head, tear leaves apart by hand into bite size pieces and keep immersed in ice cold water until needed.
  2. Dunk the cherry tomatoes in a bowl of water for 5 minutes, drain, pat dry and cut into halves. Place in a large mixing bowl.
  3. Rinse the cucumber thoroughly with the peel on . You can retain the peel on the cucumber or partly peel them too. If there are too many seeds along the middle of the cucumber, you may want to discard them. If so, cut into half lengthwise, remove the ‘seedy’ parts and slice into half circles. Else, if the seeds are tender, you can slice the cucumber into thin disks. Place along with the tomatoes in the mixing bowl.Veggies - washed, scrubbed, waiting for their dress!
  4. Pour the balsamic vinegar into a bowl. Pour the Olive oil in a thin drizzle whisking with a fork all the while. Continue to whisk well until all the vinegar and oil have blended into an almost homogenous mixture. Add the crushed pepper and salt now, whisk them in too. Dressing is ready.
  5. Now is the time to drain the lettuce in a colander – drain it well, shake up the colander and coax the last drops of water out! Add the lettuce to the mixing bowl, pour the salad dressing on top and mix well, toss, shake – do whatever except spilling the contents!
  6. Chill the salad for at least half an hour before serving so that it is at the right temperature and the flavours settle well.
Some salad everyday keeps tummy trouble away
Notes
  • You can add pitted black olives, walnuts, coloured peppers (capsicum), rocket leaves or any preferred vegetables to the salad. Use dressing in proportion to the vegetables used.
  • Using fresh tender vegetables, and chilling well before serving help to enhance the taste of the salad.

Dec 18, 2012

Stir Fried Capsicum

It appears that people either love or hate capsicum / bell peppers. Me – I love it in all forms. I enjoy it’s raw crunch in salads, add it lovingly to sambar to perk it up, toss it with paneer for a smart bhurjee,…
…Or I make this stir fry. Capsicum is the star in this dish, it does not play the role of accompanying artist. Rather, the spices and seasonings added, only serve to add to the punch of this amazing vegetable.


What’s good about Capsicum?

  1. The best contribution from Capsicum to a meal would be it’s high Vitamin C, B and carotene (Vitamin A) content. While Vitamin C  and B reduces with heat and cooking, stir frying can ensure minimal losses. 
  2. Capsicum has virtually no Sodium, so it is a great addition to salads for a person with high blood pressure.
  3. The coloured peppers such as red, yellow, purple have a higher sugar content than the green coloured one. So it is recommended that diabetics use more of green pepper and lesser of the other coloured ones.
  4. Capsicum also is a low calorie, no - fat vegetable. People keen on weight maintenance / weight loss can include this wonder veggie freely in their diets.
  5. A note about the compound Capsaicin – this compound is isolated from other chillies of the capsicum family and used in several topical medications to relieve pain. This compound does not exist in sufficient quantities in Capsicum to have any pain relieving effects.

Without further delay. here is the recipe.


greem capsicum


You need

  1. Green Capsicum – 5-6 medium sized
  2. Salt – 3/4 tsp
  3. Fresh Coconut – grated, 2 tbsp
  4. Chutney Dal – 2 tbsp
  5. Green chilli – 3
  6. Saunf – 3/4 tsp
  7. Garlic – 2 pods, washed and peeled
For seasoning
  1. Vegetable Oil – 2 tsp
  2. Mustard seeds – 1/2 tsp
To Assemble
  • Wash, deseed and cut capsicum into thin slices.
  • Powder all ingredients from 3 to 7 into a coarse powder.
  • You could warm the chutney dal and saunf together before powdering. This step is optional – it helps to release the aroma and powder better.
  • Heat oil in a wok / pan, add mustard seeds.
  • When the mustard crackles, tip in the sliced capsicum and stir rapidly.
  • Keep the heat at medium high, add salt and keep stirring for 3-4 minutes. Adding salt may release water from the vegetable. If it releases too much water, make a well in the centre of the pan and let the water sizzle out quickly. The veggies should retain the green colour and just turn soft but not soggy.
  • Add the powdered mixture and toss to coat all slices.
  • Remove from heat and serve warm with dal and rice.
  • I served it with ‘basale soppu dal’ and steamed rice.


Steamed rice, dal and sir fried Capsicum
Variations
  1. You could choose to include all coloured peppers such as red, yellow along with green pepper. If so, include in equal proportion, tip in the green pepper first and add the others halfway through.
  2. Slice up a red onion and stir fry that first before adding the capsicum.
  3. Add chopped coriander as a final garnish.
Stir fried Capsicum - a closer look
Notes
  • The key to successful stir frying, is to chop / slice vegetables to similar size, so they fry evenly.
  • Use a much larger wok / pan than needed to fit in the vegetables. This way, they swish around well and fry happily!
  • Heat minimum oil to a good heat, just below it’s smoking point. Stir fry in this hot oil at medium high to high heat. This retains crispness, colour and flavour of the vegetables.
  • Do not dump in all vegetables together. Add the ones that need more cooking first and so on till you add the quickest cooking vegetable last.
  • The best stir fry is one that takes only a few minutes on high heat.