Showing posts with label best meal. Show all posts

Dec 10, 2015

Sai Protein for Chennai Floods

All these days, I have been watching the news with unspeakable pain and sorrow. The Chennai floods, that swept away precious life, left us all shocked and dazed. If the torrential monsoon rains were not enough, the city’s overflowing reservoirs too added to the mayhem. Coupled with indiscriminate real estate development, with no thought given to civic infrastructure, the people of Chennai are paying a very heavy price for the greed of their leaders. 

The terrible times also brought forth unprecedented help from different parts. Normal people turned heroes, and pretend heroes turned zeroes. Homes have been thrown open to complete strangers, people are offering their time and services for free, and heroic tales of survival and rescue are now flooding the social media. It is so heartening to see the generous help that people are offering each other.

While it looks like the rain gods have finally relented, a massive job still lies ahead in the flood-hit areas. Cleaning out the debris, preventing and fighting any water-borne diseases, rebuilding homes,… the task list goes on. In this context, I would like to share a recipe for kanji powder that can be made in bulk and distributed to those affected by the floods. All those want to contribute in some form for Chennai Flood Relief, please do try to make this powder and help those affected. The combination of grains used in this recipe is unique. Designed to be a complete food, 3 tablespoons of the powder dissolved in water or milk (if available), can replace an entire meal. It can be had by people of all ages, toddlers to old people. However, may not be suitable for weaning infants.

In a time when the immunity of a population is at risk, when people do not have access to normal cooking methods, when nutritious food is vital to health, this powder is a God-send. Beats instant noodles or biscuits by several miles in nourishment.

YOU NEED

INGREDIENTS

  1. 6 kilos Whole wheat (wheat pearls)
  2. 1.5 kilos parboiled rice
  3. 1.5 kilos Ragi (finger millet)
  4. 1.5 kilos Green Chickpeas
  5. 1.5 kilos Green Mung Beans
  6. 1.5 kilos Roasted Chana Dal ( Chutney dal)
  7. 0.5 kilo Soya beans
  8. 0.5 kilo Peanuts
  9. 0.5 kilo Jowar grains (sorghum/white millet)
  10. 100 grams Sago (sabudana)
  11. 30 grams cardamom
  12. 10 kilos sugar

METHOD

  1. Dry roast all ingredients from 1 to 10. Roast individually to a golden brown.
  2. Do not roast cardamom and sugar.
  3. Add the cardamom and sugar to the roasted grains. Powder in a flour mill.
  4. This recipe makes about 25 kilos of kanji powder.
  5. To make kanji, dissolve 3 tablespoons of the powder in hot water or hot milk. Stir briskly and serve. 

Please share this recipe/blog post freely. Please make in bulk for your homes or send to those affected by the floods. Either way, you are doing yourself a good turn.

Jun 3, 2015

Idli – The Ultimate Guide to Softest Idlis.

Idli. Enough said. That spongy, light as air, uber healthy, steamed breakfast of millions in India. It is every idli lover’s dream to make the fluffiest, softest, ‘malli poo’ idlis (as soft as jasmine flower) at home. Idli is the stuff of  culinary dreams. The perfect idli seems so much in reach and yet, so elusive. As my friend put it, “Idli is the cause and weapon of marital fights at our home.” If you want Idli to be the cause of marital harmony rather than distress, or if you are looking for a healthy breakfast recipe, read on..

Much has been written about how to grind the perfect idli batter. Family and friends who have tasted my idlis have been reminding me to document my recipe at the blog. So here I am, with my method of making idli batter. Do share what works for you as well. It would be great to hear from everyone.

The key to good food begins with good ingredients. I use Salem idli rice. I use the best quality whole white urad that I can find. In Bangalore, Salem idli rice and whole white urad can be bought at most wholesale rice and grain shops. (rice mandi) Some supermarkets like Nilgiris, Spar, Star Bazaar, Towness also carry them. “Can I use idli rava instead of the rice?” You can. But the texture of idli will be different. Don’t tell me I did not warn you.

The next step is correct technique. For fermentation, timing is key! I soak the grains overnight, grind it the next morning and leave it to ferment through the day. By evening, the batter is ready. I store the fermented batter in the fridge and use it for up to a week without any loss of flavours.

Idli topped with two chutneys 

If you are eager to make the perfect idlis for your family, follow these steps carefully. Please read the method thoroughly before trying. As with other recipes, perfection comes with practise. If you have any doubts, write to me and I can try to sort it for you.

YOU NEED

COOKWARE – Wet grinder, big bowls, spatula, idli steamer 

INGREDIENTS

  1. 4 cups Salem Idli Rice
  2. 1 cup Whole white urad
  3. 1 tsp Fenugreek seeds – (optional)
  4. 2 tsp Salt
  5. 5-7 cups chilled drinking water for grinding.

METHOD

  1. Measure out rice and urad in two separate bowls. Add fenugreek seeds, if using, to rice bowl. Rinse in enough changes of water till water runs clear. Soak in fresh drinking water. Water level should be 1 inch above the grains. Soaking time can range from minimum of 4 hours to maximum of 8-9 hours. I soak overnight. (about 8 hours)
  2. Measure out 2+1/2 cups of drinking water. Drain the soaking water from urad and grind in wet grinder. Keep sprinkling a quarter cup of water every 8-10 minutes. Use all of the 2 cups of water. Add as much of the 1/2 cup as needed. I grind for 40-45 minutes. Remove to a deep bowl when the batter looks doubled in volume and is silky smooth when you feel between your fingers.
  3. Measure out 3+1 cups of chilled drinking water. Drain out the soaking water from rice. Grind in wet grinder with 1 cup of water to begin with. Sprinkle just enough water to keep the grinder running smoothly. Keep checking every 4-5 minutes while grinding. Add water as necessary. I grind rice for 20 minutes. I stop grinding when the rice feels a little coarse and before the rice becomes a very smooth paste. That is not to say a semolina texture. Rather, between fine semolina and paste….
  4. Remove to same bowl as urad batter. Add salt and mix well with your hand. Yes, I dip most of my forearm into the batter to mix it up. This is vital to good fermentation. Have you not heard?
  5. Set this covered bowl of batter to rest in a warm place. Make sure to fill you bowl only half way to give room for rising. You can divide the batter into two bowls too. At my home, the batter takes about 8 hours to ferment. If your room temperature is below 20C, set to ferment inside your cold oven. Or cover the bowl with a beach towel/blanket. And pray that the batter does not attach itself to your blanket!
  6. The batter is completely fermented when it rises to double in volume, has a sour-sweet fragrance. Stir it lightly. Pour into greased idli moulds.
  7. Steam for 10-12 minutes over a medium flame. The idlis are done when a knife inserted through the centre comes clean.
  8. Serve hot with assorted chutneys, or molaga podi or sambar. Or all of them!

Mini idli served with love

Jan 24, 2015

Methi (No)Malai Matar

Some days are different. In a lazy luxurious kind of way. Some days when the routine is banal, when the mundane will just not cut it. Days when we linger just a little longer in bed, luxuriate in the bath, indulge in a hot tea while soaking in the morning sun. I am sure you have these days in your life too.

Such days call for a special meal. A rich, creamy, sinful dish around which a deeply satisfying repast can be planned. Today was such a day. A day to be extravagant, yet sensible. A day to savor. Time to gratify the tongue, body and soul with gastronomic hedonism, yet, not feel the pain of sin later. Time for another recipe to get the Healthy Slurps tweak.

Before you wonder any more, let me share this winner of a recipe with you. Winter is a season of amazing variety of produce in India. Fresh green peas are an irresistible part of this season. Every year, I buy fresh green peas in bulk, shell them, and freeze to use later through the year. After gorging on them in various avatars through the winter, that is. Punjabi and other North Indian cuisines have several dishes with peas as the star ingredient. Of these, I have been wanting to try this Methi Malai Matar for a long time. Translated from Hindi, it means a gravy/curry of fragrant fenugreek leaves and green peas laced generously with fresh cream. I could never bring myself to add cream in the quantities mentioned in most recipes. I just had to find a good healthier substitute.

Today, the idea just presented itself and I went along with the inner flow. The result was a rhapsody of aromas, flavours, an appearance that was alluring and beckoned us to the dining table! Substituting skim milk curd/yoghurt for cream was a fitting idea. The almond meal also added to the richness and added to the good fats in the meal. I prefer almonds over cashews to thicken a gravy as the former has a better fatty acid profile. In plain speak, it means, almonds have more heart-healthy fats than cashew nuts have.

The dish gets done in 4 simple steps. Soak the almonds in warm milk. Fry all ingredients for grinding. Grind along with almonds.  Simmer chopped fenugreek leaves with the gravy. Add boiled peas, season, and the dish is ready!

I am so happy to share this recipe with all of you. So here goes -

Fragrant Fenugreek married to Perky Peas!

ALLERGY INFORMATION

  • Does NOT contain corn, soya, gluten.
  • Suitable for people with gluten intolerance.
  • Contains lactose from milk. Those with lactose intolerance can substitute milk with same volume of water in the recipe.
  • Contains nuts. Those with nut allergy can substitute almond in the recipe with pureed silken tofu.

Preparation Time – 15-20 minutes, Cooking Time – 20-25 minutes, Serves – 4-6.

You Need -

Cookware – Saute pan, Small saucepan/Glass bowl, Mixer grinder

Ingredients -

  1. 3/4 cup fresh or frozen green peas
  2. 2 cups loosely packed fenugreek leaves ( Methi saag)
  3. 1/4 cup almond meal OR 2 tbsp whole almonds powdered with skin OR 1/4 cup pureed silken tofu
  4. 1/2 cup skim milk OR 1/2 cup water
  5. 1 heaped tsp salt
  6. 1 cup skim milk yoghurt
  7. 1 tbsp grated jaggery Or sugar (optional)

To fry and grind -

  1. 1 heaped cup chopped onions
  2. 3-4 tomatoes
  3. 2 tbsp chopped ginger
  4. 2-3 garlic cloves
  5. 2-3 green chillies depending on heat preference
  6. 1 inch stick of cinnamon
  7. 3 cloves
  8. 2 green cardamom pods
  9. 1/4 cup chopped green coriander leaves
  10. 1 tbsp cooking oil

Method -

  1. If you have whole almonds, soak in measured warm milk OR measured warm water(use warm water if you have lactose intolerance). If you have almond meal, soak those in warm milk too. Set aside. If you have nut allergy, omit the almonds, thaw the silken tofu, puree and set aside.
  2. Heat a fry pan, add oil, toss in the chopped onions, saute for a minute. Then tip in the chopped ginger and peeled garlic. Fry another minute. When the onions take on a light pink tone, add the chopped tomatoes. Also stir in the cinnamon, cloves and cardamom. Fry over a medium flame. Do not brown the onions. After 3-4 minutes of frying, when the tomatoes look slightly mushy, take off the flame.
  3. Grind this mixture along with chopped coriander leaves, and the soaking almonds+milk/water, or the pureed tofu. Blend to a smooth paste.
  4. Return this blend to the first fry pan, and set to simmer again.
  5. Chop the cleaned fenugreek leaves finely and add to the simmering sauce. Add 1/4 cup water if too thick and let the greens simmer in the sauce for 3-4 minutes. Stir in between to avoid charring at the bottom.
  6. Meanwhile boil the fresh or frozen green peas over stove top or microwave. Cover the peas with 1/2 cup water and cook for 3-5 minutes until soft and cooked. Add this cooked peas along with any remaining cooking water to the simmering sauce too.
  7. Add salt, sugar, curd, and mix in well. Bring to boil over medium heat. Switch off and let the gravy rest for 10-15 minutes.
  8. Serve warm with phulka/kulcha/pita bread/jeera rice/any mild pulao/pilaf. i served it with fragrant jeera rice and a carrot salad.

A satisfying repast

Creamy rich Methi Malai Matar minus the guilt 

Jun 28, 2014

Magic under the stars


Childhood memories and family mealtimes are closely intertwined in my mind. My earliest memories of happy times are of those spent at my grandparents' place. Carefree days filled with play time, bonding with cousins, fun and games nonstop, and of course, meals shared with all in the family. My grandmother, a powerhouse who could create meals for the huge family with astounding ease - would effortlessly cook up giant pots of the most aromatic dishes and enjoyed serving them to her family. Nothing gave her more happiness than to see her food being polished off.

As a special treat to the young brigade, my grandma would lovingly mix cooked rice, soft thick curd, add a pinch of salt, some hing powder, and season with cracked mustard and curry leaves. Into this, she would fold in some grated carrot or pomegranate or green grapes depending on supplies at home. When in a generous mood, she would also add a dollop of butter to the rice mixture. I would run and chop up some fresh coriander leaves and mix in. The milky white of the rice, dotted with brown mustard, a splash of green from the herbs, interspersed with the hues of the fruits made a meal fit for the Gods.

The entire creamy goodness would then be transferred to a steel bowl and carried to the terrace. All the grandchildren would throng around her. There, under the clear summer starry skies, the magic would unfold. She would narrate tales of kings and kingdoms, of brave men who fought for their land, all the while filling each child’s cupped palm with a scoop of heavenly curd rice. We would never know when we ate, and how much. Even the most fussy child would join in and be fed happily thus. What a feast under the stars! Tummy and soul nourished, we would all retire to a good night’s sleep.

Another age, another bunch of kids. I wanted to recreate this magic for my children and their cousins too. The terrace was cleaned and mats spread out in readiness. I read up and armed myself with a couple of stories from the Panchatantra and Anderson’s fairy tales. The lush, smooth, rich curd rice was assembled. To this meal, I added a roasted baby potato curry. Who can resist golden brown baby potatoes, enhanced with a fragrant mint and garlic spice mix! This dish would be best cooked in this Grill & Drop Casserole. I would love to check if I can make a killer roast without having to use too much oil and not end up scorching them either. For a spicy accompaniment,  I would also carry some fried curd chillies in this Gourmet Bowl.

To make the meal visually arresting, and to help cast a spell on today’s children, I would serve this delectable meal in these Gourmet Cook and Store bowls. The clear bowl could show off the beautiful embellishments, the speckled red from the pomegranate and the tinge of green from the coriander in this delicious dish to good effect. The snug lid would help to carry it safely without spillage to the terrace.

A fitting finale to the meal would be some home made fruit and nut chocolates nestled in pretty paper cases, served in the elegant Variety Platter.

Did I forget to add? While I am at creating this magic, I would like to add to the ambience by lighting up a few of these lovely Tea Lights too.

My entry to ‘My Beautiful Food’ contest announced by Indiblogger and Borosil.  Round 1 – Alphabet Soup.

Per requirements for contest, I have attempted describing a perfect meal with words alone and without using any pictures.

Jun 22, 2012

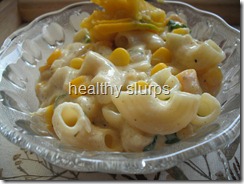
Chilled Pasta Salad

Summer bring the best and the worst out of all of us. Think thirsty  parched throats, prickly heat,…and again think tall cool glasses of sherbet, lazy vacation days, at least for school going kids, ice cream, swimming, and of course the season’s best – mangoes! Mango is so rightly called the king of fruits. I am yet to meet a person who does not like this ever so fragrant luscious fruit. Also think chilled salads when you are in no mood to cook your self along with food in a sweltering kitchen. To me, a pasta salad seemed just the answer to a hungry family and a not-ready-to-cook mom, that’s me. Teamed with warm grilled garlic bread, this filling salad left us so happy and content last weekend. I urge you too, do recreate this Indian-Italian piece de resistance in your homes this summer.chilled salad beckons
What’s good about this dish?
  • The meal combines grains(pasta and whole wheat bread), dairy protein (from the curd), fruit and veggies too. Hence it is a complete one pot meal.
  • Ripe mangoes and corn add to the vitamin A, B6, C and E levels of the meal, apart from the natural dietary fibre content. 
  • A good Potassium content in mangoes makes it a good fruit for people with hypertension. To make the dish more suitable for a hypertensive person, halve the salt used in the recipe.
  • Fresh curd is rich in probiotics – the helpful bacteria that are needed for normal functioning and maintenance of stomach and intestines. Fresh curd is also rich in vitamins B and C. Even people with lactose intolerance can usually tolerate curd as the ‘lactose’ sugar is converted to ‘lactic acid’.
Do you need more reasons to try out this fuss-free delicious recipe…. sunday lunch
You need
  1. Small elbow or bow tie pasta – 250 gm ( I used  half of a 500 gm pack)
  2. Sweet corn kernels – 1/2 cup, steamed 
  3. Ripe, firm mango (any variety) – finely dice and measure 1 cup.
For the dressingingredients for dressing
  1. Fresh thick curd, and hung for an hour – 2 cups. Measure the cheese after curd is hung.
  2. Onion – very fine minced, 2 tbsp
  3. Sugar – 1/2 tsp
  4. Black/white pepper powder – 1/2 tsp
  5. Salt – 1 heaped tsp
  6. Mustard – 1 tsp ( I used ‘Fun foods’ brand - English Mustard)
  7. Fresh coriander leaves – finely minced, 2 tbsp
  8. Green capsicum (Bell Pepper) – finely minced, 1 tbsp
  9. Fresh cream – 2 tbsp (optional, I did not use any)
To assemble
  1. Boil pasta for 8-9 minutes. Drain and rinse under cold water. Leave to cool in the colander until dressing is ready.
  2. Steam the sweet corn kernels for 2 minutes in the microwave oven.
  3. Peel and dice the mango as finely as possible without squishing it!
  4. Combine all ingredients for dressing in a mixing bowl. Please do not omit any ingredient ( I did not have capsicum and sorely felt it’s absence). Adding cream is your choice though – it helps to give a smooth mouth feel, but does amp up the calories.
  5. Once the dressing is mixed in well, add the cooked pasta, corn, and mangoes and toss well.mix dressing and pasta welladd corn, mango and pasta to dressing
  6. Chill well before serving. I chilled for an hour before garnishing it with more mango slices and served it up, accompanied with warm, cheesy garlic bread.
warm garlic bread and cold salad
Notes
  • Can use pineapple when mangoes are not in season.
  • Can use other vegetables such as carrots too.
  • Can use fresh or dried parsley or other fresh herb seasoning. Pudina / mint, however will be too overpowering a flavour.
  • Do not omit any ingredient from the ‘dressing’ list. I did not have green bell pepper (capsicum) at the time of assembling this salad and sorely felt it’s need to perk up the dish!
warm garlic bread and chilled pasta salad