Showing posts with label chutney. Show all posts

Feb 10, 2015

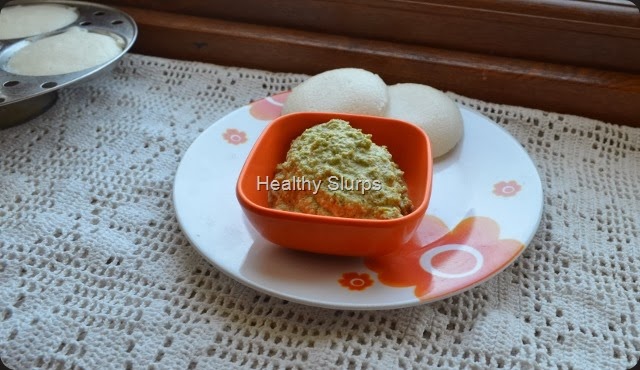
Nellikkai Thair Pachadi / Amla Raita

Do you know that Amla or the Indian Gooseberry has the highest Vitamin C content among all vegetables and fruits? That it has mention in ancient Sanskrit texts, is used extensively in Ayurvedic medicine, and is considered a miracle fruit. Amla can be used to treat eye disorders, increase calcium absorption in the bones, help build strong bones, cure skin ailments, strengthen and nourish hair, promote hair growth, actually just about do anything healthy and nourishing for our bodies.

The Indian Gooseberry (Amla) also has known anti oxidant properties. Amla has been found to offer a full range of benefits from free radical scavenging, anti inflammatory properties, beneficial effect on diabetes.   It is also widely used for its ability to dissolve plaques in arteries, reducing serum cholesterol levels.

Studies have also shown that even preserving in brine or pickling does not reduce the availability of vitamins, especially Vitamin C. Readers may be aware that vitamins B and C are easily destroyed when food is exposed to sunlight or heat, or excess water during cooking. So excessively cooked foods or preserved foods lose their vitamin content over time. Not so with Amla. This miracle fruit continues to dole out its health benefits even when cooked or preserved.

Despite having such a wonder fruit growing in our midst, I feel people in India do not make full use of it. We are in search of that elusive magic potion sourced from deep in the Amazon forests or some wonder drug that is shipped from a Scandinavian country. While those drugs/potions/foods may be good in them selves, I ask myself and everyone reading this – Is it wise to ignore the wealth in your backyard and seek something from far away? Are the money, effort, rising fuel costs, justified?

I, for one, am going to include more of this wonder fruit ‘Amla’ in my family’s meals. I am sure all of you have recipes from different cuisines with Amla as the main ingredient. Do share your favourite recipes with Amla in the comment section below.

Here is one simple, really quick, tongue tickling recipe with Amla. Perks up any meal and loads you up with its nutrients. Go on. Try it out.

Luminous Amla

ALLERGY INFORMATION

  • Does NOT contain gluten, lactose, nuts, corn, soya.
  • Suitable for people with gluten or lactose intolerance, or nut allergy.

Preparation Time – 10 minutes, Cooking Time – 5 minutes, Serves – 4-6

You Need -

Cookware – Small wok, Mixer grinder

Ingredients -

  1. 4-5 Amla fruits
  2. 2 tbsp fresh grated coconut
  3. 3-4 green chillies
  4. 1/2 cup skim milk curd
  5. 1/4 tsp salt

For Seasoning -

  1. 1/4 tsp oil
  2. a pinch mustard seeds
  3. a pinch fenugreek seeds
  4. a pinch asafoetida
  5. 3 curry leaves
  6. 1/2 red chilli (optional)

Method -

  1. Rinse the Amla well. Cut incisions along the segments. Pull out the flesh and discard the seeds.
  2. Grind along with coconut, green chilli, and part of the curd to make a paste. Grind more than a coarse paste but stop short of a fine paste.  Add the rest of the measured curd and whip along with the paste.
  3. Heat oil in a small wok/kadai/fry pan.
  4. Add ingredients for seasoning in order. When mustard crackles, pour in the ground mixture, and add salt. Simmer until the liquid foams up.  Do not boil this mixture. Keep stirring over medium heat for it to cook lightly.
  5. Remove to serving bowl and enjoy with hot phulkas,  or steamed rice, a dal and some stir fried vegetables.

Quick Amla Raita


Jun 3, 2014

Peerkangai chutney


I seem to be on a spree to cook with un-glamorous, un-restaurant-y, humble vegetables. Well, why not? Gourds are very easy on the wallet and the waist line, mostly neutral in flavour, lend body to various dishes, have varied nutritional benefits but are ignored despite all these.

Pic Courtesy - Sankalpfarms.com

No South Indian breakfast is complete without chutney. That inevitably means use of fresh coconut. On days when you do not have stock of fresh/frozen coconut, or want to limit it’s use in daily meals, you need some saviour to rescue the day’s chutney. Enter the star of today’s chutney - ridge gourd. I have used it in this recipe to benefit from the nutrients it offers, as much as a coconut-substitute.

  • Ridge gourd is high in moisture and crude fibre (good news for those with chronic constipation).
  • It is a very low calorie vegetable, so great to include in a weight loss diet. It adds plenty of bulk to a meal without adding significant calories! This means, you can eat a whole cupful of ridge gourd and add less than 20 calories to the meal!
  • Ridge Gourd has negligible Sodium and a fair source of Potassium. Hence it is useful for people with high blood pressure or certain kidney ailments where sodium is severely restricted.

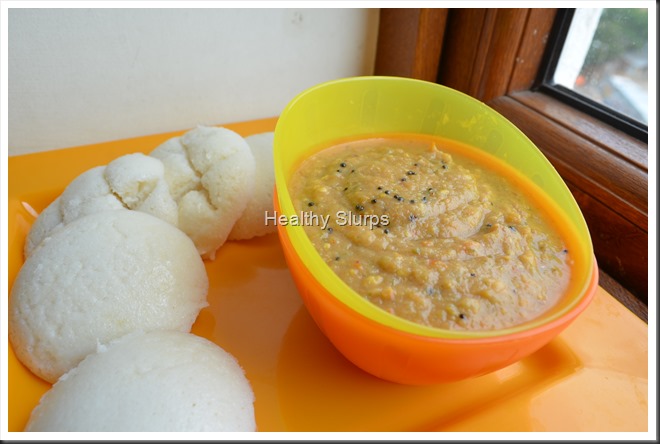
Here is how I made the chutney. We used it to complement soft idlis for breakfast. It was spicy, tangy and declared ‘good’ by my family. Do try it out and let me know how you liked it. The quantity here serves 5-6. Halve to serve 2-3.The chutney can be refrigerated and used within 2 days.

Preparation Time – 15 minutes ; Cooking Time – 5-6 minutes ; Serves – 5 – 6

Allergy Information – Does NOT contain gluten, egg, soya, peanuts, corn, lactose.

You Need

 Cookware  -  A frying pan, mixer grinder or food processor

Ingredients

  1. Red Onion – 1 medium, or measure 1/2 cup after chopping
  2. Roma Tomatoes – 2 medium, or measure 3/4 cup chopped
  3. Ridge Gourd / Peerkangai – 1 big, or measure 1+1/2 cups sliced
  4. Green chilli – 4-5 cut into halves
  5. Chana dal – 2 tbsp
  6. Tamarind – 1/4 tsp*
  7. Salt – 1/2 tsp
  8. Oil – 1/2 tsp
  9. Coriander leaves – 6-7 stalks with leaves (optional)

For Seasoning -

  1. Oil - 1/4 tsp
  2. Mustard seeds – /4 tsp
  3. Hing Powder – a pinch

* Use Tamarind if tomatoes are not tart enough, or add a couple of extra tomatoes and avoid tamarind. You can even omit tamarind entirely if you do not prefer a sour-ish chutney

To Assemble

  1. Prepare the vegetables for frying. To begin,  wash, peel and chop onions. Next, wash peel and chop tomatoes and green chilli. Rinse the ridge gourd well, peel part of the rough skin at the ridges, while leaving some skin on the vegetable. Cut into thick slices.Fry all vegetables for chutney
  2. Heat a small wok / frying pan. Add the half tsp oil, let it heat up. Add the chana dal, fry over medium heat until golden brown. Add all the prepared vegetables, chilli, tamarind and salt. Toss well, (do not add any water), cover and simmer for 2–3 minutes or until you find the tomato skin has shrunk a little bit and the gourd seems to go slightly limp. If you are using  coriander leaves, add at this point, and switch off flame.
  3. Let it cool. Grind to a coarse paste. You will not need any water for grinding. After removing to a bowl, rinse out the mixer jug with a 1/4 cup of water and add to the chutney if you wish to dilute it. Chutney with Seasoning
  4. Heat oil for seasoning. Crackle mustard seeds, add hing powder and pour over the chutney.
  5. Serve as accompaniment to idli, dosa, or over plain steamed rice, as a sandwich spread or as dip for crudites too!

Soft Idlis with Spicy Chutney

Fresh breakfast for two!

Feb 21, 2014

White Radish and Tomato chutney


A chutney a day as accompaniment to breakfast or tiffin is so required in a South Indian home. Often it involves grinding of fresh coconut with some green chillies and perhaps some chutney dal added. I often hear my elderly clients telling me they cannot eat breakfast without chutney but their diet restrictions does not permit them to include as much coconut as they would wish to.

A vegetable based chutney such as this one is the answer to such dilemmas! This recipe does not require coconut or peanuts, has vegetables as it’s base and the best part is you would not miss the coconut at all.

So if you are just looking for a new way to make chutneys or need to replace coconut or peanut in your chutney, this could be just what you would like to try out. This recipe serves as accompaniment for 4 people. Halve to serve 2 or freeze for later use.

Delicious chutney, want some?

You need

  1. White radish – grate or slice thin and measure 1 level cup (about 2 medium size radish)
  2. Tomato – chopped, 1 cup ( about 3 small Roma tomatoes)
  3. Green chillies – 3-4 depending on heat preference
  4. Chana dal – 2 tbsp
  5. Vegetable Oil – 1 tbsp
  6. Salt – 1 tsp

For seasoning

  1. Vegetable Oil – 1/2 tsp
  2. Mustard – 1/4 tsp
  3. Urad Dal – 1/4 tsp
  4. Curry leaves – 4-5
  5. Asafoetida powder (hing powder) – a tiny  pinch

To Assemble

  • Wash, peel, radish. Slice into thin disks or grate. Measure 1 level cup.
  • Clean and chop tomatoes and green chillies.
  • Set a kadai / fry pan over flame, heat oil. Add chana dal, saute. When the dal turns golden brown, (fry for approx. 2 minutes) add the radish, saute over high heat for 2 minutes.

All ingredients from frying pan to...


  • Tip in chopped tomatoes and green chillies. Cover and cook for another 2 minutes or until the tomatoes look squishy.
  • Cool and grind to smooth paste. Remove to bowl.

...To the mixie jar!

  • Set a small fry pan / tadka pan over flame, add oil, heat ingredients for seasoning, pour over chutney.
  • Serve as accompaniment to dosa, idli, vada, upma, pongal, well, actually with anything you may want to eat.

'Seasoned chutney' ready to serve

Jan 17, 2014

Peanut Chutney

Peanut chutney and idli - power breakfast

My daughter is a total peanut fan.  She eats peanuts roasted, fried, boiled, in salads, asks for them in lemon rice, or if I am not looking, she gobbles them even raw! A jar of peanuts are never safe around her. To the extent that she is called the ‘ Li’l monkey’ of the house. She pouts and sulks when called so, and that tickles her big brother. So he runs her insane by chanting ‘monkey, monkey monkey’. Her dad calls her his fav  cute Li’l monkey – that did not seem to appease her either.
And then one day, I made this peanut chutney. Obviously, you cannot see the peanuts in them cos they are ground! Guess what? Her dad loved the chutney so much, he asked me, “What chutney is this? It pairs so well with idli” . My daughter was delighted. She ran to her dad, and told him “You are my favourite big monkey now, cos you like peanuts too! This is peanut chutney!” All of us had a hearty laugh. And peanut chutney came to stay forever at our home.
There are many versions of peanut chutney made, here is my unique combination of ingredients. I often add some coriander leaves, or mint leaves, a clove of garlic or even curry leaves to the mixture and then blend it up. You could try those variations too.
You Need
  1. Raw peanuts with skin – 1/2 cup
  2. Coconut, grated – 2 tbsp
  3. Onion – 1, medium sliced
  4. Green chilli – 4, cut in halves
  5. Tamarind pulp – 1 tsp
  6. Salt – 1/2 tsp
  7. Vegetable Oil – 1/2 tsp
  8. Drinking water – 1/4 to 1/2 cup for grinding
For Seasoning -
  1. Vegetable Oil – 1/4 tsp
  2. Mustard seeds – 1/4 tsp
  3. Urad dal – 1/4 tsp
  4. Curry Leaves – 4-5
Fry ingredients for chutney
To Assemble
  1. Take oil in a fry pan / wok / kadai, Heat it.
  2. Add whole peanuts to it, fry for 2 –3 minutes.
  3. Next, tip in green chilli cut in halves, followed by onion slices, last comes the tamarind.
  4. Fry well over medium to high flame, for 2-3 minutes more. Do not burn the ingredients. Stop frying when the peanuts look golden brown and the onions turn translucent.
  5. Add salt and grated coconut to this mixture, switch off flame ( cool it if you have time) and blend in a mixie to a coarse-ish smooth paste. You may need to add some water, say 1/4 cup while grinding to get a thinner chutney.
  6. Heat ingredients for seasoning, when the dal gets a warm golden hue, pour on top of chutney.
  7. Enjoy with idli, dosa, use as sandwich spread, or even with hot steamed rice.
Tasty tangy peanut chutney
Please do read the allergy information before trying out this recipe, especially if you have never eaten peanuts in any form before or if you have noticed any other food allergy symptoms too.
IMPORTANT ALLERGY INFORMATION
Some people develop an allergy to several nuts including peanuts. Symptoms may range from itching around mouth or throat, skin reactions, digestive disturbances, or more serious symptoms like breathing trouble too. In such situations, please stay away from peanuts in all forms – whether raw, boiled, roasted or fried. However, refined peanut oil seems to be tolerated even by people with peanut allergy. Still, do consult with your doctor before attempting to include peanuts in your diet.
PEANUT NUTRITION INFORMATION
Peanuts are a high energy food, most of the energy coming from fats and protein. As we know, all fat is not bad fat, peanuts are cholesterol free, have omega 3 and Omega 6 fatty acids.
To give a better picture, the total fats in 100 gms of raw peanuts is 49 gms, of which monounsaturated fats are 24 gms and polyunsaturated fats are 15 gms, while the saturated fats in peanuts are only 6 gms. They also have a high content of Omega 6 fatty acids – 15 gms / 100 gms.This makes it a valuable ‘good fat source’ in vegetarian diets.
Peanuts are also known to prevent cancer, help in weight control in moderate amounts and also have very valuable anti oxidants which have the heart health benefits and also prevent stroke. Regular consumption of peanuts also helps in preventing Alzheimer’s.
Peanuts are an inexpensive, ready to eat protein source, go ahead and enjoy it’s benefits.
Peanut chutney up close!

Apr 15, 2013

Raw Mango Pachadi


A very Happy Ugadi, Tamizh Puthandu nal vazhthukkal , Happy Baisakhi, Happy Pohela Boishakh, and Wish you Happy Vishu to all readers!

New Year – Several names for the same event, many customs, happy celebrations, delicacies, it sure is happiness all around.

It is summer in several parts of India already. Our city is going through mid – summer too. The best part of summer is the arrival of mangoes in India. Raw, ripe, fragrant, in all sizes, mangoes are consumed in so many forms through summer. Apart from eating mangoes just so, they are also cooked into several delicious dishes. Each region of India has their own varietals of mangoes and several delicacies prepared with them too.

Raw Mango Pachadi is one such – hot, sweet, tangy, spicy, slurpy, all flavours in one dish. I never tire of making this simple pachadi during summer. Any variety of mango which has a small seed and plenty of flesh is good for the recipe. I normally use ‘Totapuri’ mango.The pachadi becomes part of lunch menus as well as festive menu at our home during this season. So I would love to share this much loved recipe with all readers on this Happy New year’s Day. Try it out and enjoy as much as we do.

Raw Mango Pachadi

You Need

  1. Raw mango, 1 medium – Peel skin, shave out pulp, discard seed. Measure 1 cup heaped of pulp shavings. Taste a wee bit of the cut mango. That will decide how much jaggery is needed.Mango pulp
  2. Jaggery -  If mango is super – sour, use equal volume of jaggery and mango. Else use up to 3/4 cup jaggery per cup of mango.
  3. Salt – 1 heaped tsp (again, depends on how sour the mango is)
  4. Turmeric powder – a pinch
  5. Fresh drinking water – 1 cup

For seasoning

  1. Any vegetable oil – 1 tbsp
  2. Fenugreek seeds ( methi seeds) – 1/2 tsp
  3. Mustard seeds – 1/2 tsp
  4. Red chillies – 6-8, broken into 3 bits each
  5. Curry  leaves – 5

To Assemble

  1. Take the mango pulp shavings and water in a slightly thick bottomed pan, set on boil. Once the water boils, cover and simmer  for 5 minutes. Stir once in between, check for water. Add more if needed. The mango should have cooked through by the end of 5 minutes. Skin, shave mango pulp
  2. Heat oil in a pan. Add fenugreek seeds, mustard, broken red chillies, curry leaves. Let sizzle.Add Seasonings to hot oil
  3. Add mango pulp, the measured jaggery, salt and turmeric powder. If your jaggery is big and lumpy, pound it to smaller chunks and then add. Allow the jaggery to melt and blend in with the mangoes.  Add salt, jaggery, simmer
  4. Give a quick mix, cover and keep for flavours to infuse.
  5. Serve with festive lunch of steamed rice, sambar, other curries. Raw Mango Pachadi
  6. Or just use as dipping sauce for samosas, smear onto chapatti and roll it up, or as dip for crudités. When using as a dip, squeeze out the red chillies, discard the curry leaves and then use.

Apr 1, 2011

Power Pesarattu

Pesarattu is a much loved dish of Andhra or Telugu region of India. I have adapted the ingredients to suit my family’s taste. The use of sprouts and herbs in the batter create a unique power packed combination, easy and amazingly tasty.The herbs helped in masking a slight bitter flavour that sprouts develop. This dish works just right for breakfast in our home. I hope you find it great too! The measures used here serve 5-6 people.
Power Pesarattu
You need   
  1. Mung bean sprouts – 4 cups, heaped
  2. Raw rice – 1/2 cup, rinsed and soaked for 1/2 hour
  3. Ginger – 1 tbsp, chopped fine
  4. Green chillies – 2
  5. Coriander leaves – 1 cup, chopped
  6. Mint leaves – 1 cup, loosely packed
  7. Cumin seeds – 1 tsp
  8. Garlic – 1 pod (optional)
  9. Salt – 1 tbsp ( or more)
  10. Fresh water – 1 cup
  11. Vegetable oil / sesame oil  - 4-5 tbsp, for drizzling over dosas
mint, cumin, ginger, chillisprouts, rice, and coriander


To assemble
  1. Grind all ingredients mentioned under ‘You need’ except oil, to a real smooth batter. I used a mixer grinder. Using garlic gives a ‘kick’ to the final taste, but omitting it does not take away the pleasure either.
  2. Use water sparingly for grinding. The batter should be thinner than usual dosa batter but not too runny.smooth, frothy batter
  3. Hereon, writing the recipe is fairly simple, but creating a good dosa / pesarattu does need some practice!
  4. Heat up a dosa griddle real hot. You can see the griddle all smoked up in this picture. Season the griddle with a tsp of oil.
  5. smokin hot
  6. Dribble a ladleful of batter around the griddle, fill up the centre with more batter, and spread very gently to form a circle. Drizzle 1/2 tsp of oil around the dosa, let it sizzle.Mummy look, a green dosa!
  7. Allow to cook through and brown around the sides, ease out the dosa carefully with a sharp spatula and flip over. flip over
  8. Cook this side over medium heat, ease out and remove to a plate when done.
  9. Check the dosa for salt and flavours before proceeding with the rest of the batter. To  salvage a runny batter or too much salt, you could add up to a couple of tbsp of rice flour to the batter. Rice flour will also help the Pesarattu become more ‘flippable’ and less clingy to the dosa griddle.
I did ruin a couple of dosas before I got it right. It helped to have the griddle smoking hot, waiting for the first side to really brown before attempting to loosen it and thereon, cooking over medium heat.
Pesarattu is traditionally served with ginger chutney. I usually serve with a peanut chutney which is a great favourite with my kids.
power pesarattu
Notes
  • Soak, drain, rinse whole mung bean and tie up in a muslin cloth, leave in a moist dark place for 10-12 hours, by which time the seeds would have sprouted and you have super healthy sprouts ready.
  • Mung bean sprouts have been used in Ayurvedic approach and Chinese cuisine for several centuries.
  • Consuming raw sprouts is not advised for toddlers, pregnant women, and in any gastrointestinal disturbance. The ideal way to consume for these people would be to use home  grown sprouts, rinse well, steam or lightly stir fry them.
Nutri notes
  • The sprouting process increases the beans’ enzyme content which means, complex carbs are converted to simpler starches, proteins to amino acids and fats to simpler lipids. As a result sprouts are more easily digested.
  • Sprouting increases sodium and Vitamin C content, both of which add to protein digestibility in the body.
  • Sprouts are 'live' food. They contain active RNA, DNA, in addition to being a veritable enzymes and antioxidants storehouse. They help cell regeneration and can rightly be called ‘fountain of youth’.
  • Dry beans do not have any vitamins or minerals, but we get almost magical amounts of Vitamins A, B, C, Calcium, Sodium, Potassium, Iron, Phosphorous, Manganese, from sprouts. Thus they are very handy in winters when fresh fruits or vegetables are in short supply. Sprouts can be eaten the whole year through too, for the whole host of amazing benefits.
  • Sprouts decrease the oligosacharides in the beans – this means, beans lose their gas producing quality.
  • Sprouting also increases fibre and water content of the beans, thus helping in avoiding or easing constipation.
  • For benefits of pudina and coriander, please do read up my earlier posts.

Feb 12, 2011

Tomato Herb Chutney


Luscious red tomatoes paired with fragrant coriander, the result is a flavourful chutney. My younger one wanted tomato chutney and the elder one wanted a green chutney; I was running short of time and threw both together – result was something all of us liked !
tomato herb chutney
You need
  1. Ripe red tomatoes ( any variety) - 2 big or 3 medium
  2. Green chillies – 3 (can add or reduce according to taste and heat)
  3. Coriander leaves – chopped roughly, 1 cup
  4. Fresh Coconut – grated,  1/4 cup
  5. Salt – 1/2 tsp
  6. Vegetable oil – 1/4 tsp
For seasoning
  1. Vegetable oil – 1/4 tsp
  2. Mustard seeds – 1/4 tsp
  3. Urad dal – 1/4 tsp
  4. Hing powder – a tiny pinch
  5. Curry leaves – 4-5 torn up
quartered tomatoes
 To assemble
  1. Wash and pat dry tomatoes. Quarter them.
  2. Wash green chillies and chop up.
  3. Remove roots of coriander, rinse thoroughly, drain and chop roughly.
  4. Grate coconut, measure out 1/4 cup.
  5. Heat up oil in a small frying pan, add green chillies, step aside.
  6. Tip in chopped tomatoes, toss to coat oil evenly.fried ingredients
  7. Add the salt now, and fry for  a minute more.
  8. When the tomatoes are squishy, (in a minute or two) add the chopped coriander and switch off flame.
  9. Let it cool, add grated coconut and grind to get a fragrant chutney.
  10. Heat oil, add ingredients for seasoning in order and pour over chutney.
  11. Serve with flair as accompaniment for idli, dosa, paratha, steamed rice, sandwiches, well, just about anything!
 tomato herb chutney
Nutri notes
  • Coriander (both leaves and seed) help regulate blood sugar levels by stimulating insulin production.
  • Volatile oils found in the leaves seem to have antimicrobial properties.
  • Coriander reduces lipid peroxides in cell membranes, thus inhibiting free radical formation.
  • In a study conducted on rats fed with high fat diet, adding coriander to the diet increased the HDL and lowered levels of LDL cholesterol.
  • Besides these benefits, coriander is also good source of dietary fibre, magnesium, manganese and fair source of iron.
  • A compound called dodecenal isolated from coriander, has been found to be more effective than antibiotics in fighting salmonella infection.
  • A drink of coriander seeds boiled with water  (in the proportion of 2 tbsp seeds per litre of water) cures urinary tract infection rapidly.
  • Apart from these amazing uses of coriander, it is also a flavanoid and phytonutrient dense food. I guess all this information will prompt us to use more of coriander in our daily foods.
  • Benefits of tomatoes have been discussed earlier, hence I am not repeating it here.
  • Addition of coconut, though minimal, will increase the fat content of the chutney. One alternative is to use chutney dal in place of coconut. The taste does differ, but provides a healthier alternative.

Oct 26, 2010

Vegetable sandwiches

This was the lazy weekend,and I was too engrossed in aromatic elaichi tea with the morning newspaper,to think of any gourmet breakfast.It was then that I remembered the pudina chutney I  had made the previous day.I lost no time in chopping up the veggies at hand,and went on to make this A GRADE (the young ones gave me this grade!) scrumptious breakfast for my kids.So quick and tasty,especially if you have the spread made ahead,my heart filled with happiness at having been able to whip up a hearty wholesome breakfast for my family.
You need 
  1. Sandwich bread / whole wheat bread-1 loaf
  2. Pudina chutney-1 recipe (from previous post)
  3. Tomatoes-3-4 medium, thinly sliced
  4. Capsicum-2 medium, thinly sliced
  5. Zuchini, yellow-1 long, thinly sliced
  6. Onion-2 medium, cut into thin rounds (optional)
  7. Butter-2 tbsp, melted
To assemble
  1. Clean all vegetables that you wish to use, peel and slice into thin rounds.
  2. Brush 1 side of each bread slice very lightly with melted butter.
  3. Heat a sandwich toaster, place a buttered slice down on the toaster.
  4. Use a spoon or spatula to spread some pudina chutney onto the slice.
  5. Place 2-3 tomato slices on the bread slice, then place some zuchini slices over it, followed by a slice each of onion and capsicum.
  6. Top the sandwich with a buttered bread slice faced up.
  7. Close the sandwich toaster, step back and wait for the heavenly aroma of toasted bread.
  8. Depending on model of toaster, your sandwich should be ready in 60-80 seconds.
  9. Take care not to burn the underside of the sandwich, switch off and remove carefully with a spatula.
  10. Repeat making sandwiches using up your bread and veggies and the yummy chutney spread.
  11. Cut the sandwiches into triangles with a sharp knife, sit back and       ATTACK!!!!
Variations
  1. You could use any vegetable combination- sliced carrot, blanched beetroot, raw cucumber, tender radish- all work well inside sandwiches.
Notes
  • A sandwich filled with vegetables like this is a super healthy, filling, no mess, school lunch.
  • You could add half a slice of cheese to each sandwich to increase satiety for a school lunch box.
  • I used a Philips electric sandwich toaster to make these sandwiches.
Now for the nutri notes
  • Using whole wheat bread increases fibre content of the meal, especially useful for diabetics, since it is a low glycemic index food.
  • Health benefits of pudina has already been mentioned in previous post.
  • Making a vegetable sandwich like this, at home,  lets you use several types of vegetables in the same sandwich (you are not victim of limited veggie fillings commonly doled out at several restaurants).
  • Using raw vegetables like capsicum, tomato provides for the daily average requirement of Vitamin C (Please note that cooking time of 60 -80 seconds inside the toaster is quite minimal and ensures easy digestion, while retaining the vitamin content of the vegetable to almost 80%)
  • Onion is a sulphur containing vegetable, while tomatoes have lycopene, a  plant pigment. Such vegetables have anti carcinogenic property, that is, they help prevent cancer in the body!
  • The homemade sandwich spread eliminates the need of  using store bought ketchups and spreads (which may contain several food additives and preservatives).
Here are the visuals


sliced vegetables
bread slice topped and ready to toast!
yummy sandwiches


Oct 12, 2010

Pudina chutney

I was looking for a zesty pick me up to brighten up a usual rice-dal routine.As I rummaged though the fridge,this bright dark green bunch of pudina invited me with it's lovely aroma-this was exactly what could fit my need!I could not wait to convert it into this chutney below; once you have separated leaves from stalks, go ahead and make this quick, delicious pick me up!

You need
  1. Pudina leaves-1 1/2 cups packed
  2. Green chillies-3-4 big
  3. Root ginger-2 tsp chopped
  4. Garlic-7-8 cloves,peeled
  5. Fresh coconut-grated-1/4cup or chopped-1/2 cup
  6. Juice of 1 lemon (can add more if you feel the need for a super tangy taste)
  7. Salt-1/4 tsp
  8. Vegetable oil-1/4 tsp
To assemble
  1. Remove stalks,clean and wash pudina leaves under several changes of water,drain and keep aside.
  2. Take a flat bottomed pan,heat oil in it.
  3. Add chopped green chillies, ginger, garlic to the pan, swirl the pan and let sizzle.
  4. After a minute you can add the washed pudina leaves, toss in the oil for a quick coating.Do not fry for more than a minute-you will lose the flavor and colour if you do.
  5. Take a fresh coconut halved, and grate or chop out the white flesh (use quantity, as given in ingredient list)
  6. After the fried ingredients have cooled, place these and the coconut in a mixer grinder, add the salt and grind to a smooth paste.Use the lemon juice instead of water,midway through the grinding.You can add another tsp or two of water after adding the juice,(if required).
  7. Your tangy bursting-with -good-health-pudina- chutney is ready!
Notes
  • This chutney can be stored in the fridge for a couple of days,and upto 10 days in a freezer box in the freezer;thaw only as much as you would use up each time.
  • The chutney works great to perk up a meal,as a sandwich spread,or a tangy spread for rotis-fill up with salad veggies,roll and eat!
  • You can use fresh raw mango in season instead of lemon juice-it adds body to the chutney too.
  • Can avoid ginger and garlic and use only green chillies for a slight change in flavour.
  • Can make the same chutney using fresh coriander (cilantro) leaves too,use 1 1/2 cup of chopped leaves to substitute for every cup of pudina leaves.
  • Take care-Do not  fry the leaves for more than a minute.
Now for the nutri notes
  • Ginger, garlic and pudina are known to be excellent digestive aids, they relieve gas, distension, and improve digestion.
  • At a good 15mg of iron per100g of pudina leaves, mint packs in good punch!
  • Combining lemon juice or raw mango in the chutney makes Vitamin C readily available.Vitamin C improves iron absorption in the body.
  • Pudina also adds to the fibre content of the meal.
  • With virtually no sodium, it is a good choice for both hypertensive (blood pressure) and some renal patients, who need to control sodium intake.Of course, adding salt to the dish increases the sodium content.You can use low sodium salt insted of regular table salt in case of sodium restriction.
Here follows the visuals


    frying ingredients
    toss pudina leaves in oil

     fresh coconut
    pudina chutney