Showing posts with label recipe. Show all posts

Jun 21, 2014

Five minute Three Pepper Paneer Curry

Check-out Allergy Information.

Every parent with school-going kids has to face the morning or the night before with a very important question – what to pack in the school lunch box? What’s there in my pantry? Also, when you have to feed more than one kid, the agony is doubled, believe me!

If my older one wants muesli for breakfast, the younger one fancies ‘Chocos’. The day the older one thinks of a sandwich for lunch, the younger one would like rice. If one feels like some thing sweet, the other wants a savoury treat right then! The Universe connives with my kids such that, they have exactly opposite moods at any time. At such times, nothing helps - not requests to adjust with each other, not promises to make it tomorrow, not threats, nothing! Trust me.

And, I have an hour to make breakfast for them, make acceptable (read different gourmet meals) lunches, pack them, fill their water bottles, make sure they have brushed, showered, prayed (yes, that is important in my home), combed, attired in mandatory school regalia!, find random books/papers/assignments/stationery that they have forgotten to stuff into their school bags, find their socks, salvage their shoes from the chasm between the shoe racks and the wall, and make sure they reach the school bus on time!

I know I am not alone. Most mothers/parents in my city and maybe, the world over, go through some variation of this vertigo-inducing routine in the morning! Well, after going through this rigmarole for more than 15 years, I have a few tricks up my sleeve. Some recipes which help me assemble quick, hearty, nourishing home-made lunches for my children.

This paneer curry is one such easy-peasy life saver on such insanity-causing weekday mornings!

If you have paneer ready, that is.

And coloured capsicum (bell peppers), and a couple of sauces.

It is versatile, easy to put together, can be used to partner with chapatis, filled into a sandwich, rolled into a kathi roll, or add pizzazz to some fried rice. Most important, when packed in a lunch box, it will come back home empty. Hopefully your child got to eat some of it Smile

Preparation Time – 10 minutes; Cooking time – 5 minutes; Serves – 4-5.

ALLERGY INFORMATION

  • Does NOT contain egg, nuts, corn.
  • Has dairy and lactose. Can be made dairy- and lactose-free by substituting paneer with extra-firm tofu.
  • Has MSG. Not suitable for children below 2 years.

The 3 pepper paneer sandwich

You Need

Cookware – Cutting Board, Knife, Colander, 9” Diameter frying pan / Wok.

Ingredients

  1. Paneer (Or extra firm tofu) – 200 gm
  2. Green, red and yellow capsicum, chopped – 1/3 cup each
  3. Red Onion – 1 big, or measure 1 cup, finely diced
  4. Fresh coriander leaves (Cilantro), chopped fine – 1/4 cup
  5. Schezwan Sauce (any brand) -  2 tsp
  6. Tomato Ketchup – 3-4 tbsp
  7. Salt – a couple of pinches ( if needed)
  8. Any vegetable oil – 2 tsp
  9. Saunf ( fennel seeds) – 1 tbsp*
  10. Honey – 1 tsp OR Sugar – 2 pinches (Optional)

*Do not omit the saunf in this recipe. It adds a unique flavour to the dish.

To Assemble

  1. Rinse paneer or tofu in drinking water. Carefully place it in colander to drain. Then, you can choose to either dice the paneer (or Tofu) or roughly crumble it. I prefer to dice, as then, the diced vegetables and the paneer all look similarly proportioned.
  2. Rinse, and finely dice all the capsicum into the same size. Peel, rinse and finely dice the onion too. Happy day with happy veggies
  3. Set frying pan/wok on fire and heat the oil in it. Add saunf, let it sizzle and release its’ aroma. Inhale - the aroma of saunf
  4. Tip in the onion before the saunf browns. Sauté for a minute. Add a pinch of salt to speed things up.
  5. As soon as the onion looks pink,  tip in the diced capsicum, toss. Sauté for another two minutes.Veggies in a merry sizzle
  6. Now the sauces can go in. The sight of these liquids hitting the hot pan and then the aroma around – I’ll leave you to savour in your kitchen!
  7. A quick mix of the sauces and veggies, and now it is the turn of diced paneer followed by chopped coriander to hit the pan. Switch off flame, mix all contents well, taste and add more salt now if needed. Some paneer will get crumbled while mixing, that is fine. Add the (sugar /honey if you are using), now. Mix through, taste again to make sure the flavours satisfy your palate.*Tri-colour glory
  8. The 5 minute 3 pepper paneer curry is now ready. Use it as filling in whole wheat chapatis – spread 2 tbsp of curry per chapati, roll up, cover in foil and pack for lunch. Or, use as filling for sandwiches. it is a great accompaniment to Chinese fried rice too. Sandwiches in the making

* My family found the play of texture and flavour in this recipe to be very appealing! You could add more or less of the sauces, or add more seasonings as you prefer. Add red chilli paste instead of Shezwan sauce, omit the sugar, try the dish with any one type of capsicum – all these are variations you could try.

Pick-me-up Sandwiches for anytime of the day

We are enjoying these filling, healthy and absolutely lip-smacking sandwiches at our home, in our lunch boxes and as after-school snacks too! Go ahead, make some for yourself, enjoy and let me know if you liked them.

Apr 1, 2013

Minty Garlic Potatoes

This was a recipe I tried out on a whim ages ago. I did not think much of it then. That is, until my child requested for it again. Isn’t it is true that potatoes are so versatile and can work with any flavours, seasonings and is an all time favourite with kids?
Yummilicious Baby Potatoes
I am particularly fond of this recipe since the flavours taste very fresh if you follow this method of preparation. Of course, I have just made it up the way my family likes it. You could tweak, add, change ingredients to suit your favourite flavours too. After all, what is a dish without improvisations? Useful for last minute lunch prep or when guests land up at mealtimes and you need to rustle up more food. I have used baby potatoes because I had them and because they look cute. SmileOf course, normal potatoes boiled and cubed are fine too. Take it forward anyway you like. This could even be a salad with boiled potatoes, pomegranate, some diced tomatoes and use the pudina as a dressing. The results are sure going to be delicious.
What’s good about potatoes?
  • It is popular belief that potatoes are full of starch and fat and offer little else. Potatoes have complex carbohydrates, which are a good source of carbs as opposed to refined flours and refined sugars.
  • It may also be surprising to know potatoes are a good source of several minerals like Magnesium, Potassium, Zinc, Copper.
  • Potatoes are also fair sources of Iron, Vitamin B complex and Vitamin C. Despite losses during cooking potatoes can deliver 2- 5 % of daily requirement of Vitamin B and C.
  • Potatoes are fatty? No way – they are a zero cholesterol food! The total fat in 100 gm. of potatoes is only 0.1 g and that is Omega 3 and Omega 6 fatty acids.
  • While the skin does not have any nutrients, it is the layer of potato just below the skin that has them. The best way to harness all these great vitamins and minerals is to cook/ boil them with skin on. This locks the nutrients in. When we peel potatoes after cooking, instead of before, we save a lot of the nutrients.
  • A lot of vitamins and minerals ‘leach into’ the cooking water. So it is a good practise to cook/boil in just enough water (instead of excess water) to optimise the maximum value of any vegetable, especially so in this recipe.
  • Adding a good bunch of fresh herbs like pudina (mint) and coriander to this recipe enhances it’s iron and fibre content.
I guess we need no more incentive to cook a lovely batch of minty potatoes. So here goes -
You need
  1. Baby potatoes – 500 gms
  2. Onion – 1 small, diced Fresh pudina leaves
  3. Mint leaves (Pudina leaves) – packed, 1 cup
  4. Coriander leaves – remove roots, clean, chop and measure 1/4 cup (optional)
  5. Garlic – 1 medium clove
  6. Juice of half a lemon
  7. Any vegetable oil – 2 tsp
  8. Saunf (fennel seeds) – 1/2 tsp
  9. Jeera – !/2 tsp
  10. Salt – 3/4 tsp
  11. Sugar – a pinch
To Assemble
  1. Immerse the baby potatoes in a water bath for half an hour if you have time. Else, leave in for 5 minutes and clean the skin well. You can boil the potatoes in enough water for 20 minutes or just pressure cook it till 1 whistle.
  2. Leave the boiled potatoes on the chopping board to cool naturally. Peel when sufficiently cool to handle.
    (Why not dunk in cold water? – Because that lets more minerals and vitamins dissolve into the ‘cooling water’ too.)
  3. Make a coarse paste of the following ingredients – half onion, pudina leaves, coriander leaves (if using), juice of half a lemon, sugar and the garlic clove. I used the ‘pulse’ button in my mixer to get the coarse texture. Coarse blend paste
  4. To a pan set on high heat, add the oil, sizzle saunf and jeera. Tip in the other half diced onion, fry until pink.
  5. Add the potatoes, salt and toss well. If you wish to get a nice ‘roasted feel’, let them simmer, scraping and tossing occasionally for 10 – 15 minutes. Salt the frying potatoes
  6. When the potatoes are done, add the coarse ground paste as a final step, toss the pan well to let the paste coat all the potatoes. Switch off flame immediately. Pudina paste - final step
  7. Cover and let flavours rest for 10 minutes. Serve warm with steamed rice and sambar or with hot phulkas.Minty Garlicky Potatoes
Notes
  • Add the crushed garlic to the hot oil instead of adding it to pudina paste if you detest the flavour of raw garlic.
  • Toss boiled potato with cherry tomatoes, (or regular tomato diced) and cucumber with the coarse ground pudina paste, chill and serve as salad.
Ready to dig in..

Mar 11, 2011

Cauliflower masala dosa


Calling all cauliflower lovers, all dosa lovers, all fusion food lovers and all who have not had enough of cauliflower from my last post – here is another fun masala dosa. I have created this filling with critical inputs from my kids, so I guess it will work for all of you too! I hope too, that this can join the exalted ranks of  amazing dosa fillings like palak paneer dosa or pav bhaji dosa.                 
Fusion dosa
You need
For the filling
  1. Cauliflower( what else) – 1 medium head (I got 2 heaped cups of florets)
  2. Paneer – 250gm (I used 200 gms in this recipe and found it inadequate, hence suggesting 250gms)
  3. Onions – 3-4 medium, chopped fine  ingredients
  4. Capsicum – 1, chopped
  5. Green chillies – 6-7, chopped
  6. Salt – 1tbsp
  7. Turmeric powder – 1/2 tsp
  8. Garam masala powder – 2 heaped tsp
  9. Sugar – 1 tsp (optional)
  10. Vegetable oil – 4 tsp
  11. Mustard seeds – 1 tsp
  12. Cumin – 1 tsp
For dosa
  1. Idli rice – 4 cups
  2. Whole skinned urad – 1 cup
  3. Water for grinding – 2-3 cups
  4. Salt – 2 heaped tsp
  5. Sesame oil – 4-5 tsp, for making dosas
I soaked rice and dal separately overnight, ground each separately and then mixed the batter with salt and left to ferment for at least 6-7 hours. You can dilute if too thick for dosa batter. Making idli or dosa batter merits a separate post. I shall post that as soon as I am able to take good pictures of my dosa batter!
To assemble
  1. Heat oil in a pan. Add seasonings (11 and12).
  2. Add green chillies, chopped onions, chopped capsicum in this order.seasonings   pink onions and green chillies
  3. Add cauliflower florets, toss well.
  4. Add turmeric powder, salt, garam masala, sugar (if using).
  5. Cover and cook for a few minutes over low flame.
  6. Crumble paneer coarsely.
  7. Once the cauliflower is cooked through, add paneer, fold gently.cauliflower and paneer filling
  8. Filling for dosa is ready. (Aha, can’t wait to dig in)
  9. Heat a skillet/ non-stick griddle/ iron dosa griddle.
  10. Grease the griddle with a tsp of sesame oil.
  11. Splatter a few drops of water on the hot griddle. When it sizzles, go ahead, attack!
  12. Pour a heaped ladle of batter in the centre, spread the batter in concentric circles using the ladle. dosa on griddle-note the lovely concentric circles
  13. Drizzle some sesame oil around the dosa. When it begins to brown, loosen the edges carefully and flip over. flip dosa over
  14. Dosa should be done in just a minute. Turn over again, spread the filling over half of the dosa, fold over and serve.fold dosa with filling I served with some coconut  chutney and more filling on the side.super yum masala dosa
Variations
  • Add boiled peas instead of paneer.
  • Use cheese spread to spread on dosa. In case you use cheese spread, omit paneer. You can smear cheese spread on flipped dosa and then spread vegetable filling.
  • The same filling can be used inside a sandwich or to make frankie rolls.
Nutri notes
  • This dish is a complete meal in itself. It combines carbohydrates and proteins from the dosa, vegetable allowance from the cauliflower, dairy protein from paneer, fats from oil, paneer and coconut (if using for chutney), fibre from vegetables, coconut.
  • Since dosa is made from fermented batter, the dish has all benefits of fermentation. These will be discussed later with my post on dosa/idli batter.

Dec 2, 2010

Dalia khichdi

We returned tired and hungry after an exciting round of Diwali shopping. With just more than half an hour at hand, I had to rustle up a reviving meal for my family. This is what I made. Quick and easy to put together, no exotic ingredients, and healthy comfort food at it's best! Do try it out and let me know how you liked it.

You need
  1. Cracked wheat-1 cup (200 gm)
  2. Mung dal-1 cup (200gm)
  3. Carrot-2 small, chopped-(1/2 cup)
  4. Capsicum-1 medium, chopped (1/4 cup)
  5. Potato-1 big, chopped (1/4 cup)
  6. Large violet brinjal- 1/2 chopped (1 cup)
  7. Tomatoes-3/4 kg
  8. Asafoetida powder-a pinch
  9. Turmeric powder-3/4 tsp
  10. Salt-2 tsp
  11. Coriander leaves-3 tbsp chopped
For seasoning
  1. Oil + ghee-2 tbsp
  2. Jeera-1 tsp
  3. Whole black pepper- 1tsp
  4. Cloves- 7-8
  5. Cinnamon-5-7 small sticks
  6. green cardamom-3-4
To assemble
  1. Choose ripe red tomatoes, wash well and puree in mixer.You could also blanch them, peel skin and then puree.Retaining the skin or peeling it off is personal choice, I have not seen flavour change with either.
  2. Wash all other vegetables, dice into even sized pieces.
  3. Wash dalia and mung dal together, add three times the volume of water (that makes it 6 cups of water for this recipe), and pressure cook for 4 whistles.
  4. Meanwhile, heat oil, ghee mixture in a broad kadai/ saucepan.
  5. Add in order given, all the ingredients for seasoning.
  6. When jeera crackles, and you get a pleasant aroma of spices, it ts time to add hing powder, turmeric powder.
  7. Add chopped vegetables toss well and fry for 3 minutes.
  8. Add tomato puree and salt.Allow to simmer for atleast 10 minutes until raw smell of tomatoes are gone.
  9. When the pressure has released, add the simmering vegetables to the cooked dalia,  mix thoroughly and simmer for another 2-3 minutes.
  10. Finally add chopped coriander blend in and serve hot.
  11. Serve with any raita / salad and papad.
Notes
  • You can fry washed wheat + dal in a tsp of ghee for a nice aroma.
  • You can add more vegetables like knol khol, peas, sweet potato, onion.
  • You can omit tomatoes entirely if you do not prefer the tang, or mix in juice of 1 lemon at the end.
  • You can serve this hot topped with a tsp of ghee to kids and omit for those with calorie restrictions.
  • Microwaved masala papad is a good accompaniment too.
  • Can add more water after mixing the vegetables and cooked dalia.
Now for  the nutri notes
  • This is a great one pot meal - combining cereal, pulse, vegetables and dairy allowance if served with raita.
  • Eating a cereal and a pulse in the same meal ensures that the amino acids missing in one is complemented by those in the other. This is great for vegetarians since they derive maximum benefit from plant protein by eating in combination like in this recipe.
  • Tomatoes, rich in lycopene take pride of place in this dish. Apart from fibre, vitamin A and vitamin C, that you get in tomatoes, the lycopene in tomatoes also is an anti carcinogenic agent.
  • Using cracked wheat ensures that the benefits of bran and germ are derived fully. Hence, a high protein content (12gm/100gm), not to mention high fibre as well (1.2-1.4g/100gm).What would interest everyone is also the high niacin and folate levels in cracked wheat makes it an ideal grain for pregnant women, athletes, teenagers and elderly too.
  • Carrots used here add to the beta carotene, you get half your daily allowance of Vitamin A by adding 1/4 cup of chopped carrots per person.
Here are the visuals 

chopped vegetables

frying whole spices
simmering vegetables
Mix cooked dalia with vegetables

Serve with raita

Nov 19, 2010

Green beetroot salad

A green beetroot salad?Well, yes, check out this recipe.Quite surprisingly, the fenugreek does not leave any bitter aftertaste, even my kids relished this colourful salad!Considering the amazing benefits of fenugreek, this salad is an all time winner, go ahead,  please do yourself a good turn by trying out this one.I must thank my dear friend who gave me this great recipe.
You need
  1. Beet root, tender, small - 2, grated
  2. Fenugreek leaves, tender - chopped, 1 cup
  3. Onion - 2 medium, chopped fine
  4. Tomatoes - 2 chopped fine
  5. Hung curd - 2 tbsp
  6. Salt - 1/2 tsp or lesser
For seasoning
  1. Vegetable oil - 1/2 tsp
  2. Mustard seeds - 1/2 tsp
  3. Curry leaves - 4-5 leaves
  4. Hing powder - a small pinch
  5. Green chilli - 2, chopped very fine
To assemble
  1. Tie up a cupful of homemade skim milk curd in a muslin cloth for about an hour.Use 2 tbsp of the hung curd in this recipe, reserve the rest for later.
  2. Choose tender fenugreek leaves.Remove thick stalks from fenugreek leaves, wash thoroughly.Chop up - neither too fine nor too big.
  3. Select medium, tender beetroot.Wash well, peel skin away, and grate the beetroot with a fine grater.
  4. Take 2 medium sized onions, peel, wash well, and chop up real fine.
  5. Similarly wash tomatoes and chop fine.
  6. Once chopped,  toss all vegetables together with the salt and hung curd.
  7. Heat oil in a small sauce pan, add mustard .When mustard splutters, add the rest of ingredients for seasoning in order.Pour over the tossed salad and give a good mix.
  8. Allow flavours to settle by keeping it covered in the fridge for atleast half an hour.
  9. Serve with phulkas, or rice.
Notes
  • You can use juice of 1 lemon instead of hung curd for the tartness.
  • You can substitute green chilli with fresh cracked black pepper, add it along with salt.
  • Always select tender fresh vegetables while assembling a salad.
  • Consume a salad within an hour of tossing or even earlier.
  • Keep a salad covered well in the fridge to avoid loss of freshness and to avoid other odours from seeping in.
  • You can omit the beetroot entirely for severe diabetics.Else you can substitute it with fresh carrots.
Now for the nutri notes
  • There are numerous studies which show the benefits of fenugreek on lowering blood glucose levels and lowering blood lipid levels.These have been shown in ancient Ayurvedic medicine too.Space here does not permit detailed analysis of such studies, suffice to say that we do have a wonder vegetable at hand.DO consume either seeds or leaves raw on an empty stomach to benefit fully from the hypoglycemic and hypolipidemic effects of fenugreek.Consuming just 5- 8 gms of seeds per day seem to bring on all the benefits of this wonder plant.
  • The leaves also give us good amounts of Vitamin A,and sizable amounts of  vitamin B and C when consumed fresh and raw.
  • Among trace elements,while it contains only fair amounts of iron, the leaves pack in good amounts of copper (0.10mg/100gm), zinc (0.36mg/100gm) Due to the presence of copper and zinc,quality of iron absorption is good.Those with iron deficiency anemia, please go all out for this fragrant green!
  • It is a low source of sodium (76mg/100gm and potassium (31mg/100gm).Hence it is a welcome food for hypertensive patients.
Here are the visuals
chopped salad veggies


Blended and seasoned salad
Chilled salad with hot phulkas!


Nov 10, 2010

Palak and sweet corn sandwiches

Mummy, please make Cafe Coffee Day sandwiches for us! This was the refrain from my kids for the past few months!This was the result of the trial.While the outcome was not exactly like the famous cafe chain,(that version had a more pronounced garlicky flavour),try this version and give me your comments.

You need
  1. Palak leaves-chopped, 4 cups (frozen palak can also be used)
  2. American sweet corn-2 cups
  3. Salt-1/2 tsp or to taste
  4. White pepper powder-1 tsp to 1 1/2 tsp
  5. Crushed garlic-1 tsp (optional)
  6. Bread-1 loaf (can be any variety, whole wheat is good)
  7. Melted butter- 2 tbsp, for brushing

For white sauce
  1. Skim milk-200ml
  2. Whole wheat flour-1/4 cup (50gms)
  3. Unsalted butter-15 gms
  4. Cheddar cheese-100 gms cube (can add more if you wish)
To assemble
  1. Remove thick stalks from palak leaves, wash well, and chop roughly.Measure 4 cups after chopping.
  2. Cook in its own juices in an open pot over stove top for 8-10 minutes or cook in a  micowave for 4 minutes  (800W).If using frozen palak, thaw and then cook.
  3. Rinse if using frozen corn, boil in microwave until just tender (4-5 mins).
  4. For the white sauce, melt butter in a thick bottomed pan, add crushed garlic, if using, and then add whole wheat flour, fry stirring rapidly to avoid burning.
  5. After the raw smell of flour subsides, switch off stove, add the milk, stir briskly to remove lumps (you could use a whisk too).
  6. Return to fire and simmer.
  7. Grate the cheese you are using and add to the simmering sauce, mix well and allow to melt well into the sauce.
  8. The sauce is done when it coats the back of ladle, add salt and white pepper powder now, and stir.
  9. Add the cooked palak and corn, mix well.
  10. Simmer for a minute or two until the filling turns into a moist homogenous mass.
  11. To make the sandwiches, brush one side of each slice of bread very lightly with melted butter.
  12. Place one slice buttered side down on a sandwich maker, spoon some prepared filling onto the slice evenly.
  13. Cover with another bread slice, buttered side up and close the sandwich maker.
  14. Sandwich should be ready in a minute or so.
  15. Switch off the sandwich maker and remove gently, rest for a minute and then serve.
  16. Repeat until your bread and filling is used up.
Notes
  • You could add boiled peas instead of corn or in addition to corn.
  • You could add more of cheddar cheese or add half measure each of cheddar and mozzarella cheese.
  • Add more garlic as per taste.
Now for the nutri notes
  • Spinach is only a moderate source of iron.However what makes it a great green is that it comes packed with 51 micro gms of folic acid per 100gm spinach, as well as comes loaded with beta carotene (5580 micro gms)  and vitamin C (28mg/100gm).It thus packs a super healthy punch. Given this ideal combination-of folate and vitamin C necessary  for optimum iron absorption in the body,it is a must have veggie on a weekly basis.
  • Corn is a low fat, fibre laden, cereal.It is not a signifiacnt source of calcium or iron.However it's low sodium (40mg/100gm) and fair potassium content (151mg/100gm) makes it a good bet for hypertensive patients.
  • Cheese loads the dish with calcium and of course plenty of sodium and saturated fats too.Reason enough to use sparingly.While this recipe is a treat for kids, adults can tweak the recipe to add fresh homemade paneer made from skim milk-this obviously ensures calcium without the sin!
  • Milk alongwith cheese ensures that your kids' daily dairy protein needs are met in a fun way!
  • Using whole wheat bread for the sandwiches gives you carbs of a low glycemic index.
  • A dish that has it all- good carbs, dairy protein, bursting -with -good -health -veggies,plenty of fibre and super yummy to boot,Wow.

Here are the visuals

cooking palak
Add flour to butter for white sauce
Add milk and cheese

Add cooked palak and corn to the white sauce
Sandwiches with filling ready!

Oct 12, 2010

Pudina chutney

I was looking for a zesty pick me up to brighten up a usual rice-dal routine.As I rummaged though the fridge,this bright dark green bunch of pudina invited me with it's lovely aroma-this was exactly what could fit my need!I could not wait to convert it into this chutney below; once you have separated leaves from stalks, go ahead and make this quick, delicious pick me up!

You need
  1. Pudina leaves-1 1/2 cups packed
  2. Green chillies-3-4 big
  3. Root ginger-2 tsp chopped
  4. Garlic-7-8 cloves,peeled
  5. Fresh coconut-grated-1/4cup or chopped-1/2 cup
  6. Juice of 1 lemon (can add more if you feel the need for a super tangy taste)
  7. Salt-1/4 tsp
  8. Vegetable oil-1/4 tsp
To assemble
  1. Remove stalks,clean and wash pudina leaves under several changes of water,drain and keep aside.
  2. Take a flat bottomed pan,heat oil in it.
  3. Add chopped green chillies, ginger, garlic to the pan, swirl the pan and let sizzle.
  4. After a minute you can add the washed pudina leaves, toss in the oil for a quick coating.Do not fry for more than a minute-you will lose the flavor and colour if you do.
  5. Take a fresh coconut halved, and grate or chop out the white flesh (use quantity, as given in ingredient list)
  6. After the fried ingredients have cooled, place these and the coconut in a mixer grinder, add the salt and grind to a smooth paste.Use the lemon juice instead of water,midway through the grinding.You can add another tsp or two of water after adding the juice,(if required).
  7. Your tangy bursting-with -good-health-pudina- chutney is ready!
Notes
  • This chutney can be stored in the fridge for a couple of days,and upto 10 days in a freezer box in the freezer;thaw only as much as you would use up each time.
  • The chutney works great to perk up a meal,as a sandwich spread,or a tangy spread for rotis-fill up with salad veggies,roll and eat!
  • You can use fresh raw mango in season instead of lemon juice-it adds body to the chutney too.
  • Can avoid ginger and garlic and use only green chillies for a slight change in flavour.
  • Can make the same chutney using fresh coriander (cilantro) leaves too,use 1 1/2 cup of chopped leaves to substitute for every cup of pudina leaves.
  • Take care-Do not  fry the leaves for more than a minute.
Now for the nutri notes
  • Ginger, garlic and pudina are known to be excellent digestive aids, they relieve gas, distension, and improve digestion.
  • At a good 15mg of iron per100g of pudina leaves, mint packs in good punch!
  • Combining lemon juice or raw mango in the chutney makes Vitamin C readily available.Vitamin C improves iron absorption in the body.
  • Pudina also adds to the fibre content of the meal.
  • With virtually no sodium, it is a good choice for both hypertensive (blood pressure) and some renal patients, who need to control sodium intake.Of course, adding salt to the dish increases the sodium content.You can use low sodium salt insted of regular table salt in case of sodium restriction.
Here follows the visuals


    frying ingredients
    toss pudina leaves in oil

     fresh coconut
    pudina chutney 

    Oct 11, 2010

    Palak dal

    What could be healthy, filling, have a protein and veggies combined in a single dish and get cooked in less than half an hour? Well, this greens dal fits the bill just right! Of course, pressure cooking the rice along with the dal saved me cooking time and I had this soul food ready in under 40 minutes-quite a treat for hungry kids when served with homemade ghee! 


    You need
    1. Tur dal (red gram dal) -150ml
    2. Paruppu keerai (called kari cheera,pappu koora) /palak - chopped, 3 cups
    3. Onions-2 medium, finely chopped
    4. Tomatoes-2 medium, diced
    5. Green chillies-3 big, finely chopped
    6. Fresh root ginger-1 tsp chopped
    7. Curry leaves-1 tbsp, finely chopped
    8. Turmeric powder-3/4 tsp
    9. Salt-1 tsp (adjust to taste)
    For seasoning
    1. Vegetable oil-2 tsp
    2. Mustard seeds-1 tsp
    3. Jeera (cumin seeds)-1 tsp
    4. Saunf (aniseed)-1 tsp(optional)
    To assemble
    1. Wash the dal well.
    2. Add double the volume of water and pressure cook to a soft consistency.
    3. Wash the greens you are using well under several changes of water.
    4. Chop up medium fine.
    5. Place the chopped greens in a microwavable bowl, add some water and cook on high for 4-5 minutes.
    6. Heat oil in a deep pan.
    7. Add ingredients for seasonings in order.
    8. When they splutter, add green chillies, ginger ,curry leaves.
    9. Next to go in is the onions, followed by diced tomatoes.
    10. Toss in the turmeric and salt.
    11. Mix it well and let the veggies mush up a bit.
    12. Add the cooked greens, give a good mix, add about 100 ml of water, simmer for 2 minutes.
    13. Now is time to add cooked dal, mash with the back of ladle, simmer for 3-4 minutes, add more water if needed to avoid burning.
    14. Your lovely nutrient-packed greens dal is now ready!
    15. Serve with steamed rice, pudina chutney and carrot sticks.
    Here follows the nutri notes-
    • Combining a cereal and a pulse in a meal is the best way to get all amino acids.
    • The greens dal combines in itself the protein and vegetables needed in a meal.
    • The mint chutney packs-
    More of green leafy vegetable allowance.
    Adds zing,spice and hence improves satiety of a meal.
    Adding lime juice to the chutney provides vitamin C needed for better iron absorption(from the greens and pudina) in the body.
    • Serving with carrot sticks adds to the beta carotene in the meal(greens have them too).
    • Carrots also amp up the fibre quotient.
    • Preportioning the meal (as in the pic) allows you to eat sufficiently.
    • This helps weight watchers to prevent from reaching out mindlessly for extra servings.

    Here are the visuals-
    
    
    diced tomatoes


    chopped ingredients


    chopped greens
    cooked dal

    microwaved greens

    bubbling greens dal


    Sep 19, 2010

    Stuffed brinjals-my style

    
    Stuffed brinjal-my style

    You will need-
    1. peanuts-200ml
    2. dhaniya-150ml
    3. chana dal-100ml
    4. urad dal-75ml
    5. white til-100ml
    6. jeera-1 heaped tsp
    7. mustard seeds-1/2tsp
    8. red chillies-15-20
    9. tamarind-size of orange
    10. jaggery- approx half the amount of tamarind
    11. onions- finely chopped 2cups
    12. salt-as per taste(approx 2tsp)
    13. violet brinjals-1kg
    14. vegetable oil-2tbsp
    15. mustard seeds-1/2 tsp
    16. urad dal-1 tsp
    To assemble the stuffing-
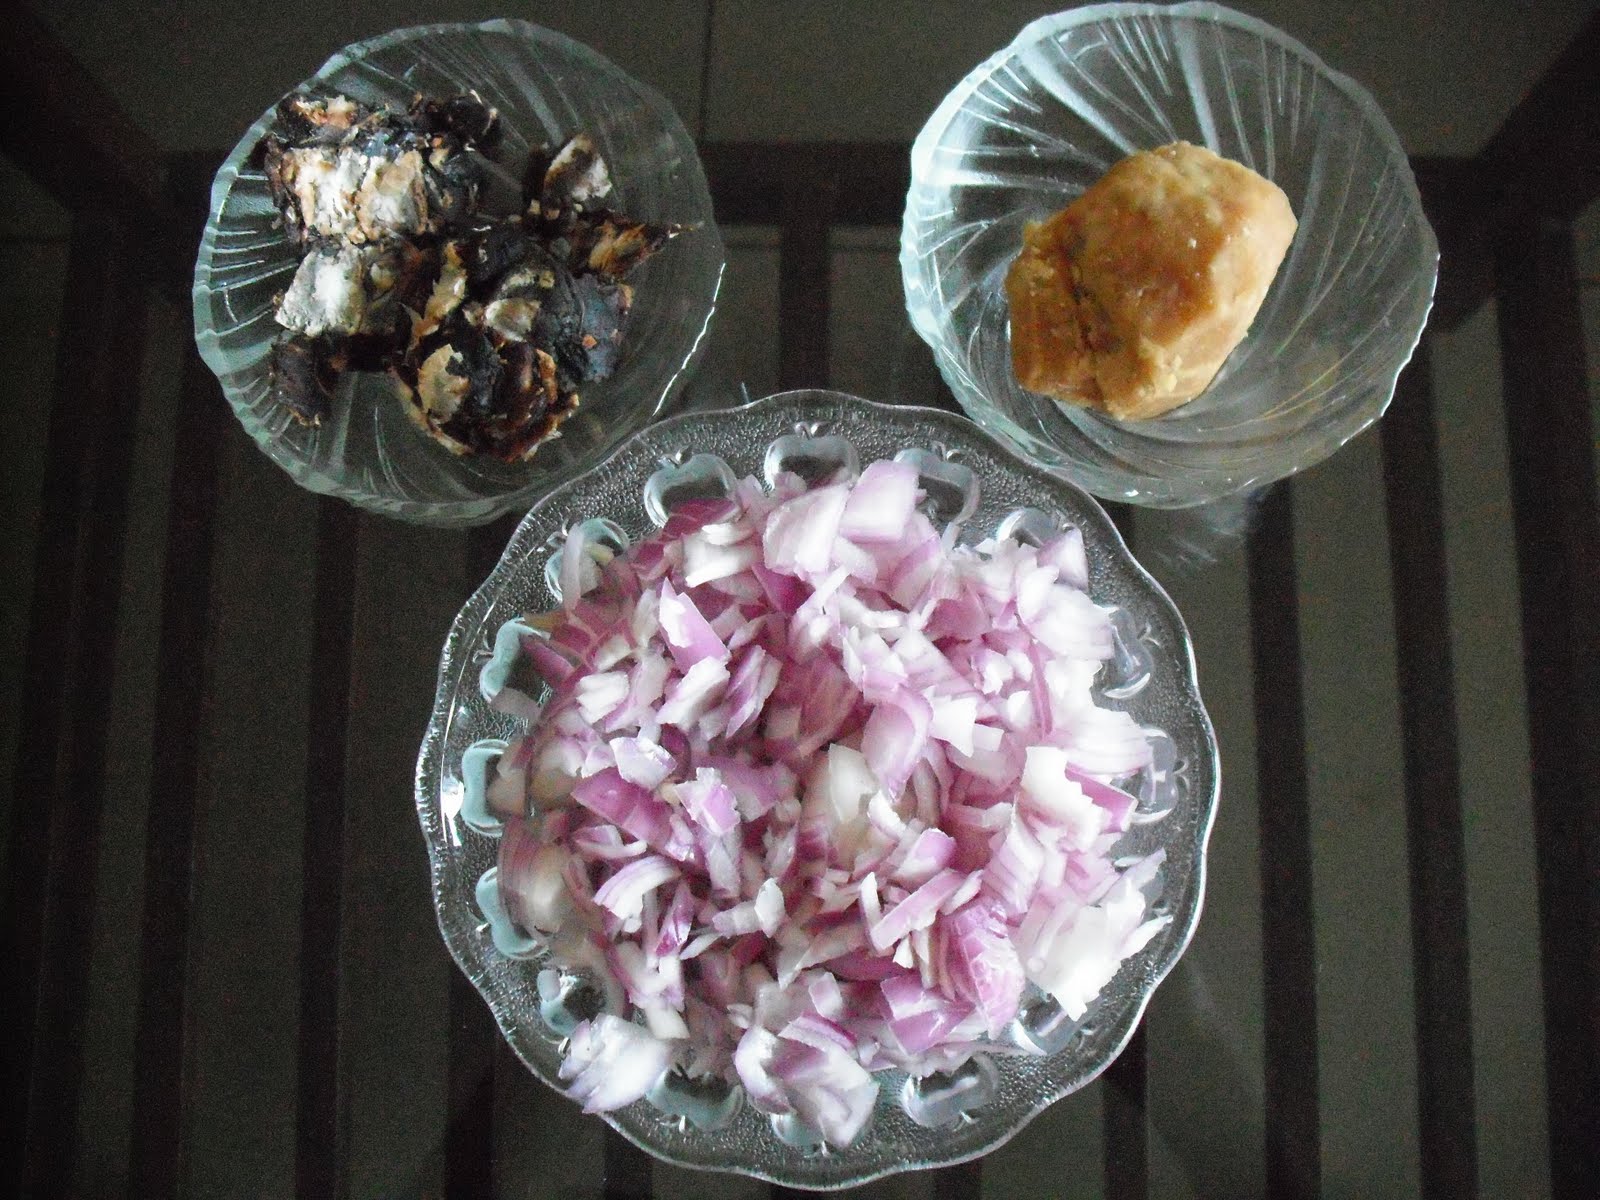
    1. Soak tamarind in a cup of warm water.squeeze out juice, set aside.
    2. Roast items for masala powder(from 1 -8),separately,in a drop of oil each.Roast the red chillies last.when cooled powder them together.
    3. Saute the chopped onions lightly.
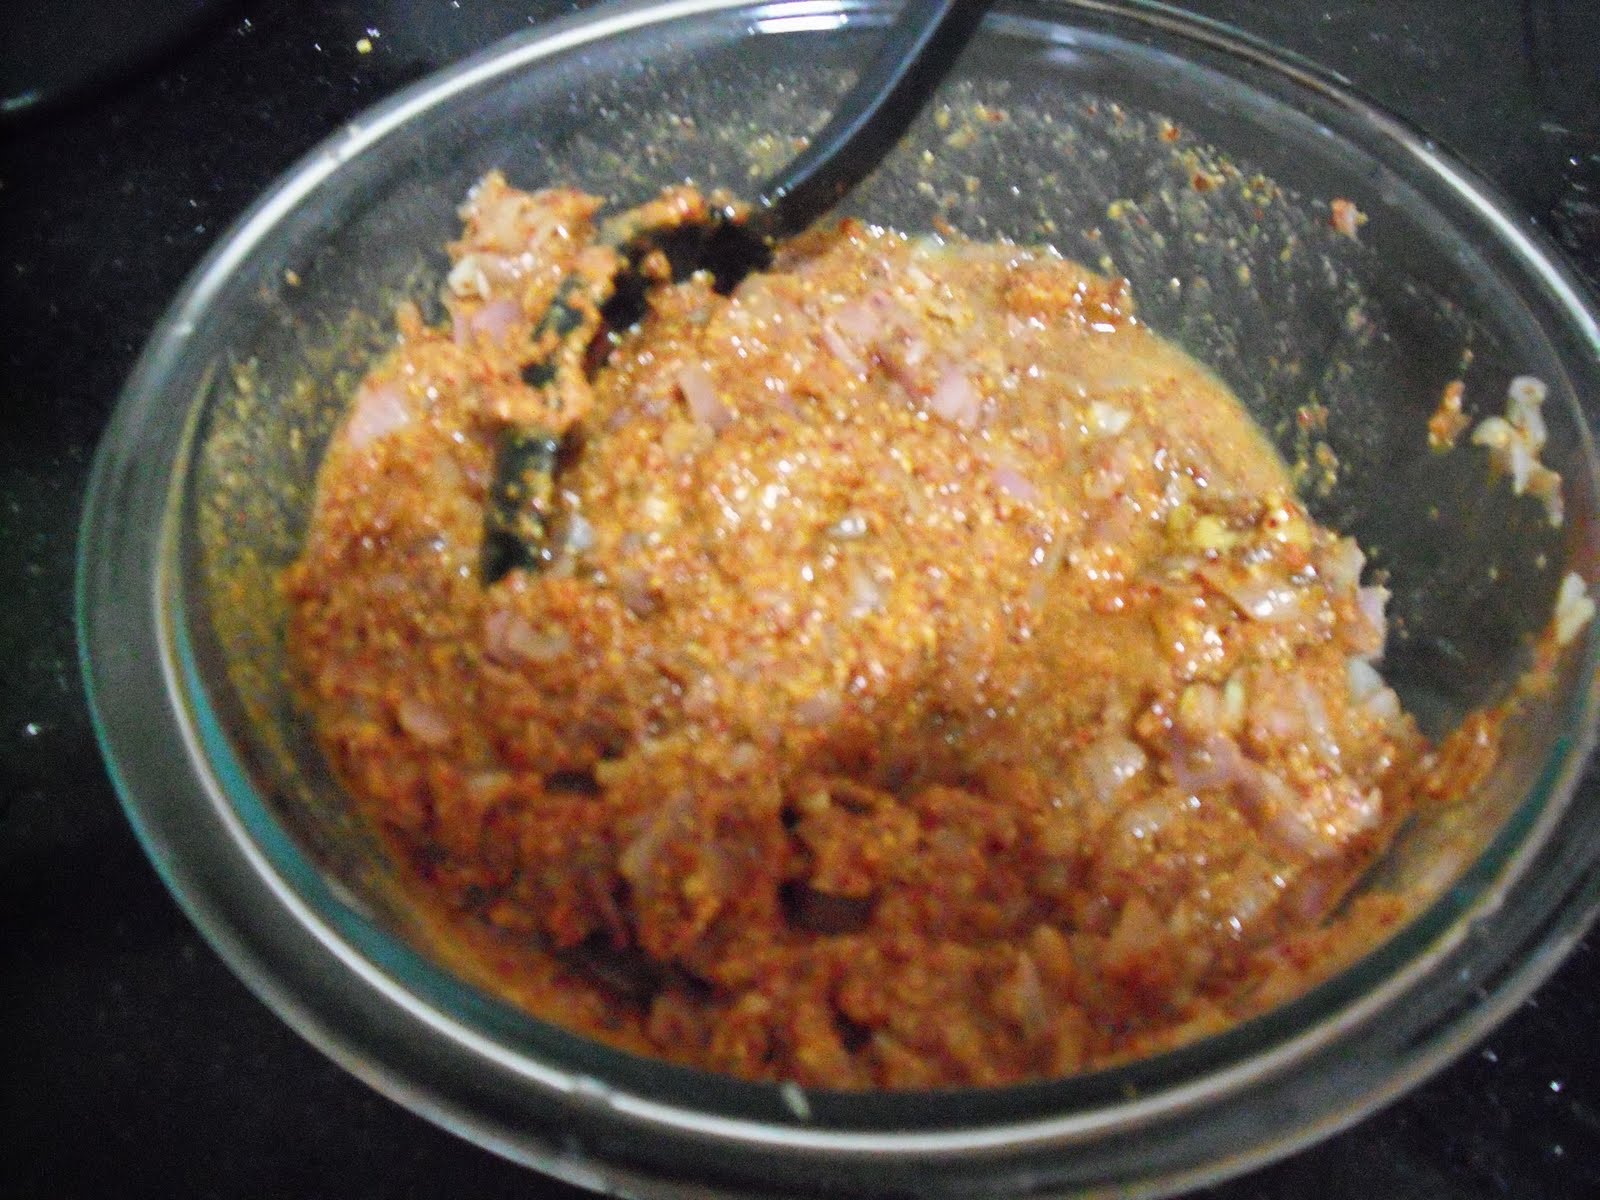
    4. In a large bowl,combine the masala powder,sauted onions,jaggery,tamarind juice,salt.Blend well with hand/ladle to get uniform mixture.
    5. Wash whole brinjals wipe clean.You may slice off the stems.
    6. Cut them into quarters or sixes keeping the base of the brinjal intact.
    7. Use a spoon to fill in the stuffing mixture well into the cut brinjal.(I enjoy getting dirty with my hands at this stage!!).Reserve any left over stuffing.
    To assemble the stuffed brinjal-
    1. Heat a large heavy bottomed pan/pressure cooker.
    2. Add all the oil,temper with mustard seeds,urad dal.
    3. Gently place the brinjals stuffed side up into the pan.Tip in the remaining stuffing with 1 cup water(add more water if using a pan).
    4. Cover lid of pan/cooker.Cook till 1 whistle if using cooker.Check for doneness in a pan,after 7-8 minutes,add more water if needed,cook till done.
    5. Your gooey,heavenly smelling stuffed brinjal is now ready.
    6. Serve warm with hot steamed rice and tadka dal.
    Notes-
    • Pressure cooker works best for me.
    • Roast each ingredient for powder patiently until just golden brown.
    • Omit jaggery if you dont fancy a hot-sweet flavour.
    • Cut brinjals carefully after getting the stuffing ready,they get discolourd if left cut for too long.
    • Optional-Add chopped coriander to stuffing or after cooking,as a garnish.

       
    ingredients
    fried onions with powdered jaggery,masala and salt.
    stuffing mixture
    slit brinjals stuffed with paste
    
    Serve with steamed rice and dal.