Showing posts with label low sodium. Show all posts

Mar 28, 2015

Recipe: Sweet and Sour Pumpkin Curry

Sweet pumpkin is also known as Kaddu, Manjal Pooshanikkai, Gummadikayi in different Indian languages. Often considered as a lowly, humble vegetable, pumpkin actually packs a great punch in terms of nutrients. It is a weight watcher’s delight.

Sweet pumpkin has less calories and more nutrients. To explain this better, it has four times lesser calories than sweet potato, 50 times lesser Sodium but 3 times more Vitamin C, double the folic acid, and similar Calcium, Magnesium, Phosphorus, Iron content. This means that you can eat more of sweet pumpkin than sweet potato (up to 4 times more) and still benefit from its rich nutrients without the calorie overload. More health for lesser calories, now is that not a winner?

Sweet pumpkin seems to be this gentle, powerful giant among vegetables. It looks elegant despite its rotund form, swathed in deep green or mustard yellow skin revealing a firm sweet golden flesh when cut. Lends a quiet dignified presence to a dish, knows to be at home in sweet or savoury recipes with equal ease. Delicious whether cooked with skin or without. Pumpkin often comes to my rescue when I have to cook in a hurry.

Every family has their favourite pumpkin recipe. This is ours. I hope you have as much fun cooking it and enjoying as we do.

Pumpkin in a bowl

Preparation Time – 20 minutes, Cooking Time – 10-15 minutes, Serves – 4-6.

ALLERGY INFORMATION

  • Does NOT contain egg, gluten, soya, lactose, yeast, corn, nuts.
  • Suitable for gluten, lactose intolerance or nut allergy.

YOU NEED -

COOKWARE – Knife, Cutting board, Fry pan

INGREDIENTS -

  1. 2 cups chopped sweet yellow pumpkin (with* or without skin)
  2. 1/2 cup finely diced onion
  3. 1 cup chopped tomato
  4. 1 scant tsp salt
  5. 1/2 tsp turmeric
  6. 2 tsp jaggery powder
  7. 1 tsp garam masala powder
  8. 1 tsp sambhar powder
  9. 2 tsp cooking oil
  10. 1/2 tsp mustard seeds
  11. 1/2 tsp cumin seeds
  12. 2 tbsp coriander leaves for garnish

*Sweet pumpkin takes longer to cook with skin and lesser time without skin.

            METHOD -

            1. Clean, peel and chop all vegetables. Set aside separately.
            2. Heat oil in a fry pan, add mustard and cumin.
            3. When they sizzle and crackle, add in onions, fry on high flame for 3-4 minutes until they turn pink-brown.
            4. Next to go in is the chopped pumpkin. Saute on high heat for a minute, sprinkle water and cover and cook for a further 2 minutes.
            5. Finally add the tomatoes. Keep tossing over high heat until tomatoes mush up.
            6. Add salt, turmeric powder, jaggery, garam masala and sambhar powder. Mix everything well. Cover and simmer for 2-3 minutes more.
            7. Garnish with fresh chopped coriander leaves and serve hot with steamed rice.

            Pumpkin Sweet and sour curry

            Notes -

            • Sweet pumpkin cooks very quickly. Cook lesser if you want to retain the shape of the vegetables. Cook longer if you like a mushy texture.
            • Keep stirring while on high heat to avoid scorching.
            • Add the powders after the vegetables are mostly done. This helps to retain flavours better.

            Life's simple pleasures

            Nov 25, 2014

            Cabbage and Carrot Thoran

            Cabbage does grow all year round, but acquires its best flavours only in winter. Since cabbage is quite sweet and less pungent in these months, it is easy to include it in several dishes. I often make a cabbage soup in this chilly weather too. It actually tastes much better than we would imagine. None of the bitter, sulphurous, menacing notes to it – just some crisp sweetness and heart warming honesty. Well about the soup, later. About cabbage first.

            Cabbage has most of the vitamins and minerals we need daily. It has a high content of vitamin B and C. Besides, it is also high in fibre, potassium as well as low in sodium. It is also a fair source of Omega 6 fatty acids. These point to it being an excellent vegetable for people with high blood pressure, or are pregnant, or suffering from constipation too. Cabbage has small amounts of an ‘anti nutrient’ called as ‘protease inhibitor’. This prevents proteins from being digested well in the body. Hence it is better to cook cabbage lightly and then eat. Cooking deactivates the inhibitors and improves digestion of the vegetable and the entire meal.

            Stir frying cabbage is the best way to cook it. The vegetable is stripped of its anti nutrients through minimal cooking, yet, the vitamins lost by heating are reduced too. Adding carrots to this recipe is optional. I’ve just added them for extra colour.

            Select cabbage that has a compact oblong head vs a flat-ish round shape. Also, if a smaller cabbage weighs more than a larger one, then you can be sure the smaller dense cabbage will taste better.


            Cabbage Thoran


            Now I’ll walk you through one traditional Kerala recipe. It is as simple as it gets. Thinly shredded cabbage is tossed in a seasoning of oil, mustard and curry leaves. It is salted, stir fried and finished off with fragrant coconut and green chillies. A worthy accompaniment to tangy spicy sambar or kadhi/ moar kuzhambu and steamed rice. Can be tweaked a little to work as side dish to bhakri or phulkas too.


            Dal and Cabbage stir fry vying for attention

            ALLERGY INFORMATION

            • Does not contain egg, gluten, soya, corn, nuts, lactose or dairy.
            • Suitable for people with lactose intolerance or gluten sensitivity, or nut allergy.

            Preparation Time – 15 minutes, Cooking Time – 15 minutes, Serves – 4.

            You Need

            Cookware – Knife, Cutting Board, Wok/Fry pan of about 4 litre capacity, metal spatula, mixer grinder,

            Ingredients

            1. 1 whole cabbage weighing 800-1000gms
            2. 1/4 kg Orange/Red Carrots (optional)
            3. 2 tsp cooking oil
            4. 1 tsp salt
            5. 1/2 tsp mustard seeds
            6. 1/2 tsp urad dal
            7. 10-12 curry leaves torn up
            8. 1/4 cup grated fresh coconut
            9. 2-4 green chillies depending on heat preference
            10. 1/4 tsp cumin seeds
            11. 1-2 cloves garlic(optional)

            To Assemble

            1. Remove outer bruised leaves of cabbage, if any, and shred/chop finely.
            2. Peel carrots and grate on the large hole of grater.
            3. Heat up oil in a wok. Season oil with mustard seeds and urad dal. Add curry leaves when the mustard crackles, and tip in the chopped vegetables.
            4. Stir fry over high heat for a couple of minutes. Sprinkle a few tablespoons of water, cover and let cook for 3-4 minutes. Open lid and mix well a couple of times in between for uniform cooking.
            5. Meanwhile, whizz the grated coconut with chillies, cumin, and garlic (if using) in a mixer to a coarse mixture. Do not add any water while grinding this.
            6. After 3-4 minutes, when the cabbage feels cooked through, yet retaining some crispness, add salt and then add the coconut mixture and fold through the stir fry well. Keep stirring over high heat, especially if using garlic, to eliminate raw odour. Remove from flame. Cover and let flavours mingle for 5-10 minutes.
            7. Serve warm with steamed rice, and tomato dal, or sambar, or kadhi. I served it with a ‘Basella greens’ and tomato dal and steamed rice.

            The red chilli in the dal does not taste as sinister as it looks!

            A complete meal

            Nov 20, 2013

            Sweet Corn and Pomegranate Salad

            Colourful Salad
            Ingredients for a salad are never fixed at my home. Assembling a salad is a flexible exercise, often involving the bringing together of whatever is available in the fridge, and finishing it off with a dressing, which is most often a citrus-y one. This salad too was created similarly with foods present at hand. Sweet corn kernels and juicy pomegranate do a pretty tango here, with some worthy add-ons such as red onion and grated carrot thrown in to merrily add to the colour riot. I’ve noticed quite often that my kids need no coaxing to try a salad that is as vibrant in colour as this one.
            Apart from being loaded with Beta Carotene from the vegetables and anti oxidants from the fruit, salads help to increase the dietary fibre of our daily meal.
            As per the recommendations of the National Institute of Nutrition, an adult person must have 40 gm. of fibre in a day, which includes soluble and insoluble fibre. Dietary fibre is needed for
            1. Proper bowel function,
            2. To prevent Haemorrhoids
            3. To prevent Coronary heart disease
            4. To control diabetes and obesity
            5. To reduce plasma cholesterol
            6. To protect against colon cancer.
            Salads are the tastiest way to consume fibre in a meal. In addition, they provide colour, texture and variety resulting in a satisfying meal experience.
            Go ahead and make this salad for yourself and share it with me too!
            You Need
            1. Sweet corn kernels – 1/2 cup
            2. Pomegranate pearls – 1/2 cup
            3. Carrot grated – 1/4 cup
            4. Roma tomato, diced fine – 1 medium tomato
             For the dressing
            1. Salt – 1/4 tsp
            2. Pinch of sugar
            3. Juice of 1 medium lemon
            4. Crushed black pepper – 1/4 tsp OR Green chilli – 1 minced fine
            5. Red onion, diced fine – 2 level tbsp
            To Assemble
            1. Steam the sweet corn kernels for 2 minutes in the microwave at high power. Set aside.
            2. Remove the pomegranate pearls from the fruit, keep aside.
            3. Combine all ingredients for dressing, mix well with a fork.
            4. Bring all ingredients for salad together, toss well with the dressing.
            5. Chill for half an hour in the fridge in a covered bowl.
            6. Serve along with warm pulkas or freshly grilled garlic bread or as a side with tadka dal and steamed rice.
            Healthy and Radiant


            Dec 18, 2012

            Stir Fried Capsicum

            It appears that people either love or hate capsicum / bell peppers. Me – I love it in all forms. I enjoy it’s raw crunch in salads, add it lovingly to sambar to perk it up, toss it with paneer for a smart bhurjee,…
            …Or I make this stir fry. Capsicum is the star in this dish, it does not play the role of accompanying artist. Rather, the spices and seasonings added, only serve to add to the punch of this amazing vegetable.


            What’s good about Capsicum?

            1. The best contribution from Capsicum to a meal would be it’s high Vitamin C, B and carotene (Vitamin A) content. While Vitamin C  and B reduces with heat and cooking, stir frying can ensure minimal losses. 
            2. Capsicum has virtually no Sodium, so it is a great addition to salads for a person with high blood pressure.
            3. The coloured peppers such as red, yellow, purple have a higher sugar content than the green coloured one. So it is recommended that diabetics use more of green pepper and lesser of the other coloured ones.
            4. Capsicum also is a low calorie, no - fat vegetable. People keen on weight maintenance / weight loss can include this wonder veggie freely in their diets.
            5. A note about the compound Capsaicin – this compound is isolated from other chillies of the capsicum family and used in several topical medications to relieve pain. This compound does not exist in sufficient quantities in Capsicum to have any pain relieving effects.

            Without further delay. here is the recipe.


            greem capsicum


            You need

            1. Green Capsicum – 5-6 medium sized
            2. Salt – 3/4 tsp
            3. Fresh Coconut – grated, 2 tbsp
            4. Chutney Dal – 2 tbsp
            5. Green chilli – 3
            6. Saunf – 3/4 tsp
            7. Garlic – 2 pods, washed and peeled
            For seasoning
            1. Vegetable Oil – 2 tsp
            2. Mustard seeds – 1/2 tsp
            To Assemble
            • Wash, deseed and cut capsicum into thin slices.
            • Powder all ingredients from 3 to 7 into a coarse powder.
            • You could warm the chutney dal and saunf together before powdering. This step is optional – it helps to release the aroma and powder better.
            • Heat oil in a wok / pan, add mustard seeds.
            • When the mustard crackles, tip in the sliced capsicum and stir rapidly.
            • Keep the heat at medium high, add salt and keep stirring for 3-4 minutes. Adding salt may release water from the vegetable. If it releases too much water, make a well in the centre of the pan and let the water sizzle out quickly. The veggies should retain the green colour and just turn soft but not soggy.
            • Add the powdered mixture and toss to coat all slices.
            • Remove from heat and serve warm with dal and rice.
            • I served it with ‘basale soppu dal’ and steamed rice.


            Steamed rice, dal and sir fried Capsicum
            Variations
            1. You could choose to include all coloured peppers such as red, yellow along with green pepper. If so, include in equal proportion, tip in the green pepper first and add the others halfway through.
            2. Slice up a red onion and stir fry that first before adding the capsicum.
            3. Add chopped coriander as a final garnish.
            Stir fried Capsicum - a closer look
            Notes
            • The key to successful stir frying, is to chop / slice vegetables to similar size, so they fry evenly.
            • Use a much larger wok / pan than needed to fit in the vegetables. This way, they swish around well and fry happily!
            • Heat minimum oil to a good heat, just below it’s smoking point. Stir fry in this hot oil at medium high to high heat. This retains crispness, colour and flavour of the vegetables.
            • Do not dump in all vegetables together. Add the ones that need more cooking first and so on till you add the quickest cooking vegetable last.
            • The best stir fry is one that takes only a few minutes on high heat.

            Jun 22, 2012

            Chilled Pasta Salad

            Summer bring the best and the worst out of all of us. Think thirsty  parched throats, prickly heat,…and again think tall cool glasses of sherbet, lazy vacation days, at least for school going kids, ice cream, swimming, and of course the season’s best – mangoes! Mango is so rightly called the king of fruits. I am yet to meet a person who does not like this ever so fragrant luscious fruit. Also think chilled salads when you are in no mood to cook your self along with food in a sweltering kitchen. To me, a pasta salad seemed just the answer to a hungry family and a not-ready-to-cook mom, that’s me. Teamed with warm grilled garlic bread, this filling salad left us so happy and content last weekend. I urge you too, do recreate this Indian-Italian piece de resistance in your homes this summer.chilled salad beckons
            What’s good about this dish?
            • The meal combines grains(pasta and whole wheat bread), dairy protein (from the curd), fruit and veggies too. Hence it is a complete one pot meal.
            • Ripe mangoes and corn add to the vitamin A, B6, C and E levels of the meal, apart from the natural dietary fibre content. 
            • A good Potassium content in mangoes makes it a good fruit for people with hypertension. To make the dish more suitable for a hypertensive person, halve the salt used in the recipe.
            • Fresh curd is rich in probiotics – the helpful bacteria that are needed for normal functioning and maintenance of stomach and intestines. Fresh curd is also rich in vitamins B and C. Even people with lactose intolerance can usually tolerate curd as the ‘lactose’ sugar is converted to ‘lactic acid’.
            Do you need more reasons to try out this fuss-free delicious recipe…. sunday lunch
            You need
            1. Small elbow or bow tie pasta – 250 gm ( I used  half of a 500 gm pack)
            2. Sweet corn kernels – 1/2 cup, steamed 
            3. Ripe, firm mango (any variety) – finely dice and measure 1 cup.
            For the dressingingredients for dressing
            1. Fresh thick curd, and hung for an hour – 2 cups. Measure the cheese after curd is hung.
            2. Onion – very fine minced, 2 tbsp
            3. Sugar – 1/2 tsp
            4. Black/white pepper powder – 1/2 tsp
            5. Salt – 1 heaped tsp
            6. Mustard – 1 tsp ( I used ‘Fun foods’ brand - English Mustard)
            7. Fresh coriander leaves – finely minced, 2 tbsp
            8. Green capsicum (Bell Pepper) – finely minced, 1 tbsp
            9. Fresh cream – 2 tbsp (optional, I did not use any)
            To assemble
            1. Boil pasta for 8-9 minutes. Drain and rinse under cold water. Leave to cool in the colander until dressing is ready.
            2. Steam the sweet corn kernels for 2 minutes in the microwave oven.
            3. Peel and dice the mango as finely as possible without squishing it!
            4. Combine all ingredients for dressing in a mixing bowl. Please do not omit any ingredient ( I did not have capsicum and sorely felt it’s absence). Adding cream is your choice though – it helps to give a smooth mouth feel, but does amp up the calories.
            5. Once the dressing is mixed in well, add the cooked pasta, corn, and mangoes and toss well.mix dressing and pasta welladd corn, mango and pasta to dressing
            6. Chill well before serving. I chilled for an hour before garnishing it with more mango slices and served it up, accompanied with warm, cheesy garlic bread.
            warm garlic bread and cold salad
            Notes
            • Can use pineapple when mangoes are not in season.
            • Can use other vegetables such as carrots too.
            • Can use fresh or dried parsley or other fresh herb seasoning. Pudina / mint, however will be too overpowering a flavour.
            • Do not omit any ingredient from the ‘dressing’ list. I did not have green bell pepper (capsicum) at the time of assembling this salad and sorely felt it’s need to perk up the dish!
            warm garlic bread and chilled pasta salad


            Apr 23, 2011

            Raj Conito - Arusuvai Friendship Season 2 Recipe


            Arusuvai chain   Arusuvai friendship chain season II is here. Hurrah to Sayantani for reviving it. This friendship chain was kick started by Lathamma and Srivalli and Bharthi took it forward.

            I received my mystery parcel from Jayashree. Thank you very much, Jayashree for the lovely hand written note and the very apt book on baking. The mystery ingredient was a pouch of flour. I had to rack my brains to find the mystery ingredient. Finally it turned out to be  Rajgira flour / Amaranth flour. I was very eager to create a recipe with this flour as I have not used it in my cookery so far. Upon searching for recipes with Rajgira in the internet, I came across several ‘farali’ (recipes used during religious fasts) recipes in the Indian cuisine and several Mexican dishes too! That’s when my brain started whizzing. So here is a recipe which I created exclusively for the Arusuvai chain.

            If I have managed to arouse your curiosity about the strange title, I’m happy. This dish has to be the ultimate product of my fevered imagination… I did not want the usual roti /puri recipes. As if on cue, my daughter walked in complaining that I have not treated her in a long time to her favourite version of pizza – conizza. So a cone base, fillings, burritos ( from Mexican cuisine) – all of them swam around in my head until I came up with this potpourri. The result is here for all – please do give me your feedback on the recipe.

            At a recent meet of the Indian Dietetic Association, Bangalore Chapter, Rajgira and several other millets took centre stage. Nutritionists are eager to promote the use of millets in urban diets. By creating a fun, glamorous, and healthy recipe using an age –old ingredient, I hope to do my bit to promote use of such millets in our urban diets replete with polished cereals and other low fibre foods. Without further ado, here is how you can make it too…

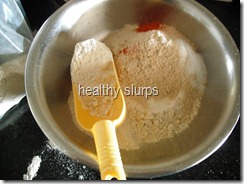
            You needFlours, salt and chilli powder
            For roti cones  

            1. Rajgira flour – 1 cup
            2. Whole wheat flour – 1 cup
            3. Salt – 1/2 tsp
            4. Red chilli powder – 1/4 tsp (optional)
            5. Ajwain seeds – 1/4 tsp (optional)
            6. Fresh water – 1/2 cup + 1 tbsp
            7. Vegetable oil – 2 tsp

            For filling

            1. Red lobia – 1 cup, rinsed, soaked for 4 hourscumin powder, oregano and blanched tomaotes
            2. Onion – 1 medium, chopped fine ( had 1/2 cup)
            3. Garlic – 2 small cloves, minced super fine
            4. Tomatoes – 2, blanched and pureed
            5. Vegetable oil – 1 tsp OR Butter melted – 2 tsp
            6. Red chilli powder – 1/2 tsp
            7. Cumin powder – 1 tsp
            8. Oregano – 1 level tsp
            9. Salt – 1 heaped tsp
            10. Sugar – 1/2 tsp

            For garnish

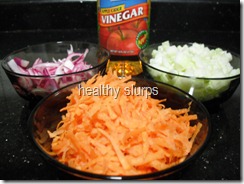
            1. Green cucumber – peel, deseed, chopped fine – 1 cupDressed garnishes !
            2. Carrot – 1, grated
            3. Onion – 1 medium, sliced
            4. Apple cider vinegar – 3 tbsp, to soak the onion slices in
            5. Cheddar cheese - grated, 2 tbsp or more!
            6. Pitted olives – 2 tbsp (Optional)
            7. Iceberg lettuce – shredded, 1/2 cup (optional)


            To assemble

            For roti cones

            Combine all ingredients mentioned under ‘roti cones’ into a dough. The measure of water I have used worked for the brand of whole wheat flour I had. Other brands may need lesser, so add water carefully. Knead well to activate the gluten in wheat flour. Rajgira does not have gluten. (more on that in the nutrition notes)
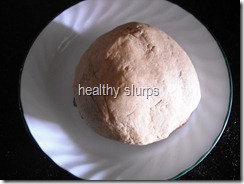
            roti dough basking in love !

            Make balls of the dough.

            Roll into oblong rotis I used whole wheat flour for dusting. The oblong shape worked best for making cones later.oblong conito base

            Raj conito balls !

            Cook on one side until brown dots appear. Flip and cook the other side too. Smear 1/8 tsp butter / oil on each roti. Make oblong rotis with the rest of the balls, cook similarly. Wrap in a napkin and and set aside.flip over when lightly browned

            from the rolling pin onto the frying pan


            For garnish

            Peel, rinse and slice the onion meant for garnish. Soak in 3 tbsp of apple cider vinegar. This turns the onions into a lovely pink hue and also removes the ‘bite’ of onions.

            Rinse, peel carrot and grate using medium fine grater.

            Rinse, peel, deseed cucumber and chop fine.

            Shred cheddar cheese.

            Pit olives, slice them thin. (if using)

            Rinse lettuce, shred and keep immersed in ice cold water till needed. (if using)

            Store each ingredient separately until required.

            for garnish

            For filling

            I followed the recipe for refried beans from Tarla Dalal’s Mexican cookbook. I have substituted rajma with red lobia here and adapted quantities of other ingredients to taste. Here is what I did -

            Rinse the soaked lobia. Pressure cook with water enough to cover the top of the lobia. I cooked for 5 minutes after the first whistle of the pressure cooker.

            Rinse a couple of tomatoes, blanch and puree them.

            Heat oil / butter in a pan.

            ah, the aroma of garlic and onion frying  in butter

            Tip in minced garlic followed by chopped onions.

            When onions turn pink, pour in tomato puree.

            When the puree has lost its raw flavour, add sugar, salt, red chilli powder, mix well.

            sugar, salt and red chilli in

            Now is the time to add the cooked lobia. Keep turning in the lobia and mash well with the back of the ladle. Take care not to burn the bottom.
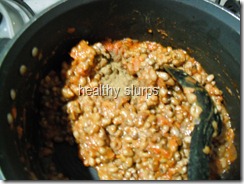
            add cooked lobia, mash well

            Add the cumin powder, oregano, mix thoroughly. Switch off flame.

            filling ready


            To assemble the conito

            Place a rectangular sheet of foil on a plate and place a roti on the foil as in the picture.

            Turn the two ends of the roti to form a cone and wrap the foil around the cone, tuck the pointed end of the foil around the roti cone.conito under constuction !

            wrap me soon, I can't wait

            Place a heaped tablespoon of the lobia filling inside the cone.

            Top up with shredded lettuce, olives (if using), grated carrots, cucumber and sliced onions. Don’t forget the yummy cheese !all ready with  garnishes !

            filling peeping out !


            What are you waiting for? Go ahead and enjoy your labour of love!!

            The Raj ConitoAnother droolworthy Pic !

            Nutri notes

            • By far, the greatest advantage of Rajgira flour is that it is gluten free and hence can be used by people with gluten – intolerance, Celiac disease.
            • With 2mg iron / 100gm of Rajgira and 47 mg Calcium / 100gm of flour, Rajgira is an immediate pick me up for adolescents.
            • The unique amino acid profile of Rajgira enables it to be a complete food when combined with pulses / legumes. (As in this recipe) The grain has a very high lysine content.
            • A low sodium food, hence great for hypertensive people too.
            • The flour has a dietary fibre of 9 mg / 100gm, great news for weight watchers, diabetics, cancer, heart disease and anyone with chronic constipation.
            • The flour does not contain B complex vitamins. Hence it has to be combined with fresh vegetables / fruits in a meal.
            • Rajgira is best consumed cooked as it has some inhibitors  ( substances that block absorption of nutrients on body). The flour can also be cooked into a plain porridge.
            • The flour has also been found to have significant amounts of phytoesterols,important in building defence mechanisms and improving immunity.