Showing posts with label lunch. Show all posts

Feb 10, 2015

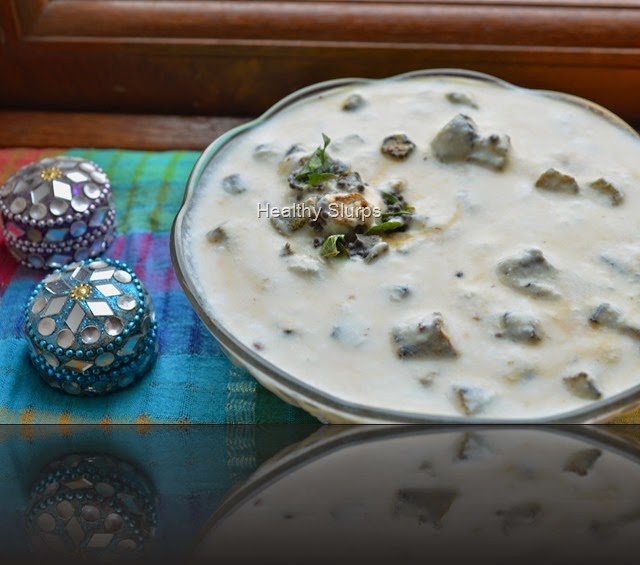
Nellikkai Thair Pachadi / Amla Raita

Do you know that Amla or the Indian Gooseberry has the highest Vitamin C content among all vegetables and fruits? That it has mention in ancient Sanskrit texts, is used extensively in Ayurvedic medicine, and is considered a miracle fruit. Amla can be used to treat eye disorders, increase calcium absorption in the bones, help build strong bones, cure skin ailments, strengthen and nourish hair, promote hair growth, actually just about do anything healthy and nourishing for our bodies.

The Indian Gooseberry (Amla) also has known anti oxidant properties. Amla has been found to offer a full range of benefits from free radical scavenging, anti inflammatory properties, beneficial effect on diabetes.   It is also widely used for its ability to dissolve plaques in arteries, reducing serum cholesterol levels.

Studies have also shown that even preserving in brine or pickling does not reduce the availability of vitamins, especially Vitamin C. Readers may be aware that vitamins B and C are easily destroyed when food is exposed to sunlight or heat, or excess water during cooking. So excessively cooked foods or preserved foods lose their vitamin content over time. Not so with Amla. This miracle fruit continues to dole out its health benefits even when cooked or preserved.

Despite having such a wonder fruit growing in our midst, I feel people in India do not make full use of it. We are in search of that elusive magic potion sourced from deep in the Amazon forests or some wonder drug that is shipped from a Scandinavian country. While those drugs/potions/foods may be good in them selves, I ask myself and everyone reading this – Is it wise to ignore the wealth in your backyard and seek something from far away? Are the money, effort, rising fuel costs, justified?

I, for one, am going to include more of this wonder fruit ‘Amla’ in my family’s meals. I am sure all of you have recipes from different cuisines with Amla as the main ingredient. Do share your favourite recipes with Amla in the comment section below.

Here is one simple, really quick, tongue tickling recipe with Amla. Perks up any meal and loads you up with its nutrients. Go on. Try it out.

Luminous Amla

ALLERGY INFORMATION

  • Does NOT contain gluten, lactose, nuts, corn, soya.
  • Suitable for people with gluten or lactose intolerance, or nut allergy.

Preparation Time – 10 minutes, Cooking Time – 5 minutes, Serves – 4-6

You Need -

Cookware – Small wok, Mixer grinder

Ingredients -

  1. 4-5 Amla fruits
  2. 2 tbsp fresh grated coconut
  3. 3-4 green chillies
  4. 1/2 cup skim milk curd
  5. 1/4 tsp salt

For Seasoning -

  1. 1/4 tsp oil
  2. a pinch mustard seeds
  3. a pinch fenugreek seeds
  4. a pinch asafoetida
  5. 3 curry leaves
  6. 1/2 red chilli (optional)

Method -

  1. Rinse the Amla well. Cut incisions along the segments. Pull out the flesh and discard the seeds.
  2. Grind along with coconut, green chilli, and part of the curd to make a paste. Grind more than a coarse paste but stop short of a fine paste.  Add the rest of the measured curd and whip along with the paste.
  3. Heat oil in a small wok/kadai/fry pan.
  4. Add ingredients for seasoning in order. When mustard crackles, pour in the ground mixture, and add salt. Simmer until the liquid foams up.  Do not boil this mixture. Keep stirring over medium heat for it to cook lightly.
  5. Remove to serving bowl and enjoy with hot phulkas,  or steamed rice, a dal and some stir fried vegetables.

Quick Amla Raita


Sep 2, 2014

Which Salad Is Really Good For You?


Have we not heard this enough times? Eat your vegetables. Have a big bowl of salad for lunch. Feast only on salads at the buffet table. Eat salads, stay healthy, live long. Have a salad daily, a salad for a meal and so on. But are all salads good? Also, are salads always good for you?

In this article, let me attempt answering the first question for you.

Yes, eating enough vegetables is vital to good health. The Food Pyramids of USDA and NIN amply bring home that for us.

Food Pyramid - National Institue of Nutrition

Yes, eating salads are a great way to increase variety in routine meals. Salads are low in calories, add colour, zest, fibre, anti oxidants and every other good thing you may find in diet and nutrition books.

Which salad gives you all of this?

Pic Courtesy-http://en.wikipedia.org/wiki/Produce

A salad that is made from fresh produce, not old.

A  freshly harvested fruit or vegetable is still living and breathing. If harvested when fully formed, the vegetable has the maximum nutrient content. With each passing day after harvest, fruits and vegetables lose moisture and valuable nutrients through surface. Losses can range from 5% for Vitamin B to even 70% for Vitamin C depending on harvest procedure, type of post harvest handling, effective cold storage (or not). Fat soluble vitamins are lost if the produce is exposed to heat / light.

Fresh vegetables, fresh fruits work best in a salad both in terms of flavour and nutrition. If you have ever dug into a salad which had one rotten tomato, you will understand this easily. The reasons we include salads in a meal are the vitamins, minerals, fibre, phytonutrients and anti oxidants that fresh produce has to offer. The real purpose of a salad is defeated if we use shrivelled, nearly dying vegetables.

A salad that is NOT drenched in sugary, creamy, high fat dressings.

Pic Courtesy-http://hilobrow.com/2012/07/22/de-condimentis-14-dress-my-salad/

Again, if you are stuffing yourself with a salad slathered in gooey, creamy, cheesy dressings, you have just added a few hundreds of calories from sugar and fat, thousands of mg of sodium and thwarted all attempts to ‘eat healthy’. Choose dressings with good fats such as olive oil, skim milk yoghurt or low fat Greek yoghurt. Include dressings such as those with herbs, lemon juice, honey mustard, balsamic vinaigrette, fresh pesto.  Avoid dressings which have ingredients such as sour cream, any type of cheese, maple syrup, high fructose corn syrup.

High fat salad dressings you will be happy to avoid. Pic Courtesy-http://hilobrow.com/2012/07/22/de-condimentis-14-dress-my-salad/

A salad that does not have deep fried foods as part of it’s ingredients.

Crunchy but not fried-Sweet Corn and pomegranante salad

Fried chicken salad, lettuce salad topped with deep fried croutons, crispy noodles, deep fried potatoes, potato straws, fried pork or any other deep fried ingredients to add crunch or taste to salad are harming your health and waistline.

Want crunch in your salad without the guilt of excess fat or sodium or calories? Add grilled vegetables or baked croutons. Add healthy nuts and seeds such as toasted walnuts, almonds, toasted melon seeds or pumpkin seeds to add nutty crunch.*

Also, a salad that is assembled in hygienic conditions and stored safely before consumption.

Cauliflower Koshimbir - Simple home made salad

Every single vegetable or fruit used in a salad, (especially raw salads) has to be thoroughly rinsed before peeling/chopping. Rinsing after peeling or chopping increases chances of contamination and nutrient losses. After rinsing, the ingredients have to be drained clean of the wash water too.

Bagged salad, pre cut greens, are all potential sources of bacterial contamination.

No salad ingredient should come in contact with raw meat.

Use clean cutting boards, knives and utensils while assembling salads.

Take care to store the salad as well as the dressings in a cool dark place, preferably covered in the fridge. If dressing is store bought, store as per instructions. Sniff, taste a wee bit before using each time to make sure it is still usable.

Assembling a simple home made salad is often easier than shopping for necessary ingredients and dressings. Enjoy fresh home made salads any time!

Happy, healthy eating.

*Nuts in salads – People who are allergic to tree nuts or all nuts should avoid them in salads too.


Apr 14, 2014

Vendakkai Thair Pachadi / Crispy Okra in Chilled Yoghurt


A very Happy New Year to all who celebrate today. Happy Vishu to all Malayalees across the world! All family members taking time off from busy lives, praying and eating together, tables rich with culinary treats– these surely are some special features of festivals. Celebrations always involve good food. Contrary to popular thought, festive food need not all be time consuming to prepare, nor be calorie-rich.

Today, I would like to share a lip-smacking, simple recipe which you can use to grace the table at any festive menu. This recipe has distinct south Indian flavours, so you can tweak the seasonings to accommodate the demands of your palate or cuisine. (Read notes)

Happy New Year to all

The key point here is how the vendakkai / lady’s finger / bhindi / okra is cooked - crispy ‘fried’ okra is first readied by slicing it thin, drizzling with a quarter tsp cooking oil and grilling it for 10 minutes. This then is lovingly folded into a bowlful of thick skim milk yoghurt, seasoned with salt.The dish is finished off with a fragrant tadka of mustard seeds, curry leaves and pinch of hing in some oil. The grilling ensures that you save fuel, oil and time. The crisp texture encourages even die-hard okra haters to try it out. The chilled yoghurt is just so perfect for this blazing summer season. While this recipe is an accompaniment, you will soon find yourself eating a chilled bowlful on its own. Here is what you need -

You Need

  1. Okra / Lady’s finger / Bhindi / Vendakkai – 200 gm
  2. Skim milk yoghurt – 500 ml
  3. Salt – 1/4 tsp
  4. Sugar – a pinch
  5. Cooking Oil – 1/4 tsp

For seasoning

  1. Cooking oil – 1/4 tsp
  2. Mustard seeds – 1/4 tsp
  3. Curry leaves – 3
  4. Asafoetida Powder (Hing) – a pinch

To Assemble

  1. Wash the vendakkai by immersing in a bowl of water, drain on colander and spread out to dry on a kitchen towel. Snip off the tops and tails, and slice into even thin disks.
  2. Preheat the grill to 250 C.
  3. Place in a single layer on a baking tray. Drizzle 1/4 tsp oil over the disks, and spread in a single layer.
  4. Once the grill is ready, place the tray of vegetables inside, and grill for 10 minutes. Toss and scrape the contents at half time to ensure even browning. By the end of 10 minutes, the Vendakkai would have shrunk to half – size pieces, and would have browned evenly without being charred. You may need to watch the grill in the last minute to ensure correct browning without charring.
  5. Let it cool in the tray. Meanwhile, whip up the skim milk yoghurt with salt and sugar.
  6. Prepare the seasoning by heating oil in a small pan, adding all the ingredients for seasoning in order. Pour over the whipped yoghurt.
  7. Gently fold in the cooled Vendakkai into the yoghurt, chill for half an hour before serving.
  8. Serve with steamed rice, sambar, papads.

Bowl of chilled pachadi flecked with crisp okra

Notes

  • Avoid mixing the grilled vegetable too vigorously into the yoghurt, it will darken the colour of yoghurt.
  • You can experiment with flavours by adding roasted jeera powder, coriander leaves instead of hing and curry leaves.
  • Can be used as a dip for crudites or rolls too by seasoning with a tbsp of chopped, fried onion, a pinch of red chilli powder and a tsp of chopped fresh parsley instead of above seasonings.
  • Grilling the vegetables as opposed to deep frying them helps to cut down on cooking oil used.

Enjoy the cool pachadi!

Apr 8, 2014

Little Millet Khichdi


Weight loss is the most important reason people visit a dietician or nutritionist. People want to lose weight for many reasons. Some of them could include - to look good, be able to carry off several outfits, to feel more energetic and several other reasons too. It is not advisable, however, to attempt weight loss in an unhealthy, unscientific or haphazard manner. Many people adopt extreme measures to lose weight. We would have heard of several restrictive diets such as all fluid diets, cabbage diet, only fruit diet, only vegetable diet, only milk diet, and several other ‘only diets’. Pause for a moment and think: are these really nourishing, sustaining, or even feasible in the long term?

The big goal and focus should be on achieving good health and fitness. Weight loss should only be a part of the journey to fitness and better health. Weight loss and weight management should also be approached with common sense, moderation and with a long term goal in mind.  Changes in diet should be made gradually and systematically. Including healthy grains, increasing fluid and fruit intake, keeping an eye on what one eats/drinks through the day are all important points to be kept in mind when attempting weight loss.

Pack of the Organic Millet I bought

In a study published by the American Journal of Clinical Nutrition on Glycemic Index and Obesity, scientists found a strong correlation between the type of grains consumed, its glycemic index and the ability to lose weight and keep it off too. This means, by choosing grains intelligently, it is possible to feed the body maximum nutrition while keeping weight in check too. Millets are a valuable group of grains which most of us in India have forgotten in the last century or so. Millets pack complex carbohydrates,(hence low glycemic index), more fibre than polished rice/wheat, are high in several minerals like Calcium, Iron, Magnesium. They are easy to cook too and flavours are quite mild and palatable. It is time we undo this damage of ignoring such nutrient powerhouses and allow ourselves their benefits.

This recipe is part of my effort to include millets in my family’s meals in delicious and acceptable ways. Little millet, also called Saama rice, Saame, Koda, is slightly bigger than semolina in size. It cooks very quickly, has an unobtrusive flavour and lends itself to several dishes easily. I cooked up this delicious khichdi several times in the past few months altering the spices and vegetables used each time. It is now a family favourite.  Do use the recipe below as a broad guideline and feel free to make your own favourite version.

Bowls of goodness

You Need

  1. Saama millet – 1 heaped cup
  2. Mung dal – scant 3/4 cup
  3. Potato – diced, 1/4 cup
  4. Carrot – diced, 1 cup
  5. Fresh green peas – 1/4 cup
  6. Bay leaf – 1 large
  7. Cinnamon – 2 thin sticks
  8. Cloves – 3
  9. Black pepper corns – 1  tsp
  10. Cumin seeds ( Jeera) – 1 heaped tsp
  11. Butter – 1 tbsp + Cooking oil – 1 tbsp
  12. Salt – 1 heaped tsp + 1/2 tsp
  13. Fresh water – 4 1/2 cups

To Assemble

  1. Rinse the millet and mung dal together.Place them in a suitable large vessel along with the potato, carrot, green peas and bay leaf. Add measured water,( read notes) place inside pressure cooker and pressure cook as you would normally cook rice. I reduce the flame after the first whistle and let it simmer for 5 minutes before switching off and letting it cool naturally.
  2. To a small frying pan, add the butter + oil, heat and add all the other spices mentioned in ingredients. Do not burn the spices, let them sizzle gently until it just releases its aroma.
  3. Pour over the khichdi when aromatic, add salt, mix well.
  4. Serve steaming hot with plain curd and a salad or kadhi and salad.

Creamy millet khichdi

Notes

  • Water - Add 3 times the volume of grain+dal if you want a creamy mushy khichdi, or add lesser for a less gooey version. I prefer the former for ease of spooning and swallowing!
  • Add spices such as cardamom, saunf( fennel seeds) or omit bay leaf if you feel so.
  • Any combination of vegetables can be used. Or you can make it with no vegetables at all too.

Sending this recipe to the following event started by Pari and co-hosted by Shruti. I am so excited to participate in such a useful event where all can use the archives for several healthy recipes. Do check out the spaces of both these awesome bloggers.

Only Grains

Also linking dish to event run by Nupur of UK Rasoi and Priya’s Versatile Recipes.

Mar 29, 2014

Hesaru Kalu and Sabsige Soppu Palya


A Happy Ugadi to all readers. Wishing plenty of good health, happiness and laughter in all your homes. All who celebrate must be busy with the shopping and cooking of the special Ugadi feast. Ugadi, Yugadi, Gudi Padwa are different names to the New Year Celebrations across Karnataka, Andhra and Maharashtra. As part of festivities, I bring to you an extremely flavourful and healthy dish from the North Karnataka region.
If the name of the dish sounds tongue twisting to non-Kannadigas,  I apologise. Do not let the long name fool you. It just means ‘a curry with mung bean and dill leaves’.The dish itself is quite easy to put together. A North Karnataka special recipe, I was introduced to this super aromatic and healthy dish at my dear friend Deepa’s place. Deepa’s enthusiasm for life and generous nature is so infectious. I do have a feeling that she is so high on life because she makes and shares dishes like these, which are so nutritious and lip-smacking tasty at the same time.
Dill leaves are used in several cuisines around the world. What’s good about dill leaves? This amazing aromatic green is very low in Saturated Fat and Cholesterol. It is also a good source of 1.Dietary Fiber, and a very good source of 2. Vitamins - Vitamin A, Vitamin C, Riboflavin, Vitamin B6, Folate, Niacin as well as 3. Minerals - Phosphorus, Zinc and Copper, Calcium, Iron, Magnesium, Potassium and Manganese.
To those not familiar with the flavour, it does take some time to accept. To be honest with you, my family was not so welcoming of the dill flavour when I made it first. At the next attempt, I reduced the quantity of dill leaves to half that of the mung beans. This then, found appreciation among my ‘testers and tasters’ - (read family).
Dill leaves and Mung bean
You Need
  1. Mung Bean – uncooked, 1 cup
  2. Dill leaves – pick leaves, discard thick stem and measure 1/2 cup packed
  3. Onion – diced, 1/4 cup
  4. Oil – 1 tbsp
  5. Mustard seeds – 1/2 tsp
  6. Green chilli – 4-5 chopped fine
  7. Salt – 1 level tsp or less
To Assemble
  1. Rinse the mung beans well, pressure cook them in just enough water for only 2 whistles or till just cooked but not mushy.
  2. Was the picked dill leaves under several changes of water, chop fine and set aside.
  3. Heat oil in a pan, add mustard to crackle, pour in the chopped green chilli and diced onion. Toss well till light brown. Saute onion in oil
  4. Add the dill leaves, sauté on high heat, stirring briskly. Add chopped dill leaves
  5. When the leaves have been tossing for a couple of minutes, add the cooked mung beans, add salt to taste. If there is extra water from the cooked beans, add only if required to the pan at this point. The curry should be moist but not ‘gravy–ish’. Add cooked mung bean
  6. Stir on high heat for 2 more minutes, switch off flame, cover and set aside for flavours to blend well. Ready to serve after half an hour with Steamed rice or Jowar Roti.
Palya ready! Don't you like the red hot chili?
Hesaru kalu sabsige soppu palya - Happy Ugadi

Jan 9, 2014

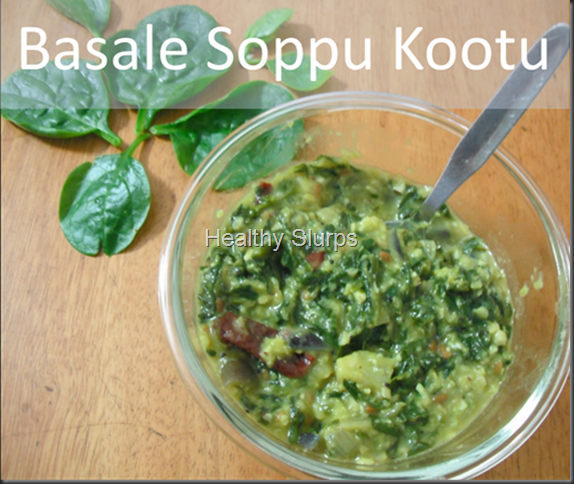
Basalle soppu Kootu


kootu pic


Basella alba or Basale soppu as it is known in Kannada, is a very nutritious green leafy vegetable. It grows up to a height of even 10 metres! This green leafy vegetable has amazing uses.

Health Benefits of Basella alba
  1. Topical anti inflammatory, anti fungal – helps to reduce freckles, treat acne, heal skin ulcers and reduce skin inflammation. Leaf juice mixed with butter used to heal burns, wounds.
  2. Decoction of leaves used as mild laxative, cooked roots used to control diarhoea
  3. Used to treat Pelvic inflammatory disease, sterility, threatened abortion, false labour
  4. In Africa, roots and leaves used for reducing stomach pain after childbirth, and to increase mother’s milk.
  5. The mucus from leaves if applied as a pack on forehead removes headaches and improves sleep, so used in Ayurveda for insomnia.
  6. To treat Vitamin A deficiency and iron deficiency anaemia
  7. The leaf has anti-oxidants - Beta Carotene, Xea Xanthin. This helps in free radical scavenging, hence has benefit on ageing or cancer cure.

It lends itself to a delicious stir fry or ‘bhaji’, or tambli in Marathi cuisine,or to basale soppu saaru in Kannada cuisine. Here is my attempt to make a Tamil style kootu with these very healthy greens. You Need
  1. Baselle Soppu – trimmed leaves, 4 heaped cups
  2. Red Onion – 3 medium or 2 big, peel and chop fine
  3. Tuvar dal – 3/4 cup, pressure cooked until soft
  4. Turmeric powder – 1/2 tsp
  5. Grated fresh coconut – 1 tbsp
  6. Green chilli – 1 or 2 depending on heat preference
  7. Salt – 2 heaped tsp
  8. Sugar – 2 big pinches
  9. Fresh water – 1/2 cup
For seasoning
  1. Any vegetable oil – 2 tbsp
  2. Mustard seeds – 1 tsp
  3. Urad Dal – 2 tbsp
  4. Dry red chilli – 1 –2 torn into halves
To Assemble
  1. Wash the greens in several  changes of water until no trace of grits, sand or mud remains! I dunk the trimmed greens into my kitchen sink. This way, I can wash them very quickly. Drain for 10 minutes in a large colander. Chop them coarse. We do not want a slimy paste while chopping them fine.
  2. Pressure cook the tuvar dal with turmeric powder until soft and mushy.
  3. Whiz the fresh coconut with the trimmed green chilli to a coarse mixture. Do not add any water while blending, just dry whiz.
  4. Heat oil in a wok / kadhai / fry pan.
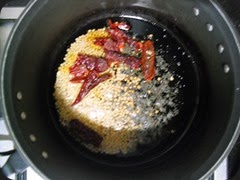
  5. Sizzle the mustard and urad dal; when dal browns, add the torn red chilli.Add seasonings to oil
  6. Tip in the diced onions, fry well for several minutes over high flame, keep stirring to avoid burning. Foggy Onions!Fry them onions well
  7. When the onions have changed from pink to translucent and light brown, toss in the chopped greens. Toss the pan well to incorporate the seasoning oil into the greens. After you see some wilt, add  sugar, half a cup of water and cook uncovered.Onions + soppu                Soppu under a haze
  8. The greens are usually done in 7-10 minutes depending on flame and quantity. Now add the cooked dal, coconut mixture, and salt. Mix well over medium flame to blend all components together.
  9. Best served with steamed rice and a spicy sambar or tangy rasam.
Kootu ready!


Mar 12, 2013

Lauki raita/ Sorakayi pachadi


Bottle gourd as it is known in English, was not a favourite at our home too, that is until my yoga teacher shared this recipe with me. Bottle gourd is always paired with a protein such as chana dal or tuvar dal or mung dal in traditional Indian recipes. One reason could be that the vegetable has very low protein levels. Thus creating a dish with the vegetable + protein makes it complete!

Of the several Indian recipes such as using it in koftas, avial, kootu, I took an instant liking to using it in raita. Cooling, refreshing, this extremely simple dish can be paired with any entree, any cuisine. The best part is very few ingredients are required and takes little time to put together. Use it as dip, chutney, raita, or to fill in hunger pangs between meals too.

What’s good about Bottle gourd?

  • Bottle gourd has plenty of moisture and dietary fibre. This makes it an ideal summer vegetable to replenish fluids in the body. The fibre keeps constipation, piles, cholesterol and even colon cancer at bay.
  • 100 gm of uncooked bottle gourd has only 12 calories. This makes the vegetable an instant pick me up for weight loss diets.
  • It has no protein or fat content – the only way to add that would be in a recipe that includes some protein and good fat.
  • This humble vegetable is a fair source of Magnesium, Zinc, Potassium and Copper. All minerals needed by teenagers and growing children.
  • Also a very low sodium vegetable, this is very suitable for people with high blood pressure or diabetes too.
  • Do check out this link too. http://www.thehindu.com/health/policy-and-issues/article2571430.ece

So do try out this super simple and soul satisfying recipe this summer.

You needGrated bottle gourd

  1. Bottle gourd/ lauki/ sorakayi – select tender lauki, wash, peel, grate to a medium fineness, measure 3/4 cup.
  2. Thick curd – 1 cup ( I used home made skim milk curd) If you use store bought curd, select fresh probiotic skim milk curd.
  3. Salt – 1/4 tsp.
  4. Sugar – a pinch (optional).
  5. Fresh coriander leaves – chopped fine – 1 tbsp

For seasoning

  1. Oil – 1/2 tsp
  2. Mustard seeds – 1/4 tsp
  3. Asafoetida – a teeny pinch
  4. Green chilli – 1, finely chopped
  5. Curry leaves – 3-4 torn up

To assemble

  1. Combine the grated bottle gourd, whipped curd, salt, and sugar.
  2. Heat oil in a small tadka pan, add oil and other seasoning ingredients in order.
  3. Pour over raita.
  4. Top with chopped coriander leaves.
  5. Chill for an hour before serving.

Cool curd and hot takda

Variations

  1. Omit seasoning.
  2. Add roasted jeera powder and kala namak powder if you like the piquancy.
  3. Add one half onion, finely diced, or few chopped stems of spring onion along with bottle gourd in the raita.
  4. Add grated carrot for colour!

 Chilled Bottle gourd raita

Mar 5, 2013

Sprouts In Palak Gravy

Reposting the recipe as entry to Only Cooking with Legumes event at Nalini’s Kitchen. A great event started by Pari Vashisht at her blog Foodelicious

March is the season of winter in some places, spring in some parts of the world, and summer in several parts too! One season is common to all in India – March is the season of exam fever all over the country! Rising temperatures, portions to complete, revise, projects to submit, cramming before exams, and raging hormones no less, all add to the Indian teenager’s agony. Standing at an important crossroad of life, today’s teenager and the family have a lot of stress to face through these weeks.
At such stressful times, it goes without saying that a healthy body and healthy mind are very crucial to crack the tests and come through happily. Parents are eager to know what can help in improving their children’s health and will do all it takes to better their child’s chances at success. I have had several parents ask me about ideal diet for children during study holidays and examination - time. An ideal diet at these times should include plenty of fibre, vitamins and minerals and less of refined starches. Greasy, spicy foods are best avoided too. Fruits, fresh squeezed citrus fruit juice without too much sugar, other fluids like tender coconut water do wonders to keep the body and mind stable and calm. It also helps to spend some time in playing  a favourite game and / or doing breathing exercises like ‘Pranayama’ (after learning from a qualified teacher).
Let us begin with good food. Food that is nourishing, sustaining, and tasty too! Food that energises without being heavy, food that delivers maximum effect with minimum effort. What can fit this bill better than sprouts?
I am quite fond of sprouts for their power packed nutrient content. Sprouts are an invaluable source of protein in a vegetarian’s diet. Besides the protein punch, sprouts are also chockfull of Vitamins B (better digestion, stronger nerves), Vitamin C ( better immunity, healthier gums). Also present are Minerals like Zinc, Copper, Iron – These are needed for a growing teen for stronger muscles, more blood cells and hence more oxygen to body and brain! Sprouts are low on glycemic index too. They are the perfect food for holistic health – of mind and body.
While it is true that raw sprouts give all the benefits of vitamins, fibre, minerals, yet it is not an easy task to coax children to chew on them frequently.If you can get your teen to chew on a tbsp of raw mung bean sprouts daily, it would be wonderful. However. do not despair if she does not agree. I often choose the middle path – steam the sprouts, or microwave them for a brief while to take the raw offensive flavour out. Steaming sprouts also is good to help elderly or people with compromised immunity to digest it easily.
Eating cooked sprouts is better than not eating them at all. Eating cooked sprouts in a smooth flavourful palak gravy is even better. What say?
Parathas made with multi grain dough flavoured with ajwain paired well with this sprouts in palak gravy. It was school lunch fare and I am so glad to say that other kids at school liked it too. This is an ideal meal for children working hard at their academics at this time of the year.
Bowl of Sprouts in Palak
You need
  1. Mixed sprouts or mung bean sprouts – heaped, 1 cup
  2. Palak leaves – wash in several changes of water, drain, chop and measure – 3 heaped cups
  3. Onion – chopped, 1/4 cup
  4. Garlic – 1 clove, crushed
  5. Tomato – chopped, 1/2 cup
  6. Green chilli – 2
  7. Root ginger – chopped – 1 tbsp
  8. Salt – 1 heaped tsp
  9. Garam masala powder – 1 tsp
  10. Oil – 1 tbsp + 1/2 tsp
  11. Jeera – 1/2 tsp
To Assemble
  1. Pressure cook mixed sprouts or mung bean sprouts for as much time as needed to be just cooked. The cooking time will depend on the bean. Set aside, for pressure to release. Alternately, if you are using only mung bean sprouts, just steaming them for 3-4 minutes would be good too.
  2. Heat 1 tbsp oil in a non stick pan or kadhai.
  3. Add in this order, each at a 30 second interval   – garlic, ginger, green chilli, onion and tomato. Add salt, let the tomatoes mush up. Fry ingredients in oil
  4. Add chopped palak leaves. Toss the palak well in the pan, let it wilt and cook for about 2 minutes. Add chopped palak
  5. Cool and grind to a smooth paste.
  6. To the same pan, add 1/2 tsp oil, Sizzle jeera in it.
  7. Tip in the palak puree and the cooked sprouts, add garam masala. Check for salt, add more if needed. Mix palak puree and cooked sprouts
  8. Simmer for 3-4 minutes, switch off cover and let flavours mingle for 10 minutes or more. DSC_0042
  9. Serve warm with a lime wedge if you like, as accompaniment to hot phulkas or steamed rice. Yum. SmilePower Packed Meal

Jan 19, 2013

Cherry tomato Lettuce Salad


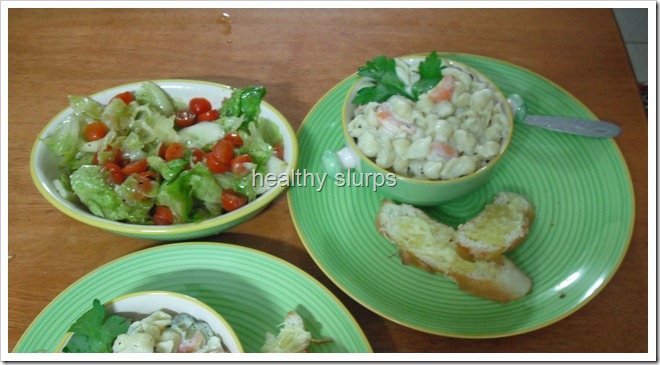
Well, this salad does not even need a recipe. It is such a simple combination of veggies and dressing. In fact, I am sure several of you will have tried out some version of this salad. I made this salad to accompany the Low Fat Creamy Pasta. The salad, pasta and fragrant garlic bread comprised dinner last weekend. Quite a combination of textures, colours, flavours and tastes. It was a very satisfying meal.
Taking some time to plan, shop and create good meals is so fulfilling. The happiness I feel when I sit down with loving family members eager to sample the latest creations and finding their faces light up with joy and hearing those happy exclamations – these make all the effort of cooking worthwhile. Well let me also admit that I go through my good share of disasters, and food that no one wants to touch. But thankfully, these happen lesser than the former.
As I said, this salad is a simple combination of dressing, veggies and tossing them together.
You need
For the veggies -
  1. Iceberg lettuce – 1 small head
  2. Cherry tomatoes – 22-25 numbers
  3. Cucumber – 1-2 medium (really, your choice)
  4. Ice cold water – enough to dunk the lettuce in (approx. 4 cups)
For the dressing -
  1. Balsamic vinegar – 1 tbsp
  2. Extra virgin Olive Oil – 4 tbsp
  3. Crushed black pepper – 1-2 tsp
  4. Salt – 2 pinches
  5. Sugar – 1 pinch (optional)
To assemble
  1. Wash the lettuce head, tear leaves apart by hand into bite size pieces and keep immersed in ice cold water until needed.
  2. Dunk the cherry tomatoes in a bowl of water for 5 minutes, drain, pat dry and cut into halves. Place in a large mixing bowl.
  3. Rinse the cucumber thoroughly with the peel on . You can retain the peel on the cucumber or partly peel them too. If there are too many seeds along the middle of the cucumber, you may want to discard them. If so, cut into half lengthwise, remove the ‘seedy’ parts and slice into half circles. Else, if the seeds are tender, you can slice the cucumber into thin disks. Place along with the tomatoes in the mixing bowl.Veggies - washed, scrubbed, waiting for their dress!
  4. Pour the balsamic vinegar into a bowl. Pour the Olive oil in a thin drizzle whisking with a fork all the while. Continue to whisk well until all the vinegar and oil have blended into an almost homogenous mixture. Add the crushed pepper and salt now, whisk them in too. Dressing is ready.
  5. Now is the time to drain the lettuce in a colander – drain it well, shake up the colander and coax the last drops of water out! Add the lettuce to the mixing bowl, pour the salad dressing on top and mix well, toss, shake – do whatever except spilling the contents!
  6. Chill the salad for at least half an hour before serving so that it is at the right temperature and the flavours settle well.
Some salad everyday keeps tummy trouble away
Notes
  • You can add pitted black olives, walnuts, coloured peppers (capsicum), rocket leaves or any preferred vegetables to the salad. Use dressing in proportion to the vegetables used.
  • Using fresh tender vegetables, and chilling well before serving help to enhance the taste of the salad.

Aug 7, 2012

Cauliflower Koshimbir


When I heard my friend, Geetanjali tell me about the several koshimbir or salads that she rustles up often at her home, I was all ears. I am always on the look out for newer healthier food options. This salad, apart from new ingredients for koshimbir, also packs in freshness, sweet, tangy and citrusy flavours in.

While Geetanjali’s version had cauliflower as the sole vegetable, and used lemon juice for the tang, I added some carrots for colour, and had to improvise with grated raw mango since I did not have lemon at hand. You could try both versions. They taste just right with steamed rice and dal combo or with hot phulkas too. In fact, you could make a wrap with a hot phulka, some mustard smeared on it, filled in with the koshimbir, rolled up and enjoyed!

What’s good about this dish?

  • Cauliflower is a cruciferous vegetable, similar to cabbage or broccoli.
  • Fresh cauliflower is an excellent source of Vitamin C, Vitamins B1, B3, B5, B6. A great source of minerals like iron, manganese, potassium, too.
  • Di-indolyl methane (DIM), a substance found in this family of vegetables have anti viral, anti bacterial properties and also functions as immune modulator. This property is being used in clinical trials for treating Human Papilloma Virus (the virus that causes cervical cancer)
  • Cauliflower has several other cancer fighting compounds too – they protect against prostrate, cervical, colon, breast, and ovarian cancers. All this makes it a very important vegetable in every woman’s diet.
  • When cooking, wash the head under running water, parboil in salted water, rinse again and use in recipes.

Go on, realise the benefits of this wonder vegetable using it in recipes such as the one below - 

Cauliflower Koshimbir

You need

  1. Cauliflower – 1 medium head
  2. Carrot – 1 medium Or Grated Carrot – 1/2 cup
  3. Raw mango – 1 small OR Grated mango – 1/4 cup
  4. Fresh grated coconut – 2 tsp, optional
  5. Salt- 1/2 tsp or more if needed
  6. Sugar – 1/4 tsp,optional

For seasoning -

  1. Fresh coriander leaves – chopped, 2 tbsp
  2. Oil – 1/2 tsp
  3. Mustard – 1/4 tsp
  4. Asafoetida powder (hing) – a pinch
  5. Green chilli – 2, finely chopped

To assemble

  1. Break the cauliflower head into small florets.
  2. Boil about 1 litre water in a saucepan, add about a tsp of salt to it, drop the florets in the boiling water, turn off the stove, steep for a couple of minutes in the water. Drain, rinse under clean cold water. Now use a steel grater and grate the cauliflower florets into a finer texture.the grated cauliflower - a closer look
  3. Grate the raw mango, and the carrot too.
  4. Toss all the grated veggies together, mix in the coconut, (if using) add salt and sugar and mix well without bruising the vegetables. Add in the chopped coriander too.

tossed salad ingredients

5. Heat the oil in a pan, add the mustard, allow to splutter, tip in the chilli and hing, and pour over the salad.

6.Chill for half an hour before serving.

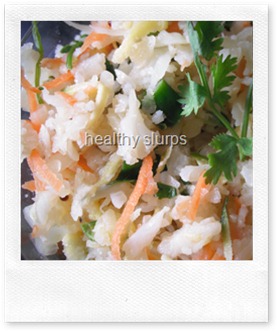
chilled and portioned koshimbirCauliflower Koshimbir

Jun 22, 2012

Chilled Pasta Salad

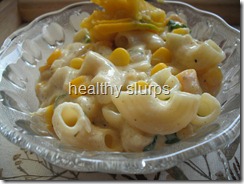
Summer bring the best and the worst out of all of us. Think thirsty  parched throats, prickly heat,…and again think tall cool glasses of sherbet, lazy vacation days, at least for school going kids, ice cream, swimming, and of course the season’s best – mangoes! Mango is so rightly called the king of fruits. I am yet to meet a person who does not like this ever so fragrant luscious fruit. Also think chilled salads when you are in no mood to cook your self along with food in a sweltering kitchen. To me, a pasta salad seemed just the answer to a hungry family and a not-ready-to-cook mom, that’s me. Teamed with warm grilled garlic bread, this filling salad left us so happy and content last weekend. I urge you too, do recreate this Indian-Italian piece de resistance in your homes this summer.chilled salad beckons
What’s good about this dish?
  • The meal combines grains(pasta and whole wheat bread), dairy protein (from the curd), fruit and veggies too. Hence it is a complete one pot meal.
  • Ripe mangoes and corn add to the vitamin A, B6, C and E levels of the meal, apart from the natural dietary fibre content. 
  • A good Potassium content in mangoes makes it a good fruit for people with hypertension. To make the dish more suitable for a hypertensive person, halve the salt used in the recipe.
  • Fresh curd is rich in probiotics – the helpful bacteria that are needed for normal functioning and maintenance of stomach and intestines. Fresh curd is also rich in vitamins B and C. Even people with lactose intolerance can usually tolerate curd as the ‘lactose’ sugar is converted to ‘lactic acid’.
Do you need more reasons to try out this fuss-free delicious recipe…. sunday lunch
You need
  1. Small elbow or bow tie pasta – 250 gm ( I used  half of a 500 gm pack)
  2. Sweet corn kernels – 1/2 cup, steamed 
  3. Ripe, firm mango (any variety) – finely dice and measure 1 cup.
For the dressingingredients for dressing
  1. Fresh thick curd, and hung for an hour – 2 cups. Measure the cheese after curd is hung.
  2. Onion – very fine minced, 2 tbsp
  3. Sugar – 1/2 tsp
  4. Black/white pepper powder – 1/2 tsp
  5. Salt – 1 heaped tsp
  6. Mustard – 1 tsp ( I used ‘Fun foods’ brand - English Mustard)
  7. Fresh coriander leaves – finely minced, 2 tbsp
  8. Green capsicum (Bell Pepper) – finely minced, 1 tbsp
  9. Fresh cream – 2 tbsp (optional, I did not use any)
To assemble
  1. Boil pasta for 8-9 minutes. Drain and rinse under cold water. Leave to cool in the colander until dressing is ready.
  2. Steam the sweet corn kernels for 2 minutes in the microwave oven.
  3. Peel and dice the mango as finely as possible without squishing it!
  4. Combine all ingredients for dressing in a mixing bowl. Please do not omit any ingredient ( I did not have capsicum and sorely felt it’s absence). Adding cream is your choice though – it helps to give a smooth mouth feel, but does amp up the calories.
  5. Once the dressing is mixed in well, add the cooked pasta, corn, and mangoes and toss well.mix dressing and pasta welladd corn, mango and pasta to dressing
  6. Chill well before serving. I chilled for an hour before garnishing it with more mango slices and served it up, accompanied with warm, cheesy garlic bread.
warm garlic bread and cold salad
Notes
  • Can use pineapple when mangoes are not in season.
  • Can use other vegetables such as carrots too.
  • Can use fresh or dried parsley or other fresh herb seasoning. Pudina / mint, however will be too overpowering a flavour.
  • Do not omit any ingredient from the ‘dressing’ list. I did not have green bell pepper (capsicum) at the time of assembling this salad and sorely felt it’s need to perk up the dish!
warm garlic bread and chilled pasta salad