Showing posts with label greens. Show all posts

May 22, 2014

Keerai Masyial

 
Few dishes can beat the simplicity of Keerai Masiyal. However, as a child, this was not my favoured dish. I have pretended every ailment to escape eating this ‘ green paste’. Now I am better able to appreciate it’s subtlety of flavour, the health benefits, ease of preparation, and the brilliant hue of this humble dish. When the summer heat is making cooking a painful chore, I urge you to try this out. Can be put together in under 15 minutes, needs very few ingredients, and supremely healthy, what’s not to like?
Steaming Keerai Masiyal
I have used Palak in this dish, but Amaranth, Arai Keerai, Siru Keerai, can also be used. In fact, using different greens in rotation brings each one’s unique health benefits to the table.
  • Agathi Keerai has more than 12 times the Calcium found in Palak and more than 3 times that found in Methi leaves.
  • Radish Leaves, Siru Keerai, Arai Keerai, Manathakkali Keerai and Paruppu Keerai are all very rich in Iron. They have more than 3 times the Iron found in Agathi Keerai or Palak .
  • Amaranth and Agathi Keerai lead in Vitamin C while Palak, Mint and Amaranth lead in Folic Acid content.
  • Paruppu Keerai and Palak have a low Sodium and high Potassium combination which makes it ideal for people with high BP or kidney ailments or gout.
In a survey conducted by the National Nutrition Monitoring Bureau (NNMB), Indians were found to consume far lesser (average - 48gm/day) than the recommended 300 gm vegetables per day.Of this RDA of 300 gm, The National Institute of Nutrition, recommends at least 100 gm greens per person per day.
Here is the Food Pyramid picture as released by the National Institute of Nutrition, 2011. It helps to form a visual idea of what should be on our plate everyday!
 
Pic Courtesy - Dietary Guidelines for Indians, NIN
Finally to the recipe of the day -
You Need-
  1. Palak or any other greens – 4 packed cups of leaves.
  2. Salt – 1/2  tsp to 3/4 tsp ( use as needed)
For seasoning -
  1. Oil – 2 tsp
  2. Mustard seeds – 1/2 tsp
  3. Urad Dal – 2 tbsp
  4. Red Chilli – 2, broken into halves
  5. Grated fresh coconut – 1/2 tsp (optional)
To Assemble -
  1. Pick leaves and tender stems. Discard stems that are thick. Measure 4 packed cups.
  2. Wash well in a colander in several batches. Or fill water in the kitchen sink and submerge the greens in the sink tub. This is a great way to wash quickly and effectively.
  3. Drain well. Chop roughly. Any size and shape will do. It needs to be blended anyway.
  4. Place a large wok on heat, add the greens and let it cook in it’s own juices. If it looks like it is sticking to the bottom of the pan, add half a cup of water. stir through a couple of times so that the greens get cooked uniformly. After 5-7 minutes, the greens should be just cooked enough. Cool and grind to smooth paste with any water that may be left over in the pan.
  5. Return the puree to the wok, place wok over fire, rinse the blender jar with 1/4 cup water, add that too to the wok. Add salt, mix well, taste and add more as/if needed.
  6. To a small seasoning pan, add oil, place over heat, add mustard seeds, urad dal, red chillies. When you hear happy crackles, enjoy the sizzle and the aroma, pour it into the Masiyal before it chars! Smile If using grated coconut, add it to the seasoning pan last, stir around until the coconut turns a golden hue and pour over the Masiyal.
  7. Enjoy hot with steamed rice, sambar and a cucumber carrot salad with lemon dressing.  Vitamin C in the lemon juice helps in better iron absorption.
NOTES -
  • For local and botanical names of all the Greens mentioned in this post, please refer to Glossary of Ingredients Page.
  • To retain nutrients in greens cook in just enough water until just cooked. Do not discard the water, use it up in the recipe.
  • To retain the colour of greens, add half a tsp sugar while cooking, leave pan uncovered, cook quickly over high heat instead of low flame for a longer time.
  • Add a sliced onion and couple of crushed garlic cloves to the seasoning for a twist in flavour.
Enjoy Masiyal with Steamed Rice
 

Mar 29, 2014

Hesaru Kalu and Sabsige Soppu Palya


A Happy Ugadi to all readers. Wishing plenty of good health, happiness and laughter in all your homes. All who celebrate must be busy with the shopping and cooking of the special Ugadi feast. Ugadi, Yugadi, Gudi Padwa are different names to the New Year Celebrations across Karnataka, Andhra and Maharashtra. As part of festivities, I bring to you an extremely flavourful and healthy dish from the North Karnataka region.
If the name of the dish sounds tongue twisting to non-Kannadigas,  I apologise. Do not let the long name fool you. It just means ‘a curry with mung bean and dill leaves’.The dish itself is quite easy to put together. A North Karnataka special recipe, I was introduced to this super aromatic and healthy dish at my dear friend Deepa’s place. Deepa’s enthusiasm for life and generous nature is so infectious. I do have a feeling that she is so high on life because she makes and shares dishes like these, which are so nutritious and lip-smacking tasty at the same time.
Dill leaves are used in several cuisines around the world. What’s good about dill leaves? This amazing aromatic green is very low in Saturated Fat and Cholesterol. It is also a good source of 1.Dietary Fiber, and a very good source of 2. Vitamins - Vitamin A, Vitamin C, Riboflavin, Vitamin B6, Folate, Niacin as well as 3. Minerals - Phosphorus, Zinc and Copper, Calcium, Iron, Magnesium, Potassium and Manganese.
To those not familiar with the flavour, it does take some time to accept. To be honest with you, my family was not so welcoming of the dill flavour when I made it first. At the next attempt, I reduced the quantity of dill leaves to half that of the mung beans. This then, found appreciation among my ‘testers and tasters’ - (read family).
Dill leaves and Mung bean
You Need
  1. Mung Bean – uncooked, 1 cup
  2. Dill leaves – pick leaves, discard thick stem and measure 1/2 cup packed
  3. Onion – diced, 1/4 cup
  4. Oil – 1 tbsp
  5. Mustard seeds – 1/2 tsp
  6. Green chilli – 4-5 chopped fine
  7. Salt – 1 level tsp or less
To Assemble
  1. Rinse the mung beans well, pressure cook them in just enough water for only 2 whistles or till just cooked but not mushy.
  2. Was the picked dill leaves under several changes of water, chop fine and set aside.
  3. Heat oil in a pan, add mustard to crackle, pour in the chopped green chilli and diced onion. Toss well till light brown. Saute onion in oil
  4. Add the dill leaves, sauté on high heat, stirring briskly. Add chopped dill leaves
  5. When the leaves have been tossing for a couple of minutes, add the cooked mung beans, add salt to taste. If there is extra water from the cooked beans, add only if required to the pan at this point. The curry should be moist but not ‘gravy–ish’. Add cooked mung bean
  6. Stir on high heat for 2 more minutes, switch off flame, cover and set aside for flavours to blend well. Ready to serve after half an hour with Steamed rice or Jowar Roti.
Palya ready! Don't you like the red hot chili?
Hesaru kalu sabsige soppu palya - Happy Ugadi

Jan 9, 2014

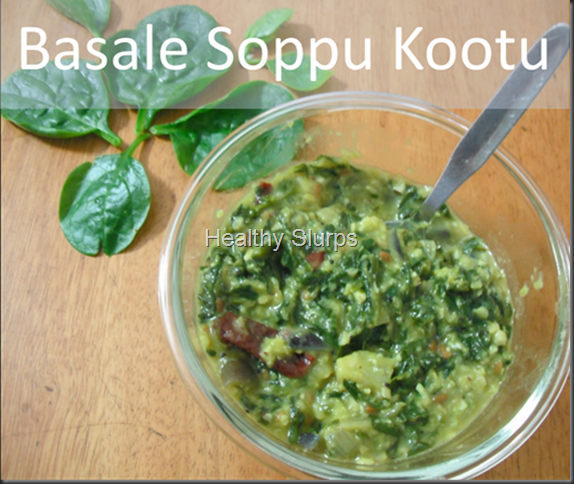
Basalle soppu Kootu


kootu pic


Basella alba or Basale soppu as it is known in Kannada, is a very nutritious green leafy vegetable. It grows up to a height of even 10 metres! This green leafy vegetable has amazing uses.

Health Benefits of Basella alba
  1. Topical anti inflammatory, anti fungal – helps to reduce freckles, treat acne, heal skin ulcers and reduce skin inflammation. Leaf juice mixed with butter used to heal burns, wounds.
  2. Decoction of leaves used as mild laxative, cooked roots used to control diarhoea
  3. Used to treat Pelvic inflammatory disease, sterility, threatened abortion, false labour
  4. In Africa, roots and leaves used for reducing stomach pain after childbirth, and to increase mother’s milk.
  5. The mucus from leaves if applied as a pack on forehead removes headaches and improves sleep, so used in Ayurveda for insomnia.
  6. To treat Vitamin A deficiency and iron deficiency anaemia
  7. The leaf has anti-oxidants - Beta Carotene, Xea Xanthin. This helps in free radical scavenging, hence has benefit on ageing or cancer cure.

It lends itself to a delicious stir fry or ‘bhaji’, or tambli in Marathi cuisine,or to basale soppu saaru in Kannada cuisine. Here is my attempt to make a Tamil style kootu with these very healthy greens. You Need
  1. Baselle Soppu – trimmed leaves, 4 heaped cups
  2. Red Onion – 3 medium or 2 big, peel and chop fine
  3. Tuvar dal – 3/4 cup, pressure cooked until soft
  4. Turmeric powder – 1/2 tsp
  5. Grated fresh coconut – 1 tbsp
  6. Green chilli – 1 or 2 depending on heat preference
  7. Salt – 2 heaped tsp
  8. Sugar – 2 big pinches
  9. Fresh water – 1/2 cup
For seasoning
  1. Any vegetable oil – 2 tbsp
  2. Mustard seeds – 1 tsp
  3. Urad Dal – 2 tbsp
  4. Dry red chilli – 1 –2 torn into halves
To Assemble
  1. Wash the greens in several  changes of water until no trace of grits, sand or mud remains! I dunk the trimmed greens into my kitchen sink. This way, I can wash them very quickly. Drain for 10 minutes in a large colander. Chop them coarse. We do not want a slimy paste while chopping them fine.
  2. Pressure cook the tuvar dal with turmeric powder until soft and mushy.
  3. Whiz the fresh coconut with the trimmed green chilli to a coarse mixture. Do not add any water while blending, just dry whiz.
  4. Heat oil in a wok / kadhai / fry pan.
  5. Sizzle the mustard and urad dal; when dal browns, add the torn red chilli.Add seasonings to oil
  6. Tip in the diced onions, fry well for several minutes over high flame, keep stirring to avoid burning. Foggy Onions!Fry them onions well
  7. When the onions have changed from pink to translucent and light brown, toss in the chopped greens. Toss the pan well to incorporate the seasoning oil into the greens. After you see some wilt, add  sugar, half a cup of water and cook uncovered.Onions + soppu                Soppu under a haze
  8. The greens are usually done in 7-10 minutes depending on flame and quantity. Now add the cooked dal, coconut mixture, and salt. Mix well over medium flame to blend all components together.
  9. Best served with steamed rice and a spicy sambar or tangy rasam.
Kootu ready!


Jan 2, 2014

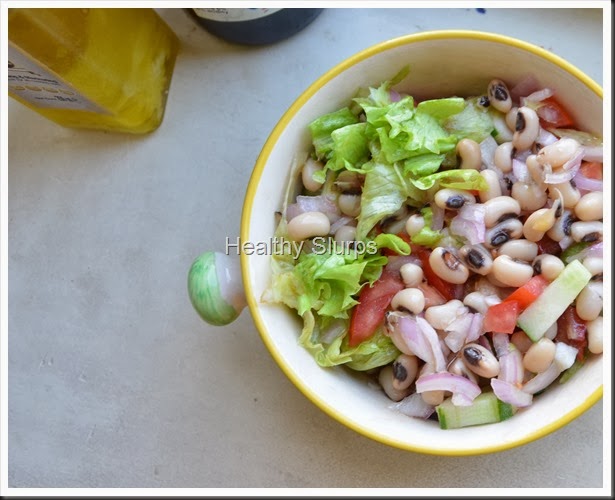
Black Eyed Bean Salad


A very Happy New Year to all readers of Healthy Slurps. There is something about the air during New Year which is very invigorating and refreshing. Goodwill, cheer, positivity abound in everyone’s heart during this season. Here is my first recipe for this year which has packed in it, all the love and cheer of this season.
To kick start this New Year with more healthy recipes, here is a salad that I assembled today. As I have mentioned earlier, salads are created with available produce at my home without sticking to any recipe. The reason I am documenting them here is to share the recipe with myself as much as with all of you. For I find myself at a loss to remember all ingredients when I want to recreate that last great salad.

Come, eat me
You Need
  1. Black eyed beans ( Lobia ) – 1 cup, soaked for at least an hour
  2. Cucumber – 1
  3. Red Onion – 1 medium
  4. Roma Tomato – 2 medium
  5. Iceberg Lettuce – Roughly torn and measure 2 cups
For Dressing
  1. Red Wine Vinegar – 2 tbsp
  2. Extra Virgin Olive Oil – 8 tbsp
  3. Crushed Black Pepper – 1 tsp
  4. Salt – 1 tsp
  5. Granulated Sugar – 1 tsp
To Assemble
  1. Whisk all ingredients for dressing together in a bowl.( I used a fork to whisk them,) quite simple really. Set aside.
  2. Peel the lettuce leaves from the head and immerse in ice cold water.
  3. Pressure cook the soaked beans until just done. I pressure cooked them by simmering the flame for 5 minutes after the cooker gave out the first whistle.
  4. Peel and chop the other three salad ingredients in the same shapes – go with dice, slice or cubes. The only rule is to be uniform. That does give the salad a good appearance.
  5. Drain the water from the cooked beans, if any. Do not discard but use in soup, sambar, or as cooking liquid for any vegetable too.
  6. Toss all the ingredients and the dressing together in a suitable large bowl.
  7. Chill for half an hour and serve.
Filling and Tasty Salad
Come, Eat me

Apr 1, 2013

Minty Garlic Potatoes

This was a recipe I tried out on a whim ages ago. I did not think much of it then. That is, until my child requested for it again. Isn’t it is true that potatoes are so versatile and can work with any flavours, seasonings and is an all time favourite with kids?
Yummilicious Baby Potatoes
I am particularly fond of this recipe since the flavours taste very fresh if you follow this method of preparation. Of course, I have just made it up the way my family likes it. You could tweak, add, change ingredients to suit your favourite flavours too. After all, what is a dish without improvisations? Useful for last minute lunch prep or when guests land up at mealtimes and you need to rustle up more food. I have used baby potatoes because I had them and because they look cute. SmileOf course, normal potatoes boiled and cubed are fine too. Take it forward anyway you like. This could even be a salad with boiled potatoes, pomegranate, some diced tomatoes and use the pudina as a dressing. The results are sure going to be delicious.
What’s good about potatoes?
  • It is popular belief that potatoes are full of starch and fat and offer little else. Potatoes have complex carbohydrates, which are a good source of carbs as opposed to refined flours and refined sugars.
  • It may also be surprising to know potatoes are a good source of several minerals like Magnesium, Potassium, Zinc, Copper.
  • Potatoes are also fair sources of Iron, Vitamin B complex and Vitamin C. Despite losses during cooking potatoes can deliver 2- 5 % of daily requirement of Vitamin B and C.
  • Potatoes are fatty? No way – they are a zero cholesterol food! The total fat in 100 gm. of potatoes is only 0.1 g and that is Omega 3 and Omega 6 fatty acids.
  • While the skin does not have any nutrients, it is the layer of potato just below the skin that has them. The best way to harness all these great vitamins and minerals is to cook/ boil them with skin on. This locks the nutrients in. When we peel potatoes after cooking, instead of before, we save a lot of the nutrients.
  • A lot of vitamins and minerals ‘leach into’ the cooking water. So it is a good practise to cook/boil in just enough water (instead of excess water) to optimise the maximum value of any vegetable, especially so in this recipe.
  • Adding a good bunch of fresh herbs like pudina (mint) and coriander to this recipe enhances it’s iron and fibre content.
I guess we need no more incentive to cook a lovely batch of minty potatoes. So here goes -
You need
  1. Baby potatoes – 500 gms
  2. Onion – 1 small, diced Fresh pudina leaves
  3. Mint leaves (Pudina leaves) – packed, 1 cup
  4. Coriander leaves – remove roots, clean, chop and measure 1/4 cup (optional)
  5. Garlic – 1 medium clove
  6. Juice of half a lemon
  7. Any vegetable oil – 2 tsp
  8. Saunf (fennel seeds) – 1/2 tsp
  9. Jeera – !/2 tsp
  10. Salt – 3/4 tsp
  11. Sugar – a pinch
To Assemble
  1. Immerse the baby potatoes in a water bath for half an hour if you have time. Else, leave in for 5 minutes and clean the skin well. You can boil the potatoes in enough water for 20 minutes or just pressure cook it till 1 whistle.
  2. Leave the boiled potatoes on the chopping board to cool naturally. Peel when sufficiently cool to handle.
    (Why not dunk in cold water? – Because that lets more minerals and vitamins dissolve into the ‘cooling water’ too.)
  3. Make a coarse paste of the following ingredients – half onion, pudina leaves, coriander leaves (if using), juice of half a lemon, sugar and the garlic clove. I used the ‘pulse’ button in my mixer to get the coarse texture. Coarse blend paste
  4. To a pan set on high heat, add the oil, sizzle saunf and jeera. Tip in the other half diced onion, fry until pink.
  5. Add the potatoes, salt and toss well. If you wish to get a nice ‘roasted feel’, let them simmer, scraping and tossing occasionally for 10 – 15 minutes. Salt the frying potatoes
  6. When the potatoes are done, add the coarse ground paste as a final step, toss the pan well to let the paste coat all the potatoes. Switch off flame immediately. Pudina paste - final step
  7. Cover and let flavours rest for 10 minutes. Serve warm with steamed rice and sambar or with hot phulkas.Minty Garlicky Potatoes
Notes
  • Add the crushed garlic to the hot oil instead of adding it to pudina paste if you detest the flavour of raw garlic.
  • Toss boiled potato with cherry tomatoes, (or regular tomato diced) and cucumber with the coarse ground pudina paste, chill and serve as salad.
Ready to dig in..

Mar 5, 2013

Sprouts In Palak Gravy

Reposting the recipe as entry to Only Cooking with Legumes event at Nalini’s Kitchen. A great event started by Pari Vashisht at her blog Foodelicious

March is the season of winter in some places, spring in some parts of the world, and summer in several parts too! One season is common to all in India – March is the season of exam fever all over the country! Rising temperatures, portions to complete, revise, projects to submit, cramming before exams, and raging hormones no less, all add to the Indian teenager’s agony. Standing at an important crossroad of life, today’s teenager and the family have a lot of stress to face through these weeks.
At such stressful times, it goes without saying that a healthy body and healthy mind are very crucial to crack the tests and come through happily. Parents are eager to know what can help in improving their children’s health and will do all it takes to better their child’s chances at success. I have had several parents ask me about ideal diet for children during study holidays and examination - time. An ideal diet at these times should include plenty of fibre, vitamins and minerals and less of refined starches. Greasy, spicy foods are best avoided too. Fruits, fresh squeezed citrus fruit juice without too much sugar, other fluids like tender coconut water do wonders to keep the body and mind stable and calm. It also helps to spend some time in playing  a favourite game and / or doing breathing exercises like ‘Pranayama’ (after learning from a qualified teacher).
Let us begin with good food. Food that is nourishing, sustaining, and tasty too! Food that energises without being heavy, food that delivers maximum effect with minimum effort. What can fit this bill better than sprouts?
I am quite fond of sprouts for their power packed nutrient content. Sprouts are an invaluable source of protein in a vegetarian’s diet. Besides the protein punch, sprouts are also chockfull of Vitamins B (better digestion, stronger nerves), Vitamin C ( better immunity, healthier gums). Also present are Minerals like Zinc, Copper, Iron – These are needed for a growing teen for stronger muscles, more blood cells and hence more oxygen to body and brain! Sprouts are low on glycemic index too. They are the perfect food for holistic health – of mind and body.
While it is true that raw sprouts give all the benefits of vitamins, fibre, minerals, yet it is not an easy task to coax children to chew on them frequently.If you can get your teen to chew on a tbsp of raw mung bean sprouts daily, it would be wonderful. However. do not despair if she does not agree. I often choose the middle path – steam the sprouts, or microwave them for a brief while to take the raw offensive flavour out. Steaming sprouts also is good to help elderly or people with compromised immunity to digest it easily.
Eating cooked sprouts is better than not eating them at all. Eating cooked sprouts in a smooth flavourful palak gravy is even better. What say?
Parathas made with multi grain dough flavoured with ajwain paired well with this sprouts in palak gravy. It was school lunch fare and I am so glad to say that other kids at school liked it too. This is an ideal meal for children working hard at their academics at this time of the year.
Bowl of Sprouts in Palak
You need
  1. Mixed sprouts or mung bean sprouts – heaped, 1 cup
  2. Palak leaves – wash in several changes of water, drain, chop and measure – 3 heaped cups
  3. Onion – chopped, 1/4 cup
  4. Garlic – 1 clove, crushed
  5. Tomato – chopped, 1/2 cup
  6. Green chilli – 2
  7. Root ginger – chopped – 1 tbsp
  8. Salt – 1 heaped tsp
  9. Garam masala powder – 1 tsp
  10. Oil – 1 tbsp + 1/2 tsp
  11. Jeera – 1/2 tsp
To Assemble
  1. Pressure cook mixed sprouts or mung bean sprouts for as much time as needed to be just cooked. The cooking time will depend on the bean. Set aside, for pressure to release. Alternately, if you are using only mung bean sprouts, just steaming them for 3-4 minutes would be good too.
  2. Heat 1 tbsp oil in a non stick pan or kadhai.
  3. Add in this order, each at a 30 second interval   – garlic, ginger, green chilli, onion and tomato. Add salt, let the tomatoes mush up. Fry ingredients in oil
  4. Add chopped palak leaves. Toss the palak well in the pan, let it wilt and cook for about 2 minutes. Add chopped palak
  5. Cool and grind to a smooth paste.
  6. To the same pan, add 1/2 tsp oil, Sizzle jeera in it.
  7. Tip in the palak puree and the cooked sprouts, add garam masala. Check for salt, add more if needed. Mix palak puree and cooked sprouts
  8. Simmer for 3-4 minutes, switch off cover and let flavours mingle for 10 minutes or more. DSC_0042
  9. Serve warm with a lime wedge if you like, as accompaniment to hot phulkas or steamed rice. Yum. SmilePower Packed Meal

Jan 19, 2013

Cherry tomato Lettuce Salad


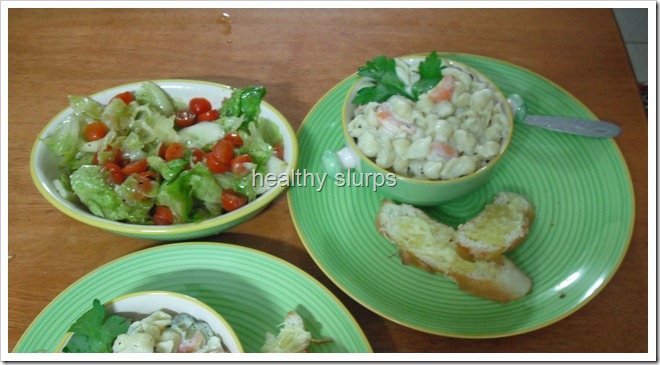
Well, this salad does not even need a recipe. It is such a simple combination of veggies and dressing. In fact, I am sure several of you will have tried out some version of this salad. I made this salad to accompany the Low Fat Creamy Pasta. The salad, pasta and fragrant garlic bread comprised dinner last weekend. Quite a combination of textures, colours, flavours and tastes. It was a very satisfying meal.
Taking some time to plan, shop and create good meals is so fulfilling. The happiness I feel when I sit down with loving family members eager to sample the latest creations and finding their faces light up with joy and hearing those happy exclamations – these make all the effort of cooking worthwhile. Well let me also admit that I go through my good share of disasters, and food that no one wants to touch. But thankfully, these happen lesser than the former.
As I said, this salad is a simple combination of dressing, veggies and tossing them together.
You need
For the veggies -
  1. Iceberg lettuce – 1 small head
  2. Cherry tomatoes – 22-25 numbers
  3. Cucumber – 1-2 medium (really, your choice)
  4. Ice cold water – enough to dunk the lettuce in (approx. 4 cups)
For the dressing -
  1. Balsamic vinegar – 1 tbsp
  2. Extra virgin Olive Oil – 4 tbsp
  3. Crushed black pepper – 1-2 tsp
  4. Salt – 2 pinches
  5. Sugar – 1 pinch (optional)
To assemble
  1. Wash the lettuce head, tear leaves apart by hand into bite size pieces and keep immersed in ice cold water until needed.
  2. Dunk the cherry tomatoes in a bowl of water for 5 minutes, drain, pat dry and cut into halves. Place in a large mixing bowl.
  3. Rinse the cucumber thoroughly with the peel on . You can retain the peel on the cucumber or partly peel them too. If there are too many seeds along the middle of the cucumber, you may want to discard them. If so, cut into half lengthwise, remove the ‘seedy’ parts and slice into half circles. Else, if the seeds are tender, you can slice the cucumber into thin disks. Place along with the tomatoes in the mixing bowl.Veggies - washed, scrubbed, waiting for their dress!
  4. Pour the balsamic vinegar into a bowl. Pour the Olive oil in a thin drizzle whisking with a fork all the while. Continue to whisk well until all the vinegar and oil have blended into an almost homogenous mixture. Add the crushed pepper and salt now, whisk them in too. Dressing is ready.
  5. Now is the time to drain the lettuce in a colander – drain it well, shake up the colander and coax the last drops of water out! Add the lettuce to the mixing bowl, pour the salad dressing on top and mix well, toss, shake – do whatever except spilling the contents!
  6. Chill the salad for at least half an hour before serving so that it is at the right temperature and the flavours settle well.
Some salad everyday keeps tummy trouble away
Notes
  • You can add pitted black olives, walnuts, coloured peppers (capsicum), rocket leaves or any preferred vegetables to the salad. Use dressing in proportion to the vegetables used.
  • Using fresh tender vegetables, and chilling well before serving help to enhance the taste of the salad.

Apr 1, 2011

Power Pesarattu

Pesarattu is a much loved dish of Andhra or Telugu region of India. I have adapted the ingredients to suit my family’s taste. The use of sprouts and herbs in the batter create a unique power packed combination, easy and amazingly tasty.The herbs helped in masking a slight bitter flavour that sprouts develop. This dish works just right for breakfast in our home. I hope you find it great too! The measures used here serve 5-6 people.
Power Pesarattu
You need   
  1. Mung bean sprouts – 4 cups, heaped
  2. Raw rice – 1/2 cup, rinsed and soaked for 1/2 hour
  3. Ginger – 1 tbsp, chopped fine
  4. Green chillies – 2
  5. Coriander leaves – 1 cup, chopped
  6. Mint leaves – 1 cup, loosely packed
  7. Cumin seeds – 1 tsp
  8. Garlic – 1 pod (optional)
  9. Salt – 1 tbsp ( or more)
  10. Fresh water – 1 cup
  11. Vegetable oil / sesame oil  - 4-5 tbsp, for drizzling over dosas
mint, cumin, ginger, chillisprouts, rice, and coriander


To assemble
  1. Grind all ingredients mentioned under ‘You need’ except oil, to a real smooth batter. I used a mixer grinder. Using garlic gives a ‘kick’ to the final taste, but omitting it does not take away the pleasure either.
  2. Use water sparingly for grinding. The batter should be thinner than usual dosa batter but not too runny.smooth, frothy batter
  3. Hereon, writing the recipe is fairly simple, but creating a good dosa / pesarattu does need some practice!
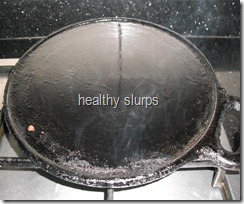
  4. Heat up a dosa griddle real hot. You can see the griddle all smoked up in this picture. Season the griddle with a tsp of oil.
  5. smokin hot
  6. Dribble a ladleful of batter around the griddle, fill up the centre with more batter, and spread very gently to form a circle. Drizzle 1/2 tsp of oil around the dosa, let it sizzle.Mummy look, a green dosa!
  7. Allow to cook through and brown around the sides, ease out the dosa carefully with a sharp spatula and flip over. flip over
  8. Cook this side over medium heat, ease out and remove to a plate when done.
  9. Check the dosa for salt and flavours before proceeding with the rest of the batter. To  salvage a runny batter or too much salt, you could add up to a couple of tbsp of rice flour to the batter. Rice flour will also help the Pesarattu become more ‘flippable’ and less clingy to the dosa griddle.
I did ruin a couple of dosas before I got it right. It helped to have the griddle smoking hot, waiting for the first side to really brown before attempting to loosen it and thereon, cooking over medium heat.
Pesarattu is traditionally served with ginger chutney. I usually serve with a peanut chutney which is a great favourite with my kids.
power pesarattu
Notes
  • Soak, drain, rinse whole mung bean and tie up in a muslin cloth, leave in a moist dark place for 10-12 hours, by which time the seeds would have sprouted and you have super healthy sprouts ready.
  • Mung bean sprouts have been used in Ayurvedic approach and Chinese cuisine for several centuries.
  • Consuming raw sprouts is not advised for toddlers, pregnant women, and in any gastrointestinal disturbance. The ideal way to consume for these people would be to use home  grown sprouts, rinse well, steam or lightly stir fry them.
Nutri notes
  • The sprouting process increases the beans’ enzyme content which means, complex carbs are converted to simpler starches, proteins to amino acids and fats to simpler lipids. As a result sprouts are more easily digested.
  • Sprouting increases sodium and Vitamin C content, both of which add to protein digestibility in the body.
  • Sprouts are 'live' food. They contain active RNA, DNA, in addition to being a veritable enzymes and antioxidants storehouse. They help cell regeneration and can rightly be called ‘fountain of youth’.
  • Dry beans do not have any vitamins or minerals, but we get almost magical amounts of Vitamins A, B, C, Calcium, Sodium, Potassium, Iron, Phosphorous, Manganese, from sprouts. Thus they are very handy in winters when fresh fruits or vegetables are in short supply. Sprouts can be eaten the whole year through too, for the whole host of amazing benefits.
  • Sprouts decrease the oligosacharides in the beans – this means, beans lose their gas producing quality.
  • Sprouting also increases fibre and water content of the beans, thus helping in avoiding or easing constipation.
  • For benefits of pudina and coriander, please do read up my earlier posts.

Feb 12, 2011

Tomato Herb Chutney


Luscious red tomatoes paired with fragrant coriander, the result is a flavourful chutney. My younger one wanted tomato chutney and the elder one wanted a green chutney; I was running short of time and threw both together – result was something all of us liked !
tomato herb chutney
You need
  1. Ripe red tomatoes ( any variety) - 2 big or 3 medium
  2. Green chillies – 3 (can add or reduce according to taste and heat)
  3. Coriander leaves – chopped roughly, 1 cup
  4. Fresh Coconut – grated,  1/4 cup
  5. Salt – 1/2 tsp
  6. Vegetable oil – 1/4 tsp
For seasoning
  1. Vegetable oil – 1/4 tsp
  2. Mustard seeds – 1/4 tsp
  3. Urad dal – 1/4 tsp
  4. Hing powder – a tiny pinch
  5. Curry leaves – 4-5 torn up
quartered tomatoes
 To assemble
  1. Wash and pat dry tomatoes. Quarter them.
  2. Wash green chillies and chop up.
  3. Remove roots of coriander, rinse thoroughly, drain and chop roughly.
  4. Grate coconut, measure out 1/4 cup.
  5. Heat up oil in a small frying pan, add green chillies, step aside.
  6. Tip in chopped tomatoes, toss to coat oil evenly.fried ingredients
  7. Add the salt now, and fry for  a minute more.
  8. When the tomatoes are squishy, (in a minute or two) add the chopped coriander and switch off flame.
  9. Let it cool, add grated coconut and grind to get a fragrant chutney.
  10. Heat oil, add ingredients for seasoning in order and pour over chutney.
  11. Serve with flair as accompaniment for idli, dosa, paratha, steamed rice, sandwiches, well, just about anything!
 tomato herb chutney
Nutri notes
  • Coriander (both leaves and seed) help regulate blood sugar levels by stimulating insulin production.
  • Volatile oils found in the leaves seem to have antimicrobial properties.
  • Coriander reduces lipid peroxides in cell membranes, thus inhibiting free radical formation.
  • In a study conducted on rats fed with high fat diet, adding coriander to the diet increased the HDL and lowered levels of LDL cholesterol.
  • Besides these benefits, coriander is also good source of dietary fibre, magnesium, manganese and fair source of iron.
  • A compound called dodecenal isolated from coriander, has been found to be more effective than antibiotics in fighting salmonella infection.
  • A drink of coriander seeds boiled with water  (in the proportion of 2 tbsp seeds per litre of water) cures urinary tract infection rapidly.
  • Apart from these amazing uses of coriander, it is also a flavanoid and phytonutrient dense food. I guess all this information will prompt us to use more of coriander in our daily foods.
  • Benefits of tomatoes have been discussed earlier, hence I am not repeating it here.
  • Addition of coconut, though minimal, will increase the fat content of the chutney. One alternative is to use chutney dal in place of coconut. The taste does differ, but provides a healthier alternative.