Showing posts with label coconut. Show all posts

Feb 21, 2017

Mirch ka Salan with Mishti Pulao

Mirch ka Salan is a famous Hyderabadi dish. The dish is said to have originated in the kitchens of the Nizams. I would believe that, as the dish uses tamarind as souring agent, a practise mostly used in South India. Also peanuts (local produce) and sesame are used instead of other nuts and dry fruits(more prevalent in Awadhi cuisine). Whatever be its origin, Mirch ka Salan always elevates the meal from a common to an exotic one. It finds a definite place in wedding feasts and other important festive meals.

At our home, Mirch ka Salan is a holiday favourite. The star of a luxurious, happy meal. The main dish when important guests come over. Almost always, Mirch ka Salan is paired with the most fragrant Mishti Pulao, a sweet, fragrant Bengali dish, also a festive treat. One Hyderbadi, one Bengali..but the pairing is made in heaven. A happy marriage which we relish down to the last morsel. The tango of the sweet and aromatic Mishti Pulao with the tart, hot, spicy Salan has to be experienced to be understood.

I was introduced to this very fragrant Mishti Pulao by my dear friend Deepasri Deb. I have followed her recipe to the T. It never fails to make the most perfect, heavenly, fit-for-Gods Mishti Pulao. Check out her treasure trove of recipes at www.hamareerasoi.com 

Here are the recipes for both the dishes.

Mirchi ka Salan

MIRCH KA SALAN

I have adapted Sanjeev Kapoor’s recipe for this. Changes to his recipe include chopping of the fat Bhavnagari Chilli into inch long batons, deseeding them, and not using any extra chillies in the recipe. This helps to scale down the heat in the Mirch ka Salan. I have also made a few changes in the preparation method. Here is how I made Mirchi ka Salan.

ALLERGY INFORMATION

  • Contains peanuts. NOT SUITABLE for people with nut allergy.
  • Does NOT contain gluten, lactose, corn, soya, egg. Suitable for people with gluten intolerance or lactose intolerance.

Preparation Time – 15-20 minutes, Cooking Time – 30 minutes, Serves – 4 as main course or 6 as side dish if used with other accompaniments in the meal.

YOU NEED

COOKWARE – Sharp knife, cutting board, 3-4 litre wok, long flat ladle, small bowl, Mixer-grinder

INGREDIENTS -

  1. 250 gms or 15-18 fat Bhavnagari chillies (bajji mirchi)
  2. A small lemon sized ball of Tamarind
  3. 1/4 heaped cup raw peanuts with skin
  4. 1/4 level cup white sesame seeds
  5. 1/4 level cup fresh grated coconut
  6. 1 tablespoon coriander seeds
  7. 1/2 teaspoon cumin seeds
  8. 3-4 cloves garlic
  9. A thumb size knob of fresh ginger root
  10. 1 medium red onion, finely chopped (1/4 cup finely chopped red onion)
  11. 1/2 teaspoon black mustard seeds
  12. a few curry leaves
  13. 2 tablespoons cooking oil
  14. a pinch turmeric powder (add upto 1 teaspoon if you want a yellow coloured Salan)
  15. 1 heaped teaspoon salt

METHOD

  1. Wash and wipe down the fat chillies. Remove the stem, cut into inch long thick batons, and scrape out the seeds from within.
  2. Soak tamarind in half cup warm water. Squeeze out tamarind juice from it. Repeat with some more warm water. Set tamarind extract aside.
  3. Heat the wok over medium flame. Dry roast the peanuts first. As they begin to brown, tip in sesame. Roast until the sesame begins to crackle. Add the coriander and cumin seeds and roast until aromatic. Do not burn. Keep stirring. Remove to mixer grinder jar.
  4. Return wok to heat, add a drizzle of oil. Fry the ginger and garlic for a minute. Remove this to mixer jar too.
  5. Add the fresh grated coconut to the mixer jar, add some water and grind to smooth paste. Set aside.
  6. Add the rest of the oil to the wok, temper with mustard seeds and curry leaves. When this crackles, add the finely chopped onions and keep stirring over medium flame. When onions turn pink and shiny, add the chopped chilli batons. Saute over high heat for 5 minutes. Keep stirring to avoid charring.
  7. Pour tamarind juice into the wok, add salt, turmeric, cover and cook for 5-7 minutes over medium flame, until the chilli just softens.
  8. Pour in the ground mixture, add half a cup of water, and simmer covered for another 15 minutes.
  9. Switch off flame. Rest for half an hour for flavours to develop. Serve warm or hot with fragrant, sweet, Mishti Pulao.
Royal Feast - Mirch ka Salan with Mishti Pulao

MISHTI PULAO

ALLERGY INFORMATION

  • Contains Cashew nut. People with nut allergy can avoid adding cashew nuts to the recipe.
  • Does NOT contain gluten, corn, soya, egg, or lactose. Suitable for people with gluten or lactose intolerance.

Preparation time – 15 minutes, Cooking Time – 30-35 minutes, Serves – 4 as main course

YOU NEED-

COOKWARE – 3-4 litre wok with fitting lid, ladle, colander

INGREDIENTS -

  1. 1 heaped cup Gobindobhog rice, or Jeera rice, or Basmati rice
  2. 1/4 cup fresh/frozen green peas
  3. 1 teaspoon turmeric powder
  4. 2 tablespoon ghee
  5. 1/2 teaspoon salt
  6. a fistful each of broken cashews and raisins
  7. 1’' piece of cinnamon bark broken into two
  8. 2 bay leaves
  9. 3-4 cloves
  10. 2 green cardamom
  11. 2 black cardamom
  12. 1 mace flower
  13. 5-6 black peppercorns
  14. 3 tablespoon sugar
  15. 2 cups drinking water

METHOD -

  1. Rinse the rice well under running water. Set to drain in colander. Rub in the turmeric powder into the rice and spread the rice in the colander to drain well.
  2. Heat ghee in the wok, add cashews and raisins. Fry over medium flame until golden brown and raisins plump up.
  3. Add spices – cinnamon, bay leaves, mace, peppercorns, cloves, green and black cardamom.
  4. When the spices release aroma (about a minute or two over medium flame) add the rice and sugar. Stir well continuously over medium heat. Add the green peas midway and continue stirring until rice gets a sheen from the ghee. (About 7-10minutes)
  5. Add salt, 2 cups water. Increase flame to highest and bring water to boil.
  6. After water has come to a boil, set wok on your smallest burner, turn down heat to minimum, cover and cook for 10-12 minutes. Switch off flame.
  7. Let it rest for 5-10 minutes. Then, open wok, fluff up rice.
  8. Serve along with tangy, spicy Mirch ka Salan.
Fit for Gods - Mishti Pulao

Jan 17, 2014

Peanut Chutney

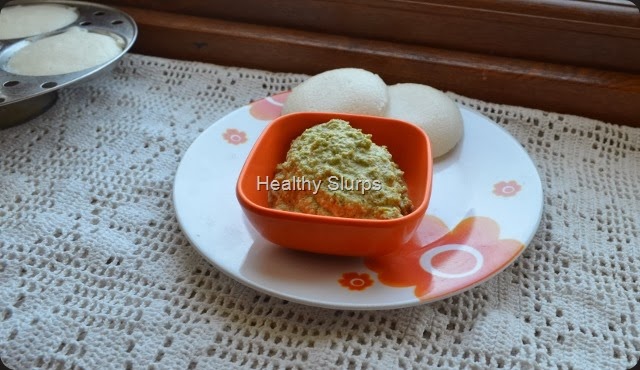
Peanut chutney and idli - power breakfast

My daughter is a total peanut fan.  She eats peanuts roasted, fried, boiled, in salads, asks for them in lemon rice, or if I am not looking, she gobbles them even raw! A jar of peanuts are never safe around her. To the extent that she is called the ‘ Li’l monkey’ of the house. She pouts and sulks when called so, and that tickles her big brother. So he runs her insane by chanting ‘monkey, monkey monkey’. Her dad calls her his fav  cute Li’l monkey – that did not seem to appease her either.
And then one day, I made this peanut chutney. Obviously, you cannot see the peanuts in them cos they are ground! Guess what? Her dad loved the chutney so much, he asked me, “What chutney is this? It pairs so well with idli” . My daughter was delighted. She ran to her dad, and told him “You are my favourite big monkey now, cos you like peanuts too! This is peanut chutney!” All of us had a hearty laugh. And peanut chutney came to stay forever at our home.
There are many versions of peanut chutney made, here is my unique combination of ingredients. I often add some coriander leaves, or mint leaves, a clove of garlic or even curry leaves to the mixture and then blend it up. You could try those variations too.
You Need
  1. Raw peanuts with skin – 1/2 cup
  2. Coconut, grated – 2 tbsp
  3. Onion – 1, medium sliced
  4. Green chilli – 4, cut in halves
  5. Tamarind pulp – 1 tsp
  6. Salt – 1/2 tsp
  7. Vegetable Oil – 1/2 tsp
  8. Drinking water – 1/4 to 1/2 cup for grinding
For Seasoning -
  1. Vegetable Oil – 1/4 tsp
  2. Mustard seeds – 1/4 tsp
  3. Urad dal – 1/4 tsp
  4. Curry Leaves – 4-5
Fry ingredients for chutney
To Assemble
  1. Take oil in a fry pan / wok / kadai, Heat it.
  2. Add whole peanuts to it, fry for 2 –3 minutes.
  3. Next, tip in green chilli cut in halves, followed by onion slices, last comes the tamarind.
  4. Fry well over medium to high flame, for 2-3 minutes more. Do not burn the ingredients. Stop frying when the peanuts look golden brown and the onions turn translucent.
  5. Add salt and grated coconut to this mixture, switch off flame ( cool it if you have time) and blend in a mixie to a coarse-ish smooth paste. You may need to add some water, say 1/4 cup while grinding to get a thinner chutney.
  6. Heat ingredients for seasoning, when the dal gets a warm golden hue, pour on top of chutney.
  7. Enjoy with idli, dosa, use as sandwich spread, or even with hot steamed rice.
Tasty tangy peanut chutney
Please do read the allergy information before trying out this recipe, especially if you have never eaten peanuts in any form before or if you have noticed any other food allergy symptoms too.
IMPORTANT ALLERGY INFORMATION
Some people develop an allergy to several nuts including peanuts. Symptoms may range from itching around mouth or throat, skin reactions, digestive disturbances, or more serious symptoms like breathing trouble too. In such situations, please stay away from peanuts in all forms – whether raw, boiled, roasted or fried. However, refined peanut oil seems to be tolerated even by people with peanut allergy. Still, do consult with your doctor before attempting to include peanuts in your diet.
PEANUT NUTRITION INFORMATION
Peanuts are a high energy food, most of the energy coming from fats and protein. As we know, all fat is not bad fat, peanuts are cholesterol free, have omega 3 and Omega 6 fatty acids.
To give a better picture, the total fats in 100 gms of raw peanuts is 49 gms, of which monounsaturated fats are 24 gms and polyunsaturated fats are 15 gms, while the saturated fats in peanuts are only 6 gms. They also have a high content of Omega 6 fatty acids – 15 gms / 100 gms.This makes it a valuable ‘good fat source’ in vegetarian diets.
Peanuts are also known to prevent cancer, help in weight control in moderate amounts and also have very valuable anti oxidants which have the heart health benefits and also prevent stroke. Regular consumption of peanuts also helps in preventing Alzheimer’s.
Peanuts are an inexpensive, ready to eat protein source, go ahead and enjoy it’s benefits.
Peanut chutney up close!

Oct 12, 2010

Pudina chutney

I was looking for a zesty pick me up to brighten up a usual rice-dal routine.As I rummaged though the fridge,this bright dark green bunch of pudina invited me with it's lovely aroma-this was exactly what could fit my need!I could not wait to convert it into this chutney below; once you have separated leaves from stalks, go ahead and make this quick, delicious pick me up!

You need
  1. Pudina leaves-1 1/2 cups packed
  2. Green chillies-3-4 big
  3. Root ginger-2 tsp chopped
  4. Garlic-7-8 cloves,peeled
  5. Fresh coconut-grated-1/4cup or chopped-1/2 cup
  6. Juice of 1 lemon (can add more if you feel the need for a super tangy taste)
  7. Salt-1/4 tsp
  8. Vegetable oil-1/4 tsp
To assemble
  1. Remove stalks,clean and wash pudina leaves under several changes of water,drain and keep aside.
  2. Take a flat bottomed pan,heat oil in it.
  3. Add chopped green chillies, ginger, garlic to the pan, swirl the pan and let sizzle.
  4. After a minute you can add the washed pudina leaves, toss in the oil for a quick coating.Do not fry for more than a minute-you will lose the flavor and colour if you do.
  5. Take a fresh coconut halved, and grate or chop out the white flesh (use quantity, as given in ingredient list)
  6. After the fried ingredients have cooled, place these and the coconut in a mixer grinder, add the salt and grind to a smooth paste.Use the lemon juice instead of water,midway through the grinding.You can add another tsp or two of water after adding the juice,(if required).
  7. Your tangy bursting-with -good-health-pudina- chutney is ready!
Notes
  • This chutney can be stored in the fridge for a couple of days,and upto 10 days in a freezer box in the freezer;thaw only as much as you would use up each time.
  • The chutney works great to perk up a meal,as a sandwich spread,or a tangy spread for rotis-fill up with salad veggies,roll and eat!
  • You can use fresh raw mango in season instead of lemon juice-it adds body to the chutney too.
  • Can avoid ginger and garlic and use only green chillies for a slight change in flavour.
  • Can make the same chutney using fresh coriander (cilantro) leaves too,use 1 1/2 cup of chopped leaves to substitute for every cup of pudina leaves.
  • Take care-Do not  fry the leaves for more than a minute.
Now for the nutri notes
  • Ginger, garlic and pudina are known to be excellent digestive aids, they relieve gas, distension, and improve digestion.
  • At a good 15mg of iron per100g of pudina leaves, mint packs in good punch!
  • Combining lemon juice or raw mango in the chutney makes Vitamin C readily available.Vitamin C improves iron absorption in the body.
  • Pudina also adds to the fibre content of the meal.
  • With virtually no sodium, it is a good choice for both hypertensive (blood pressure) and some renal patients, who need to control sodium intake.Of course, adding salt to the dish increases the sodium content.You can use low sodium salt insted of regular table salt in case of sodium restriction.
Here follows the visuals


    frying ingredients
    toss pudina leaves in oil

     fresh coconut
    pudina chutney