Showing posts with label healthy. Show all posts

Oct 21, 2014

Ragi Chocolate Laddu

Deepawali, the festival of lights, eagerly anticipated and celebrated throughout India, is here. There is so much excitement, happiness, festivities in the air. It is also fun to run around shopping for new clothes, gifts, fire crackers.

As with most festivals, the stories behind celebrating this festival too are several. Sri Krishna killed Narakasura on this Chaturdashi day. Lord Rama returned to Ayodhya after His exile after killing Ravana and freeing Sita from his evil clutch.

Whatever be the legend, the common theme is the victory of good over evil. The assurance from Divinity that evil, cruelty, jealousy and hatred do not last long. That truth, goodness and virtuous living always triumphs. A very heartening reminder in a world where the opposite seems to be true. An assurance for those who believe. A great reason to celebrate. To meet up with family, close or extended. To renew friendships, to form new ones, to look forward with hope.

So here is wishing you happiness, good health, joy in your lives!

In continuation with my efforts at finding and documenting healthy recipes, I am very happy to share with you this new attempt of mine. The nutty aroma of roasted ragi combined with seductive cocoa, taken a notch festive with fragrant ghee all come together delightfully in this healthy dessert.

Rich, fragrant Ragi Laddus

Millets are quite the rage in the diet of every health conscious person and rightly so. They are packed with several nutrients, richer in calcium, fibre and other vitamins than grains like rice or wheat. Ragi, or Finger Millet forms the staple grain of a large part of rural India. Here is my shot at making a festive dish with this humble grain. A successful undertaking, even if I say so myself. This Diwali, when you dig into this dark, mysterious confection, you can feel a tad less guilty at indulging knowing that there is this super healthy millet at its base.

Dark, handsome laddus ready!

ALLERGY INFORMATION

  • Does NOT contain gluten, lactose, egg, soya, peanuts, any nuts.
  • Suitable for people with gluten sensitivity, lactose intolerance, nut allergy.

EDITED – A reader expressed concern about using butter or ghee in this recipe for lactose intolerance. Usually ghee is digested even by people with lactose intolerance, since it is ‘fully clarified butter’, but if you are intolerant to ghee as well, do use margarine warmed in the same proportions. I have not used margarine myself, and am only suggesting it as an alternative.

Preparation time – 30 minutes, Cooking time – 5 minutes, Makes – 12 laddus

YOU NEED

Cookware – Thick bottomed fry pan, Mixer grinder, Metal spatula, Small Saucepan.

Ingredients

  1. 1 heaped cup Ragi flour (I used store bought)
  2. 1 scant cup powdered sugar
  3. 1/4 cup cocoa powder (I used Hersheys)
  4. 1/2 tsp Vanilla essence
  5. 1/4 cup ghee (Can use melted butter too)

Method

  1. Set a thick bottomed fry pan/ skillet on fire. Dry roast the ragi flour on medium heat stirring briskly all the time. This step removes the raw flavour of the flour and gives it a good nutty tone. 2-3 minutes later, you should sense a change in aroma. The flour is then ready.
  2. Switch off flame, add in cocoa powder, mix well with ladle. Also add the powdered sugar,  and vanilla essence, and mix in thoroughly. You could use a wire whisk to mix well too.
  3. Heat up the ghee over a low flame in a different small sauce pan. If using butter, heat a similar quantity of butter for such time until you find the butter slowly changing hue to a pale gold.
  4. Drizzle this hot ghee over the ragi-sugar mixture. Mix again with ladle, and when it is of bearable heat, grab a fistful and compress using fingers to a round ball shape. The laddu can be set aside to rest when it keeps its shape. It will harden on cooling. Finish off making laddus with the rest of the mixture. Halfway through, if you find the mixture cooling and the laddu does not shape well, then warm the flour mixture gently again to help shaping the laddus.
  5. Your delicious, laddu redolent of cocoa with a hint of vanilla is ready!

DSC_3959Happy Deepawali

          HAPPY DEEPAWALI EVERYBODY. STAY HEALTHY, BE HAPPY!

Sep 20, 2014

Stir fried Bitter Gourd–Nothing Bitter About It

Is it really possible? Can bitter gourd turn sweet? Bitter gourd cannot become sweet, but with this recipe, you will convert the haters into lovers. If you are a lover of the vegetable already, then this recipe is sure to seal your love affair with it for life.

Stir Fried Bitter Gourd

The first step to a successful stir fry is selecting the best produce. If you are a hater, but are going to try this vegetable for the first time, then choose bitter gourd with light green skin. Alternatively, you can select the tiny bitter gourd also called ‘kantola’.

So what is special about this recipe? It can be put together with minimum ingredients. Tastes like a star dish on the table. You can earn brownie points for feeding your family as healthy a vegetable as bitter gourd. Would you like to try it out too? Read on to find how we make it.

Allergy Information

  • Does not contain eggs, soya, dairy, corn, peanuts, any nut.
  • Suitable for gluten intolerant and lactose intolerant people.
  • Suitable for people with nut allergy also.

Preparation time – 20 minutes, Cooking time – 20 minutes, Serves –4-5.

You Need

Cookware – Knife, Cutting board, Deep fry Pan with tight fitting lid

Ingredients

  1. 3/4 cup finely chopped red onions
  2. 1 cup finely chopped vine tomatoes
  3. 1 cup finely chopped bitter gourd
  4. 1/2  tsp turmeric powder
  5. 1 heaped tsp salt
  6. 2 tbsp jaggery powder (optional)
  7. 1 heaped tsp of the most fragrant sambar powder you can find
  8. 2 tsp oil
  9. 1/2 tsp mustard seeds
  10. 1 tsp Urad dal
  11. few curry leaves

Method

  1. Chop all vegetables.
  2. Heat a fry pan, pour oil in. Add mustard seeds, Urad Dal, and curry leaves in that order.
  3. When mustard seeds sizzle, add chopped onions, stir well over high flame. When the onions turn light brown, add tomatoes and fry till mushy.
  4. Crank up the heat, and toss in the bitter gourd, stir real quick over high flame. After 2 minutes of action on high heat, add turmeric powder, salt, jaggery powder (if using) and half of the sambar powder.
  5. Mix in the seasonings well, and cover with a tight lid. Lower the heat, and allow to simmer for 5-7 minutes.
  6. You can sprinkle a few teaspoons of water once, if the contents become too dry. Stir a couple of times in between the cook.
  7. The stir fry is done when it tastes soft but not mushy. Add the other half of the sambar powder and mix in well.
  8. You could finish it off with some chopped coriander leaves too.
  9. Do remember to scrape off the delicious burnt bits from the bottom of the pan, add them to your serving bowl. Those caramelised onions and tomatoes take the stir fry to blissful levels.
  10. Enjoy with a bowl of hot steamed rice or just by itself too.

Nothing bitter about it

Come pick me up and enjoy.

May 22, 2014

Keerai Masyial

 
Few dishes can beat the simplicity of Keerai Masiyal. However, as a child, this was not my favoured dish. I have pretended every ailment to escape eating this ‘ green paste’. Now I am better able to appreciate it’s subtlety of flavour, the health benefits, ease of preparation, and the brilliant hue of this humble dish. When the summer heat is making cooking a painful chore, I urge you to try this out. Can be put together in under 15 minutes, needs very few ingredients, and supremely healthy, what’s not to like?
Steaming Keerai Masiyal
I have used Palak in this dish, but Amaranth, Arai Keerai, Siru Keerai, can also be used. In fact, using different greens in rotation brings each one’s unique health benefits to the table.
  • Agathi Keerai has more than 12 times the Calcium found in Palak and more than 3 times that found in Methi leaves.
  • Radish Leaves, Siru Keerai, Arai Keerai, Manathakkali Keerai and Paruppu Keerai are all very rich in Iron. They have more than 3 times the Iron found in Agathi Keerai or Palak .
  • Amaranth and Agathi Keerai lead in Vitamin C while Palak, Mint and Amaranth lead in Folic Acid content.
  • Paruppu Keerai and Palak have a low Sodium and high Potassium combination which makes it ideal for people with high BP or kidney ailments or gout.
In a survey conducted by the National Nutrition Monitoring Bureau (NNMB), Indians were found to consume far lesser (average - 48gm/day) than the recommended 300 gm vegetables per day.Of this RDA of 300 gm, The National Institute of Nutrition, recommends at least 100 gm greens per person per day.
Here is the Food Pyramid picture as released by the National Institute of Nutrition, 2011. It helps to form a visual idea of what should be on our plate everyday!
 
Pic Courtesy - Dietary Guidelines for Indians, NIN
Finally to the recipe of the day -
You Need-
  1. Palak or any other greens – 4 packed cups of leaves.
  2. Salt – 1/2  tsp to 3/4 tsp ( use as needed)
For seasoning -
  1. Oil – 2 tsp
  2. Mustard seeds – 1/2 tsp
  3. Urad Dal – 2 tbsp
  4. Red Chilli – 2, broken into halves
  5. Grated fresh coconut – 1/2 tsp (optional)
To Assemble -
  1. Pick leaves and tender stems. Discard stems that are thick. Measure 4 packed cups.
  2. Wash well in a colander in several batches. Or fill water in the kitchen sink and submerge the greens in the sink tub. This is a great way to wash quickly and effectively.
  3. Drain well. Chop roughly. Any size and shape will do. It needs to be blended anyway.
  4. Place a large wok on heat, add the greens and let it cook in it’s own juices. If it looks like it is sticking to the bottom of the pan, add half a cup of water. stir through a couple of times so that the greens get cooked uniformly. After 5-7 minutes, the greens should be just cooked enough. Cool and grind to smooth paste with any water that may be left over in the pan.
  5. Return the puree to the wok, place wok over fire, rinse the blender jar with 1/4 cup water, add that too to the wok. Add salt, mix well, taste and add more as/if needed.
  6. To a small seasoning pan, add oil, place over heat, add mustard seeds, urad dal, red chillies. When you hear happy crackles, enjoy the sizzle and the aroma, pour it into the Masiyal before it chars! Smile If using grated coconut, add it to the seasoning pan last, stir around until the coconut turns a golden hue and pour over the Masiyal.
  7. Enjoy hot with steamed rice, sambar and a cucumber carrot salad with lemon dressing.  Vitamin C in the lemon juice helps in better iron absorption.
NOTES -
  • For local and botanical names of all the Greens mentioned in this post, please refer to Glossary of Ingredients Page.
  • To retain nutrients in greens cook in just enough water until just cooked. Do not discard the water, use it up in the recipe.
  • To retain the colour of greens, add half a tsp sugar while cooking, leave pan uncovered, cook quickly over high heat instead of low flame for a longer time.
  • Add a sliced onion and couple of crushed garlic cloves to the seasoning for a twist in flavour.
Enjoy Masiyal with Steamed Rice
 

Feb 21, 2014

White Radish and Tomato chutney


A chutney a day as accompaniment to breakfast or tiffin is so required in a South Indian home. Often it involves grinding of fresh coconut with some green chillies and perhaps some chutney dal added. I often hear my elderly clients telling me they cannot eat breakfast without chutney but their diet restrictions does not permit them to include as much coconut as they would wish to.

A vegetable based chutney such as this one is the answer to such dilemmas! This recipe does not require coconut or peanuts, has vegetables as it’s base and the best part is you would not miss the coconut at all.

So if you are just looking for a new way to make chutneys or need to replace coconut or peanut in your chutney, this could be just what you would like to try out. This recipe serves as accompaniment for 4 people. Halve to serve 2 or freeze for later use.

Delicious chutney, want some?

You need

  1. White radish – grate or slice thin and measure 1 level cup (about 2 medium size radish)
  2. Tomato – chopped, 1 cup ( about 3 small Roma tomatoes)
  3. Green chillies – 3-4 depending on heat preference
  4. Chana dal – 2 tbsp
  5. Vegetable Oil – 1 tbsp
  6. Salt – 1 tsp

For seasoning

  1. Vegetable Oil – 1/2 tsp
  2. Mustard – 1/4 tsp
  3. Urad Dal – 1/4 tsp
  4. Curry leaves – 4-5
  5. Asafoetida powder (hing powder) – a tiny  pinch

To Assemble

  • Wash, peel, radish. Slice into thin disks or grate. Measure 1 level cup.
  • Clean and chop tomatoes and green chillies.
  • Set a kadai / fry pan over flame, heat oil. Add chana dal, saute. When the dal turns golden brown, (fry for approx. 2 minutes) add the radish, saute over high heat for 2 minutes.

All ingredients from frying pan to...


  • Tip in chopped tomatoes and green chillies. Cover and cook for another 2 minutes or until the tomatoes look squishy.
  • Cool and grind to smooth paste. Remove to bowl.

...To the mixie jar!

  • Set a small fry pan / tadka pan over flame, add oil, heat ingredients for seasoning, pour over chutney.
  • Serve as accompaniment to dosa, idli, vada, upma, pongal, well, actually with anything you may want to eat.

'Seasoned chutney' ready to serve

Jan 17, 2014

Peanut Chutney

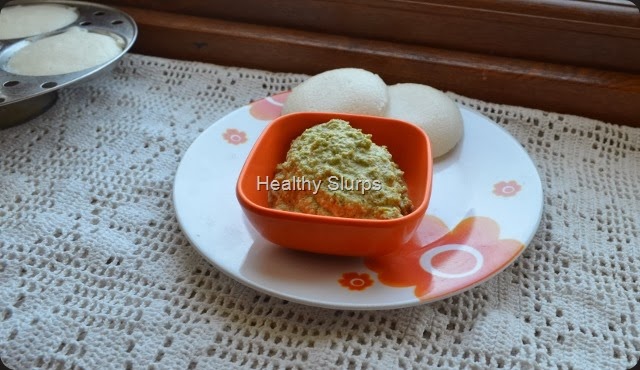
Peanut chutney and idli - power breakfast

My daughter is a total peanut fan.  She eats peanuts roasted, fried, boiled, in salads, asks for them in lemon rice, or if I am not looking, she gobbles them even raw! A jar of peanuts are never safe around her. To the extent that she is called the ‘ Li’l monkey’ of the house. She pouts and sulks when called so, and that tickles her big brother. So he runs her insane by chanting ‘monkey, monkey monkey’. Her dad calls her his fav  cute Li’l monkey – that did not seem to appease her either.
And then one day, I made this peanut chutney. Obviously, you cannot see the peanuts in them cos they are ground! Guess what? Her dad loved the chutney so much, he asked me, “What chutney is this? It pairs so well with idli” . My daughter was delighted. She ran to her dad, and told him “You are my favourite big monkey now, cos you like peanuts too! This is peanut chutney!” All of us had a hearty laugh. And peanut chutney came to stay forever at our home.
There are many versions of peanut chutney made, here is my unique combination of ingredients. I often add some coriander leaves, or mint leaves, a clove of garlic or even curry leaves to the mixture and then blend it up. You could try those variations too.
You Need
  1. Raw peanuts with skin – 1/2 cup
  2. Coconut, grated – 2 tbsp
  3. Onion – 1, medium sliced
  4. Green chilli – 4, cut in halves
  5. Tamarind pulp – 1 tsp
  6. Salt – 1/2 tsp
  7. Vegetable Oil – 1/2 tsp
  8. Drinking water – 1/4 to 1/2 cup for grinding
For Seasoning -
  1. Vegetable Oil – 1/4 tsp
  2. Mustard seeds – 1/4 tsp
  3. Urad dal – 1/4 tsp
  4. Curry Leaves – 4-5
Fry ingredients for chutney
To Assemble
  1. Take oil in a fry pan / wok / kadai, Heat it.
  2. Add whole peanuts to it, fry for 2 –3 minutes.
  3. Next, tip in green chilli cut in halves, followed by onion slices, last comes the tamarind.
  4. Fry well over medium to high flame, for 2-3 minutes more. Do not burn the ingredients. Stop frying when the peanuts look golden brown and the onions turn translucent.
  5. Add salt and grated coconut to this mixture, switch off flame ( cool it if you have time) and blend in a mixie to a coarse-ish smooth paste. You may need to add some water, say 1/4 cup while grinding to get a thinner chutney.
  6. Heat ingredients for seasoning, when the dal gets a warm golden hue, pour on top of chutney.
  7. Enjoy with idli, dosa, use as sandwich spread, or even with hot steamed rice.
Tasty tangy peanut chutney
Please do read the allergy information before trying out this recipe, especially if you have never eaten peanuts in any form before or if you have noticed any other food allergy symptoms too.
IMPORTANT ALLERGY INFORMATION
Some people develop an allergy to several nuts including peanuts. Symptoms may range from itching around mouth or throat, skin reactions, digestive disturbances, or more serious symptoms like breathing trouble too. In such situations, please stay away from peanuts in all forms – whether raw, boiled, roasted or fried. However, refined peanut oil seems to be tolerated even by people with peanut allergy. Still, do consult with your doctor before attempting to include peanuts in your diet.
PEANUT NUTRITION INFORMATION
Peanuts are a high energy food, most of the energy coming from fats and protein. As we know, all fat is not bad fat, peanuts are cholesterol free, have omega 3 and Omega 6 fatty acids.
To give a better picture, the total fats in 100 gms of raw peanuts is 49 gms, of which monounsaturated fats are 24 gms and polyunsaturated fats are 15 gms, while the saturated fats in peanuts are only 6 gms. They also have a high content of Omega 6 fatty acids – 15 gms / 100 gms.This makes it a valuable ‘good fat source’ in vegetarian diets.
Peanuts are also known to prevent cancer, help in weight control in moderate amounts and also have very valuable anti oxidants which have the heart health benefits and also prevent stroke. Regular consumption of peanuts also helps in preventing Alzheimer’s.
Peanuts are an inexpensive, ready to eat protein source, go ahead and enjoy it’s benefits.
Peanut chutney up close!

Jan 9, 2014

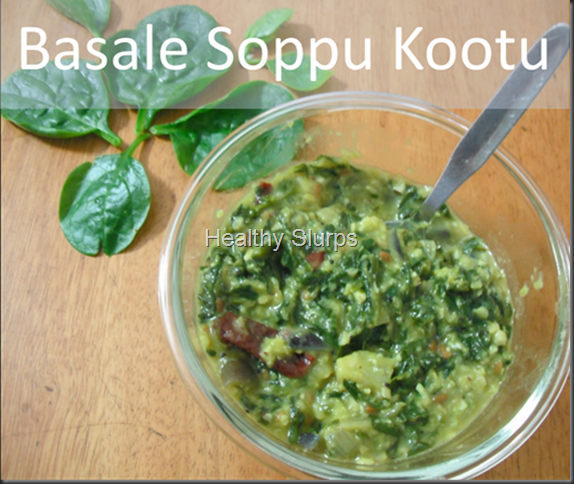
Basalle soppu Kootu


kootu pic


Basella alba or Basale soppu as it is known in Kannada, is a very nutritious green leafy vegetable. It grows up to a height of even 10 metres! This green leafy vegetable has amazing uses.

Health Benefits of Basella alba
  1. Topical anti inflammatory, anti fungal – helps to reduce freckles, treat acne, heal skin ulcers and reduce skin inflammation. Leaf juice mixed with butter used to heal burns, wounds.
  2. Decoction of leaves used as mild laxative, cooked roots used to control diarhoea
  3. Used to treat Pelvic inflammatory disease, sterility, threatened abortion, false labour
  4. In Africa, roots and leaves used for reducing stomach pain after childbirth, and to increase mother’s milk.
  5. The mucus from leaves if applied as a pack on forehead removes headaches and improves sleep, so used in Ayurveda for insomnia.
  6. To treat Vitamin A deficiency and iron deficiency anaemia
  7. The leaf has anti-oxidants - Beta Carotene, Xea Xanthin. This helps in free radical scavenging, hence has benefit on ageing or cancer cure.

It lends itself to a delicious stir fry or ‘bhaji’, or tambli in Marathi cuisine,or to basale soppu saaru in Kannada cuisine. Here is my attempt to make a Tamil style kootu with these very healthy greens. You Need
  1. Baselle Soppu – trimmed leaves, 4 heaped cups
  2. Red Onion – 3 medium or 2 big, peel and chop fine
  3. Tuvar dal – 3/4 cup, pressure cooked until soft
  4. Turmeric powder – 1/2 tsp
  5. Grated fresh coconut – 1 tbsp
  6. Green chilli – 1 or 2 depending on heat preference
  7. Salt – 2 heaped tsp
  8. Sugar – 2 big pinches
  9. Fresh water – 1/2 cup
For seasoning
  1. Any vegetable oil – 2 tbsp
  2. Mustard seeds – 1 tsp
  3. Urad Dal – 2 tbsp
  4. Dry red chilli – 1 –2 torn into halves
To Assemble
  1. Wash the greens in several  changes of water until no trace of grits, sand or mud remains! I dunk the trimmed greens into my kitchen sink. This way, I can wash them very quickly. Drain for 10 minutes in a large colander. Chop them coarse. We do not want a slimy paste while chopping them fine.
  2. Pressure cook the tuvar dal with turmeric powder until soft and mushy.
  3. Whiz the fresh coconut with the trimmed green chilli to a coarse mixture. Do not add any water while blending, just dry whiz.
  4. Heat oil in a wok / kadhai / fry pan.
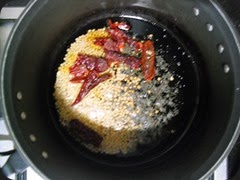
  5. Sizzle the mustard and urad dal; when dal browns, add the torn red chilli.Add seasonings to oil
  6. Tip in the diced onions, fry well for several minutes over high flame, keep stirring to avoid burning. Foggy Onions!Fry them onions well
  7. When the onions have changed from pink to translucent and light brown, toss in the chopped greens. Toss the pan well to incorporate the seasoning oil into the greens. After you see some wilt, add  sugar, half a cup of water and cook uncovered.Onions + soppu                Soppu under a haze
  8. The greens are usually done in 7-10 minutes depending on flame and quantity. Now add the cooked dal, coconut mixture, and salt. Mix well over medium flame to blend all components together.
  9. Best served with steamed rice and a spicy sambar or tangy rasam.
Kootu ready!


Jan 2, 2014

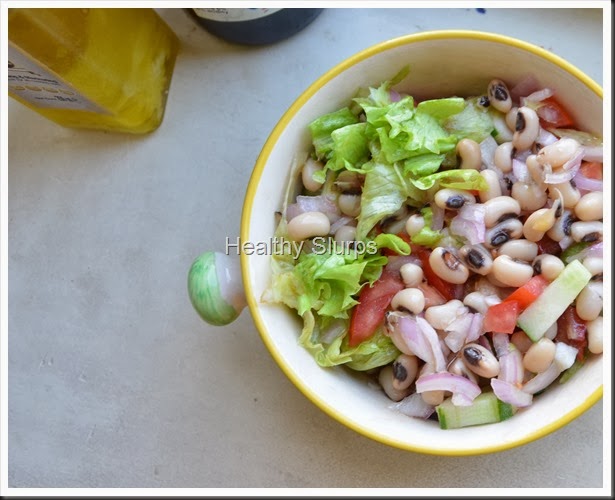
Black Eyed Bean Salad


A very Happy New Year to all readers of Healthy Slurps. There is something about the air during New Year which is very invigorating and refreshing. Goodwill, cheer, positivity abound in everyone’s heart during this season. Here is my first recipe for this year which has packed in it, all the love and cheer of this season.
To kick start this New Year with more healthy recipes, here is a salad that I assembled today. As I have mentioned earlier, salads are created with available produce at my home without sticking to any recipe. The reason I am documenting them here is to share the recipe with myself as much as with all of you. For I find myself at a loss to remember all ingredients when I want to recreate that last great salad.

Come, eat me
You Need
  1. Black eyed beans ( Lobia ) – 1 cup, soaked for at least an hour
  2. Cucumber – 1
  3. Red Onion – 1 medium
  4. Roma Tomato – 2 medium
  5. Iceberg Lettuce – Roughly torn and measure 2 cups
For Dressing
  1. Red Wine Vinegar – 2 tbsp
  2. Extra Virgin Olive Oil – 8 tbsp
  3. Crushed Black Pepper – 1 tsp
  4. Salt – 1 tsp
  5. Granulated Sugar – 1 tsp
To Assemble
  1. Whisk all ingredients for dressing together in a bowl.( I used a fork to whisk them,) quite simple really. Set aside.
  2. Peel the lettuce leaves from the head and immerse in ice cold water.
  3. Pressure cook the soaked beans until just done. I pressure cooked them by simmering the flame for 5 minutes after the cooker gave out the first whistle.
  4. Peel and chop the other three salad ingredients in the same shapes – go with dice, slice or cubes. The only rule is to be uniform. That does give the salad a good appearance.
  5. Drain the water from the cooked beans, if any. Do not discard but use in soup, sambar, or as cooking liquid for any vegetable too.
  6. Toss all the ingredients and the dressing together in a suitable large bowl.
  7. Chill for half an hour and serve.
Filling and Tasty Salad
Come, Eat me

Nov 20, 2013

Sweet Corn and Pomegranate Salad

Colourful Salad
Ingredients for a salad are never fixed at my home. Assembling a salad is a flexible exercise, often involving the bringing together of whatever is available in the fridge, and finishing it off with a dressing, which is most often a citrus-y one. This salad too was created similarly with foods present at hand. Sweet corn kernels and juicy pomegranate do a pretty tango here, with some worthy add-ons such as red onion and grated carrot thrown in to merrily add to the colour riot. I’ve noticed quite often that my kids need no coaxing to try a salad that is as vibrant in colour as this one.
Apart from being loaded with Beta Carotene from the vegetables and anti oxidants from the fruit, salads help to increase the dietary fibre of our daily meal.
As per the recommendations of the National Institute of Nutrition, an adult person must have 40 gm. of fibre in a day, which includes soluble and insoluble fibre. Dietary fibre is needed for
  1. Proper bowel function,
  2. To prevent Haemorrhoids
  3. To prevent Coronary heart disease
  4. To control diabetes and obesity
  5. To reduce plasma cholesterol
  6. To protect against colon cancer.
Salads are the tastiest way to consume fibre in a meal. In addition, they provide colour, texture and variety resulting in a satisfying meal experience.
Go ahead and make this salad for yourself and share it with me too!
You Need
  1. Sweet corn kernels – 1/2 cup
  2. Pomegranate pearls – 1/2 cup
  3. Carrot grated – 1/4 cup
  4. Roma tomato, diced fine – 1 medium tomato
 For the dressing
  1. Salt – 1/4 tsp
  2. Pinch of sugar
  3. Juice of 1 medium lemon
  4. Crushed black pepper – 1/4 tsp OR Green chilli – 1 minced fine
  5. Red onion, diced fine – 2 level tbsp
To Assemble
  1. Steam the sweet corn kernels for 2 minutes in the microwave at high power. Set aside.
  2. Remove the pomegranate pearls from the fruit, keep aside.
  3. Combine all ingredients for dressing, mix well with a fork.
  4. Bring all ingredients for salad together, toss well with the dressing.
  5. Chill for half an hour in the fridge in a covered bowl.
  6. Serve along with warm pulkas or freshly grilled garlic bread or as a side with tadka dal and steamed rice.
Healthy and Radiant


Apr 1, 2013

Minty Garlic Potatoes

This was a recipe I tried out on a whim ages ago. I did not think much of it then. That is, until my child requested for it again. Isn’t it is true that potatoes are so versatile and can work with any flavours, seasonings and is an all time favourite with kids?
Yummilicious Baby Potatoes
I am particularly fond of this recipe since the flavours taste very fresh if you follow this method of preparation. Of course, I have just made it up the way my family likes it. You could tweak, add, change ingredients to suit your favourite flavours too. After all, what is a dish without improvisations? Useful for last minute lunch prep or when guests land up at mealtimes and you need to rustle up more food. I have used baby potatoes because I had them and because they look cute. SmileOf course, normal potatoes boiled and cubed are fine too. Take it forward anyway you like. This could even be a salad with boiled potatoes, pomegranate, some diced tomatoes and use the pudina as a dressing. The results are sure going to be delicious.
What’s good about potatoes?
  • It is popular belief that potatoes are full of starch and fat and offer little else. Potatoes have complex carbohydrates, which are a good source of carbs as opposed to refined flours and refined sugars.
  • It may also be surprising to know potatoes are a good source of several minerals like Magnesium, Potassium, Zinc, Copper.
  • Potatoes are also fair sources of Iron, Vitamin B complex and Vitamin C. Despite losses during cooking potatoes can deliver 2- 5 % of daily requirement of Vitamin B and C.
  • Potatoes are fatty? No way – they are a zero cholesterol food! The total fat in 100 gm. of potatoes is only 0.1 g and that is Omega 3 and Omega 6 fatty acids.
  • While the skin does not have any nutrients, it is the layer of potato just below the skin that has them. The best way to harness all these great vitamins and minerals is to cook/ boil them with skin on. This locks the nutrients in. When we peel potatoes after cooking, instead of before, we save a lot of the nutrients.
  • A lot of vitamins and minerals ‘leach into’ the cooking water. So it is a good practise to cook/boil in just enough water (instead of excess water) to optimise the maximum value of any vegetable, especially so in this recipe.
  • Adding a good bunch of fresh herbs like pudina (mint) and coriander to this recipe enhances it’s iron and fibre content.
I guess we need no more incentive to cook a lovely batch of minty potatoes. So here goes -
You need
  1. Baby potatoes – 500 gms
  2. Onion – 1 small, diced Fresh pudina leaves
  3. Mint leaves (Pudina leaves) – packed, 1 cup
  4. Coriander leaves – remove roots, clean, chop and measure 1/4 cup (optional)
  5. Garlic – 1 medium clove
  6. Juice of half a lemon
  7. Any vegetable oil – 2 tsp
  8. Saunf (fennel seeds) – 1/2 tsp
  9. Jeera – !/2 tsp
  10. Salt – 3/4 tsp
  11. Sugar – a pinch
To Assemble
  1. Immerse the baby potatoes in a water bath for half an hour if you have time. Else, leave in for 5 minutes and clean the skin well. You can boil the potatoes in enough water for 20 minutes or just pressure cook it till 1 whistle.
  2. Leave the boiled potatoes on the chopping board to cool naturally. Peel when sufficiently cool to handle.
    (Why not dunk in cold water? – Because that lets more minerals and vitamins dissolve into the ‘cooling water’ too.)
  3. Make a coarse paste of the following ingredients – half onion, pudina leaves, coriander leaves (if using), juice of half a lemon, sugar and the garlic clove. I used the ‘pulse’ button in my mixer to get the coarse texture. Coarse blend paste
  4. To a pan set on high heat, add the oil, sizzle saunf and jeera. Tip in the other half diced onion, fry until pink.
  5. Add the potatoes, salt and toss well. If you wish to get a nice ‘roasted feel’, let them simmer, scraping and tossing occasionally for 10 – 15 minutes. Salt the frying potatoes
  6. When the potatoes are done, add the coarse ground paste as a final step, toss the pan well to let the paste coat all the potatoes. Switch off flame immediately. Pudina paste - final step
  7. Cover and let flavours rest for 10 minutes. Serve warm with steamed rice and sambar or with hot phulkas.Minty Garlicky Potatoes
Notes
  • Add the crushed garlic to the hot oil instead of adding it to pudina paste if you detest the flavour of raw garlic.
  • Toss boiled potato with cherry tomatoes, (or regular tomato diced) and cucumber with the coarse ground pudina paste, chill and serve as salad.
Ready to dig in..

Mar 12, 2013

Lauki raita/ Sorakayi pachadi


Bottle gourd as it is known in English, was not a favourite at our home too, that is until my yoga teacher shared this recipe with me. Bottle gourd is always paired with a protein such as chana dal or tuvar dal or mung dal in traditional Indian recipes. One reason could be that the vegetable has very low protein levels. Thus creating a dish with the vegetable + protein makes it complete!

Of the several Indian recipes such as using it in koftas, avial, kootu, I took an instant liking to using it in raita. Cooling, refreshing, this extremely simple dish can be paired with any entree, any cuisine. The best part is very few ingredients are required and takes little time to put together. Use it as dip, chutney, raita, or to fill in hunger pangs between meals too.

What’s good about Bottle gourd?

  • Bottle gourd has plenty of moisture and dietary fibre. This makes it an ideal summer vegetable to replenish fluids in the body. The fibre keeps constipation, piles, cholesterol and even colon cancer at bay.
  • 100 gm of uncooked bottle gourd has only 12 calories. This makes the vegetable an instant pick me up for weight loss diets.
  • It has no protein or fat content – the only way to add that would be in a recipe that includes some protein and good fat.
  • This humble vegetable is a fair source of Magnesium, Zinc, Potassium and Copper. All minerals needed by teenagers and growing children.
  • Also a very low sodium vegetable, this is very suitable for people with high blood pressure or diabetes too.
  • Do check out this link too. http://www.thehindu.com/health/policy-and-issues/article2571430.ece

So do try out this super simple and soul satisfying recipe this summer.

You needGrated bottle gourd

  1. Bottle gourd/ lauki/ sorakayi – select tender lauki, wash, peel, grate to a medium fineness, measure 3/4 cup.
  2. Thick curd – 1 cup ( I used home made skim milk curd) If you use store bought curd, select fresh probiotic skim milk curd.
  3. Salt – 1/4 tsp.
  4. Sugar – a pinch (optional).
  5. Fresh coriander leaves – chopped fine – 1 tbsp

For seasoning

  1. Oil – 1/2 tsp
  2. Mustard seeds – 1/4 tsp
  3. Asafoetida – a teeny pinch
  4. Green chilli – 1, finely chopped
  5. Curry leaves – 3-4 torn up

To assemble

  1. Combine the grated bottle gourd, whipped curd, salt, and sugar.
  2. Heat oil in a small tadka pan, add oil and other seasoning ingredients in order.
  3. Pour over raita.
  4. Top with chopped coriander leaves.
  5. Chill for an hour before serving.

Cool curd and hot takda

Variations

  1. Omit seasoning.
  2. Add roasted jeera powder and kala namak powder if you like the piquancy.
  3. Add one half onion, finely diced, or few chopped stems of spring onion along with bottle gourd in the raita.
  4. Add grated carrot for colour!

 Chilled Bottle gourd raita

Jan 19, 2013

Cherry tomato Lettuce Salad


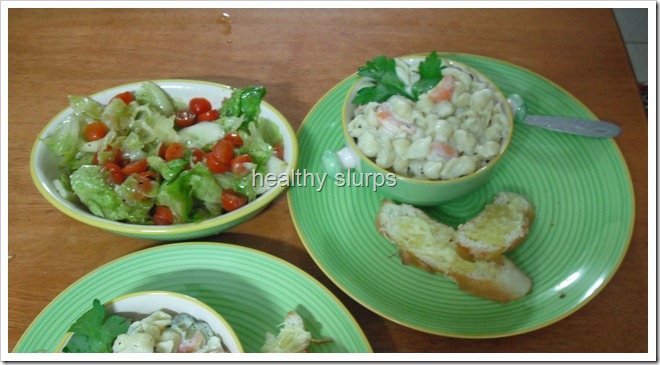
Well, this salad does not even need a recipe. It is such a simple combination of veggies and dressing. In fact, I am sure several of you will have tried out some version of this salad. I made this salad to accompany the Low Fat Creamy Pasta. The salad, pasta and fragrant garlic bread comprised dinner last weekend. Quite a combination of textures, colours, flavours and tastes. It was a very satisfying meal.
Taking some time to plan, shop and create good meals is so fulfilling. The happiness I feel when I sit down with loving family members eager to sample the latest creations and finding their faces light up with joy and hearing those happy exclamations – these make all the effort of cooking worthwhile. Well let me also admit that I go through my good share of disasters, and food that no one wants to touch. But thankfully, these happen lesser than the former.
As I said, this salad is a simple combination of dressing, veggies and tossing them together.
You need
For the veggies -
  1. Iceberg lettuce – 1 small head
  2. Cherry tomatoes – 22-25 numbers
  3. Cucumber – 1-2 medium (really, your choice)
  4. Ice cold water – enough to dunk the lettuce in (approx. 4 cups)
For the dressing -
  1. Balsamic vinegar – 1 tbsp
  2. Extra virgin Olive Oil – 4 tbsp
  3. Crushed black pepper – 1-2 tsp
  4. Salt – 2 pinches
  5. Sugar – 1 pinch (optional)
To assemble
  1. Wash the lettuce head, tear leaves apart by hand into bite size pieces and keep immersed in ice cold water until needed.
  2. Dunk the cherry tomatoes in a bowl of water for 5 minutes, drain, pat dry and cut into halves. Place in a large mixing bowl.
  3. Rinse the cucumber thoroughly with the peel on . You can retain the peel on the cucumber or partly peel them too. If there are too many seeds along the middle of the cucumber, you may want to discard them. If so, cut into half lengthwise, remove the ‘seedy’ parts and slice into half circles. Else, if the seeds are tender, you can slice the cucumber into thin disks. Place along with the tomatoes in the mixing bowl.Veggies - washed, scrubbed, waiting for their dress!
  4. Pour the balsamic vinegar into a bowl. Pour the Olive oil in a thin drizzle whisking with a fork all the while. Continue to whisk well until all the vinegar and oil have blended into an almost homogenous mixture. Add the crushed pepper and salt now, whisk them in too. Dressing is ready.
  5. Now is the time to drain the lettuce in a colander – drain it well, shake up the colander and coax the last drops of water out! Add the lettuce to the mixing bowl, pour the salad dressing on top and mix well, toss, shake – do whatever except spilling the contents!
  6. Chill the salad for at least half an hour before serving so that it is at the right temperature and the flavours settle well.
Some salad everyday keeps tummy trouble away
Notes
  • You can add pitted black olives, walnuts, coloured peppers (capsicum), rocket leaves or any preferred vegetables to the salad. Use dressing in proportion to the vegetables used.
  • Using fresh tender vegetables, and chilling well before serving help to enhance the taste of the salad.

Jan 17, 2013

Low Fat Creamy Pasta

A Happy New Year to all.

As with every year, I have resolved to live healthy, live happy, be grateful for the nice things in life,spend more time with my kids. I am also pushing myself to find healthier food, better recipes, to share with all and do my bit for a better world. Pasta and Italian food are quite a favourite among people all over the world. We love Italian food at our home too. Based on frequent demands from my kids, I try to recreate popular dishes like pasta in bechamel (white) sauce at home. However, the amount of cheese that is required each time sends alarm bells to my nutritionist mind. While some cheese is good for children, as part of milk intake, too much of it is unhealthy.

While watching an episode of Junior Masterchef, I saw one participant using an ingredient which could substitute for part of the cheese in white sauce. I was quite excited by the idea, and tried it out soon. The first attempt was just about edible – I think I scrimped too much on the cheese. The second time, I did not get the proportions right. So this time, I thought through the proportions carefully and tried – this version was by far the best.

I am sure several of us would have started off with New Year Resolutions to reduce weight, eat healthy and so on.. Most resolutions fizzle out because we lack the will power to stick with them. Low fat food, salad – only meals, tasteless food in the name of diets – these are sure fire methods to lose our goals instead of excess weight!

I named my blog ‘Healthy Slurps’ as I firmly believe that healthy food has to be tasty too. I believe in modifying or inventing recipes which optimise the nutrients in ingredients used and are filling and healthy at the same time. This recipe is a great example. So here is my recipe for creamy, oozy, tasty pasta in white sauce minus sin.

I have given measures for 500 gm. uncooked pasta. If you plan to make a smaller batch, reduce proportions accordingly, but you could also make a big batch and freeze the rest for later.


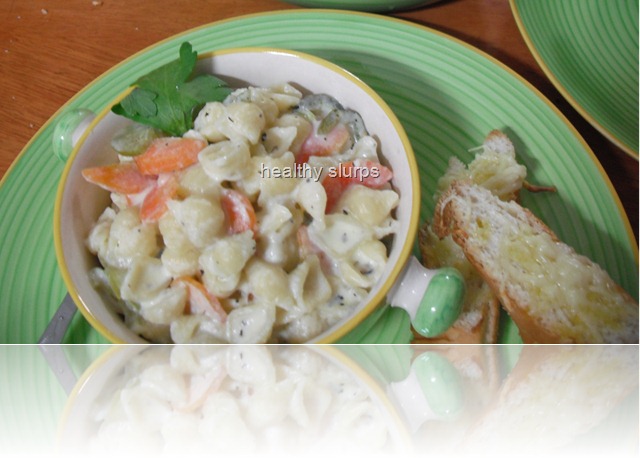
Low calorie pasta

You Need

  • Pasta shells – any shape you have in stock, I used small shell – 500 gm., uncooked.
  • Skim milk – 800 ml to 1000 ml.
  • Whole wheat flour (atta) – 1 heaped tbsp.
  • Butter – 2 tbsp., to be used in parts through the recipe.
  • Processed cheese – 50 gm
  • Carrot – wash peel cut into thin disks – 1 level cup
  • Green or any colour capsicum – cut into thin slices – 1 level cup
  • Cauliflower – 12-15 medium sized florets.
  • Seasonings –1. Dry Oregano and 2. dry basil – 1 tsp each (or to taste) 3. White pepper /black pepper crushed – 1 heaped tbsp, 4. Salt – 2 tbsp.
  • Fresh drinking water – 3 litre or slightly more, if needed.

To Assemble

  • Boil water in a large pot, add a dab of butter, 1 tbsp salt to the boiling water and boil the pasta in it for 7-8 minutes or as per instructions. Drain, rinse and set aside in a colander.
  • Blanch the cauliflower florets, drain. Heat 1/2 tsp butter in a large pan, fry the cauliflower in it for a good 3 minutes, cool and puree to smooth paste in a blender. Set aside.
cauliflower puree
  • Heat 1 tbsp butter in the same  large pan used for cauliflower, stir fry the capsicum first, add carrots next, add a pinch of salt, toss well.sauteing vegetables
  • In a corner of the pan, add the rest of the butter, place the whole wheat flour over the sizzling butter and fry to remove the raw smell. (takes about a minute or less). Now pour the skim milk in a thin stream over the flour, stir briskly to avoid lumps. You could use a whisk too. Mix in the vegetables and the white sauce, let simmer together until the sauce thickens and bubbles evenly. Control the flame as needed throughout.
  • When the sauce thickens and bubbles, add the cauliflower puree, the cheese, and mix all well.
  • After the whole mixture is homogenous, add in the seasonings, taste and adjust as per your taste.
bubbling sauce with seasonings
  • Now the sauce is ready to coat the pasta. Pour in the boiled pasta, toss well to coat. cover, take off the heat and set aside for 10 minutes or so for the flavours to settle. Toss pasta with the sauce
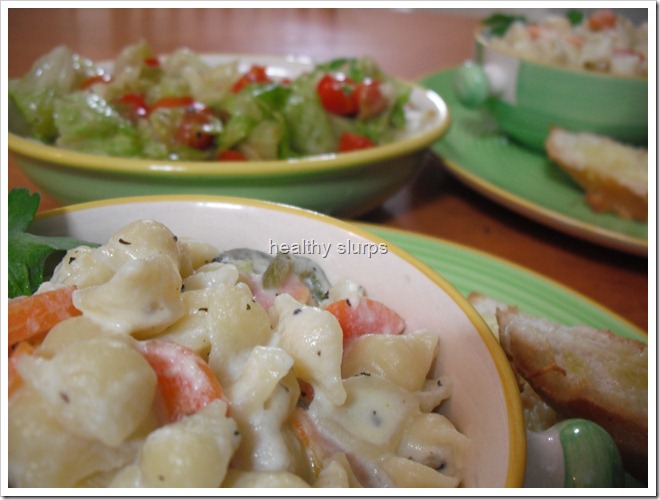
  • Tasty creamy pasta is ready to be served. I served this with warm garlic bread and a lettuce - cherry tomato salad in a balsamic vinaigrette dressing.
Dinner is served

Notes

The amount of cauliflower used for the puree is important – too much and it tastes like cauliflower soup, too little and it does not thicken well enough. Sautéing the cauliflower in butter makes sure that the taste does not overpower the other flavours in the sauce.

You can use the same sauce for lasagne or for a macaroni hot pot – spread some more grated cheese as top layer and bake as you normally would.

You can use more vegetables like broccoli, sweet corn kernels, baby corn, zucchini, even black olives if you like. ( I like black olives with a tangy tomato sauce )

You can sprinkle a tsp. or more of grated cheese on top while serving kids. Grated Parmesan tastes great. While Parmesan is not strictly ‘vegetarian’, use it if you feel comfortable.

Creamy pasta ready to dig in

What’s good about this pasta dish?

The most obvious advantage in this recipe is the limited use of cheese in the sauce. This recipe makes 8 –9 portions of pasta. 50 gms of cheese added here will amount to 6 gms per person – the quantities normally used would range from 30 –35 gms per portion. 

This means that, whatever cheese you have used in your recipe, you can cut down the fat content by 5 –6 times.

Despite cutting down on the cheese, the sauce does not lose out on creaminess, mouth feel or flavours – so we do not feel ‘deprived.’

Adding more vegetables to the dish or serving it with a stir fry or salad, as in my case, makes it a complete meal.

I have used butter optimally without indulging in excess.

I have used whole wheat flour as a thickener too as against refined corn flour or all-purpose flour (maida).

While processed cheese is not the best, I have used it here to show how despite an ordinary cheese, the sauce and the meal does taste great. Also processed cheese is most widely available in India. Feel free to use reduced fat – mozzarella in your recipe.

Do let me know if you liked the recipe, and do come back with your feedback after you have tried it out.