Jun 3, 2014

Peerkangai chutney


I seem to be on a spree to cook with un-glamorous, un-restaurant-y, humble vegetables. Well, why not? Gourds are very easy on the wallet and the waist line, mostly neutral in flavour, lend body to various dishes, have varied nutritional benefits but are ignored despite all these.

Pic Courtesy - Sankalpfarms.com

No South Indian breakfast is complete without chutney. That inevitably means use of fresh coconut. On days when you do not have stock of fresh/frozen coconut, or want to limit it’s use in daily meals, you need some saviour to rescue the day’s chutney. Enter the star of today’s chutney - ridge gourd. I have used it in this recipe to benefit from the nutrients it offers, as much as a coconut-substitute.

  • Ridge gourd is high in moisture and crude fibre (good news for those with chronic constipation).
  • It is a very low calorie vegetable, so great to include in a weight loss diet. It adds plenty of bulk to a meal without adding significant calories! This means, you can eat a whole cupful of ridge gourd and add less than 20 calories to the meal!
  • Ridge Gourd has negligible Sodium and a fair source of Potassium. Hence it is useful for people with high blood pressure or certain kidney ailments where sodium is severely restricted.

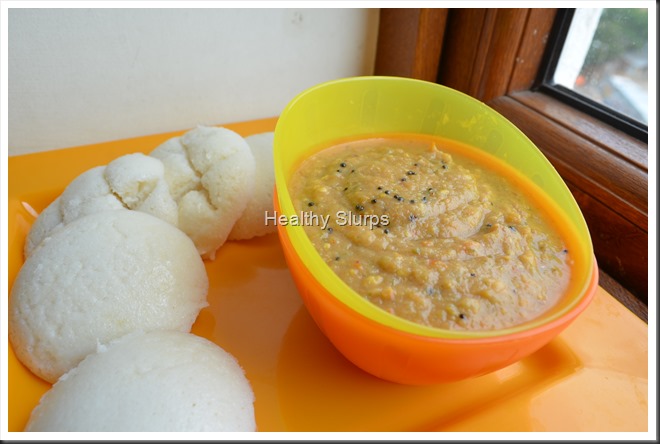
Here is how I made the chutney. We used it to complement soft idlis for breakfast. It was spicy, tangy and declared ‘good’ by my family. Do try it out and let me know how you liked it. The quantity here serves 5-6. Halve to serve 2-3.The chutney can be refrigerated and used within 2 days.

Preparation Time – 15 minutes ; Cooking Time – 5-6 minutes ; Serves – 5 – 6

Allergy Information – Does NOT contain gluten, egg, soya, peanuts, corn, lactose.

You Need

 Cookware  -  A frying pan, mixer grinder or food processor

Ingredients

  1. Red Onion – 1 medium, or measure 1/2 cup after chopping
  2. Roma Tomatoes – 2 medium, or measure 3/4 cup chopped
  3. Ridge Gourd / Peerkangai – 1 big, or measure 1+1/2 cups sliced
  4. Green chilli – 4-5 cut into halves
  5. Chana dal – 2 tbsp
  6. Tamarind – 1/4 tsp*
  7. Salt – 1/2 tsp
  8. Oil – 1/2 tsp
  9. Coriander leaves – 6-7 stalks with leaves (optional)

For Seasoning -

  1. Oil - 1/4 tsp
  2. Mustard seeds – /4 tsp
  3. Hing Powder – a pinch

* Use Tamarind if tomatoes are not tart enough, or add a couple of extra tomatoes and avoid tamarind. You can even omit tamarind entirely if you do not prefer a sour-ish chutney

To Assemble

  1. Prepare the vegetables for frying. To begin,  wash, peel and chop onions. Next, wash peel and chop tomatoes and green chilli. Rinse the ridge gourd well, peel part of the rough skin at the ridges, while leaving some skin on the vegetable. Cut into thick slices.Fry all vegetables for chutney
  2. Heat a small wok / frying pan. Add the half tsp oil, let it heat up. Add the chana dal, fry over medium heat until golden brown. Add all the prepared vegetables, chilli, tamarind and salt. Toss well, (do not add any water), cover and simmer for 2–3 minutes or until you find the tomato skin has shrunk a little bit and the gourd seems to go slightly limp. If you are using  coriander leaves, add at this point, and switch off flame.
  3. Let it cool. Grind to a coarse paste. You will not need any water for grinding. After removing to a bowl, rinse out the mixer jug with a 1/4 cup of water and add to the chutney if you wish to dilute it. Chutney with Seasoning
  4. Heat oil for seasoning. Crackle mustard seeds, add hing powder and pour over the chutney.
  5. Serve as accompaniment to idli, dosa, or over plain steamed rice, as a sandwich spread or as dip for crudites too!

Soft Idlis with Spicy Chutney

Fresh breakfast for two!

May 22, 2014

Keerai Masyial

 
Few dishes can beat the simplicity of Keerai Masiyal. However, as a child, this was not my favoured dish. I have pretended every ailment to escape eating this ‘ green paste’. Now I am better able to appreciate it’s subtlety of flavour, the health benefits, ease of preparation, and the brilliant hue of this humble dish. When the summer heat is making cooking a painful chore, I urge you to try this out. Can be put together in under 15 minutes, needs very few ingredients, and supremely healthy, what’s not to like?
Steaming Keerai Masiyal
I have used Palak in this dish, but Amaranth, Arai Keerai, Siru Keerai, can also be used. In fact, using different greens in rotation brings each one’s unique health benefits to the table.
  • Agathi Keerai has more than 12 times the Calcium found in Palak and more than 3 times that found in Methi leaves.
  • Radish Leaves, Siru Keerai, Arai Keerai, Manathakkali Keerai and Paruppu Keerai are all very rich in Iron. They have more than 3 times the Iron found in Agathi Keerai or Palak .
  • Amaranth and Agathi Keerai lead in Vitamin C while Palak, Mint and Amaranth lead in Folic Acid content.
  • Paruppu Keerai and Palak have a low Sodium and high Potassium combination which makes it ideal for people with high BP or kidney ailments or gout.
In a survey conducted by the National Nutrition Monitoring Bureau (NNMB), Indians were found to consume far lesser (average - 48gm/day) than the recommended 300 gm vegetables per day.Of this RDA of 300 gm, The National Institute of Nutrition, recommends at least 100 gm greens per person per day.
Here is the Food Pyramid picture as released by the National Institute of Nutrition, 2011. It helps to form a visual idea of what should be on our plate everyday!
 
Pic Courtesy - Dietary Guidelines for Indians, NIN
Finally to the recipe of the day -
You Need-
  1. Palak or any other greens – 4 packed cups of leaves.
  2. Salt – 1/2  tsp to 3/4 tsp ( use as needed)
For seasoning -
  1. Oil – 2 tsp
  2. Mustard seeds – 1/2 tsp
  3. Urad Dal – 2 tbsp
  4. Red Chilli – 2, broken into halves
  5. Grated fresh coconut – 1/2 tsp (optional)
To Assemble -
  1. Pick leaves and tender stems. Discard stems that are thick. Measure 4 packed cups.
  2. Wash well in a colander in several batches. Or fill water in the kitchen sink and submerge the greens in the sink tub. This is a great way to wash quickly and effectively.
  3. Drain well. Chop roughly. Any size and shape will do. It needs to be blended anyway.
  4. Place a large wok on heat, add the greens and let it cook in it’s own juices. If it looks like it is sticking to the bottom of the pan, add half a cup of water. stir through a couple of times so that the greens get cooked uniformly. After 5-7 minutes, the greens should be just cooked enough. Cool and grind to smooth paste with any water that may be left over in the pan.
  5. Return the puree to the wok, place wok over fire, rinse the blender jar with 1/4 cup water, add that too to the wok. Add salt, mix well, taste and add more as/if needed.
  6. To a small seasoning pan, add oil, place over heat, add mustard seeds, urad dal, red chillies. When you hear happy crackles, enjoy the sizzle and the aroma, pour it into the Masiyal before it chars! Smile If using grated coconut, add it to the seasoning pan last, stir around until the coconut turns a golden hue and pour over the Masiyal.
  7. Enjoy hot with steamed rice, sambar and a cucumber carrot salad with lemon dressing.  Vitamin C in the lemon juice helps in better iron absorption.
NOTES -
  • For local and botanical names of all the Greens mentioned in this post, please refer to Glossary of Ingredients Page.
  • To retain nutrients in greens cook in just enough water until just cooked. Do not discard the water, use it up in the recipe.
  • To retain the colour of greens, add half a tsp sugar while cooking, leave pan uncovered, cook quickly over high heat instead of low flame for a longer time.
  • Add a sliced onion and couple of crushed garlic cloves to the seasoning for a twist in flavour.
Enjoy Masiyal with Steamed Rice
 

Apr 30, 2014

Cantaloupe smoothie


It feels like the worst April ever in my city, unimaginably hot these days.  To add to my woes, I suffered a hit in an amusement park that has left me with a broken rib. I expect it should heal in two months. Added to this are children having summer vacations who keep darting in and out of home in between their endless rounds of play – more thirsty than hungry.  Finding simple recipes to hydrate the children and the rest of the family while trying to ‘bed-rest’ my broken rib is quite a juggle.
In summer, we are naturally inclined to drinking more fluids to overcome thirst, cool the body and keep us sane! I am experimenting with more smoothies, shakes, juices as tasty ideas to rehydration and energy. This Cantaloupe smoothie is the result of one such experiment. When the fruit is made into a smoothie, it is more refreshing and filling. The well ripened fruit gives the drink an amazing flavour and we do not miss the sugar at all.
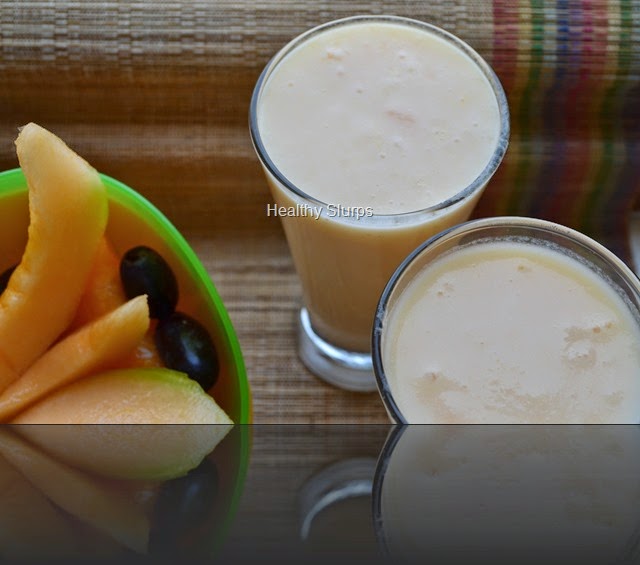
Cool chilled smoothie
  • Cantaloupe or Musk Melon, as it is called in India, is more available in summer than other seasons. The melon is very rich in Vitamin A, C, Folate, Niacin,  Potassium.
  • These vitamins are important during pregnancy, so the fruit is a good choice along with others for a pregnant woman.
  • The sweet taste of the melon comes from sugars, so diabetics need to work with your nutritionist to find it’s appropriate use in your diet.
  • The fruit’s high moisture content makes it ideal for summers, for rehydration during workouts. The smoothie thus is a very good pre / post workout meal. Made even healthier with addititon of flax powder (Omega 3 and 6 fatty acids) or sabja seeds.
You Need
  1. Skim Milk – 500 ml
  2. Cantaloupe / Musk Melon – Skinned and chopped – 2 heaped cups
  3. Honey – 1 tbsp, optional
  4. Ice cubes – optional
Method
  1. Wash, skin and deseed the melon.
  2. Chop it into largish chunks and blend into a smooth puree in the mixer.
  3. Add 1/2 cup milk, blend again. Pour into a large jug, add the rest of the milk and stir to homogenise. Taste and add honey if needed.
  4. Chill for half an hour before serving. Serve with ice, if you like!
Enjoy the fruit and the smoothie!

Apr 14, 2014

Vendakkai Thair Pachadi / Crispy Okra in Chilled Yoghurt


A very Happy New Year to all who celebrate today. Happy Vishu to all Malayalees across the world! All family members taking time off from busy lives, praying and eating together, tables rich with culinary treats– these surely are some special features of festivals. Celebrations always involve good food. Contrary to popular thought, festive food need not all be time consuming to prepare, nor be calorie-rich.

Today, I would like to share a lip-smacking, simple recipe which you can use to grace the table at any festive menu. This recipe has distinct south Indian flavours, so you can tweak the seasonings to accommodate the demands of your palate or cuisine. (Read notes)

Happy New Year to all

The key point here is how the vendakkai / lady’s finger / bhindi / okra is cooked - crispy ‘fried’ okra is first readied by slicing it thin, drizzling with a quarter tsp cooking oil and grilling it for 10 minutes. This then is lovingly folded into a bowlful of thick skim milk yoghurt, seasoned with salt.The dish is finished off with a fragrant tadka of mustard seeds, curry leaves and pinch of hing in some oil. The grilling ensures that you save fuel, oil and time. The crisp texture encourages even die-hard okra haters to try it out. The chilled yoghurt is just so perfect for this blazing summer season. While this recipe is an accompaniment, you will soon find yourself eating a chilled bowlful on its own. Here is what you need -

You Need

  1. Okra / Lady’s finger / Bhindi / Vendakkai – 200 gm
  2. Skim milk yoghurt – 500 ml
  3. Salt – 1/4 tsp
  4. Sugar – a pinch
  5. Cooking Oil – 1/4 tsp

For seasoning

  1. Cooking oil – 1/4 tsp
  2. Mustard seeds – 1/4 tsp
  3. Curry leaves – 3
  4. Asafoetida Powder (Hing) – a pinch

To Assemble

  1. Wash the vendakkai by immersing in a bowl of water, drain on colander and spread out to dry on a kitchen towel. Snip off the tops and tails, and slice into even thin disks.
  2. Preheat the grill to 250 C.
  3. Place in a single layer on a baking tray. Drizzle 1/4 tsp oil over the disks, and spread in a single layer.
  4. Once the grill is ready, place the tray of vegetables inside, and grill for 10 minutes. Toss and scrape the contents at half time to ensure even browning. By the end of 10 minutes, the Vendakkai would have shrunk to half – size pieces, and would have browned evenly without being charred. You may need to watch the grill in the last minute to ensure correct browning without charring.
  5. Let it cool in the tray. Meanwhile, whip up the skim milk yoghurt with salt and sugar.
  6. Prepare the seasoning by heating oil in a small pan, adding all the ingredients for seasoning in order. Pour over the whipped yoghurt.
  7. Gently fold in the cooled Vendakkai into the yoghurt, chill for half an hour before serving.
  8. Serve with steamed rice, sambar, papads.

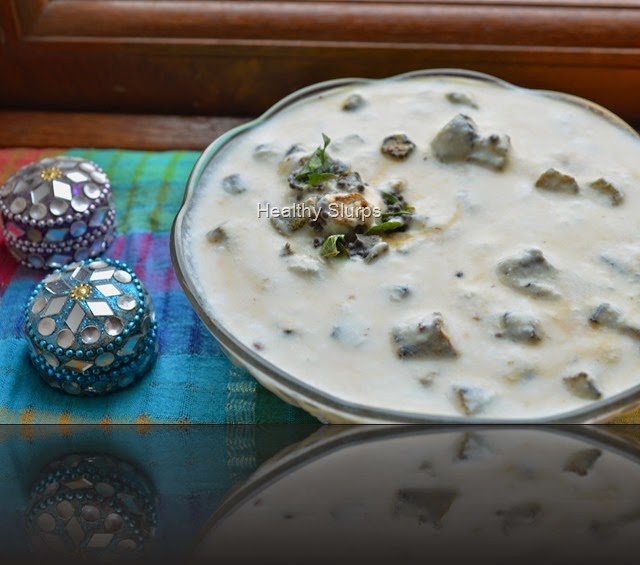
Bowl of chilled pachadi flecked with crisp okra

Notes

  • Avoid mixing the grilled vegetable too vigorously into the yoghurt, it will darken the colour of yoghurt.
  • You can experiment with flavours by adding roasted jeera powder, coriander leaves instead of hing and curry leaves.
  • Can be used as a dip for crudites or rolls too by seasoning with a tbsp of chopped, fried onion, a pinch of red chilli powder and a tsp of chopped fresh parsley instead of above seasonings.
  • Grilling the vegetables as opposed to deep frying them helps to cut down on cooking oil used.

Enjoy the cool pachadi!

Apr 8, 2014

Little Millet Khichdi


Weight loss is the most important reason people visit a dietician or nutritionist. People want to lose weight for many reasons. Some of them could include - to look good, be able to carry off several outfits, to feel more energetic and several other reasons too. It is not advisable, however, to attempt weight loss in an unhealthy, unscientific or haphazard manner. Many people adopt extreme measures to lose weight. We would have heard of several restrictive diets such as all fluid diets, cabbage diet, only fruit diet, only vegetable diet, only milk diet, and several other ‘only diets’. Pause for a moment and think: are these really nourishing, sustaining, or even feasible in the long term?

The big goal and focus should be on achieving good health and fitness. Weight loss should only be a part of the journey to fitness and better health. Weight loss and weight management should also be approached with common sense, moderation and with a long term goal in mind.  Changes in diet should be made gradually and systematically. Including healthy grains, increasing fluid and fruit intake, keeping an eye on what one eats/drinks through the day are all important points to be kept in mind when attempting weight loss.

Pack of the Organic Millet I bought

In a study published by the American Journal of Clinical Nutrition on Glycemic Index and Obesity, scientists found a strong correlation between the type of grains consumed, its glycemic index and the ability to lose weight and keep it off too. This means, by choosing grains intelligently, it is possible to feed the body maximum nutrition while keeping weight in check too. Millets are a valuable group of grains which most of us in India have forgotten in the last century or so. Millets pack complex carbohydrates,(hence low glycemic index), more fibre than polished rice/wheat, are high in several minerals like Calcium, Iron, Magnesium. They are easy to cook too and flavours are quite mild and palatable. It is time we undo this damage of ignoring such nutrient powerhouses and allow ourselves their benefits.

This recipe is part of my effort to include millets in my family’s meals in delicious and acceptable ways. Little millet, also called Saama rice, Saame, Koda, is slightly bigger than semolina in size. It cooks very quickly, has an unobtrusive flavour and lends itself to several dishes easily. I cooked up this delicious khichdi several times in the past few months altering the spices and vegetables used each time. It is now a family favourite.  Do use the recipe below as a broad guideline and feel free to make your own favourite version.

Bowls of goodness

You Need

  1. Saama millet – 1 heaped cup
  2. Mung dal – scant 3/4 cup
  3. Potato – diced, 1/4 cup
  4. Carrot – diced, 1 cup
  5. Fresh green peas – 1/4 cup
  6. Bay leaf – 1 large
  7. Cinnamon – 2 thin sticks
  8. Cloves – 3
  9. Black pepper corns – 1  tsp
  10. Cumin seeds ( Jeera) – 1 heaped tsp
  11. Butter – 1 tbsp + Cooking oil – 1 tbsp
  12. Salt – 1 heaped tsp + 1/2 tsp
  13. Fresh water – 4 1/2 cups

To Assemble

  1. Rinse the millet and mung dal together.Place them in a suitable large vessel along with the potato, carrot, green peas and bay leaf. Add measured water,( read notes) place inside pressure cooker and pressure cook as you would normally cook rice. I reduce the flame after the first whistle and let it simmer for 5 minutes before switching off and letting it cool naturally.
  2. To a small frying pan, add the butter + oil, heat and add all the other spices mentioned in ingredients. Do not burn the spices, let them sizzle gently until it just releases its aroma.
  3. Pour over the khichdi when aromatic, add salt, mix well.
  4. Serve steaming hot with plain curd and a salad or kadhi and salad.

Creamy millet khichdi

Notes

  • Water - Add 3 times the volume of grain+dal if you want a creamy mushy khichdi, or add lesser for a less gooey version. I prefer the former for ease of spooning and swallowing!
  • Add spices such as cardamom, saunf( fennel seeds) or omit bay leaf if you feel so.
  • Any combination of vegetables can be used. Or you can make it with no vegetables at all too.

Sending this recipe to the following event started by Pari and co-hosted by Shruti. I am so excited to participate in such a useful event where all can use the archives for several healthy recipes. Do check out the spaces of both these awesome bloggers.

Only Grains

Also linking dish to event run by Nupur of UK Rasoi and Priya’s Versatile Recipes.

Mar 29, 2014

Hesaru Kalu and Sabsige Soppu Palya


A Happy Ugadi to all readers. Wishing plenty of good health, happiness and laughter in all your homes. All who celebrate must be busy with the shopping and cooking of the special Ugadi feast. Ugadi, Yugadi, Gudi Padwa are different names to the New Year Celebrations across Karnataka, Andhra and Maharashtra. As part of festivities, I bring to you an extremely flavourful and healthy dish from the North Karnataka region.
If the name of the dish sounds tongue twisting to non-Kannadigas,  I apologise. Do not let the long name fool you. It just means ‘a curry with mung bean and dill leaves’.The dish itself is quite easy to put together. A North Karnataka special recipe, I was introduced to this super aromatic and healthy dish at my dear friend Deepa’s place. Deepa’s enthusiasm for life and generous nature is so infectious. I do have a feeling that she is so high on life because she makes and shares dishes like these, which are so nutritious and lip-smacking tasty at the same time.
Dill leaves are used in several cuisines around the world. What’s good about dill leaves? This amazing aromatic green is very low in Saturated Fat and Cholesterol. It is also a good source of 1.Dietary Fiber, and a very good source of 2. Vitamins - Vitamin A, Vitamin C, Riboflavin, Vitamin B6, Folate, Niacin as well as 3. Minerals - Phosphorus, Zinc and Copper, Calcium, Iron, Magnesium, Potassium and Manganese.
To those not familiar with the flavour, it does take some time to accept. To be honest with you, my family was not so welcoming of the dill flavour when I made it first. At the next attempt, I reduced the quantity of dill leaves to half that of the mung beans. This then, found appreciation among my ‘testers and tasters’ - (read family).
Dill leaves and Mung bean
You Need
  1. Mung Bean – uncooked, 1 cup
  2. Dill leaves – pick leaves, discard thick stem and measure 1/2 cup packed
  3. Onion – diced, 1/4 cup
  4. Oil – 1 tbsp
  5. Mustard seeds – 1/2 tsp
  6. Green chilli – 4-5 chopped fine
  7. Salt – 1 level tsp or less
To Assemble
  1. Rinse the mung beans well, pressure cook them in just enough water for only 2 whistles or till just cooked but not mushy.
  2. Was the picked dill leaves under several changes of water, chop fine and set aside.
  3. Heat oil in a pan, add mustard to crackle, pour in the chopped green chilli and diced onion. Toss well till light brown. Saute onion in oil
  4. Add the dill leaves, sauté on high heat, stirring briskly. Add chopped dill leaves
  5. When the leaves have been tossing for a couple of minutes, add the cooked mung beans, add salt to taste. If there is extra water from the cooked beans, add only if required to the pan at this point. The curry should be moist but not ‘gravy–ish’. Add cooked mung bean
  6. Stir on high heat for 2 more minutes, switch off flame, cover and set aside for flavours to blend well. Ready to serve after half an hour with Steamed rice or Jowar Roti.
Palya ready! Don't you like the red hot chili?
Hesaru kalu sabsige soppu palya - Happy Ugadi

Mar 16, 2014

Thandai Panna cotta


Wishing all readers a very colourful and happy Holi. The season is filled with fun, happiness, spring and a riot of colours. I find all food sites, blogs filled with recipes for the special festival menu. Mawa gujiya, samosa, kachori, and several other delicacies.

Festive Dessert Platter

My dessert is inspired by the flavours of the festival too. I had tried out a Thandai mousse last year. Somehow, I’m surprised it has not found it’s way to the blog. So it had to be panna cotta this time. I have kept the cream to milk ratio at 1/2:1, thereby reducing on the fat content. I plan to try it out with skim milk alone the next time.

Initially, I was quite worried about getting the consistency, flavour and proportions right. After making a mental map of the procedure, and after discussing the recipe with two of my great friends, Deepa and Sreelatha, I decided to go ahead and test it out. Quite happy with the outcome, even if I say it myself. But then, unless you try it out and fill me in, I wouldn't know for sure.

For the main flavouring, I followed Tarla Dalal's recipe to make the thandai paste. For the Panna cotta, here is what you need -

  1. Home made or store bought Thandai paste – 2 level tbsp
  2. Skim milk – 1 cup
  3. Fresh cream – 1/2 cup ( I used Amul )
  4. Sugar – 5 tsp
  5. Agar agar – 7 gm
  6. Water – 1/2 cup
  7. Butter or vegetable oil – 1/4 tsp, for greasing

Optional – 2 tbsp Khus Syrup as a top layer for the panna cotta. I used store bought syrup.

Scooped out deliciousness!

To Assemble

  1. Combine the skim milk, fresh cream, sugar in a heavy bottomed saucepan, and set on heat. Keep over medium flame and stir constantly.
  2. In a separate smaller saucepan, heat the 1/2 cup water, and stir in the agar agar. Set this over a low flame too and keep stirring to mix well and to avoid burning. If you cannot manage to stir both at the same time, get the milk mixture boiled first and then proceed with the agar agar.
  3. When  the milk mixture reaches a boil, add the thandai paste and simmer for a minute, and keep stirring again. After a minute, set aside. Be alert to the milk mixture, it can boil over quite suddenly. Strain through a mesh sieve into a suitable bowl.
  4. If you have not started on the agar agar + water boiling as yet, go ahead with it now. You may need to simmer it for 5-7 minutes over low flame until it has blended into a homogenous jelly like texture. Pour through a sieve or tea filter directly into the milk mixture. Mix well, and return the milk to heat. Simmer again for a minute, remove from heat and cool to room temperature.
  5. Grease 6 dessert bowls / katoris / cups with the butter/oil. Divide the mixture into the bowls. Cover with cling film / lids and refrigerate for an hour or two.
  6. To unmould, run a wet sharp knife through the sides of the panna cotta and invert into serving plate. You may serve directly from the bowls too.
  7. Optional toppings include some khus syrup drizzled,  or few strands of saffron, or some cardamom powder sprinkled, or rose petals for garnish!
  8. Happy Holi and enjoy your wonderful Panna cotta.

Happy Holi with Thandai Panna cotta