Showing posts with label school lunch. Show all posts

Jul 31, 2017

Poha Alu Tikki

Finding myself with a big bowl of leftover Kanda Poha, I was wondering what to upcycle it as. It seemed such a shame to throw away such precious organic red poha. Thus was born Poha Alu tikki. Since rice flakes (Poha) is so quick to soak, and because the tikki is easy to put together with readily available ingredients, I am sure you will enjoy making and savoring this simple Poha Alu Tikki as much as we did.

You can use either Red or White Poha for this Poha Alu Tikki. Or you can use up leftover Aval upma/Kanda Poha like me! Just add a boiled potato for binding, some herbs and seasonings, and the Poha Alu Tikki is ready to be pan fried and gorged upon.

Here is how I made Poha Alu Tikki.

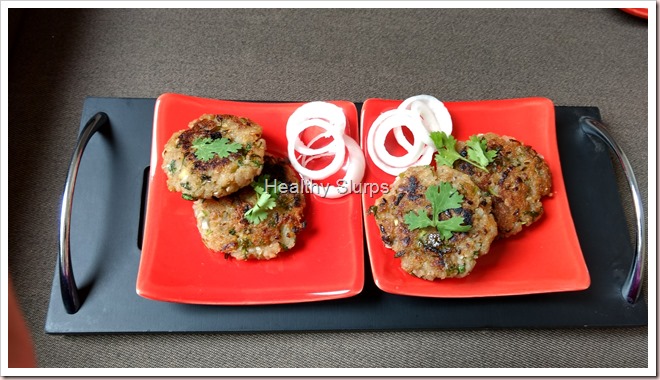
Tikki platter

ALLERGY INFORMATION

  • Does NOT contain lactose, nuts, soya, corn, egg.
  • Suitable for people with gluten allergy or lactose intolerance,

Preparation Time -  15-20 minutes, Cooking Time –  25–30 minutes, Makes – 12 –14 medium size tikkis. 

YOU NEED

COOKWARE – colander, 5 litre mixing bowl, chopping board, knife, potato masher, non-stick tawa/griddle

INGREDIENTS

  1. 1 heaped cup Red/ White rice flakes ( poha). I used *Red Poha. OR 1 heaped bowl leftover aval upma/Kanda Poha
  2. 1 medium potato boiled, or half cup boiled mashed potato
  3. 1/4 cup finely minced red onion
  4. 2 green chillies, finely minced
  5. a handful of fresh coriander leaves,finely minced
  6. 1/2 teaspoon salt
  7. 1/2 teaspoon amchur powder
  8. 1/2 teaspoon garam masala powder

METHOD

  1. If using fresh rice flakes(Poha), cover with fresh water, soak for 5 minutes. Then place in a colander and rinse under running water. Set to drain.
  2. Clean and mince finely onion, green chilly, and coriander leaves.
  3. Add the above to the drained poha, mashed potato, salt, amchur and garam masala in a mixing bowl. Mash them together using a potato masher. Mix well to a homogenous mixture.
  4. Make big lemon size balls, flatten slightly, and shallow fry on a heated non-stick tawa. Drizzle as little oil as possible while shallow frying. Flip to other side, and cook till browned. Take care to brown both sides evenly.
  5. Remove to serving plate. Serve with onion rings and mint chutney.

Tikki close upTikki close up 2


Sep 30, 2015

Chocolate Marbled Energy Bars

Breakfast is the most neglected meal of the day. On busy weekday mornings, most people are in a great rush to reach workplaces, schools, just about anywhere. No wonder then, that, people do not spare time for breakfast. Yet, starting a day without breakfast just works against what we set out to achieve. We are more likely to be zapped of energy and enthusiasm early into the workday. To help us perform better at our tasks, a healthy breakfast is vital. If so, would it not be wonderful if we could have breakfast on the go? Enter granola bars, energy bars, muesli bars. Call them by any name. They are just as convenient, delicious and perfect snacks or meal on the go.

Energy bars can be made ahead, store well, and can be packed as breakfast on the go, or anytime snacks, or on road trips, picnic munchies. They are great for a pre workout or a post workout snack too.

I came across these chocolate marbled energy bars first in ‘Chocolate’ by Delia Smith. The book is filled with decadent chocolate based recipes. However, these energy bars were the ones that caught my eyes first. I tweaked around the ingredients and proportions to suit my requirement. I have substituted the condensed milk with brown sugar/jaggery syrup. You could add both the condensed milk and jaggery syrup to increase the richness of the energy bar too. If using condensed milk, keep the total liquid at the same volume as mentioned in this recipes. I have added popped amaranth seeds to add a good protein to the bar. The only part I have left unchanged is the beautiful marbled chocolate topping! I had to work on the recipe a few times to get a proportion that works best. One that gave just the right hint of sweetness, and had just enough liquid to solid ratio to bake well. I also made sure that the baked energy bars could be cut into neat squares!

Healthy Chocolate marbled Energy Bars

I am sure you are eager to get to the recipe and make some for yourself too. So here goes…

ALLERGY INFORMATION

  • Has gluten from oats. NOT SUITABLE for people with gluten intolerance. Substitute oats with total 5 cups rice flakes to make it gluten free. 
  • This recipe does NOT contain lactose. Suitable for people with lactose intolerance. However, adding condensed milk will bring lactose into the recipe.
  • Does NOT contain corn, soya, eggs.
  • Contains nuts. Omit nuts if you have nut allergy.

Preparation Time – 20 minutes, Cooking Time – 30 minutes, Makes 9 squares

YOU NEED

COOKWARE – Convection oven, 8 inch square baking tray, baking paper to line tray, deep mixing bowl, rubber spatula, sauce pan, 2 glass bowls, steel fine mesh filter, sharp knife

INGREDIENTS

  1. 4 cups quick cooking oats
  2. 1 cup popped amaranth seeds
  3. 1 cup thin rice flakes (poha, aval, attukulu, avalakki)
  4. 1 cup deseeded, chopped sweet dates
  5. 1/2 cup dried cranberries/strawberries/blueberries (optional)
  6. 1/4 cup chopped walnuts/almonds
  7. 1 cup powdered jaggery/brown sugar
  8. 1/2 cup drinking water
  9. 1/2 cup dark cooking chocolate
  10. 1/2 cup white cooking chocolate

METHOD

  1. Bring the water to boil in a saucepan, add the jaggery, mix and let it rest for a few minutes for the jaggery to dissolve. When the jaggery has dissolved completely, strain through the mesh filter to remove impurities. Collect the jaggery solution in the deep mixing bowl.
  2. To the bowl add the oats, popped amaranth, rice flakes, dates, dried berries (if using), and nuts. Mix all the ingredients together until the liquid has coated all dry ingredients.
  3. Preheat oven to 180 C.
  4. Line the baking tray with paper leaving an overhang.
  5. Pat the mixture into the tray, pressing down firmly with a rubber spatula. Make sure there are no dry bits of ingredients on the surface. If needed, sprinkle a few drops of water on top to moisten, and pat down again.
  6. Bake in preheated oven for 20-23 minutes.
  7. Remove and cool the tray on a cooling rack. Do not remove granola from tray. Cool for 20-30 minutes.
  8. Chop the dark and white cooking chocolate into different glass bowls. Microwave in bursts of 20-30 seconds until just beginning to melt. Do not overheat the chocolate, stop heating when there a few bits of chocolate left to melt. Keep stirring with a metal spoon, to get a smooth melted chocolate.
  9. Spoon both the dark and white melted chocolate alternately in a wave pattern over the baked granola. Drag wavy lines using a fork tip or toothpick to create marbled patterns while chocolate is still wet. Tap the tray sharply on the counter top a few times for chocolate to even out.
  10. Place the tray in the fridge to set quickly.
  11. After half an hour, remove from fridge and set on counter top. Wait for the chocolate layer to warm up to room temperature a bit. I left it on the countertop for 10 minutes. Room temperature at my home is around 23C-25C. Cut into 9 squares with a sharp knife. If the chocolate layer seems to crack rather than cut up, wait for some more time and then cut up. The marbled energy bars are ready.
  12. Store in air-tight box. Stays good for at least 1 week, maybe more. I never got a chance to find out! Pack in baking paper for road trips or any place out of home. These marbled energy bars are great for breakfast on the go, for school snack boxes, for pre or post workout snacks, as well as a healthy snack option.

Guilt free healthy snacks

Notes -

  • Diabetics may/may not be able to eat these energy bars. Remember although the recipe uses jaggery, there is more sugar in the dates as well as chocolate. Omitting the chocolate could bring the sugar content of the energy bars lower.
  • The energy bars cut up neatly if baked through well. Also wait patiently for the top chocolate layer to set before cutting into squares.
  • Do not over heat the chocolate. Stop heating when three fourths of the chocolate is melted. Keep stirring in a circular motion, in the same direction for a smooth glossy chocolate.

Jun 3, 2015

Idli – The Ultimate Guide to Softest Idlis.

Idli. Enough said. That spongy, light as air, uber healthy, steamed breakfast of millions in India. It is every idli lover’s dream to make the fluffiest, softest, ‘malli poo’ idlis (as soft as jasmine flower) at home. Idli is the stuff of  culinary dreams. The perfect idli seems so much in reach and yet, so elusive. As my friend put it, “Idli is the cause and weapon of marital fights at our home.” If you want Idli to be the cause of marital harmony rather than distress, or if you are looking for a healthy breakfast recipe, read on..

Much has been written about how to grind the perfect idli batter. Family and friends who have tasted my idlis have been reminding me to document my recipe at the blog. So here I am, with my method of making idli batter. Do share what works for you as well. It would be great to hear from everyone.

The key to good food begins with good ingredients. I use Salem idli rice. I use the best quality whole white urad that I can find. In Bangalore, Salem idli rice and whole white urad can be bought at most wholesale rice and grain shops. (rice mandi) Some supermarkets like Nilgiris, Spar, Star Bazaar, Towness also carry them. “Can I use idli rava instead of the rice?” You can. But the texture of idli will be different. Don’t tell me I did not warn you.

The next step is correct technique. For fermentation, timing is key! I soak the grains overnight, grind it the next morning and leave it to ferment through the day. By evening, the batter is ready. I store the fermented batter in the fridge and use it for up to a week without any loss of flavours.

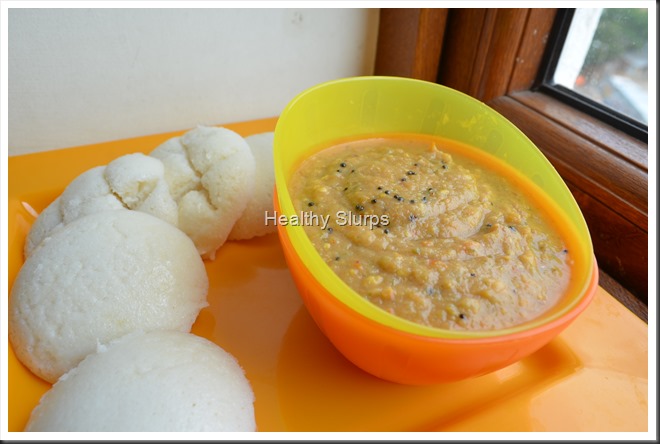
Idli topped with two chutneys 

If you are eager to make the perfect idlis for your family, follow these steps carefully. Please read the method thoroughly before trying. As with other recipes, perfection comes with practise. If you have any doubts, write to me and I can try to sort it for you.

YOU NEED

COOKWARE – Wet grinder, big bowls, spatula, idli steamer 

INGREDIENTS

  1. 4 cups Salem Idli Rice
  2. 1 cup Whole white urad
  3. 1 tsp Fenugreek seeds – (optional)
  4. 2 tsp Salt
  5. 5-7 cups chilled drinking water for grinding.

METHOD

  1. Measure out rice and urad in two separate bowls. Add fenugreek seeds, if using, to rice bowl. Rinse in enough changes of water till water runs clear. Soak in fresh drinking water. Water level should be 1 inch above the grains. Soaking time can range from minimum of 4 hours to maximum of 8-9 hours. I soak overnight. (about 8 hours)
  2. Measure out 2+1/2 cups of drinking water. Drain the soaking water from urad and grind in wet grinder. Keep sprinkling a quarter cup of water every 8-10 minutes. Use all of the 2 cups of water. Add as much of the 1/2 cup as needed. I grind for 40-45 minutes. Remove to a deep bowl when the batter looks doubled in volume and is silky smooth when you feel between your fingers.
  3. Measure out 3+1 cups of chilled drinking water. Drain out the soaking water from rice. Grind in wet grinder with 1 cup of water to begin with. Sprinkle just enough water to keep the grinder running smoothly. Keep checking every 4-5 minutes while grinding. Add water as necessary. I grind rice for 20 minutes. I stop grinding when the rice feels a little coarse and before the rice becomes a very smooth paste. That is not to say a semolina texture. Rather, between fine semolina and paste….
  4. Remove to same bowl as urad batter. Add salt and mix well with your hand. Yes, I dip most of my forearm into the batter to mix it up. This is vital to good fermentation. Have you not heard?
  5. Set this covered bowl of batter to rest in a warm place. Make sure to fill you bowl only half way to give room for rising. You can divide the batter into two bowls too. At my home, the batter takes about 8 hours to ferment. If your room temperature is below 20C, set to ferment inside your cold oven. Or cover the bowl with a beach towel/blanket. And pray that the batter does not attach itself to your blanket!
  6. The batter is completely fermented when it rises to double in volume, has a sour-sweet fragrance. Stir it lightly. Pour into greased idli moulds.
  7. Steam for 10-12 minutes over a medium flame. The idlis are done when a knife inserted through the centre comes clean.
  8. Serve hot with assorted chutneys, or molaga podi or sambar. Or all of them!

Mini idli served with love

Apr 16, 2015

Jowar dosai

Why millets? Why so much brouhaha over these pseudo cereals? Why is it important in a modern urban diet? Are they good at all? Who should eat millets? Who should not? These and many more facts set out for you here. Read on to know more.

Millets are not cereal grains, so they are called pseudo grains. Millets are smaller grains. They belong to five (or more) different botanical families, but are classified under one name as millets. Millets are grown for bird, animal and human consumption. Factors that go in favour of their cultivation are that they have a short growing season, grow in semi arid regions, (they need very little water) need very little attention. Different countries across the world have been growing and consuming millets for thousands of years. Unfortunately, urban diets have not included millets for about 50 years now.

So what is the good and bad about eating millets? Here, I split it up into its constituents and make it simple for all to understand.

The Carbohydrates -  Millets have complex starches in form of amylose and amylopectin. Such a starch can only be digested in cooked form by humans. Since they not easily digestible, they have a low glycemic index. That means they release their sugars into the blood stream in a slow steady fashion. Much like how a sustained release medicine works. There are no highs and lows in blood sugar when you are eating such starches. And yes, you guessed it right: this is great news for diabetics and pretty much everybody else.

The Proteins – After carbohydrates, proteins form the major part of millets. Egg and human milk are considered perfect proteins because they have the best combination of amino acids that the human body needs. When compared to these proteins, most millets are found to have insufficient amino acids to provide all nutrients for infants and growing children. Millets have been found to be deficient mainly in lysine, an essential amino acid. What are amino acids?

Amino acids are the building blocks of proteins. There are 21 amino acids that form all the proteins ever known. Several of these amino acids are made in the human body. These are called non-essential amino acids because the body can make it on its own. Some of these are called essential amino acids. Why are they called so? Because they are necessary for growth and cell repair but cannot be synthesised in the human body. So they have to come from the food we eat. Lysine is one of these essential amino acids.

Does this mean that millets are not good enough for weaning food? Or to feed growing children? No. Millets are very good for children, when cooked well and when paired with a legume such as mung bean or tuvar dal. Legumes are naturally rich in lysine and by combining them in the same meal ensures that the meal gives complete protein for the growing body. Besides, millets are gluten free as well. So they are a safe bet for all, children, older people or those with gluten allergy.

Look forward to more information and recipes with millets in my forthcoming posts.

Meanwhile, here is a recipe for Jowar Dosai. This recipe is good for beginners who are not sure about how to begin including millets. Millets are great for people who need a gluten–free diet as well. Besides, here, the ground batter is fermented which increases the food’s digestibility as well as increasing the availability of several vitamins and minerals from the grains.

The initial trouble of soaking, grinding and fermenting is well worth the effort. The batter keeps well in the fridge for up to a week. When you have batter ready in the fridge, making dosai for a meal takes only a few minutes. You can choose to make regular size dosai for breakfast, dinner or coin-sized ones for your child’s lunch box.

Coin Dosai platter dotted with molaga podi

ALLERGY INFORMATION

Preparation Time – 8 hours soaking+1 hour grinding+8 hours fermentation, Cooking Time – 10-15 minutes, Makes – about 20 dosais.

YOU NEED -

COOKWARE - Wet grinder or mixer grinder, Iron skillet/griddle, Big deep dish mixing bowls, ladle, sharp metal spatula

INGREDIENTS -

  1. 1 cup Jowar grains
  2. 1 cup salem idli rice/boiled rice/raw rice
  3. 2 tbsp fenugreek seeds
  4. 2 tbsp urad dal
  5. 1 heaped tsp salt
  6. Sesame oil for drizzling over dosais, about 1/4 cup oil

METHOD -

  1. Measure out all ingredients except salt and oil. Rinse the grains well, Soak overnight. To do this, steep in enough water to cover the grains plus an inch higher.
  2. The next morning, grind the soaked grains. If using wet grinder, keep sprinkling water every 7-10 minutes. You can use up to 3 cups water for grinding. I grind my batter in a wet grinder. When using jowar grains, it takes longer to grind. About 1 hour of grinding gives me a smooth batter. When the batter looks smooth, add salt, mix well and remove to a deep bowl. Allow plenty of head room for fermentation. Leave overnight for fermentation.
  3. The batter is ready when it has risen to double volume.
  4. Heat up an iron skillet/dosa tawa. Smear oil all over to grease.
  5. Pour a ladleful batter in the centre of skillet. Spread with back of ladle in concentric circles. Drizzle few drops of oil around the sides. When brown at edges, loosen the edges, flip over with a sharp spatula and cook on other side. Repeat for the next ladle of batter.
  6. Alternately, pour tiny spoonfuls of batter all over the skillet to make ‘coin dosais’. Drizzle oil around the sides, flip over to cook briefly on other side. Remove to serving platter when done.
  7. Serve with any chutney of choice or with dosai molaga podi!

Coin dosai topped with molaga podi

Crispy or soft - fragrant Jowar Dosai

Dec 22, 2014

Potato and Sorakayi Kurma

An unusual combination of vegetables. Brought about by necessity. That and the early morning rush. I found just a few vegetables in the fridge and had to create some packed lunch out of these in 30 minutes. So here is how I managed to pull it off.

In case I need to ‘repeat this accidental success’, I may need a recipe the second time. So I am documenting it here. Also thought of sharing it with my friends: harried moms who have to churn out delicious food, in school lunch boxes every morning, that too in record time.

Aromatic Potato and Sorakayi Kurma

ALLERGY INFORMATION

  • Does NOT contain lactose, gluten, nuts, soya, eggs.

You Need

Cookware

Knife, chopping board, pressure cooker, saucepan

Ingredients

  1. 1 large potato
  2. 1 heaped cup diced lauki/sorakayi/bottle Gourd
  3. 1/4 cup diced carrot (optional)
  4. 1/4 cup fresh/frozen green peas
  5. 1 small onion
  6. 2 tomatoes OR 2 tsp tomato paste
  7. 1/2 tsp garlic paste
  8. 1/2 tsp Garam Masala Powder
  9. 1/4 tsp turmeric powder
  10. 1/4 tsp red chilli powder (optional)
  11. 1/2 tsp salt or more if needed
  12. 1/4 tsp cumin seeds
  13. 1/4 tsp mustard seeds (optional)
  14. 1 tsp cooking oil

Method

  1. Rinse, peel skin and chop/dice vegetables(from 1 to 3) to similar size. Place along with peas directly in a small pressure cooker or in a suitable container inside a pressure cooker. Add 1/2 cup water, and cook for 2 whistles. Let cool on its own.
  2. While the veggies are cooking, set a sauce pan over flame. Heat oil, season with cumin and mustard seeds. (if using)
  3. Add finely chop onion. When it begins to brown, in a couple of minutes, add the garlic paste, let sizzle for minute. Keep stirring, lest it burns.
  4. Add in the tomato paste, the powders. Sprinkle a few tbsp of water. Stir and simmer for 4-5 minutes for all flavours to blend well.
  5. Combine the cooked vegetables (along with cooking water) and the simmering gravy. Check for salt and other seasonings. Mash the potato chunks roughly with the back of a ladle.
  6. When you have simmered this mixture for a couple of minutes, the kurma is ready. Can be packed along with rotis, bread or steamed rice for school lunch.
  7. TIP – If you find the gravy too salty or spicy, add quarter cup water, some chopped coriander leaves and squeeze half a lemon into it too. Hopefully you can retrieve it this way. Another way to salvage, is by adding another boiled potato to this gravy. But yes, you need time to boil another potato if you don’t have one handy.

Phulkas with Kurma for lunch

Lauki and peas doing a happy tango  

Oct 21, 2014

Ragi Chocolate Laddu

Deepawali, the festival of lights, eagerly anticipated and celebrated throughout India, is here. There is so much excitement, happiness, festivities in the air. It is also fun to run around shopping for new clothes, gifts, fire crackers.

As with most festivals, the stories behind celebrating this festival too are several. Sri Krishna killed Narakasura on this Chaturdashi day. Lord Rama returned to Ayodhya after His exile after killing Ravana and freeing Sita from his evil clutch.

Whatever be the legend, the common theme is the victory of good over evil. The assurance from Divinity that evil, cruelty, jealousy and hatred do not last long. That truth, goodness and virtuous living always triumphs. A very heartening reminder in a world where the opposite seems to be true. An assurance for those who believe. A great reason to celebrate. To meet up with family, close or extended. To renew friendships, to form new ones, to look forward with hope.

So here is wishing you happiness, good health, joy in your lives!

In continuation with my efforts at finding and documenting healthy recipes, I am very happy to share with you this new attempt of mine. The nutty aroma of roasted ragi combined with seductive cocoa, taken a notch festive with fragrant ghee all come together delightfully in this healthy dessert.

Rich, fragrant Ragi Laddus

Millets are quite the rage in the diet of every health conscious person and rightly so. They are packed with several nutrients, richer in calcium, fibre and other vitamins than grains like rice or wheat. Ragi, or Finger Millet forms the staple grain of a large part of rural India. Here is my shot at making a festive dish with this humble grain. A successful undertaking, even if I say so myself. This Diwali, when you dig into this dark, mysterious confection, you can feel a tad less guilty at indulging knowing that there is this super healthy millet at its base.

Dark, handsome laddus ready!

ALLERGY INFORMATION

  • Does NOT contain gluten, lactose, egg, soya, peanuts, any nuts.
  • Suitable for people with gluten sensitivity, lactose intolerance, nut allergy.

EDITED – A reader expressed concern about using butter or ghee in this recipe for lactose intolerance. Usually ghee is digested even by people with lactose intolerance, since it is ‘fully clarified butter’, but if you are intolerant to ghee as well, do use margarine warmed in the same proportions. I have not used margarine myself, and am only suggesting it as an alternative.

Preparation time – 30 minutes, Cooking time – 5 minutes, Makes – 12 laddus

YOU NEED

Cookware – Thick bottomed fry pan, Mixer grinder, Metal spatula, Small Saucepan.

Ingredients

  1. 1 heaped cup Ragi flour (I used store bought)
  2. 1 scant cup powdered sugar
  3. 1/4 cup cocoa powder (I used Hersheys)
  4. 1/2 tsp Vanilla essence
  5. 1/4 cup ghee (Can use melted butter too)

Method

  1. Set a thick bottomed fry pan/ skillet on fire. Dry roast the ragi flour on medium heat stirring briskly all the time. This step removes the raw flavour of the flour and gives it a good nutty tone. 2-3 minutes later, you should sense a change in aroma. The flour is then ready.
  2. Switch off flame, add in cocoa powder, mix well with ladle. Also add the powdered sugar,  and vanilla essence, and mix in thoroughly. You could use a wire whisk to mix well too.
  3. Heat up the ghee over a low flame in a different small sauce pan. If using butter, heat a similar quantity of butter for such time until you find the butter slowly changing hue to a pale gold.
  4. Drizzle this hot ghee over the ragi-sugar mixture. Mix again with ladle, and when it is of bearable heat, grab a fistful and compress using fingers to a round ball shape. The laddu can be set aside to rest when it keeps its shape. It will harden on cooling. Finish off making laddus with the rest of the mixture. Halfway through, if you find the mixture cooling and the laddu does not shape well, then warm the flour mixture gently again to help shaping the laddus.
  5. Your delicious, laddu redolent of cocoa with a hint of vanilla is ready!

DSC_3959Happy Deepawali

          HAPPY DEEPAWALI EVERYBODY. STAY HEALTHY, BE HAPPY!

Jul 6, 2014

Using Leftovers–Veg Cutlets


This recipe is about leftover-makeover. Celebrating the nifty, resourceful cook, who I guess most of you are! What would you do when faced with small bowls of random curries in the fridge? Make parathas? Or some fried rice and toss in those veggies, perhaps? We made these cute cutlets last week.

Even if we discovered the combination quite by chance, it had a great balance of protein, tubers and vegetables thrown in. Our kids could not find any fault with the textures and flavours in this melange. After polishing off several of them at their post-school snack time, they asked for it at dinner too! It was then I realised we had a killer combo in hand. Quite versatile too, for they can be devoured as such, can be sandwiched between buttered bread and packed for school lunch, or get converted to burger patties, or get drenched in the very Indian ragda pattice.

After-school deliciousness

Since we made them with whatever was in the fridge, I am not sure as to how to record a recipe. Here is what we threw together -

Preparation time – 20 minutes + 8 hours soaking time, Cooking time – 40 minutes pressure cooking + 20 minutes, Serves – 4 - 6 

Allergy Information

  • Does NOT contain egg, dairy, lactose, corn, soya.
  • Can be made gluten free by substituting bread crumbs with rice flour or corn flour for dusting.

You Need

Cookware – Pressure cooker, electric mixer, colander, mixing bowl/basin, non-stick skillet / any other skillet.

  1. Boiled* and mashed potato -  1/2 cup
  2. Cooked* kala channa / Brown channa (Garbanzo beans)– 1/2 cup
  3. Raw plantain* –peeled, chopped and cooked till just done -  1/2 cup
  4. Beetroot* – peeled and boiled, 1/4 cup
  5. Onion – finely chopped – 3/4 cup
  6. Chopped Coriander leaves – 1/4 cup
  7. Chopped green chillies – 2 tbsp
  8. Garam masala / Pav bhaji masala / Chole masala – 1 heaped tbsp
  9. Salt – 1+1/4 tsp
  10. Bread crumbs – 3 - 4 tbsp ( Use rice flour or corn flour to make it gluten-free)
  11. Oil – for sautéing, about 2-3 tsp

To Assemble

  1. Peel, rinse and chop onion, green chillies, and the coriander leaves as finely as possible. Set aside in a colander.
  2. *To save time, you can place the soaked channa in a container topped by another with all the other veggies (add 1/2 tsp salt to the vegetables to avoid getting mushed up) and cook in the same pressure cooker. I normally pressure cook the channa on a low flame for 20 minutes after the cooker’s first whistle. We want a just cooked texture without being mushy.
  3. After the pressure has released, drain all the cooking water into another bowl, place all the cooked contents in a mixer, pulse until coarsely mashed.
  4. Take a mixing bowl. Transfer the contents of the mixer into it. Also add the chopped onions, chillies, green coriander, add 1/2 tsp salt, the masala powder you are using, bring them all together using your fingers. It should feel like a moist coarse mixture (not paste), but should not ooze water or extra fluid. Shape balls into flat cutlets
  5. Make lemon sized balls, flatten slightly using your palm, dredge in bread crumbs and set aside. You can keep these in the fridge for half an hour to stabilise the texture. (Or prepare ahead till this stage, store them in a suitable air-tight container in the freezer. Thaw and fry as many as needed each time.)Dredge in bread crumbs
  6. Heat a skillet, season the skillet with a few drops of oil, place as many cutlets as the surface of the skillet holds, and fry over high heat first and medium flame later on both sides till well browned.Shallow fry both sides in skillet
  7. Remove to kitchen paper.
  8. Serve warm with mustard and tomato ketchup as accompaniments. Or make it into a sandwich filling. Or make thicker pattties, shallow fry on both sides and use to assemble burgers along with some onion, tomato rings and crisp lettuce. Whichever way you choose to gorge on it, you will find it delicious!

Hot cutlets - ready for snacking!

Jun 21, 2014

Five minute Three Pepper Paneer Curry

Check-out Allergy Information.

Every parent with school-going kids has to face the morning or the night before with a very important question – what to pack in the school lunch box? What’s there in my pantry? Also, when you have to feed more than one kid, the agony is doubled, believe me!

If my older one wants muesli for breakfast, the younger one fancies ‘Chocos’. The day the older one thinks of a sandwich for lunch, the younger one would like rice. If one feels like some thing sweet, the other wants a savoury treat right then! The Universe connives with my kids such that, they have exactly opposite moods at any time. At such times, nothing helps - not requests to adjust with each other, not promises to make it tomorrow, not threats, nothing! Trust me.

And, I have an hour to make breakfast for them, make acceptable (read different gourmet meals) lunches, pack them, fill their water bottles, make sure they have brushed, showered, prayed (yes, that is important in my home), combed, attired in mandatory school regalia!, find random books/papers/assignments/stationery that they have forgotten to stuff into their school bags, find their socks, salvage their shoes from the chasm between the shoe racks and the wall, and make sure they reach the school bus on time!

I know I am not alone. Most mothers/parents in my city and maybe, the world over, go through some variation of this vertigo-inducing routine in the morning! Well, after going through this rigmarole for more than 15 years, I have a few tricks up my sleeve. Some recipes which help me assemble quick, hearty, nourishing home-made lunches for my children.

This paneer curry is one such easy-peasy life saver on such insanity-causing weekday mornings!

If you have paneer ready, that is.

And coloured capsicum (bell peppers), and a couple of sauces.

It is versatile, easy to put together, can be used to partner with chapatis, filled into a sandwich, rolled into a kathi roll, or add pizzazz to some fried rice. Most important, when packed in a lunch box, it will come back home empty. Hopefully your child got to eat some of it Smile

Preparation Time – 10 minutes; Cooking time – 5 minutes; Serves – 4-5.

ALLERGY INFORMATION

  • Does NOT contain egg, nuts, corn.
  • Has dairy and lactose. Can be made dairy- and lactose-free by substituting paneer with extra-firm tofu.
  • Has MSG. Not suitable for children below 2 years.

The 3 pepper paneer sandwich

You Need

Cookware – Cutting Board, Knife, Colander, 9” Diameter frying pan / Wok.

Ingredients

  1. Paneer (Or extra firm tofu) – 200 gm
  2. Green, red and yellow capsicum, chopped – 1/3 cup each
  3. Red Onion – 1 big, or measure 1 cup, finely diced
  4. Fresh coriander leaves (Cilantro), chopped fine – 1/4 cup
  5. Schezwan Sauce (any brand) -  2 tsp
  6. Tomato Ketchup – 3-4 tbsp
  7. Salt – a couple of pinches ( if needed)
  8. Any vegetable oil – 2 tsp
  9. Saunf ( fennel seeds) – 1 tbsp*
  10. Honey – 1 tsp OR Sugar – 2 pinches (Optional)

*Do not omit the saunf in this recipe. It adds a unique flavour to the dish.

To Assemble

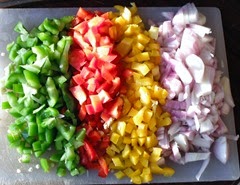
  1. Rinse paneer or tofu in drinking water. Carefully place it in colander to drain. Then, you can choose to either dice the paneer (or Tofu) or roughly crumble it. I prefer to dice, as then, the diced vegetables and the paneer all look similarly proportioned.
  2. Rinse, and finely dice all the capsicum into the same size. Peel, rinse and finely dice the onion too. Happy day with happy veggies
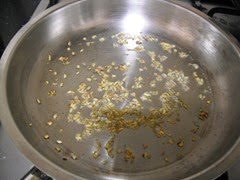
  3. Set frying pan/wok on fire and heat the oil in it. Add saunf, let it sizzle and release its’ aroma. Inhale - the aroma of saunf
  4. Tip in the onion before the saunf browns. Sauté for a minute. Add a pinch of salt to speed things up.
  5. As soon as the onion looks pink,  tip in the diced capsicum, toss. Sauté for another two minutes.Veggies in a merry sizzle
  6. Now the sauces can go in. The sight of these liquids hitting the hot pan and then the aroma around – I’ll leave you to savour in your kitchen!
  7. A quick mix of the sauces and veggies, and now it is the turn of diced paneer followed by chopped coriander to hit the pan. Switch off flame, mix all contents well, taste and add more salt now if needed. Some paneer will get crumbled while mixing, that is fine. Add the (sugar /honey if you are using), now. Mix through, taste again to make sure the flavours satisfy your palate.*Tri-colour glory
  8. The 5 minute 3 pepper paneer curry is now ready. Use it as filling in whole wheat chapatis – spread 2 tbsp of curry per chapati, roll up, cover in foil and pack for lunch. Or, use as filling for sandwiches. it is a great accompaniment to Chinese fried rice too. Sandwiches in the making

* My family found the play of texture and flavour in this recipe to be very appealing! You could add more or less of the sauces, or add more seasonings as you prefer. Add red chilli paste instead of Shezwan sauce, omit the sugar, try the dish with any one type of capsicum – all these are variations you could try.

Pick-me-up Sandwiches for anytime of the day

We are enjoying these filling, healthy and absolutely lip-smacking sandwiches at our home, in our lunch boxes and as after-school snacks too! Go ahead, make some for yourself, enjoy and let me know if you liked them.
Jun 3, 2014

Peerkangai chutney


I seem to be on a spree to cook with un-glamorous, un-restaurant-y, humble vegetables. Well, why not? Gourds are very easy on the wallet and the waist line, mostly neutral in flavour, lend body to various dishes, have varied nutritional benefits but are ignored despite all these.

Pic Courtesy - Sankalpfarms.com

No South Indian breakfast is complete without chutney. That inevitably means use of fresh coconut. On days when you do not have stock of fresh/frozen coconut, or want to limit it’s use in daily meals, you need some saviour to rescue the day’s chutney. Enter the star of today’s chutney - ridge gourd. I have used it in this recipe to benefit from the nutrients it offers, as much as a coconut-substitute.

  • Ridge gourd is high in moisture and crude fibre (good news for those with chronic constipation).
  • It is a very low calorie vegetable, so great to include in a weight loss diet. It adds plenty of bulk to a meal without adding significant calories! This means, you can eat a whole cupful of ridge gourd and add less than 20 calories to the meal!
  • Ridge Gourd has negligible Sodium and a fair source of Potassium. Hence it is useful for people with high blood pressure or certain kidney ailments where sodium is severely restricted.

Here is how I made the chutney. We used it to complement soft idlis for breakfast. It was spicy, tangy and declared ‘good’ by my family. Do try it out and let me know how you liked it. The quantity here serves 5-6. Halve to serve 2-3.The chutney can be refrigerated and used within 2 days.

Preparation Time – 15 minutes ; Cooking Time – 5-6 minutes ; Serves – 5 – 6

Allergy Information – Does NOT contain gluten, egg, soya, peanuts, corn, lactose.

You Need

 Cookware  -  A frying pan, mixer grinder or food processor

Ingredients

  1. Red Onion – 1 medium, or measure 1/2 cup after chopping
  2. Roma Tomatoes – 2 medium, or measure 3/4 cup chopped
  3. Ridge Gourd / Peerkangai – 1 big, or measure 1+1/2 cups sliced
  4. Green chilli – 4-5 cut into halves
  5. Chana dal – 2 tbsp
  6. Tamarind – 1/4 tsp*
  7. Salt – 1/2 tsp
  8. Oil – 1/2 tsp
  9. Coriander leaves – 6-7 stalks with leaves (optional)

For Seasoning -

  1. Oil - 1/4 tsp
  2. Mustard seeds – /4 tsp
  3. Hing Powder – a pinch

* Use Tamarind if tomatoes are not tart enough, or add a couple of extra tomatoes and avoid tamarind. You can even omit tamarind entirely if you do not prefer a sour-ish chutney

To Assemble

  1. Prepare the vegetables for frying. To begin,  wash, peel and chop onions. Next, wash peel and chop tomatoes and green chilli. Rinse the ridge gourd well, peel part of the rough skin at the ridges, while leaving some skin on the vegetable. Cut into thick slices.Fry all vegetables for chutney
  2. Heat a small wok / frying pan. Add the half tsp oil, let it heat up. Add the chana dal, fry over medium heat until golden brown. Add all the prepared vegetables, chilli, tamarind and salt. Toss well, (do not add any water), cover and simmer for 2–3 minutes or until you find the tomato skin has shrunk a little bit and the gourd seems to go slightly limp. If you are using  coriander leaves, add at this point, and switch off flame.
  3. Let it cool. Grind to a coarse paste. You will not need any water for grinding. After removing to a bowl, rinse out the mixer jug with a 1/4 cup of water and add to the chutney if you wish to dilute it. Chutney with Seasoning
  4. Heat oil for seasoning. Crackle mustard seeds, add hing powder and pour over the chutney.
  5. Serve as accompaniment to idli, dosa, or over plain steamed rice, as a sandwich spread or as dip for crudites too!

Soft Idlis with Spicy Chutney

Fresh breakfast for two!

Apr 14, 2014

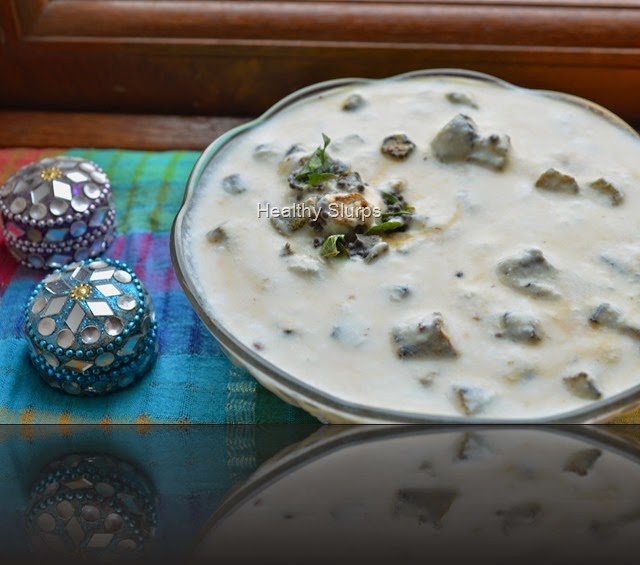
Vendakkai Thair Pachadi / Crispy Okra in Chilled Yoghurt


A very Happy New Year to all who celebrate today. Happy Vishu to all Malayalees across the world! All family members taking time off from busy lives, praying and eating together, tables rich with culinary treats– these surely are some special features of festivals. Celebrations always involve good food. Contrary to popular thought, festive food need not all be time consuming to prepare, nor be calorie-rich.

Today, I would like to share a lip-smacking, simple recipe which you can use to grace the table at any festive menu. This recipe has distinct south Indian flavours, so you can tweak the seasonings to accommodate the demands of your palate or cuisine. (Read notes)

Happy New Year to all

The key point here is how the vendakkai / lady’s finger / bhindi / okra is cooked - crispy ‘fried’ okra is first readied by slicing it thin, drizzling with a quarter tsp cooking oil and grilling it for 10 minutes. This then is lovingly folded into a bowlful of thick skim milk yoghurt, seasoned with salt.The dish is finished off with a fragrant tadka of mustard seeds, curry leaves and pinch of hing in some oil. The grilling ensures that you save fuel, oil and time. The crisp texture encourages even die-hard okra haters to try it out. The chilled yoghurt is just so perfect for this blazing summer season. While this recipe is an accompaniment, you will soon find yourself eating a chilled bowlful on its own. Here is what you need -

You Need

  1. Okra / Lady’s finger / Bhindi / Vendakkai – 200 gm
  2. Skim milk yoghurt – 500 ml
  3. Salt – 1/4 tsp
  4. Sugar – a pinch
  5. Cooking Oil – 1/4 tsp

For seasoning

  1. Cooking oil – 1/4 tsp
  2. Mustard seeds – 1/4 tsp
  3. Curry leaves – 3
  4. Asafoetida Powder (Hing) – a pinch

To Assemble

  1. Wash the vendakkai by immersing in a bowl of water, drain on colander and spread out to dry on a kitchen towel. Snip off the tops and tails, and slice into even thin disks.
  2. Preheat the grill to 250 C.
  3. Place in a single layer on a baking tray. Drizzle 1/4 tsp oil over the disks, and spread in a single layer.
  4. Once the grill is ready, place the tray of vegetables inside, and grill for 10 minutes. Toss and scrape the contents at half time to ensure even browning. By the end of 10 minutes, the Vendakkai would have shrunk to half – size pieces, and would have browned evenly without being charred. You may need to watch the grill in the last minute to ensure correct browning without charring.
  5. Let it cool in the tray. Meanwhile, whip up the skim milk yoghurt with salt and sugar.
  6. Prepare the seasoning by heating oil in a small pan, adding all the ingredients for seasoning in order. Pour over the whipped yoghurt.
  7. Gently fold in the cooled Vendakkai into the yoghurt, chill for half an hour before serving.
  8. Serve with steamed rice, sambar, papads.

Bowl of chilled pachadi flecked with crisp okra

Notes

  • Avoid mixing the grilled vegetable too vigorously into the yoghurt, it will darken the colour of yoghurt.
  • You can experiment with flavours by adding roasted jeera powder, coriander leaves instead of hing and curry leaves.
  • Can be used as a dip for crudites or rolls too by seasoning with a tbsp of chopped, fried onion, a pinch of red chilli powder and a tsp of chopped fresh parsley instead of above seasonings.
  • Grilling the vegetables as opposed to deep frying them helps to cut down on cooking oil used.

Enjoy the cool pachadi!

Nov 20, 2013

Sweet Corn and Pomegranate Salad

Colourful Salad
Ingredients for a salad are never fixed at my home. Assembling a salad is a flexible exercise, often involving the bringing together of whatever is available in the fridge, and finishing it off with a dressing, which is most often a citrus-y one. This salad too was created similarly with foods present at hand. Sweet corn kernels and juicy pomegranate do a pretty tango here, with some worthy add-ons such as red onion and grated carrot thrown in to merrily add to the colour riot. I’ve noticed quite often that my kids need no coaxing to try a salad that is as vibrant in colour as this one.
Apart from being loaded with Beta Carotene from the vegetables and anti oxidants from the fruit, salads help to increase the dietary fibre of our daily meal.
As per the recommendations of the National Institute of Nutrition, an adult person must have 40 gm. of fibre in a day, which includes soluble and insoluble fibre. Dietary fibre is needed for
  1. Proper bowel function,
  2. To prevent Haemorrhoids
  3. To prevent Coronary heart disease
  4. To control diabetes and obesity
  5. To reduce plasma cholesterol
  6. To protect against colon cancer.
Salads are the tastiest way to consume fibre in a meal. In addition, they provide colour, texture and variety resulting in a satisfying meal experience.
Go ahead and make this salad for yourself and share it with me too!
You Need
  1. Sweet corn kernels – 1/2 cup
  2. Pomegranate pearls – 1/2 cup
  3. Carrot grated – 1/4 cup
  4. Roma tomato, diced fine – 1 medium tomato
 For the dressing
  1. Salt – 1/4 tsp
  2. Pinch of sugar
  3. Juice of 1 medium lemon
  4. Crushed black pepper – 1/4 tsp OR Green chilli – 1 minced fine
  5. Red onion, diced fine – 2 level tbsp
To Assemble
  1. Steam the sweet corn kernels for 2 minutes in the microwave at high power. Set aside.
  2. Remove the pomegranate pearls from the fruit, keep aside.
  3. Combine all ingredients for dressing, mix well with a fork.
  4. Bring all ingredients for salad together, toss well with the dressing.
  5. Chill for half an hour in the fridge in a covered bowl.
  6. Serve along with warm pulkas or freshly grilled garlic bread or as a side with tadka dal and steamed rice.
Healthy and Radiant


Jun 21, 2013

Corn dalia upma


A few months ago, I was browsing the aisles of my usual supermarket and found a new product. Always one up for trying anything new, I picked it up right away. Toying with several recipe ideas using the product, I finally decided to play safe and use it to make upma. Clicked pictures as usual and then put up a teaser on my facebook page inviting guesses on the ingredient used and the dish made. There were several close guesses. The first person to get the guess totally right was Lubna Karim who blogs at http://www.kitchenflavours.net. She was so happy to guess the correct ingredient with only the picture on the facebook page for a clue. I was awed by her guessing skills.

In honour, I am dedicating this blog post to Lubna Karim.

Lubna is a multi talented person, and so modest about it to boot. Loving wife, caring mom, super cook, amazing photographer, the list goes on…Lubna recently completed five years of food blogging - hearty congrats to you dear! Do head over to her blog for amazing recipes and pictures that entice you to try out each dish right away!

So the ‘new ingredient’ is Corn daliya – or Broken Corn Kernels similar to Broken Wheat. Also called corn grits in several parts of the world, it is either used to make polenta or cooked into a porridge. Here is how I used the corn frits to make upma that day. This quantity serves 5 - 6 people. Halve the measures to serve 2 – 3.

What’s good about Corn dalia?

Corn dalia, is a low cholesterol, low sodium cereal. Being gluten free, this dalia can replace wheat dalia in upma, khichdi, porridge or any dish – a boon for gluten intolerance disorders, such as Celiac diease, or even Malabsorption Syndrome.

Corn is a fair source of Calcium, Phosphorus and Iron too. The cereal has a better contribution to vitamin A and dietary fibre when compared to rice, wheat or oats.

You Need

  1. Corn Dalia – 2 cups Organic Corn Dalia!
  2. Fresh drinking water – 6 cups
  3. Vegetable oil – 2 tbsp
  4. Red onion – 1/2 cup, chopped
  5. Tomato – 1 cup, chopped
  6. Carrot – 1 cup, grated
  7. Green chilli – 3 - 4 finely chopped
  8. Ginger – chopped, 1 tbsp
  9. Curry leaves – 8 -10, torn roughly
  10. Mustard seeds – 1 heaped tsp
  11. Urad dal – 2 heaped tsp
  12. Salt – 2 level tsp

To Assemble

  1. Clean, and prepare vegetables as mentioned in ingredients list.
  2. Measure out 6 cups of water and set to boil.
  3. Heat oil in a broad kadai / heavy bottomed pan.
  4. Add mustard seeds and urad dal. mustard and urad - yin yang
  5. When mustard crackles, add green chilli, ginger, curry leaves, saute for a minute.
  6. Add onions tomatoes and the carrot. Stir fry for a minute on high flame. Seasonings and veg added
  7. Pour the boiling water into the kadai, add salt.
  8. When the water reaches a rolling boil, pour the measured corn dalia in a steady stream into the pan. Keep stirring steadily to avoid any lumps.
  9. After all the dalia is incorporated into the water, simmer and cover the pan with a fitting lid. Let cook on the lowest flame for 12 – 14 minutes. Cover and Cook
  10. Fluff up and serve with onion raita or chutney of choice.

Notes

  • Corn Dalia cooks for longer than wheat dalia, so the same upma can be assembled in a pressure cooker also.
  • Other interesting uses could be in recipes like khichdi, bisi bele bhath, corn bread, porridge, soups.

Glamorous Corn dalia upma

Upma - A closer look at texture

Apr 1, 2013

Minty Garlic Potatoes

This was a recipe I tried out on a whim ages ago. I did not think much of it then. That is, until my child requested for it again. Isn’t it is true that potatoes are so versatile and can work with any flavours, seasonings and is an all time favourite with kids?
Yummilicious Baby Potatoes
I am particularly fond of this recipe since the flavours taste very fresh if you follow this method of preparation. Of course, I have just made it up the way my family likes it. You could tweak, add, change ingredients to suit your favourite flavours too. After all, what is a dish without improvisations? Useful for last minute lunch prep or when guests land up at mealtimes and you need to rustle up more food. I have used baby potatoes because I had them and because they look cute. SmileOf course, normal potatoes boiled and cubed are fine too. Take it forward anyway you like. This could even be a salad with boiled potatoes, pomegranate, some diced tomatoes and use the pudina as a dressing. The results are sure going to be delicious.
What’s good about potatoes?
  • It is popular belief that potatoes are full of starch and fat and offer little else. Potatoes have complex carbohydrates, which are a good source of carbs as opposed to refined flours and refined sugars.
  • It may also be surprising to know potatoes are a good source of several minerals like Magnesium, Potassium, Zinc, Copper.
  • Potatoes are also fair sources of Iron, Vitamin B complex and Vitamin C. Despite losses during cooking potatoes can deliver 2- 5 % of daily requirement of Vitamin B and C.
  • Potatoes are fatty? No way – they are a zero cholesterol food! The total fat in 100 gm. of potatoes is only 0.1 g and that is Omega 3 and Omega 6 fatty acids.
  • While the skin does not have any nutrients, it is the layer of potato just below the skin that has them. The best way to harness all these great vitamins and minerals is to cook/ boil them with skin on. This locks the nutrients in. When we peel potatoes after cooking, instead of before, we save a lot of the nutrients.
  • A lot of vitamins and minerals ‘leach into’ the cooking water. So it is a good practise to cook/boil in just enough water (instead of excess water) to optimise the maximum value of any vegetable, especially so in this recipe.
  • Adding a good bunch of fresh herbs like pudina (mint) and coriander to this recipe enhances it’s iron and fibre content.
I guess we need no more incentive to cook a lovely batch of minty potatoes. So here goes -
You need
  1. Baby potatoes – 500 gms
  2. Onion – 1 small, diced Fresh pudina leaves
  3. Mint leaves (Pudina leaves) – packed, 1 cup
  4. Coriander leaves – remove roots, clean, chop and measure 1/4 cup (optional)
  5. Garlic – 1 medium clove
  6. Juice of half a lemon
  7. Any vegetable oil – 2 tsp
  8. Saunf (fennel seeds) – 1/2 tsp
  9. Jeera – !/2 tsp
  10. Salt – 3/4 tsp
  11. Sugar – a pinch
To Assemble
  1. Immerse the baby potatoes in a water bath for half an hour if you have time. Else, leave in for 5 minutes and clean the skin well. You can boil the potatoes in enough water for 20 minutes or just pressure cook it till 1 whistle.
  2. Leave the boiled potatoes on the chopping board to cool naturally. Peel when sufficiently cool to handle.
    (Why not dunk in cold water? – Because that lets more minerals and vitamins dissolve into the ‘cooling water’ too.)
  3. Make a coarse paste of the following ingredients – half onion, pudina leaves, coriander leaves (if using), juice of half a lemon, sugar and the garlic clove. I used the ‘pulse’ button in my mixer to get the coarse texture. Coarse blend paste
  4. To a pan set on high heat, add the oil, sizzle saunf and jeera. Tip in the other half diced onion, fry until pink.
  5. Add the potatoes, salt and toss well. If you wish to get a nice ‘roasted feel’, let them simmer, scraping and tossing occasionally for 10 – 15 minutes. Salt the frying potatoes
  6. When the potatoes are done, add the coarse ground paste as a final step, toss the pan well to let the paste coat all the potatoes. Switch off flame immediately. Pudina paste - final step
  7. Cover and let flavours rest for 10 minutes. Serve warm with steamed rice and sambar or with hot phulkas.Minty Garlicky Potatoes
Notes
  • Add the crushed garlic to the hot oil instead of adding it to pudina paste if you detest the flavour of raw garlic.
  • Toss boiled potato with cherry tomatoes, (or regular tomato diced) and cucumber with the coarse ground pudina paste, chill and serve as salad.
Ready to dig in..