Showing posts with label Low glycemic index. Show all posts

Jun 3, 2015

Idli – The Ultimate Guide to Softest Idlis.

Idli. Enough said. That spongy, light as air, uber healthy, steamed breakfast of millions in India. It is every idli lover’s dream to make the fluffiest, softest, ‘malli poo’ idlis (as soft as jasmine flower) at home. Idli is the stuff of  culinary dreams. The perfect idli seems so much in reach and yet, so elusive. As my friend put it, “Idli is the cause and weapon of marital fights at our home.” If you want Idli to be the cause of marital harmony rather than distress, or if you are looking for a healthy breakfast recipe, read on..

Much has been written about how to grind the perfect idli batter. Family and friends who have tasted my idlis have been reminding me to document my recipe at the blog. So here I am, with my method of making idli batter. Do share what works for you as well. It would be great to hear from everyone.

The key to good food begins with good ingredients. I use Salem idli rice. I use the best quality whole white urad that I can find. In Bangalore, Salem idli rice and whole white urad can be bought at most wholesale rice and grain shops. (rice mandi) Some supermarkets like Nilgiris, Spar, Star Bazaar, Towness also carry them. “Can I use idli rava instead of the rice?” You can. But the texture of idli will be different. Don’t tell me I did not warn you.

The next step is correct technique. For fermentation, timing is key! I soak the grains overnight, grind it the next morning and leave it to ferment through the day. By evening, the batter is ready. I store the fermented batter in the fridge and use it for up to a week without any loss of flavours.

Idli topped with two chutneys 

If you are eager to make the perfect idlis for your family, follow these steps carefully. Please read the method thoroughly before trying. As with other recipes, perfection comes with practise. If you have any doubts, write to me and I can try to sort it for you.

YOU NEED

COOKWARE – Wet grinder, big bowls, spatula, idli steamer 

INGREDIENTS

  1. 4 cups Salem Idli Rice
  2. 1 cup Whole white urad
  3. 1 tsp Fenugreek seeds – (optional)
  4. 2 tsp Salt
  5. 5-7 cups chilled drinking water for grinding.

METHOD

  1. Measure out rice and urad in two separate bowls. Add fenugreek seeds, if using, to rice bowl. Rinse in enough changes of water till water runs clear. Soak in fresh drinking water. Water level should be 1 inch above the grains. Soaking time can range from minimum of 4 hours to maximum of 8-9 hours. I soak overnight. (about 8 hours)
  2. Measure out 2+1/2 cups of drinking water. Drain the soaking water from urad and grind in wet grinder. Keep sprinkling a quarter cup of water every 8-10 minutes. Use all of the 2 cups of water. Add as much of the 1/2 cup as needed. I grind for 40-45 minutes. Remove to a deep bowl when the batter looks doubled in volume and is silky smooth when you feel between your fingers.
  3. Measure out 3+1 cups of chilled drinking water. Drain out the soaking water from rice. Grind in wet grinder with 1 cup of water to begin with. Sprinkle just enough water to keep the grinder running smoothly. Keep checking every 4-5 minutes while grinding. Add water as necessary. I grind rice for 20 minutes. I stop grinding when the rice feels a little coarse and before the rice becomes a very smooth paste. That is not to say a semolina texture. Rather, between fine semolina and paste….
  4. Remove to same bowl as urad batter. Add salt and mix well with your hand. Yes, I dip most of my forearm into the batter to mix it up. This is vital to good fermentation. Have you not heard?
  5. Set this covered bowl of batter to rest in a warm place. Make sure to fill you bowl only half way to give room for rising. You can divide the batter into two bowls too. At my home, the batter takes about 8 hours to ferment. If your room temperature is below 20C, set to ferment inside your cold oven. Or cover the bowl with a beach towel/blanket. And pray that the batter does not attach itself to your blanket!
  6. The batter is completely fermented when it rises to double in volume, has a sour-sweet fragrance. Stir it lightly. Pour into greased idli moulds.
  7. Steam for 10-12 minutes over a medium flame. The idlis are done when a knife inserted through the centre comes clean.
  8. Serve hot with assorted chutneys, or molaga podi or sambar. Or all of them!

Mini idli served with love

Apr 16, 2015

Jowar dosai

Why millets? Why so much brouhaha over these pseudo cereals? Why is it important in a modern urban diet? Are they good at all? Who should eat millets? Who should not? These and many more facts set out for you here. Read on to know more.

Millets are not cereal grains, so they are called pseudo grains. Millets are smaller grains. They belong to five (or more) different botanical families, but are classified under one name as millets. Millets are grown for bird, animal and human consumption. Factors that go in favour of their cultivation are that they have a short growing season, grow in semi arid regions, (they need very little water) need very little attention. Different countries across the world have been growing and consuming millets for thousands of years. Unfortunately, urban diets have not included millets for about 50 years now.

So what is the good and bad about eating millets? Here, I split it up into its constituents and make it simple for all to understand.

The Carbohydrates -  Millets have complex starches in form of amylose and amylopectin. Such a starch can only be digested in cooked form by humans. Since they not easily digestible, they have a low glycemic index. That means they release their sugars into the blood stream in a slow steady fashion. Much like how a sustained release medicine works. There are no highs and lows in blood sugar when you are eating such starches. And yes, you guessed it right: this is great news for diabetics and pretty much everybody else.

The Proteins – After carbohydrates, proteins form the major part of millets. Egg and human milk are considered perfect proteins because they have the best combination of amino acids that the human body needs. When compared to these proteins, most millets are found to have insufficient amino acids to provide all nutrients for infants and growing children. Millets have been found to be deficient mainly in lysine, an essential amino acid. What are amino acids?

Amino acids are the building blocks of proteins. There are 21 amino acids that form all the proteins ever known. Several of these amino acids are made in the human body. These are called non-essential amino acids because the body can make it on its own. Some of these are called essential amino acids. Why are they called so? Because they are necessary for growth and cell repair but cannot be synthesised in the human body. So they have to come from the food we eat. Lysine is one of these essential amino acids.

Does this mean that millets are not good enough for weaning food? Or to feed growing children? No. Millets are very good for children, when cooked well and when paired with a legume such as mung bean or tuvar dal. Legumes are naturally rich in lysine and by combining them in the same meal ensures that the meal gives complete protein for the growing body. Besides, millets are gluten free as well. So they are a safe bet for all, children, older people or those with gluten allergy.

Look forward to more information and recipes with millets in my forthcoming posts.

Meanwhile, here is a recipe for Jowar Dosai. This recipe is good for beginners who are not sure about how to begin including millets. Millets are great for people who need a gluten–free diet as well. Besides, here, the ground batter is fermented which increases the food’s digestibility as well as increasing the availability of several vitamins and minerals from the grains.

The initial trouble of soaking, grinding and fermenting is well worth the effort. The batter keeps well in the fridge for up to a week. When you have batter ready in the fridge, making dosai for a meal takes only a few minutes. You can choose to make regular size dosai for breakfast, dinner or coin-sized ones for your child’s lunch box.

Coin Dosai platter dotted with molaga podi

ALLERGY INFORMATION

Preparation Time – 8 hours soaking+1 hour grinding+8 hours fermentation, Cooking Time – 10-15 minutes, Makes – about 20 dosais.

YOU NEED -

COOKWARE - Wet grinder or mixer grinder, Iron skillet/griddle, Big deep dish mixing bowls, ladle, sharp metal spatula

INGREDIENTS -

  1. 1 cup Jowar grains
  2. 1 cup salem idli rice/boiled rice/raw rice
  3. 2 tbsp fenugreek seeds
  4. 2 tbsp urad dal
  5. 1 heaped tsp salt
  6. Sesame oil for drizzling over dosais, about 1/4 cup oil

METHOD -

  1. Measure out all ingredients except salt and oil. Rinse the grains well, Soak overnight. To do this, steep in enough water to cover the grains plus an inch higher.
  2. The next morning, grind the soaked grains. If using wet grinder, keep sprinkling water every 7-10 minutes. You can use up to 3 cups water for grinding. I grind my batter in a wet grinder. When using jowar grains, it takes longer to grind. About 1 hour of grinding gives me a smooth batter. When the batter looks smooth, add salt, mix well and remove to a deep bowl. Allow plenty of head room for fermentation. Leave overnight for fermentation.
  3. The batter is ready when it has risen to double volume.
  4. Heat up an iron skillet/dosa tawa. Smear oil all over to grease.
  5. Pour a ladleful batter in the centre of skillet. Spread with back of ladle in concentric circles. Drizzle few drops of oil around the sides. When brown at edges, loosen the edges, flip over with a sharp spatula and cook on other side. Repeat for the next ladle of batter.
  6. Alternately, pour tiny spoonfuls of batter all over the skillet to make ‘coin dosais’. Drizzle oil around the sides, flip over to cook briefly on other side. Remove to serving platter when done.
  7. Serve with any chutney of choice or with dosai molaga podi!

Coin dosai topped with molaga podi

Crispy or soft - fragrant Jowar Dosai

Mar 16, 2015

Methi Muthia – Party Appetiser

Muthia, the traditional Gujarati snack, is served either steamed or deep fried. Muthias are a favourite among all. I wanted to glam it up further and make it healthier, if that were possible. Is it even? Why not? Improving the protein by adding Rajgira atta/Amaranth flour is one step. You can be sure of meeting your growing child’s protein needs by using Amaranth flour in dishes such as this. Removing the whole wheat flour makes it gluten free. Serving it with grilled vegetables on a satay stick makes it chic and fit to be a party appetiser. Grilling the vegetables and steaming the muthia keeps the oil used to a minimum, thus making it a super healthy food. This dish is also fit for eating during religious fasting, because amaranth flour is used instead of wheat flour.
 Muthia on a skewer

ALLERGY INFORMATION
  • Does NOT contain gluten, lactose, corn, soya, yeast eggs.
Preparation Time –15 minutes, Cooking Time – 15 minutes, Serves – 12-14 skewers

You need -

Ingredients -
For Muthias -
  1. 1 cup Amaranth (Rajgira /Ramdana) seeds / 1 cup Rajgira flour
  2. 1 cup Gram Flour (Besan)
  3. 2 packed cups Fenugreek leaves (Methi)
  4. 1 thumb size knob fresh ginger
  5. 3 green chillies
  6. Juice of 1 lemon
  7. 1-2 tablespoon thick curd
  8. 1 teaspoon salt
For Chutney –
  1. ½ cup Mint leaves (pudina)
  2. 2 green chillies
  3. Juice of half lemon
  4. ¼ teaspoon salt
  5. A pinch sugar
To Season –
  1. 2 tablespoons Fortune Rice Bran Oil 
  2. ½ teaspoon mustard seeds
  3. 2 tablespoons white sesame seeds
To Serve as Appetiser –
  1. 2 medium onions
  2. 2 each of yellow capsicums, red capsicums, green capsicums
  3. 2 tablespoon Fortune Rice Bran Oil
  4. 2 pinches salt
  5. 12-14 satay sticks/toothpicks
Method -
  1. Clean pudina leaves and grind all ingredients for chutney together in a small mixer grinder. Grind to smooth paste and set aside.
  2. Pick only methi leaves from the bunch, discard stems. Measure 2 packed cups. Rinse well, drain and chop fine.
  3. Peel ginger and make a coarse paste of ginger and green chillies.
  4. Grind the Rajgira seeds in a mixer to a coarse powder.
  5. In a mixing bowl, mix this powder along with besan, ginger-chilli paste, salt, chopped methi leaves and lemon juice. Add curd, 1 teaspoon at a time, mix well by hand into a stiff dough. Use only as much curd as is needed to make the dough.
  6. Shape into smooth cylindrical logs about2 inches thick. Grease a container that fits into your pressure cooker. Place the muthia cylinders in the greased container and steam inside the pressure cooker without whistle for 10-12 minutes. A knife inserted into the muthia should come clean. If sticky, steam for 2 more minutes. 
  7. While the muthia is steaming, preheat your grill to 240C.
  8. Peel onions and cut into quarters. Chop the coloured capsicums into big even sized chunks. Place on a greased plate, drizzle with Fortune Rice Bran oil, and sprinkle salt over the vegetables. Mix well by hand, spread in a single layer on the plate and grill for 10-13 minutes.
  9. Heat 2 tablespoons Fortune Rice Bran oil for seasoning.
  10. Crackle mustard seeds in the hot oil. Add the white sesame seeds, brown slightly and switch off. 
  11. Once the muthias have cooled slightly, cut into half inch thick slices. Pour half of the seasonings over the muthias and reserve the other half.
To Serve –
  1. Arrange different coloured capsicums, onion wedges and the muthia slices alternately on the satay stick.
  2. Drizzle the seasoning oil over the muthias again. Dot with pudina chutney or serve the satay sticks on a platter with a bowl of chutney as accompaniment.
Party Appetiser - Muthia with grilled vegetables
A word about the oil used in this recipe. Fortune Rice Bran Health Oil is made from Rice bran. Rice bran is the outer covering of the rice grain. So this oil is not made from rice. By virtue of this, Fortune Rice Bran Health Oil is perfectly suitable for using during religious fasting also.
While making the muthias, I observed that the oil has a high smoke point(260 C). This makes it a stable cooking oil and does not make food greasy.
This blog post is in association with Fortune Foods as a part of their Desi Health Bites activity – The Hunt for the Best Rice Bran Oil Recipes. For more updates and healthy recipes using Fortune Rice Bran Health Oil, follow Fortune Foods at www.fortunefoods.com , on Facebook at www.facebook.com/FortuneFoods and on Twitter at @fortunefoods (https://twitter.com/FortuneFoods)

 Colourful array     


Mar 13, 2015

Carrot and Alfalfa Salad

When did winter zoom past? Nobody knows. Not only is summer on us but it is exam season too. That means two things – light refreshing meals and hydration. When spending time over the stove top is a agony, we must think smart and eat sensibly. Salads are great additions to a meal and good at quenching thirst also. Salads are great even for snacking in between meals.

Salads are mostly made of raw vegetables and fruits which have a higher moisture content. Since there is no cooking involved, the vegetables retain their juices and nourishing properties to the fullest. For more on how to make or when to not have salads, read through my article here.

So, are alfalfa sprouts good for you? Here is the lowdown on alfalfa sprouts.

These are a great source of protein, B complex vitamins, Vitamin K, Calcium, Iron, Potassium, Zinc, Copper. Also high in phytoestrogens. Traditionally used to treat  kidney ailments, diabetes, these wonder sprouts also mop up cholesterol from arteries. Great news for people with high cholesterol, or arterial plaques. While they are a wonder food for most people, some sets of population may have to proceed with caution.

Pregnant women or convalescent people are better off eating all foods that are cooked, avoiding any raw sprouts including alfalfa. Since the sprouts mimic estrogen, women with low progesterone may do well to avoid eating it daily. People who have auto immune disorders such as Rheumatoid Arthritis, Multiple Sclerosis, or Lupus may find an increase in their symptoms with prolonged daily consumption of these sprouts.

It is also useful too remember that this caution is only necessary if you plan to eat raw alfalfa sprouts daily for several months. In an otherwise balanced diet that includes alfalfa sprouts once a week or thereabouts, in combination with a variety of other foods, the food only delivers its abundant vitamins and minerals with no significant damage due to its phytoestrogen, canavanine, or other components.

Carrot and alfalfa salad

This is a salad I rustled up for lunch today. I feel it looks colourful, happy and enticing. I’ve even added a surprise ingredient to encourage the younger ones to reach out for it eagerly. Want to know more? Read on for the recipe….

ALLERGY INFORMATION

  • Does not contain gluten, lactose, dairy, corn, soya, yeast, eggs.
  • Suitable for gluten or lactose intolerant people.
  • *Contains nuts. People with nut allergy can omit the nuts in this recipe.

Preparation time – 15 minutes + 30 minutes chilling time, Cooking Time – nil,  Serves – 2 main servings or 4 as accompaniment to meal

You Need -

Cookware – Peeler, Grater, Knife, Mixing Bowl, Mortar and pestle

Ingredients -

  1. 1 cup grated red carrot (I used 1 long red carrot)
  2. 1/4 cup thinly sliced onion
  3. 1 fistful alfalfa sprouts
  4. 1 cup chilled drinking water
  5. 1 green chilli OR 1/2 tsp crushed black pepper
  6. 1/4 tsp salt
  7. 2 tbsp apple cider vinegar
  8. a 1” square of peanut brittle or any nut brittle* (optional)

Method -

  1. Rinse the alfalfa sprouts in running water and steep in the chilled drinking water until needed.
  2. Immerse the thinly sliced onion in the vinegar. Set aside.
  3. Rinse, scrub, peel and grate the carrot. Slice the green chilli into thin slanting slivers.  Coarsely crush the peanut brittle in a mortar and pestle. Do not powder it. Leave behind some small bits for your kid to pick up and and bite into with glee!
  4. Place all the ingredients in a mixing bowl, drain water from the sprouts, add to the bowl, and give them all a good toss with salt. You may need to separate the sprouts with fingers.
  5. Chill before serving for flavours to marry each other well.

Phulka, Rajma and Salad - balanced meal

Mar 9, 2015

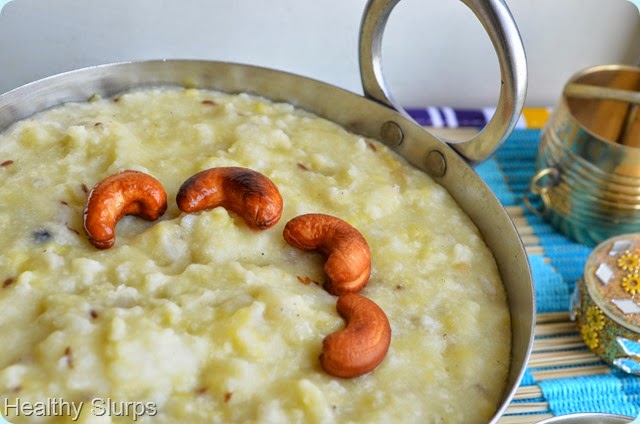
Samai Pongal / Little Millet Pongal

Ven Pongal or Khara Pongal is a much loved breakfast food in South India. However, you can have it any time of the day. Ven Pongal works at the brunch or dinner table with equal ease.  With the millet wave sweeping the diets of all, I feel this is a good time to share a recipe with millets.

Samai rice/Little Millet replaces white rice in this preparation. Not only is it far healthier, the millet also cooks faster than rice. Isn’t that great news? Samai has 8 times more iron than white rice and 10 times more fibre. If that was not enough, it is higher in thiamin(vit. B1) , riboflavin(vit. B2) and folic acid content as well. Owing to their low glycemic index, millets are good grains to include in diets for weight management, diabetes, as well as in pregnancy. Since Pongal is usually cooked to a soft mush, this dish can be fed to weaning babies or toddlers also.

Pongal tastes best when served hot, so packing for school lunch may not be a great idea. However, you can pack for an office lunch if you can re-heat your food at work place. Now that I have shared enough reasons to switch to the millet from rice, let us proceed to the recipe, shall we?

Making Pongal is really simple. Cook a grain and a lentil together, fry some seasonings in a fry pan, mix the two with some salt and your dish is ready! Read on for the proportions and method here -

Samai Pongal with chutney

ALLERGY INFORMATION

  • Does not contain gluten, corn, soya, eggs, lactose, dairy.
  • Adding nuts is optional. Omit if you have nut allergy.

Preparation time –10 minutes, Cooking Time –15 minutes, Serves – 4-5.

You Need

Cookware – Pressure Cooker, fry pan, mortar and pestle

Ingredients

  1. 1 cup Samai rice
  2. 1/2 cup Moong Dal
  3. 4 cups water
  4. 1/2 tsp salt
  5. 1 tsp cooking oil
  6. 1 tsp ghee
  7. 10 whole cashew nuts (optional)
  8. 1/2 tsp Cumin seeds
  9. 1 tsp black pepper
  10. 1 tsp ginger juliennes
  11. 7-8 curry leaves, torn up
  12. 2 green chilli, slit (optional)

 Method -

  1. There are two methods to cook this pongal. You can choose between – 1. Pressure cook the Samai rice and Moong dal together in the pressure cooker. For this, rinse the grains together, cover with 3 times the volume of  water and pressure cook for 2 whistles. Or, 2. Pressure cook the dal alone, and the Samai rice on the stove top. For this, cover dal with double volume of water and cover the millet with double the volume of water and cook for about 3-4 minutes. Mix both in a serving bowl.
  2. Coarsely pound the black pepper and cumin in a mortar and pestle.
  3. To a fry pan, add in the oil + ghee, fry the cashew nuts (if using) to a golden brown.
  4. Tip in the pounded pepper +cumin, curry leaves, ginger juliennes, and green chilli.
  5. Add salt to the cooked mixture, pour in the seasonings and mix well. You may add 1/2 cup of hot boiling water to the mixture if it looks very hard. We want a soft mushy texture to the pongal.
  6. Serve steaming hot pongal with a spicy chutney, or sambar or even the traditional gothsu! Here I have served it with a tangy raw mango chutney.

Perfect weekend breakfast or brunch

Enjoy your power packed meal!

Feb 10, 2015

Nellikkai Thair Pachadi / Amla Raita

Do you know that Amla or the Indian Gooseberry has the highest Vitamin C content among all vegetables and fruits? That it has mention in ancient Sanskrit texts, is used extensively in Ayurvedic medicine, and is considered a miracle fruit. Amla can be used to treat eye disorders, increase calcium absorption in the bones, help build strong bones, cure skin ailments, strengthen and nourish hair, promote hair growth, actually just about do anything healthy and nourishing for our bodies.

The Indian Gooseberry (Amla) also has known anti oxidant properties. Amla has been found to offer a full range of benefits from free radical scavenging, anti inflammatory properties, beneficial effect on diabetes.   It is also widely used for its ability to dissolve plaques in arteries, reducing serum cholesterol levels.

Studies have also shown that even preserving in brine or pickling does not reduce the availability of vitamins, especially Vitamin C. Readers may be aware that vitamins B and C are easily destroyed when food is exposed to sunlight or heat, or excess water during cooking. So excessively cooked foods or preserved foods lose their vitamin content over time. Not so with Amla. This miracle fruit continues to dole out its health benefits even when cooked or preserved.

Despite having such a wonder fruit growing in our midst, I feel people in India do not make full use of it. We are in search of that elusive magic potion sourced from deep in the Amazon forests or some wonder drug that is shipped from a Scandinavian country. While those drugs/potions/foods may be good in them selves, I ask myself and everyone reading this – Is it wise to ignore the wealth in your backyard and seek something from far away? Are the money, effort, rising fuel costs, justified?

I, for one, am going to include more of this wonder fruit ‘Amla’ in my family’s meals. I am sure all of you have recipes from different cuisines with Amla as the main ingredient. Do share your favourite recipes with Amla in the comment section below.

Here is one simple, really quick, tongue tickling recipe with Amla. Perks up any meal and loads you up with its nutrients. Go on. Try it out.

Luminous Amla

ALLERGY INFORMATION

  • Does NOT contain gluten, lactose, nuts, corn, soya.
  • Suitable for people with gluten or lactose intolerance, or nut allergy.

Preparation Time – 10 minutes, Cooking Time – 5 minutes, Serves – 4-6

You Need -

Cookware – Small wok, Mixer grinder

Ingredients -

  1. 4-5 Amla fruits
  2. 2 tbsp fresh grated coconut
  3. 3-4 green chillies
  4. 1/2 cup skim milk curd
  5. 1/4 tsp salt

For Seasoning -

  1. 1/4 tsp oil
  2. a pinch mustard seeds
  3. a pinch fenugreek seeds
  4. a pinch asafoetida
  5. 3 curry leaves
  6. 1/2 red chilli (optional)

Method -

  1. Rinse the Amla well. Cut incisions along the segments. Pull out the flesh and discard the seeds.
  2. Grind along with coconut, green chilli, and part of the curd to make a paste. Grind more than a coarse paste but stop short of a fine paste.  Add the rest of the measured curd and whip along with the paste.
  3. Heat oil in a small wok/kadai/fry pan.
  4. Add ingredients for seasoning in order. When mustard crackles, pour in the ground mixture, and add salt. Simmer until the liquid foams up.  Do not boil this mixture. Keep stirring over medium heat for it to cook lightly.
  5. Remove to serving bowl and enjoy with hot phulkas,  or steamed rice, a dal and some stir fried vegetables.

Quick Amla Raita


Jan 8, 2015

Mysore Pepper Rasam

The nippy afternoons and cold nights are a great time to warm the innards of body and soul with steaming hot soups. A few days ago, I had two people in the family with a running nose and cough. Just the right time to stir up some peppery, tangy, rasam. Every region has its own signature soup. Rasam is ‘the go-to soup’ of most South Indians when nursing a fever or cold. It features prominently in the menu for convalescents and nursing moms too. Well, even if you do not belong to any of these categories, you can still enjoy a hot mug of this delicious ambrosia.

I learnt this recipe for Mysore Rasam from my sister in law, Geeta. She is as creative in the kitchen as with her poetry. A truly inspiring person. We had this hot rasam at their home paired with steamed rice and a runner beans stir fry. Fond memories of that meal still linger, long after. Special people and some meals have that effect on us, don’t you agree? Well, I just had to recreate this at our home. Here, I have added extra pepper to suit our requirement. Everything else remains the same as Geeta’s rasam. Balmy, soothing, tangy, fragrant, instant comforter of stuffed noses and reliever of misery. Go on, make some for yourself.

Mysore rasam is unique in that it uses dry coconut apart from regular spices. Besides, the spices are always freshly roasted and ground. The effort of roasting fresh spices, grinding them and adding that magical powder to the rasam makes the end result so worth it.

The magic potion that cures all ills!

ALLERGY INFORMATION

  • Does NOT contain gluten, soya, lactose, corn, nuts.

Preparation time –10 minutes, Cooking time – 35 minutes, Serves - 4-6

You Need -

Cookware - Pressure cooker of 2 or 3 litre capacity, 1 Sauce pan/stew pot/steel pot of at least 5 litre capacity, 1 smaller steel pot, mixer grinder/coffee grinder, colander, Small ‘tadka’ pan or fry pan.

Ingredients -

FOR POWDER  Ingredients for Rasam Powder

  1. 1 tbsp Coriander seeds (Dhania/Sabut dhania/Malli verai/Kothambri beeja)
  2. 1/2 tbsp Cumin seeds (Jeera, Jeerige, Jeeragam, Jeelakara)
  3. 1 tsp heaped Black Pepper
  4. 1/2 tsp heaped Fenugreek seeds (Methi dana/Menthulu/Menthiam/Menthya)
  5. 1/4 tsp heaped dry coconut (copra) grated
  6. 5-6 Curry leaves
  7. 1/4 tsp ghee (clarified butter) OR 1/4 tsp cooking oil for vegan

FOR RASAM

  1. 1/4 cup Tuvar dal (split pigeon peas)
  2. 2 tbsp Tamarind paste OR pulp and juice extracted* from 3 tbsp packed tamarind
  3. 2 medium Roma or Vine tomatoes
  4. 1/2 tsp turmeric powder
  5. 1 tsp salt (more if needed)
  6. 1 tsp jaggery/sugar/brown sugar (optional)
  7. a pinch of asafoetida
  8. 2 tbsp chopped coriander

FOR SEASONING

  1. 1 tsp ghee (clarified butter) OR 1 tsp cooking oil for vegan
  2. 1/4 tsp mustard seeds
  3. 1/4 tsp cumin seeds
  4. 1/4 tsp fenugreek seeds
  5. a few curry leaves
  6. a pinch asafoetida

Method

  1. Rinse the tuvar dal, place in a suitable container that fits inside the pressure cooker. Top the dal with double the volume of water, and pressure cook for 4 whistles. Let the pressure release on its own. If you do not have a pressure cooker, rinse the dal, place in a saucepan with 3 times volume of water. Bring to boil and simmer for 20-25 minutes. Check if it is cooked. The grains should be mash-able between 2 fingers. Else, top up with more water as needed and cook until done.
  2. * To extract tamarind water, soak 3 tbsp packed tamarind in 1 cup warm water. After 10 minutes, rub the tamarind with fingers to extract juice. Sieve the juice into another container. Repeat once or twice more with half a cup of water each time. Collect this tamarind juice and use in recipe. Discard the pulp and fibre or seeds.
  3. Measure all ingredients for the Powder. Fry with the ghee over a medium to low flame. Keep stirring to avoid burning. Remove to a mixer when they are golden brown in colour and begin to smell fragrant. Powder to a fine texture.
  4. Chop tomatoes. Place all the ingredients (except tuvar dal and chopped coriander) mentioned under ‘Rasam’ in a saucepan, set to boil on stove top. Once it comes to a boil, simmer for 10 minutes.
  5. Mash the cooked tuvar dal well. You could use a potato masher, or electric churner for this. Mix this into the simmering rasam. Add water  to thin down if needed. We are looking for a thin soup consistency.
  6. Add ghee to a small saucepan. Heat with the ingredients for ‘Seasoning’. When mustard splutters, pour over the simmering soup. Add the chopped coriander and remove from stove. Cover and set aside for the seasonings to infuse.
  7. Pour into mugs and enjoy warm/hot with a piece of crusty bread. Or ladle onto steamed rice and eat with a crunchy papad or a crispy stir fried vegetable curry.

Piping hot Mysore Pepper Rasam with crunchy papads

,,

Dec 2, 2014

Peanut and Potato Salad

It is the season of peanut harvest in and around Bangalore. There is an interesting story around peanut harvest in our city.
Legend has it that a bull would roam over the fields every full moon night destroying the peanut crops. Flustered farmers offered their first harvest at the Bull temple and the roaming of the bull ceased!Local farmers offer their first crop to Nandi, the bull devotee of Lord Shiva at the Bull temple in Bangalore to this day. The temple vicinity wears a festive look during these two days. A village fair unfolds in the middle of the city. This annual fair is known as ‘Kadalekai Parishe’.
I love the earthy aroma of freshly dug up peanuts here. Call me biased, but the aroma and incredible, sweet, nutty flavours of peanuts that I buy from this fair every year beats all other. I cook the peanuts in their shells in salted water. All of us then gather around the steaming hot bowl of boiled peanuts, shell them and gobble them before some one else grabs it! Warm bonding  during chilly evenings over hot boiled peanuts!
Mostly I have no peanuts left over to include in any dish. However, I managed to make this peanut-potato salad from some that survived the onslaught. Even if the salad was made up from simple, readily available ingredients, it was bowl-scraping, finger-licking, slurp-worthy good. Ok, I’ll stop now.
I am documenting this recipe as much for myself as for sharing with all of you. Fresh seasonal ingredients. A good mix of crunch, soft, and crisp textures. A tongue tickling interplay of flavours. No fried ingredients. Healthy carbs and protein with a giant dose of fibre and vitamins. Do you need any more reasons? Just try it once. I am sure you’ll be hooked.
Peanut Potato salad served with baguette
ALLERGY INFORMATION
  • Does NOT contain gluten, lactose, corn, soya, eggs.
  • Suitable for lactose or gluten intolerant people
  • Contains peanuts.
  • NOT SUITABLE for people with nut allergy.
Preparation time – 30 minutes + 30 minutes optional chilling time, Cooking Time – 30 minutes, Serves – 3-4.
You Need
Cookware - Pressure Cooker with 2 containers that fit into it, Metal/Glass Bowl, Colander/Salad spinner, Knife, Chopping Board
Ingredients
  1. 2 cups peanuts in their shells
  2. 2 medium potatoes, chopped with skin into quarters. 
  3. 3 heaped cups Iceberg/Romaine Lettuce
  4. 1 big Tomato
  5. 2 tsp salt
  6. 2-3 cups fresh water
  7. a big bowl of ice water
For Salad Dressing
  1. 2 tbsp Apple Cider Vinegar
  2. 1/2 a red onion
  3. 8-9 tbsp Extra Virgin Olive oil (EVOO)
  4. 2 generous pinches crushed black pepper
  5. 1/4 tsp salt
To Assemble
  1. Dunk the peanuts in shells into a huge bowl of water. Let it sit for a few minutes. Rub the shells vigorously with both hands to loosen the dirt on them. Drain the water and repeat with 2 more changes of water. You can omit this step if using shelled peanuts. Just rinse peanuts once in water is enough.
  2. Now place in a container, pour enough water to cover all the peanuts,  scatter 2 tsp salt over it. Place the rinsed and chopped potatoes also in another container. Place both containers in pressure cooker and pressure cook for 3 whistles.
  3. Rinse the lettuce first under tap water, then place in ice water.
  4. Peel and dice/slice the red onion. Place in a bowl, add 1 tbsp apple cider vinegar to it and let steep.
  5. Meanwhile, whisk the remaining vinegar, EVOO, salt and crushed pepper into an emulsion.
  6. Shell the peanuts and peel the potatoes. You can dice the potatoes into smaller size if you wish. Chop the tomato finely. Place all these together in a bowl.
  7. Drain the lettuce, use a salad spinner if you have one. Else just drain in a colander and shake it well. Tear up the large leaves into bite size ones by hand. Add to the other vegetables.
  8. Combine the onion and dressing from step 4 and 5. Drizzle over the salad vegetables. Mix well.
Combine the dressing with salad ingredients
The salad tastes best if allowed to chill for half an hour before serving. But, if you are in a hurry, just dig in and enjoy! We coupled it with 2 slices of warm toasted baguette for an after school snack.
A complete meal -warm toast and chilled salad

Nov 25, 2014

Cabbage and Carrot Thoran

Cabbage does grow all year round, but acquires its best flavours only in winter. Since cabbage is quite sweet and less pungent in these months, it is easy to include it in several dishes. I often make a cabbage soup in this chilly weather too. It actually tastes much better than we would imagine. None of the bitter, sulphurous, menacing notes to it – just some crisp sweetness and heart warming honesty. Well about the soup, later. About cabbage first.

Cabbage has most of the vitamins and minerals we need daily. It has a high content of vitamin B and C. Besides, it is also high in fibre, potassium as well as low in sodium. It is also a fair source of Omega 6 fatty acids. These point to it being an excellent vegetable for people with high blood pressure, or are pregnant, or suffering from constipation too. Cabbage has small amounts of an ‘anti nutrient’ called as ‘protease inhibitor’. This prevents proteins from being digested well in the body. Hence it is better to cook cabbage lightly and then eat. Cooking deactivates the inhibitors and improves digestion of the vegetable and the entire meal.

Stir frying cabbage is the best way to cook it. The vegetable is stripped of its anti nutrients through minimal cooking, yet, the vitamins lost by heating are reduced too. Adding carrots to this recipe is optional. I’ve just added them for extra colour.

Select cabbage that has a compact oblong head vs a flat-ish round shape. Also, if a smaller cabbage weighs more than a larger one, then you can be sure the smaller dense cabbage will taste better.


Cabbage Thoran


Now I’ll walk you through one traditional Kerala recipe. It is as simple as it gets. Thinly shredded cabbage is tossed in a seasoning of oil, mustard and curry leaves. It is salted, stir fried and finished off with fragrant coconut and green chillies. A worthy accompaniment to tangy spicy sambar or kadhi/ moar kuzhambu and steamed rice. Can be tweaked a little to work as side dish to bhakri or phulkas too.


Dal and Cabbage stir fry vying for attention

ALLERGY INFORMATION

  • Does not contain egg, gluten, soya, corn, nuts, lactose or dairy.
  • Suitable for people with lactose intolerance or gluten sensitivity, or nut allergy.

Preparation Time – 15 minutes, Cooking Time – 15 minutes, Serves – 4.

You Need

Cookware – Knife, Cutting Board, Wok/Fry pan of about 4 litre capacity, metal spatula, mixer grinder,

Ingredients

  1. 1 whole cabbage weighing 800-1000gms
  2. 1/4 kg Orange/Red Carrots (optional)
  3. 2 tsp cooking oil
  4. 1 tsp salt
  5. 1/2 tsp mustard seeds
  6. 1/2 tsp urad dal
  7. 10-12 curry leaves torn up
  8. 1/4 cup grated fresh coconut
  9. 2-4 green chillies depending on heat preference
  10. 1/4 tsp cumin seeds
  11. 1-2 cloves garlic(optional)

To Assemble

  1. Remove outer bruised leaves of cabbage, if any, and shred/chop finely.
  2. Peel carrots and grate on the large hole of grater.
  3. Heat up oil in a wok. Season oil with mustard seeds and urad dal. Add curry leaves when the mustard crackles, and tip in the chopped vegetables.
  4. Stir fry over high heat for a couple of minutes. Sprinkle a few tablespoons of water, cover and let cook for 3-4 minutes. Open lid and mix well a couple of times in between for uniform cooking.
  5. Meanwhile, whizz the grated coconut with chillies, cumin, and garlic (if using) in a mixer to a coarse mixture. Do not add any water while grinding this.
  6. After 3-4 minutes, when the cabbage feels cooked through, yet retaining some crispness, add salt and then add the coconut mixture and fold through the stir fry well. Keep stirring over high heat, especially if using garlic, to eliminate raw odour. Remove from flame. Cover and let flavours mingle for 5-10 minutes.
  7. Serve warm with steamed rice, and tomato dal, or sambar, or kadhi. I served it with a ‘Basella greens’ and tomato dal and steamed rice.

The red chilli in the dal does not taste as sinister as it looks!

A complete meal

Nov 17, 2014

Roasted Brinjal Raita / Eggplant Raita / Roasted Eggplant Dip

The best meals are often the simplest ones. Those which can be rustled up with really few ingredients, in minimum time, and deliver high on nutrition, as well as satisfaction. Quick cooking=happy eating=content tummies.

This raita is one such recipe. Besides, the dish is versatile in that it can be used in many ways. The day I made it at home, we used it as raita, dip, as well as a substitute for mayo in sandwiches! So does it taste like baba ghanoush? Well, not quite. Tzatziki? well, maybe. Punjabi Baingan Bharta? mmm, not that either.

Why don’t we  just delve in and find out? Shall we?

Chilled bowl of smoky raita

The secret to an amazing brinjal raita lies in how it is smoked. While purists will tell you to rub some oil on the skin and roast on all sides over an open flame patiently turning it over and watching lest it char beyond recognition, i am going to let you in on a secret!

Just rinse the brinjal, wipe dry, slit into four long pieces, place in a microwave safe glass bowl and cook on the highest power for 6-7 minutes. Now take each piece and roast them individually over an open flame for just a minute per piece.  Dunk them in a bowl of cold water, peel the charred skin and reserve the pulp. This whole process takes less than 15 minutes. This gives the right amount of smokiness to the pulp without being overpowering. It also frees you up to attend to the rest of the meal while it cooks in the microwave. No need to tend to it constantly. Plus a total reduction in cooking time.

Now that I have simplified it for you, go ahead and make yourself some fragrant raita/dip/sandwich filling/meal by itself.

Come and eat me!

ALLERGY INFORMATION

  • Does NOT contain gluten, nuts, corn, soya, eggs.
  • Has dairy in the form of skim milk curd (yoghurt). Usually tolerated by people with lactose intolerance.

Preparation Time – 15 minutes, Cooking time – 15 minutes, Serves – 4

You Need

Cookware – Knife, Cutting Board, Small Sauce pan / Tadka pan,  Bowl of 1 litre capacity.

Ingredients

  1. 1 Big Violet Brinjal/Eggplant weighing approximately 500gms
  2. 1 cup Fresh curd
  3. 1/2 tsp salt
  4. A pinch sugar
  5. 1/4 tsp mustard seeds
  6. 1 small green chilli
  7. 1/4 tsp cooking oil
  8. a pinch of asafoetida powder
  9. a few curry leaves and coriander leaves for garnish – optional

To Assemble

  1. Prepare the brinjal/ aubergine/eggplant as described earlier. To repeat – wash, wipe dry, slit along length of brinjal into 3 pieces. cook for 6-7 minutes in microwave safe glass bowl at highest power. You may add 2-3 tbsp water to the bowl to help cook without shrinking. I find this method works best for me.
  2. After this, place each piece individually over an open small flame and char the skin. Dunk all of them into a bowl of cold water. When cool enough to handle, peel the skin off and reserve the pulp.
  3. Mash the pulp with potato masher/fork.
  4. Whip curd with sugar and salt. Add the mashed brinjal, and stir in well to combine. Raita just needs seasoning now.
  5. Prepare the seasoning by heating oil in a small sauce pan/tadka pan. Add mustard seeds, when they crackle, add slit green chilli, asafoetida powder. Switch off flame. Pour over the raita. Add the curry leaves and coriander leaves, if using, stir in and let it rest for few minutes.

Your delicious fragrant raita is ready! Serve with hot phulkas, paratha, bisi bele bhath, biryani, filling for sandwich, dip for crudites, wraps. Don’t want to make anything else? Just have it chilled. A bowlful. As it is.

Get me a bowl of this,quick!

Notes -

  • This method of cooking first and smoking next allows for a good desirable smokiness. Even agnostics of smoky flavours will find it appealing.
  • Do not omit the seasoning. It is crucial in bringing all the flavours together.
  • Some chilling will really help in elevating this simple creation. However, if you are in a hurry, don’t worry. Just dig in.

Nov 9, 2014

Chole Kachumber Salad

Hearty, nourishing, vibrant, colourful. These are the descriptions that come to my mind as I think of the salads we make often at our home. And I am talking about vegetarian salads here. No, we do not miss the meat in salads or in anything else for that matter. Actually nobody would.
If we know how to bring together a medley of textures, colours, aromas and flavours, we can create amazing fresh, healthy salads for ourselves with just about as few or as many ingredients.
Salads such as these can be rustled up and forked down with guilt-less relish. At any time of the day. As part of a meal. As a meal in itself. As a filler between meal times. As a post workout snack. As an after school snack. …
Which is why I stock some soaked and cooked beans such as mung, brown or green chana (varieties of chickpeas), rajma (red kidney beans) or lobia (black eyed beans) in my freezer. They come in handy to spruce up a salad like this one.
I am calling this as chole – kachumber salad. It also closely resembles ‘Balilah’, a salad from Middle Eastern or Moroccan cuisine which is centred around chickpeas too. Here is the recipe for my chole – kachumber  salad.
Luscious colourful salad
ALLERGY INFORMATION
  • Does NOT contain lactose, soya, gluten, nuts.
Preparation Time* – 15-20 minutes + 30 minutes chilling, Cooking Time – nil, Serves – 4-6.
You Need
Cookware – Steel/glass mixing bowl, Knife, Grater
Ingredients
  1. 1 cup of cooked chickpeas/kabuli chana
  2. 1/4 cup finely diced red onion
  3. 1/2 cup chopped tomatoes
  4. 1/2 cup diced/grated cucumber**
  5. 1/2 cup grated  carrots
  6. 1/2 cup pomegranate arils
  7. A few lettuce leaves torn by hand (optional)
  8. 1 tbsp chopped parsley OR 2 tbsp chopped coriander leaves
  9. 1 tbsp lemon juice
  10. 1 tsp sesame oil
  11. Salt and pepper to season
To Assemble
  1. To make the dressing, mix salt, pepper, oil and lemon juice. Whisk well and set aside.
  2. Prepare all the vegetables as mentioned for the salad.
  3. **Peel and core the cucumber if you find it has big seeds. Then chop or grate as preferred.
  4. Mix all the ingredients in a bowl, drizzle the seasoning. Add salt and pepper. Toss well.
  5. Chill for half an hour before serving.
* The preparation time is lesser only if you have cooked chana ready. Else, you may have to soak and cook ahead to use for the salad.  In that case, allow for 8 hours Soaking Time + 1 hour Cooking Time.
Single serve bowls of salad
High protein snack - chole kachumber salad

Jul 25, 2014

Plum and Elaneer Terrine

(Elaneer–Tender Coconut Water)

Ok, so it has been raining plums all over the country and beyond too! Wonder not at the surfeit of interest that all bloggers seem to have in plums. The reason is the contest announced jointly by KitchenAid India and the Indian Food Bloggers Meet. Here is my last attempt at all things ‘plummy’.

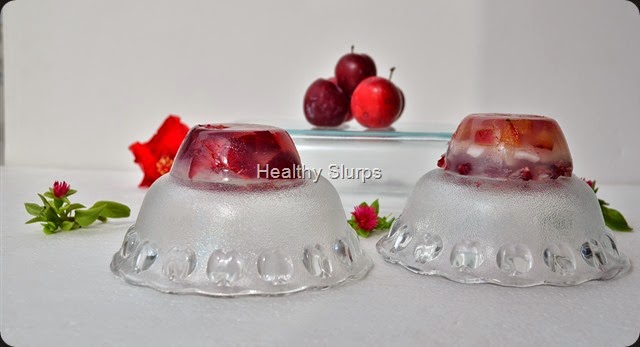
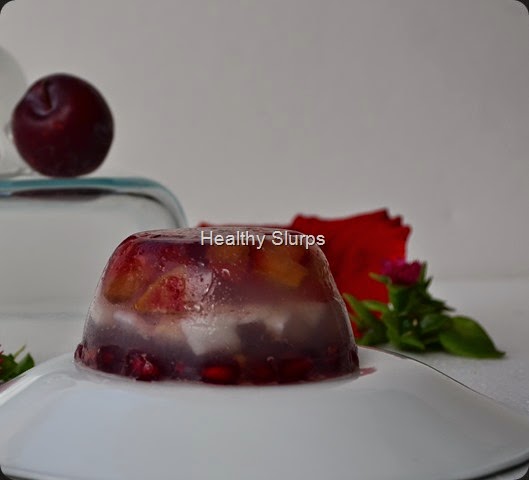
A simple, visually stunning dessert that has been born of the desire to create a new, uncomplicated, breath taking dish. Of marrying French sensibilities with Indian flavours. Of paying tribute to my home state, Kerala. What can capture the essence of Kerala better than it’s famous coconuts? The Elaneer or tender coconut water is an excellent base for this refreshing fruit terrine. Juicy plum bits suspended in a clear, delicately flavoured tender coconut jelly and shining like a jewel! Have a look at this.

Jewel in a bowl - Plum Terrine

This plum terrine, with it’s gorgeous appearance has to be the least sinful and most healthy of desserts. With zero fat and very minimal calories from added sugar, the terrine is a great option for dieters of every hue. Besides, it’s glamorous appearance will surely earn you plenty of applause at a potluck or from dinner guests. The best part is it takes very little time to assemble, but the final outcome belies that (We are not going to let our guests know that, are we?)

Triple layered Plum Terrine

A few tips to keep in mind are to select tender coconut which is slightly sweeter. Retain the tender meat from inside the coconut too. Select ripe but firm plums that are just short of over ripe or squishy.

Without further ado, here goes..

Preparation time – 45 minutes+1 hour setting time, Cooking Time – 15 minutes, Serves - 6

Allergy Information

Does not contain egg, soya, wheat, dairy, nuts.

Ingredients

  1. Firm ripe plums – 8-10
  2. Tender coconut water – 2 cups (I got it from 2 tender coconuts)
  3. Flesh from the tender coconuts, chopped
  4. Agar agar – 2 gms
  5. Fresh water – 1 cup +1/2 cup if needed
  6. Sugar – 3 heaped tbsp (or less if the coconut water is sweet enough)
  7. Pomegranate pearls – 1/4 cup (optional)
  8. Flavourless vegetable oil like sunflower or canola oil – a few drops to grease

Chilled no-guilt dessert

Method

  1. Wash the plums, pat dry and stone the fruit by cutting from all four sides close to the seed, and then from top and bottom! Dice the pulp into an even small size taking care not to squish the flesh. Set aside.
  2. Chop the agar agar into small pieces, soak in 1 cup water in a small sauce pan, bring to boil, stirring continuously for 4-5 minutes, until the strands dissolve through. Strain the liquid through a metal sieve into a clean bowl. Return the remaining strands to the same sauce pan, add 1/4 – 1/2 cup water, and boil again while stirring all the time. Strain again into the same bowl, discard any leftover agar agar bits.
  3. Warm up the tender coconut water very gently for a minute, (do not boil). Remove from flame and add in a thin stream to the warm agar agar liquid, whisk well. Taste and add as much sugar as needed. Keep stirring until sugar has dissolved. Keep the agar agar sauce pan over flame. When sugar has dissolved, and the liquid looks clear and transparent, remove from flame.
  4. Grease a 8” by 4” loaf tin or several small ramekins/bowls/katoris (about 5-6, each of 120 ml capacity).
  5. Place the chopped plums in a single layer at the bottom of the prepared tin/bowls. Gently pour the tender coconut liquid over the fruit until the fruit pieces are drenched and submerged in the clear liquid. Tap sharply on the counter and rest on the counter for 15 minutes. (no need to refrigerate)
  6. After 15 minutes, check if the top of the liquid layer has set. If yes, proceed to add the chopped coconut pieces, again in a single layer. If not set, wait for 5 minutes, check and then layer the coconut. Repeat the gentle pouring of the agar agar liquid over the coconut. If this liquid has begun setting, warm it up gently until clear liquid and then pour. Tap over counter again and leave to set for 15 minutes.
  7. Once this layer too has set, scatter a few pomegranate pearls over if using. Else you could use up the rest of the diced plums too. Finish off by pouring the coconut water+agar agar liquid over the fruit. Tap the container sharply again (to avoid air pockets) and set in refrigerator for an hour.
  8. To unmould, dip a knife in hot water, wipe and run carefully around the set terrine. Loosen the sides alone and invert onto serving plate. Cut into slices if set in loaf tin using a serrated knife. Serve chilled as is, or accompanied with whipped cream or ice cream.
  9. Sit back and enjoy this absolutely guilt free dessert and bask in appreciative applause!

Terrine loaf

Terrine from the top!

Jul 19, 2014

My Bircher Muesli


We first sampled Bircher Muesli a couple of years ago at  Hong Kong Sky City, Marriott. Vacationing at Hong Kong, we were tucking into the amazing breakfast spread (which is a lot to say for vegetarians.)  My interest was sparked at the sight of very cute jars of muesli sitting on a bed of crushed ice. I enjoy hot muesli by pouring steaming skim milk over muesli, but this? On crushed ice? After confirming with the wait staff that it had all vegetarian ingredients (you never know, after all, even congee there has bacon in it) we tentatively sampled one jar, and boy, fell in love with it. My son declared, “Mom, we have been wasting life by not having this wonderful breakfast dish”.

I researched into it’s origin, and discovered that Bircher muesli was first developed by a Swiss doctor, Dr. Bircher – Brenner. First used for patients, the recipe has become hugely popular in Switzerland and Germany. It is traditionally made by soaking rolled oats in yoghurt/curd along with grated apple, apple juice and left overnight in the fridge. The next morning, it is enjoyed for breakfast along with choice of toppings such as roasted nuts, or more fresh fruit. With it’s easy make-ahead prep, versatile choice of toppings, and deliciousness in every spoonful, it’s not difficult to love Bircher Muesli.

But wait, what’s a recipe without customisation? I am a big fan of eating local, buying seasonal. So the muesli had to be localised and include seasonal fruit too. The apple had to give way to mango, the fruit of the season.The Bircher muesli became muesli parfait. Another ingredient, popped amaranth just begged to go in too. Some easily available dry fruits and nuts completed the meal-in-a-jar. Local ingredients, global flavours! Good morning muesli

So I set about soaking oats in skim milk yoghurt. I also soaked some pitted dates and raisins in honey in a separate bowl and left them to rest in the fridge overnight. The next morning, I chopped up some mangoes, toasted a few almonds and walnuts. Now I was ready to assemble. The layering of the ‘breakfast-parfait’ began with a few spoons of the soaked oats. On this, I piled some chopped mangoes, then came the turn of another star ingredient, popped amaranth. A few drizzles of honey and then the turn of the oats again. The soaked dates+raisins went in next followed by some more chopped mangoes and popped amaranth. The parfait was finished off with nuts and another drizzle of honey. There, so simple. It took 5 minutes to assemble two servings. A most delicious, filling, uber healthy breakfast ready. Needless to say it was demolished as quickly as it was assembled.

While you can play around with ingredients and serving size, I am giving the ingredients and measures I followed. Feel free to play around the main theme and come up with a combination that your family loves.

Preparation time –15 minutes+8 hours soaking time, Cooking Time –3 minutes, Serves – 2

Allergy Information

  • Does NOT contain egg, soya, peanuts, corn, milk.
  • Contains yoghurt, some gluten from oats.

You Need

Cookware –2 mixing bowls, chopping board, knife, small saucepan,300-400 ml jars to assemble the meal.

Ingredients

  1. Quick cooking oats – 4 tbsp
  2. Skim milk yoghurt – 400 ml ( 2 cups)
  3. Skinned and chopped mango – 1/2 cup
  4. Popped amaranth – 3-4 tbsp
  5. Dates – 6-8
  6. Golden raisins – 12
  7. Almonds – 6
  8. Walnuts – 2
  9. Honey – 2 tbsp+2 tsp

To Assemble

  1. Mix the measured oats into the yoghurt, stir in well, cover and rest in refrigerator overnight. Also place the pitted dates and raisins with 2 tbsp honey in a small bowl, cover and store in refrigerator.
  2. I popped the amaranth at home from amaranth seeds. To pop, you add amaranth seeds to a super hot wok, a tsp at a time, stir gently and watch them seeds merrily popping and dancing in front of your eyes! You could use store bought popped amaranth or omit it entirely too. Or attempt popping at home if you get hold of amaranth seeds.
  3. Chop the mangoes and almonds, keep aside.
  4. Take the serving bowls, or jar or tall glass to assemble the parfait. Rinse well and wipe dry.
  5. Layer the soaked oats at the bottom, 2 tsp should suffice. Place the chopped fruit on the oats. Next, add the popped amaranth, about 1 tbsp would do. Place the soaked and plump dates+raisins mixture over this and cover again with a couple of tsp of soaked oats. A drizzle of honey, then fruit, popped amaranth and finally topped with toasted nuts follow. Finish off with a good drizzle of honey.
  6. Enjoy for breakfast, or assemble in ajar with screw top lid, and carry to work. Ideal for mid-morning or 4 p.m. hunger pangs.

Meal in a jar


Bircher Muesli Parfait

Apr 30, 2014

Cantaloupe smoothie


It feels like the worst April ever in my city, unimaginably hot these days.  To add to my woes, I suffered a hit in an amusement park that has left me with a broken rib. I expect it should heal in two months. Added to this are children having summer vacations who keep darting in and out of home in between their endless rounds of play – more thirsty than hungry.  Finding simple recipes to hydrate the children and the rest of the family while trying to ‘bed-rest’ my broken rib is quite a juggle.
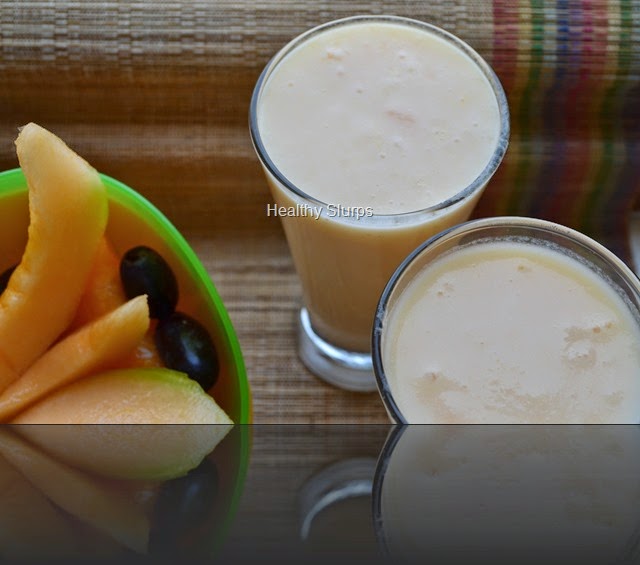
In summer, we are naturally inclined to drinking more fluids to overcome thirst, cool the body and keep us sane! I am experimenting with more smoothies, shakes, juices as tasty ideas to rehydration and energy. This Cantaloupe smoothie is the result of one such experiment. When the fruit is made into a smoothie, it is more refreshing and filling. The well ripened fruit gives the drink an amazing flavour and we do not miss the sugar at all.
Cool chilled smoothie
  • Cantaloupe or Musk Melon, as it is called in India, is more available in summer than other seasons. The melon is very rich in Vitamin A, C, Folate, Niacin,  Potassium.
  • These vitamins are important during pregnancy, so the fruit is a good choice along with others for a pregnant woman.
  • The sweet taste of the melon comes from sugars, so diabetics need to work with your nutritionist to find it’s appropriate use in your diet.
  • The fruit’s high moisture content makes it ideal for summers, for rehydration during workouts. The smoothie thus is a very good pre / post workout meal. Made even healthier with addititon of flax powder (Omega 3 and 6 fatty acids) or sabja seeds.
You Need
  1. Skim Milk – 500 ml
  2. Cantaloupe / Musk Melon – Skinned and chopped – 2 heaped cups
  3. Honey – 1 tbsp, optional
  4. Ice cubes – optional
Method
  1. Wash, skin and deseed the melon.
  2. Chop it into largish chunks and blend into a smooth puree in the mixer.
  3. Add 1/2 cup milk, blend again. Pour into a large jug, add the rest of the milk and stir to homogenise. Taste and add honey if needed.
  4. Chill for half an hour before serving. Serve with ice, if you like!
Enjoy the fruit and the smoothie!