Showing posts with label complete meal. Show all posts

Jul 31, 2017

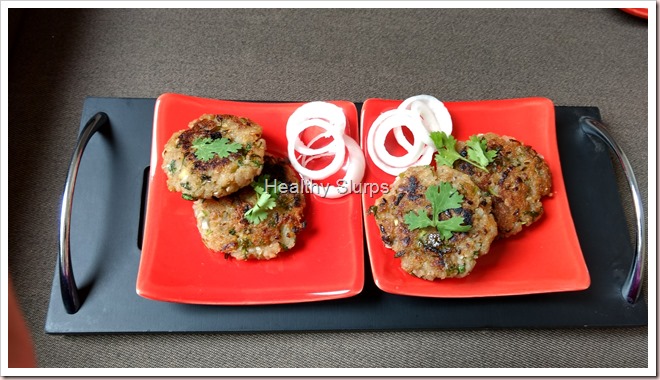
Poha Alu Tikki

Finding myself with a big bowl of leftover Kanda Poha, I was wondering what to upcycle it as. It seemed such a shame to throw away such precious organic red poha. Thus was born Poha Alu tikki. Since rice flakes (Poha) is so quick to soak, and because the tikki is easy to put together with readily available ingredients, I am sure you will enjoy making and savoring this simple Poha Alu Tikki as much as we did.

You can use either Red or White Poha for this Poha Alu Tikki. Or you can use up leftover Aval upma/Kanda Poha like me! Just add a boiled potato for binding, some herbs and seasonings, and the Poha Alu Tikki is ready to be pan fried and gorged upon.

Here is how I made Poha Alu Tikki.

Tikki platter

ALLERGY INFORMATION

  • Does NOT contain lactose, nuts, soya, corn, egg.
  • Suitable for people with gluten allergy or lactose intolerance,

Preparation Time -  15-20 minutes, Cooking Time –  25–30 minutes, Makes – 12 –14 medium size tikkis. 

YOU NEED

COOKWARE – colander, 5 litre mixing bowl, chopping board, knife, potato masher, non-stick tawa/griddle

INGREDIENTS

  1. 1 heaped cup Red/ White rice flakes ( poha). I used *Red Poha. OR 1 heaped bowl leftover aval upma/Kanda Poha
  2. 1 medium potato boiled, or half cup boiled mashed potato
  3. 1/4 cup finely minced red onion
  4. 2 green chillies, finely minced
  5. a handful of fresh coriander leaves,finely minced
  6. 1/2 teaspoon salt
  7. 1/2 teaspoon amchur powder
  8. 1/2 teaspoon garam masala powder

METHOD

  1. If using fresh rice flakes(Poha), cover with fresh water, soak for 5 minutes. Then place in a colander and rinse under running water. Set to drain.
  2. Clean and mince finely onion, green chilly, and coriander leaves.
  3. Add the above to the drained poha, mashed potato, salt, amchur and garam masala in a mixing bowl. Mash them together using a potato masher. Mix well to a homogenous mixture.
  4. Make big lemon size balls, flatten slightly, and shallow fry on a heated non-stick tawa. Drizzle as little oil as possible while shallow frying. Flip to other side, and cook till browned. Take care to brown both sides evenly.
  5. Remove to serving plate. Serve with onion rings and mint chutney.

Tikki close upTikki close up 2


Dec 10, 2015

Sai Protein for Chennai Floods

All these days, I have been watching the news with unspeakable pain and sorrow. The Chennai floods, that swept away precious life, left us all shocked and dazed. If the torrential monsoon rains were not enough, the city’s overflowing reservoirs too added to the mayhem. Coupled with indiscriminate real estate development, with no thought given to civic infrastructure, the people of Chennai are paying a very heavy price for the greed of their leaders. 

The terrible times also brought forth unprecedented help from different parts. Normal people turned heroes, and pretend heroes turned zeroes. Homes have been thrown open to complete strangers, people are offering their time and services for free, and heroic tales of survival and rescue are now flooding the social media. It is so heartening to see the generous help that people are offering each other.

While it looks like the rain gods have finally relented, a massive job still lies ahead in the flood-hit areas. Cleaning out the debris, preventing and fighting any water-borne diseases, rebuilding homes,… the task list goes on. In this context, I would like to share a recipe for kanji powder that can be made in bulk and distributed to those affected by the floods. All those want to contribute in some form for Chennai Flood Relief, please do try to make this powder and help those affected. The combination of grains used in this recipe is unique. Designed to be a complete food, 3 tablespoons of the powder dissolved in water or milk (if available), can replace an entire meal. It can be had by people of all ages, toddlers to old people. However, may not be suitable for weaning infants.

In a time when the immunity of a population is at risk, when people do not have access to normal cooking methods, when nutritious food is vital to health, this powder is a God-send. Beats instant noodles or biscuits by several miles in nourishment.

YOU NEED

INGREDIENTS

  1. 6 kilos Whole wheat (wheat pearls)
  2. 1.5 kilos parboiled rice
  3. 1.5 kilos Ragi (finger millet)
  4. 1.5 kilos Green Chickpeas
  5. 1.5 kilos Green Mung Beans
  6. 1.5 kilos Roasted Chana Dal ( Chutney dal)
  7. 0.5 kilo Soya beans
  8. 0.5 kilo Peanuts
  9. 0.5 kilo Jowar grains (sorghum/white millet)
  10. 100 grams Sago (sabudana)
  11. 30 grams cardamom
  12. 10 kilos sugar

METHOD

  1. Dry roast all ingredients from 1 to 10. Roast individually to a golden brown.
  2. Do not roast cardamom and sugar.
  3. Add the cardamom and sugar to the roasted grains. Powder in a flour mill.
  4. This recipe makes about 25 kilos of kanji powder.
  5. To make kanji, dissolve 3 tablespoons of the powder in hot water or hot milk. Stir briskly and serve. 

Please share this recipe/blog post freely. Please make in bulk for your homes or send to those affected by the floods. Either way, you are doing yourself a good turn.

Jun 3, 2015

Idli – The Ultimate Guide to Softest Idlis.

Idli. Enough said. That spongy, light as air, uber healthy, steamed breakfast of millions in India. It is every idli lover’s dream to make the fluffiest, softest, ‘malli poo’ idlis (as soft as jasmine flower) at home. Idli is the stuff of  culinary dreams. The perfect idli seems so much in reach and yet, so elusive. As my friend put it, “Idli is the cause and weapon of marital fights at our home.” If you want Idli to be the cause of marital harmony rather than distress, or if you are looking for a healthy breakfast recipe, read on..

Much has been written about how to grind the perfect idli batter. Family and friends who have tasted my idlis have been reminding me to document my recipe at the blog. So here I am, with my method of making idli batter. Do share what works for you as well. It would be great to hear from everyone.

The key to good food begins with good ingredients. I use Salem idli rice. I use the best quality whole white urad that I can find. In Bangalore, Salem idli rice and whole white urad can be bought at most wholesale rice and grain shops. (rice mandi) Some supermarkets like Nilgiris, Spar, Star Bazaar, Towness also carry them. “Can I use idli rava instead of the rice?” You can. But the texture of idli will be different. Don’t tell me I did not warn you.

The next step is correct technique. For fermentation, timing is key! I soak the grains overnight, grind it the next morning and leave it to ferment through the day. By evening, the batter is ready. I store the fermented batter in the fridge and use it for up to a week without any loss of flavours.

Idli topped with two chutneys 

If you are eager to make the perfect idlis for your family, follow these steps carefully. Please read the method thoroughly before trying. As with other recipes, perfection comes with practise. If you have any doubts, write to me and I can try to sort it for you.

YOU NEED

COOKWARE – Wet grinder, big bowls, spatula, idli steamer 

INGREDIENTS

  1. 4 cups Salem Idli Rice
  2. 1 cup Whole white urad
  3. 1 tsp Fenugreek seeds – (optional)
  4. 2 tsp Salt
  5. 5-7 cups chilled drinking water for grinding.

METHOD

  1. Measure out rice and urad in two separate bowls. Add fenugreek seeds, if using, to rice bowl. Rinse in enough changes of water till water runs clear. Soak in fresh drinking water. Water level should be 1 inch above the grains. Soaking time can range from minimum of 4 hours to maximum of 8-9 hours. I soak overnight. (about 8 hours)
  2. Measure out 2+1/2 cups of drinking water. Drain the soaking water from urad and grind in wet grinder. Keep sprinkling a quarter cup of water every 8-10 minutes. Use all of the 2 cups of water. Add as much of the 1/2 cup as needed. I grind for 40-45 minutes. Remove to a deep bowl when the batter looks doubled in volume and is silky smooth when you feel between your fingers.
  3. Measure out 3+1 cups of chilled drinking water. Drain out the soaking water from rice. Grind in wet grinder with 1 cup of water to begin with. Sprinkle just enough water to keep the grinder running smoothly. Keep checking every 4-5 minutes while grinding. Add water as necessary. I grind rice for 20 minutes. I stop grinding when the rice feels a little coarse and before the rice becomes a very smooth paste. That is not to say a semolina texture. Rather, between fine semolina and paste….
  4. Remove to same bowl as urad batter. Add salt and mix well with your hand. Yes, I dip most of my forearm into the batter to mix it up. This is vital to good fermentation. Have you not heard?
  5. Set this covered bowl of batter to rest in a warm place. Make sure to fill you bowl only half way to give room for rising. You can divide the batter into two bowls too. At my home, the batter takes about 8 hours to ferment. If your room temperature is below 20C, set to ferment inside your cold oven. Or cover the bowl with a beach towel/blanket. And pray that the batter does not attach itself to your blanket!
  6. The batter is completely fermented when it rises to double in volume, has a sour-sweet fragrance. Stir it lightly. Pour into greased idli moulds.
  7. Steam for 10-12 minutes over a medium flame. The idlis are done when a knife inserted through the centre comes clean.
  8. Serve hot with assorted chutneys, or molaga podi or sambar. Or all of them!

Mini idli served with love

Apr 16, 2015

Jowar dosai

Why millets? Why so much brouhaha over these pseudo cereals? Why is it important in a modern urban diet? Are they good at all? Who should eat millets? Who should not? These and many more facts set out for you here. Read on to know more.

Millets are not cereal grains, so they are called pseudo grains. Millets are smaller grains. They belong to five (or more) different botanical families, but are classified under one name as millets. Millets are grown for bird, animal and human consumption. Factors that go in favour of their cultivation are that they have a short growing season, grow in semi arid regions, (they need very little water) need very little attention. Different countries across the world have been growing and consuming millets for thousands of years. Unfortunately, urban diets have not included millets for about 50 years now.

So what is the good and bad about eating millets? Here, I split it up into its constituents and make it simple for all to understand.

The Carbohydrates -  Millets have complex starches in form of amylose and amylopectin. Such a starch can only be digested in cooked form by humans. Since they not easily digestible, they have a low glycemic index. That means they release their sugars into the blood stream in a slow steady fashion. Much like how a sustained release medicine works. There are no highs and lows in blood sugar when you are eating such starches. And yes, you guessed it right: this is great news for diabetics and pretty much everybody else.

The Proteins – After carbohydrates, proteins form the major part of millets. Egg and human milk are considered perfect proteins because they have the best combination of amino acids that the human body needs. When compared to these proteins, most millets are found to have insufficient amino acids to provide all nutrients for infants and growing children. Millets have been found to be deficient mainly in lysine, an essential amino acid. What are amino acids?

Amino acids are the building blocks of proteins. There are 21 amino acids that form all the proteins ever known. Several of these amino acids are made in the human body. These are called non-essential amino acids because the body can make it on its own. Some of these are called essential amino acids. Why are they called so? Because they are necessary for growth and cell repair but cannot be synthesised in the human body. So they have to come from the food we eat. Lysine is one of these essential amino acids.

Does this mean that millets are not good enough for weaning food? Or to feed growing children? No. Millets are very good for children, when cooked well and when paired with a legume such as mung bean or tuvar dal. Legumes are naturally rich in lysine and by combining them in the same meal ensures that the meal gives complete protein for the growing body. Besides, millets are gluten free as well. So they are a safe bet for all, children, older people or those with gluten allergy.

Look forward to more information and recipes with millets in my forthcoming posts.

Meanwhile, here is a recipe for Jowar Dosai. This recipe is good for beginners who are not sure about how to begin including millets. Millets are great for people who need a gluten–free diet as well. Besides, here, the ground batter is fermented which increases the food’s digestibility as well as increasing the availability of several vitamins and minerals from the grains.

The initial trouble of soaking, grinding and fermenting is well worth the effort. The batter keeps well in the fridge for up to a week. When you have batter ready in the fridge, making dosai for a meal takes only a few minutes. You can choose to make regular size dosai for breakfast, dinner or coin-sized ones for your child’s lunch box.

Coin Dosai platter dotted with molaga podi

ALLERGY INFORMATION

Preparation Time – 8 hours soaking+1 hour grinding+8 hours fermentation, Cooking Time – 10-15 minutes, Makes – about 20 dosais.

YOU NEED -

COOKWARE - Wet grinder or mixer grinder, Iron skillet/griddle, Big deep dish mixing bowls, ladle, sharp metal spatula

INGREDIENTS -

  1. 1 cup Jowar grains
  2. 1 cup salem idli rice/boiled rice/raw rice
  3. 2 tbsp fenugreek seeds
  4. 2 tbsp urad dal
  5. 1 heaped tsp salt
  6. Sesame oil for drizzling over dosais, about 1/4 cup oil

METHOD -

  1. Measure out all ingredients except salt and oil. Rinse the grains well, Soak overnight. To do this, steep in enough water to cover the grains plus an inch higher.
  2. The next morning, grind the soaked grains. If using wet grinder, keep sprinkling water every 7-10 minutes. You can use up to 3 cups water for grinding. I grind my batter in a wet grinder. When using jowar grains, it takes longer to grind. About 1 hour of grinding gives me a smooth batter. When the batter looks smooth, add salt, mix well and remove to a deep bowl. Allow plenty of head room for fermentation. Leave overnight for fermentation.
  3. The batter is ready when it has risen to double volume.
  4. Heat up an iron skillet/dosa tawa. Smear oil all over to grease.
  5. Pour a ladleful batter in the centre of skillet. Spread with back of ladle in concentric circles. Drizzle few drops of oil around the sides. When brown at edges, loosen the edges, flip over with a sharp spatula and cook on other side. Repeat for the next ladle of batter.
  6. Alternately, pour tiny spoonfuls of batter all over the skillet to make ‘coin dosais’. Drizzle oil around the sides, flip over to cook briefly on other side. Remove to serving platter when done.
  7. Serve with any chutney of choice or with dosai molaga podi!

Coin dosai topped with molaga podi

Crispy or soft - fragrant Jowar Dosai

Mar 9, 2015

Samai Pongal / Little Millet Pongal

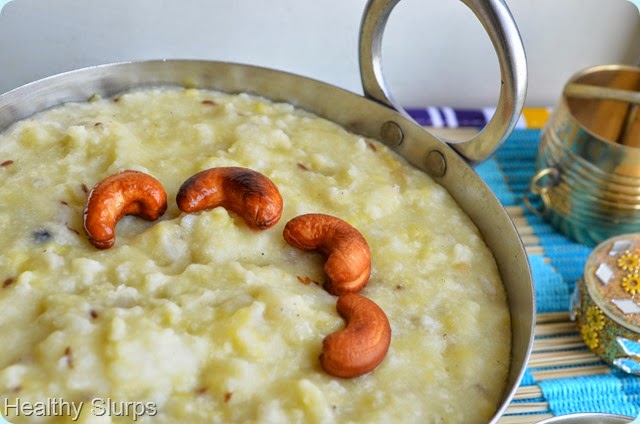
Ven Pongal or Khara Pongal is a much loved breakfast food in South India. However, you can have it any time of the day. Ven Pongal works at the brunch or dinner table with equal ease.  With the millet wave sweeping the diets of all, I feel this is a good time to share a recipe with millets.

Samai rice/Little Millet replaces white rice in this preparation. Not only is it far healthier, the millet also cooks faster than rice. Isn’t that great news? Samai has 8 times more iron than white rice and 10 times more fibre. If that was not enough, it is higher in thiamin(vit. B1) , riboflavin(vit. B2) and folic acid content as well. Owing to their low glycemic index, millets are good grains to include in diets for weight management, diabetes, as well as in pregnancy. Since Pongal is usually cooked to a soft mush, this dish can be fed to weaning babies or toddlers also.

Pongal tastes best when served hot, so packing for school lunch may not be a great idea. However, you can pack for an office lunch if you can re-heat your food at work place. Now that I have shared enough reasons to switch to the millet from rice, let us proceed to the recipe, shall we?

Making Pongal is really simple. Cook a grain and a lentil together, fry some seasonings in a fry pan, mix the two with some salt and your dish is ready! Read on for the proportions and method here -

Samai Pongal with chutney

ALLERGY INFORMATION

  • Does not contain gluten, corn, soya, eggs, lactose, dairy.
  • Adding nuts is optional. Omit if you have nut allergy.

Preparation time –10 minutes, Cooking Time –15 minutes, Serves – 4-5.

You Need

Cookware – Pressure Cooker, fry pan, mortar and pestle

Ingredients

  1. 1 cup Samai rice
  2. 1/2 cup Moong Dal
  3. 4 cups water
  4. 1/2 tsp salt
  5. 1 tsp cooking oil
  6. 1 tsp ghee
  7. 10 whole cashew nuts (optional)
  8. 1/2 tsp Cumin seeds
  9. 1 tsp black pepper
  10. 1 tsp ginger juliennes
  11. 7-8 curry leaves, torn up
  12. 2 green chilli, slit (optional)

 Method -

  1. There are two methods to cook this pongal. You can choose between – 1. Pressure cook the Samai rice and Moong dal together in the pressure cooker. For this, rinse the grains together, cover with 3 times the volume of  water and pressure cook for 2 whistles. Or, 2. Pressure cook the dal alone, and the Samai rice on the stove top. For this, cover dal with double volume of water and cover the millet with double the volume of water and cook for about 3-4 minutes. Mix both in a serving bowl.
  2. Coarsely pound the black pepper and cumin in a mortar and pestle.
  3. To a fry pan, add in the oil + ghee, fry the cashew nuts (if using) to a golden brown.
  4. Tip in the pounded pepper +cumin, curry leaves, ginger juliennes, and green chilli.
  5. Add salt to the cooked mixture, pour in the seasonings and mix well. You may add 1/2 cup of hot boiling water to the mixture if it looks very hard. We want a soft mushy texture to the pongal.
  6. Serve steaming hot pongal with a spicy chutney, or sambar or even the traditional gothsu! Here I have served it with a tangy raw mango chutney.

Perfect weekend breakfast or brunch

Enjoy your power packed meal!

Jan 24, 2015

Methi (No)Malai Matar

Some days are different. In a lazy luxurious kind of way. Some days when the routine is banal, when the mundane will just not cut it. Days when we linger just a little longer in bed, luxuriate in the bath, indulge in a hot tea while soaking in the morning sun. I am sure you have these days in your life too.

Such days call for a special meal. A rich, creamy, sinful dish around which a deeply satisfying repast can be planned. Today was such a day. A day to be extravagant, yet sensible. A day to savor. Time to gratify the tongue, body and soul with gastronomic hedonism, yet, not feel the pain of sin later. Time for another recipe to get the Healthy Slurps tweak.

Before you wonder any more, let me share this winner of a recipe with you. Winter is a season of amazing variety of produce in India. Fresh green peas are an irresistible part of this season. Every year, I buy fresh green peas in bulk, shell them, and freeze to use later through the year. After gorging on them in various avatars through the winter, that is. Punjabi and other North Indian cuisines have several dishes with peas as the star ingredient. Of these, I have been wanting to try this Methi Malai Matar for a long time. Translated from Hindi, it means a gravy/curry of fragrant fenugreek leaves and green peas laced generously with fresh cream. I could never bring myself to add cream in the quantities mentioned in most recipes. I just had to find a good healthier substitute.

Today, the idea just presented itself and I went along with the inner flow. The result was a rhapsody of aromas, flavours, an appearance that was alluring and beckoned us to the dining table! Substituting skim milk curd/yoghurt for cream was a fitting idea. The almond meal also added to the richness and added to the good fats in the meal. I prefer almonds over cashews to thicken a gravy as the former has a better fatty acid profile. In plain speak, it means, almonds have more heart-healthy fats than cashew nuts have.

The dish gets done in 4 simple steps. Soak the almonds in warm milk. Fry all ingredients for grinding. Grind along with almonds.  Simmer chopped fenugreek leaves with the gravy. Add boiled peas, season, and the dish is ready!

I am so happy to share this recipe with all of you. So here goes -

Fragrant Fenugreek married to Perky Peas!

ALLERGY INFORMATION

  • Does NOT contain corn, soya, gluten.
  • Suitable for people with gluten intolerance.
  • Contains lactose from milk. Those with lactose intolerance can substitute milk with same volume of water in the recipe.
  • Contains nuts. Those with nut allergy can substitute almond in the recipe with pureed silken tofu.

Preparation Time – 15-20 minutes, Cooking Time – 20-25 minutes, Serves – 4-6.

You Need -

Cookware – Saute pan, Small saucepan/Glass bowl, Mixer grinder

Ingredients -

  1. 3/4 cup fresh or frozen green peas
  2. 2 cups loosely packed fenugreek leaves ( Methi saag)
  3. 1/4 cup almond meal OR 2 tbsp whole almonds powdered with skin OR 1/4 cup pureed silken tofu
  4. 1/2 cup skim milk OR 1/2 cup water
  5. 1 heaped tsp salt
  6. 1 cup skim milk yoghurt
  7. 1 tbsp grated jaggery Or sugar (optional)

To fry and grind -

  1. 1 heaped cup chopped onions
  2. 3-4 tomatoes
  3. 2 tbsp chopped ginger
  4. 2-3 garlic cloves
  5. 2-3 green chillies depending on heat preference
  6. 1 inch stick of cinnamon
  7. 3 cloves
  8. 2 green cardamom pods
  9. 1/4 cup chopped green coriander leaves
  10. 1 tbsp cooking oil

Method -

  1. If you have whole almonds, soak in measured warm milk OR measured warm water(use warm water if you have lactose intolerance). If you have almond meal, soak those in warm milk too. Set aside. If you have nut allergy, omit the almonds, thaw the silken tofu, puree and set aside.
  2. Heat a fry pan, add oil, toss in the chopped onions, saute for a minute. Then tip in the chopped ginger and peeled garlic. Fry another minute. When the onions take on a light pink tone, add the chopped tomatoes. Also stir in the cinnamon, cloves and cardamom. Fry over a medium flame. Do not brown the onions. After 3-4 minutes of frying, when the tomatoes look slightly mushy, take off the flame.
  3. Grind this mixture along with chopped coriander leaves, and the soaking almonds+milk/water, or the pureed tofu. Blend to a smooth paste.
  4. Return this blend to the first fry pan, and set to simmer again.
  5. Chop the cleaned fenugreek leaves finely and add to the simmering sauce. Add 1/4 cup water if too thick and let the greens simmer in the sauce for 3-4 minutes. Stir in between to avoid charring at the bottom.
  6. Meanwhile boil the fresh or frozen green peas over stove top or microwave. Cover the peas with 1/2 cup water and cook for 3-5 minutes until soft and cooked. Add this cooked peas along with any remaining cooking water to the simmering sauce too.
  7. Add salt, sugar, curd, and mix in well. Bring to boil over medium heat. Switch off and let the gravy rest for 10-15 minutes.
  8. Serve warm with phulka/kulcha/pita bread/jeera rice/any mild pulao/pilaf. i served it with fragrant jeera rice and a carrot salad.

A satisfying repast

Creamy rich Methi Malai Matar minus the guilt 

Jan 17, 2015

Instant Gojju Avalakki / Beaten Rice with Tamarind Sauce / Aval Puliodharai / Attukulu Pulihora

Gojju Avalakki is a popular breakfast dish in Karnataka. It packs health and flavour in big measure. Each family has their own version of the recipe. Mallika makes a weekend favourite breakfast out of this humble beaten rice at her blog Veg bowl. Sailu’s Kitchen makes it with a different technique at her space.
While I make this breakfast dish similarly at our home too, I find the soaking time a deterrent when I need an instant breakfast on somedays. And then, I discovered an instant method of making the same dish minus the soaking and waiting time. Traditional recipes require a soaking time of at least half an hour prior to seasoning and cooking. In this method, I have eliminated the soaking time completely. Who can say no to 30 whole minutes saved in the morning rush hour, or at any time of the day!
Excited, I felt this new method has to be documented for my own reference as well as for all my dear readers. For, what is a discovery if not shared with all, correct? Well, here goes.
Do you know that the humble beaten rice is a powerhouse of health? Poha or beaten rice has 20 times more Iron than white rice, and double its Calcium, besides having higher Potassium and fibre content too. So if you were to substitute a cup of  raw rice with a cup of poha/beaten rice, you have made a very smart choice in increasing the nutrient density of your meal! Not to mention it is an easy substitute for rice too. With near zero cooking time, beaten rice also has a similar taste profile as rice, making the replacement fuss free. Did I mention it is naturally gluten free as well?
Well, what are we waiting for? Ah yes, the recipe. I forgot that I’ve not shared it with you yet. Here it is.
Notice the texture of the ground poha
ALLERGY INFORMATION
  • Does NOT contain gluten, soya, corn, eggs, lactose.
  • Contains peanuts in this recipe. Not suitable for people with nut allergy.
Cooking time – 15 minutes, Preparation time – 15 minutes, Serves – 4-6.
You Need -
Cookware - Mixer grinder, large wok with fitting lid
Ingredients -
  1. 3 cups ‘medium thick’ poha/ aval/avalakki/beaten rice
  2. 2 tbsp cooking oil
  3. 2-3 tbsp raw peanuts
  4. 1/2 tsp mustard seeds
  5. 1/4 tsp turmeric powder  
  6. a pinch asafoetida powder
  7. 2 tsp jaggery powder
  8. 1/2 tsp salt
  9. 1 tsp sambhar powder (MTR or any brand or home made)
  10. 2 tbsp MTR Puliotharai Powder ( Puliogare Powder)
  11. 1 1/2 to 2 cups fresh water
  12. fresh coriander leaves to garnish (optional, though highly recommended)
Method -
  1. Powder dry aval/poha in several batches in a mixer grinder. To do this effectively, fill about half cupful of aval in the mixer, pulse for a few times until it resembles coarse rawa.  Remove to a bowl. Repeat until all the aval has been ground in this way. Set aside. Take care so you do not over do it and end up with aval powder. We need some texture to the dish.
  2. Heat cooking oil in a large wok. Add peanuts to it and fry until lightly browned. Do not burn the peanuts, keep stirring. When the peanuts are giving out a fried aroma, add mustard seeds, turmeric, asafoetida, jaggery, salt, sambhar powder and puliotharai powder to the oil. Stir over medium heat. Add 1/2 –3/4 cup water and simmer until the mixture is homogenous.
  3. Now tip in the powdered aval, mix well. Sprinkle the water all around the wok, stir well, cover and simmer on the lowest heat possible for 5 minutes. After 5 minutes, taste the mixture, adjust seasonings if needed. You may sprinkle some more water if the aval does not feel soft enough.
  4. Stir in the chopped coriander leaves, cover and switch off flame. Let the contents rest for 5 minutes. After 5 minutes, toss and fluff up the aval puliotharai and serve with thick probiotic curd. Serve at breakfast or as an anytime snack.
  5. Only aval/poha with medium thickness can be made in this way. Thick aval needs longer soaking time. Do not use thick aval for this recipe.
Anytime healthy snack

Dec 22, 2014

Potato and Sorakayi Kurma

An unusual combination of vegetables. Brought about by necessity. That and the early morning rush. I found just a few vegetables in the fridge and had to create some packed lunch out of these in 30 minutes. So here is how I managed to pull it off.

In case I need to ‘repeat this accidental success’, I may need a recipe the second time. So I am documenting it here. Also thought of sharing it with my friends: harried moms who have to churn out delicious food, in school lunch boxes every morning, that too in record time.

Aromatic Potato and Sorakayi Kurma

ALLERGY INFORMATION

  • Does NOT contain lactose, gluten, nuts, soya, eggs.

You Need

Cookware

Knife, chopping board, pressure cooker, saucepan

Ingredients

  1. 1 large potato
  2. 1 heaped cup diced lauki/sorakayi/bottle Gourd
  3. 1/4 cup diced carrot (optional)
  4. 1/4 cup fresh/frozen green peas
  5. 1 small onion
  6. 2 tomatoes OR 2 tsp tomato paste
  7. 1/2 tsp garlic paste
  8. 1/2 tsp Garam Masala Powder
  9. 1/4 tsp turmeric powder
  10. 1/4 tsp red chilli powder (optional)
  11. 1/2 tsp salt or more if needed
  12. 1/4 tsp cumin seeds
  13. 1/4 tsp mustard seeds (optional)
  14. 1 tsp cooking oil

Method

  1. Rinse, peel skin and chop/dice vegetables(from 1 to 3) to similar size. Place along with peas directly in a small pressure cooker or in a suitable container inside a pressure cooker. Add 1/2 cup water, and cook for 2 whistles. Let cool on its own.
  2. While the veggies are cooking, set a sauce pan over flame. Heat oil, season with cumin and mustard seeds. (if using)
  3. Add finely chop onion. When it begins to brown, in a couple of minutes, add the garlic paste, let sizzle for minute. Keep stirring, lest it burns.
  4. Add in the tomato paste, the powders. Sprinkle a few tbsp of water. Stir and simmer for 4-5 minutes for all flavours to blend well.
  5. Combine the cooked vegetables (along with cooking water) and the simmering gravy. Check for salt and other seasonings. Mash the potato chunks roughly with the back of a ladle.
  6. When you have simmered this mixture for a couple of minutes, the kurma is ready. Can be packed along with rotis, bread or steamed rice for school lunch.
  7. TIP – If you find the gravy too salty or spicy, add quarter cup water, some chopped coriander leaves and squeeze half a lemon into it too. Hopefully you can retrieve it this way. Another way to salvage, is by adding another boiled potato to this gravy. But yes, you need time to boil another potato if you don’t have one handy.

Phulkas with Kurma for lunch

Lauki and peas doing a happy tango  

Dec 2, 2014

Peanut and Potato Salad

It is the season of peanut harvest in and around Bangalore. There is an interesting story around peanut harvest in our city.
Legend has it that a bull would roam over the fields every full moon night destroying the peanut crops. Flustered farmers offered their first harvest at the Bull temple and the roaming of the bull ceased!Local farmers offer their first crop to Nandi, the bull devotee of Lord Shiva at the Bull temple in Bangalore to this day. The temple vicinity wears a festive look during these two days. A village fair unfolds in the middle of the city. This annual fair is known as ‘Kadalekai Parishe’.
I love the earthy aroma of freshly dug up peanuts here. Call me biased, but the aroma and incredible, sweet, nutty flavours of peanuts that I buy from this fair every year beats all other. I cook the peanuts in their shells in salted water. All of us then gather around the steaming hot bowl of boiled peanuts, shell them and gobble them before some one else grabs it! Warm bonding  during chilly evenings over hot boiled peanuts!
Mostly I have no peanuts left over to include in any dish. However, I managed to make this peanut-potato salad from some that survived the onslaught. Even if the salad was made up from simple, readily available ingredients, it was bowl-scraping, finger-licking, slurp-worthy good. Ok, I’ll stop now.
I am documenting this recipe as much for myself as for sharing with all of you. Fresh seasonal ingredients. A good mix of crunch, soft, and crisp textures. A tongue tickling interplay of flavours. No fried ingredients. Healthy carbs and protein with a giant dose of fibre and vitamins. Do you need any more reasons? Just try it once. I am sure you’ll be hooked.
Peanut Potato salad served with baguette
ALLERGY INFORMATION
  • Does NOT contain gluten, lactose, corn, soya, eggs.
  • Suitable for lactose or gluten intolerant people
  • Contains peanuts.
  • NOT SUITABLE for people with nut allergy.
Preparation time – 30 minutes + 30 minutes optional chilling time, Cooking Time – 30 minutes, Serves – 3-4.
You Need
Cookware - Pressure Cooker with 2 containers that fit into it, Metal/Glass Bowl, Colander/Salad spinner, Knife, Chopping Board
Ingredients
  1. 2 cups peanuts in their shells
  2. 2 medium potatoes, chopped with skin into quarters. 
  3. 3 heaped cups Iceberg/Romaine Lettuce
  4. 1 big Tomato
  5. 2 tsp salt
  6. 2-3 cups fresh water
  7. a big bowl of ice water
For Salad Dressing
  1. 2 tbsp Apple Cider Vinegar
  2. 1/2 a red onion
  3. 8-9 tbsp Extra Virgin Olive oil (EVOO)
  4. 2 generous pinches crushed black pepper
  5. 1/4 tsp salt
To Assemble
  1. Dunk the peanuts in shells into a huge bowl of water. Let it sit for a few minutes. Rub the shells vigorously with both hands to loosen the dirt on them. Drain the water and repeat with 2 more changes of water. You can omit this step if using shelled peanuts. Just rinse peanuts once in water is enough.
  2. Now place in a container, pour enough water to cover all the peanuts,  scatter 2 tsp salt over it. Place the rinsed and chopped potatoes also in another container. Place both containers in pressure cooker and pressure cook for 3 whistles.
  3. Rinse the lettuce first under tap water, then place in ice water.
  4. Peel and dice/slice the red onion. Place in a bowl, add 1 tbsp apple cider vinegar to it and let steep.
  5. Meanwhile, whisk the remaining vinegar, EVOO, salt and crushed pepper into an emulsion.
  6. Shell the peanuts and peel the potatoes. You can dice the potatoes into smaller size if you wish. Chop the tomato finely. Place all these together in a bowl.
  7. Drain the lettuce, use a salad spinner if you have one. Else just drain in a colander and shake it well. Tear up the large leaves into bite size ones by hand. Add to the other vegetables.
  8. Combine the onion and dressing from step 4 and 5. Drizzle over the salad vegetables. Mix well.
Combine the dressing with salad ingredients
The salad tastes best if allowed to chill for half an hour before serving. But, if you are in a hurry, just dig in and enjoy! We coupled it with 2 slices of warm toasted baguette for an after school snack.
A complete meal -warm toast and chilled salad

Oct 4, 2014

Sprouted Mung Bean Sagu

A sensible diet does not mean fasting for most part of the day. Rather it means eating smart, deriving maximum nutrition for every bite, making the right food choices. For vegetarians, a healthy diet also means an intelligent blend of cereals and proteins. You may ask why?

Egg is called a complete protein source because it contains all the 20 amino acids needed by the body.

Does that mean you lose out on the proteins if you follow a vegetarian or a vegan diet? NO!!

Nature has provided so much variety that we can easily make every meal a complete protein meal simply by smart pairing of a cereal and a legume. This is because, cereals and legumes have complementary amino acid profiles. In simple speak, cereals will supply the amino acids found missing in legumes and vice versa. By consuming both at the same meal, every time, we can compensate for the amino acids missing in each of these grains and make the meal a nourishing and strengthening one.

Power Breakfast - Idlis and Sprouts Sagu

Enter - a favourite South Indian breakfast. Rava Idlis are made with wheat semolina unlike usual idlis which are made from a rice based batter. Rava Idlis are always paired with Potato Sagu in homes and restaurants in Bangalore. In Tamil Nadu or other Southern states, the dish is usually paired with a mixed vegetable ‘kurma’, or chutney. All these dishes are great spicy accompaniments to the bland, soft rava idli.

However, I wanted to take this meal a notch up in the nutrition ladder. Looking for a protein ingredient to accompany the ‘rava’, I felt the best one would be mung bean sprouts. Several reasons for this – mung beans are a pantry staple in most homes, they sprout with little effort, are quick cooking, and lend character to any meal. Still, with great trepidation, I waited to see the reaction on my family’s faces when I served this up for breakfast. One look at them all, and I was satisfied we have a winner at hand.

I urge all of you to try this out too. Enjoy it for breakfast, brunch or even dinner. And let me know your thoughts. Here is how I made our weekend breakfast.

ALLERGY INFORMATION

  • Contains gluten from rava. NOT suitable for celiacs, or people with gluten sensitivity.
  • Contains buttermilk. Usually suitable for people with lactose intolerance.
  • Does NOT contain egg, corn, soya, nuts. Suitable for people with nut allergy.

Preparation Time – 30 minutes, Cooking Time – 30 minutes, Serves – 4-6.

YOU NEED

Cookware – Idli steamer, Pressure Cooker, Mixer Grinder, Sauce Pan

Ingredients

For the Rava Idlis – I used an Instant Mix of Soulfull Rava Idli Mix. This was part of the goodies we received at the IFBM. Quite fresh and convenient. Mix the contents of the packet with enough sour buttermilk to make a thick pouring batter. Grease idli moulds, pour in batter and steam in a pressure cooker/idli steamer for 10-12 minutes until done.

Spongy soft Rava Idlis

For the Mung Bean Sprout Sagu

  1. 1 heaped cup Mung Bean Sprouts
  2. 1/2 cup finely chopped Onions
  3. 1/2 cup diced Tomatoes
  4. 1 tsp Ginger garlic Paste OR make a paste of a thumb size ginger piece and 2 cloves garlic
  5. 2-4 green chillies depending on your heat preference
  6. 1 tbsp khus khus (poppy seeds) soaked in hot water for half an hour
  7. 2 tbsp fresh grated coconut
  8. 1/4 cup roughly chopped green coriander leaves with stem
  9. 1/2 tsp salt
  10. 1 tsp Cooking Oil
  11. 1/4 tsp Mustard seeds
  12. 1/4 tsp Cumin seeds

To Assemble

  1. Set the khus khus to soak in 1/4 cup very hot water.
  2. Rinse the sprouts, place in bowl, add 1/2 cup water and pressure cook for 2 whistles.
  3. Rinse, dice, prepare all vegetables as mentioned in ingredient list.
  4. Grind these ingredients into a smooth paste – khus, fresh coconut, green chillies, fresh coriander leaves, ginger and garlic. You can add some water to help grind too.
  5. Set a sauce pan over heat, add oil, tip in mustard and cumin to season.
  6. When they crackle, add the onions, fry till soft, then add tomatoes. Add salt, fry till tomatoes are pulpy.
  7. Pour in the cooked sprouts, add the ground paste, mix well, and simmer for 5 minutes. Do not boil on high heat. Add 1/2cup water to thin down if needed. We want a liquid dipping consistency. Check for salt. When the sagu is well blended, remove to serving bowl and enjoy with hot steaming rava idlis.

Enjoy hot breakfast with a view

Bowl of fragrant sagu

Sep 24, 2014

The Tastiest Lentil Stew

I have finally found my tastiest lentil stew. Also the most versatile. Also adaptable to any cuisine. Also really quick to make, and totally slurp-worthy. Vegan to boot. As usual, such great discoveries happen by serendipity. For long, I had been drooling over the hearty bean chillis that many folks make. For long I’ve been toying with the idea of a chilli with an Indian flavour. For long, I’ve been dreaming of making a meal of a hearty soup-ish stew. For long, ....OK, I’ll stop now.

Dinner in a bowl

I had some leftovers to be used up. In a crazy moment of devil-may-care, I just poured some things into a pot and seasoned them with fragrant fried onion, a couple of green chillies to notch up the heat, and finished off with some aromatic chopped coriander.

You could make the same stew at least three ways. Use a seasoning of oregano, cumin powder, chipotle peppers, flat leaf parsley, and topped with Greek yoghurt. Or dress with Sriracha, chopped spring onions, and drizzle some sesame oil on top. Or you could go the Indian Garam Masala route seasoning with fennel seeds, a couple of green chillies if you like, top with fried onions, chopped coriander and if in a indulgent mood, some fresh cream or butter as well. Did I not tell you this is the most versatile?

Tasty Lentil Stew

These are the ingredients I used. You could change the ingredients if you wish, but the flavours and textures will differ accordingly.

ALLERGY INFORMATION

  • Does NOT contain gluten, soya, peanuts, other nuts, corn, yeast, egg or dairy.
  • Suitable for gluten and lactose intolerant people.
  • Also suitable for people with nut allergy.

Preparation Time – 20 minutes, Cooking Time – 30 minutes, Serves – 4 – 6 depending on whether it is your main meal or as an entree.

YOU NEED

Cookware – 2-3 litre capacity Pressure cooker, mixer grinder, knife, cutting board, Small fry pan

Ingredients

  1. 1/2 cup Tuvar Dal
  2. 1/4 cup Chana Dal
  3. 1/4 cup Pearl Barley
  4. 2 heaped cups of chopped Lauki / Bottle Gourd
  5. 3 ripe large tomatoes
  6. 1/4 cup chopped carrot
  7. 2 cloves peeled garlic
  8. 1/2 inch piece ginger
  9. 3/4 tsp salt
  10. 1/2 tsp cracked black pepper
  11. 1 tsp Cooking Oil
  12. 1/4 cup finely chopped Onion
  13. 3 green chillies (optional)
  14. 1/4 tsp Mustard seeds
  15. 1/2 tsp Cumin Seeds

Method

  1. Rinse, peel bottle gourd, and chop into 1 cm squares. Rinse, peel and chop carrot similarly. Peel the ginger, garlic. Leave them whole.
  2. Place the Dals and the pearl barley inside your pressure cooker directly or in a vessel that fits inside the cooker. Rinse the dals once,drain the water, then add the chopped vegetables, peeled ginger and garlic, and the tomatoes. Top with water to cover the contents, (approx double volume of water) and pressure cook for 3 whistles. Set aside for pressure to release on its own.
  3. Once you open the pressure cooker, remove the vegetables from the top to a mixer jar, leaving the pulses inside. Discard only the ginger piece. Whizz the rest in a mixer grinder to a coarse-ish paste. Return the paste to the dals+barley.
  4. Add salt, and simmer over a very low flame for 10 minutes until the stew is thick, flavours blended well.
  5. In a separate small fry pan, add the oil, heat it up, add the mustard, cumin, let crackle, add chopped onions, green chillies if using. Sauté the onions until they are light brown, or for longer if you wish. Pour over the simmering stew, stir the seasonings in and cover immediately. Let the stew rest for half an hour to allow for flavours to mingle.

Serve warm just by itself, or with a corn muffin or with a salad with herb dressing. Else, you could also top it with some fried chips, add a dollop of Greek yoghurt, and enjoy.

Or serve the Indian way. Pour some stew into a bowl, drizzle with some green chutney and sweet chutney, top with finely chopped onions, scatter some fine ‘sev’ over and serve.

Whichever way you choose to indulge, this dish is extremely tasty, incorporates several grains, has loads of vegetables, makes a meal by itself or is a worthy accompaniment to any meal.

Healthy, filling Lentil Stew

Jul 19, 2014

My Bircher Muesli


We first sampled Bircher Muesli a couple of years ago at  Hong Kong Sky City, Marriott. Vacationing at Hong Kong, we were tucking into the amazing breakfast spread (which is a lot to say for vegetarians.)  My interest was sparked at the sight of very cute jars of muesli sitting on a bed of crushed ice. I enjoy hot muesli by pouring steaming skim milk over muesli, but this? On crushed ice? After confirming with the wait staff that it had all vegetarian ingredients (you never know, after all, even congee there has bacon in it) we tentatively sampled one jar, and boy, fell in love with it. My son declared, “Mom, we have been wasting life by not having this wonderful breakfast dish”.

I researched into it’s origin, and discovered that Bircher muesli was first developed by a Swiss doctor, Dr. Bircher – Brenner. First used for patients, the recipe has become hugely popular in Switzerland and Germany. It is traditionally made by soaking rolled oats in yoghurt/curd along with grated apple, apple juice and left overnight in the fridge. The next morning, it is enjoyed for breakfast along with choice of toppings such as roasted nuts, or more fresh fruit. With it’s easy make-ahead prep, versatile choice of toppings, and deliciousness in every spoonful, it’s not difficult to love Bircher Muesli.

But wait, what’s a recipe without customisation? I am a big fan of eating local, buying seasonal. So the muesli had to be localised and include seasonal fruit too. The apple had to give way to mango, the fruit of the season.The Bircher muesli became muesli parfait. Another ingredient, popped amaranth just begged to go in too. Some easily available dry fruits and nuts completed the meal-in-a-jar. Local ingredients, global flavours! Good morning muesli

So I set about soaking oats in skim milk yoghurt. I also soaked some pitted dates and raisins in honey in a separate bowl and left them to rest in the fridge overnight. The next morning, I chopped up some mangoes, toasted a few almonds and walnuts. Now I was ready to assemble. The layering of the ‘breakfast-parfait’ began with a few spoons of the soaked oats. On this, I piled some chopped mangoes, then came the turn of another star ingredient, popped amaranth. A few drizzles of honey and then the turn of the oats again. The soaked dates+raisins went in next followed by some more chopped mangoes and popped amaranth. The parfait was finished off with nuts and another drizzle of honey. There, so simple. It took 5 minutes to assemble two servings. A most delicious, filling, uber healthy breakfast ready. Needless to say it was demolished as quickly as it was assembled.

While you can play around with ingredients and serving size, I am giving the ingredients and measures I followed. Feel free to play around the main theme and come up with a combination that your family loves.

Preparation time –15 minutes+8 hours soaking time, Cooking Time –3 minutes, Serves – 2

Allergy Information

  • Does NOT contain egg, soya, peanuts, corn, milk.
  • Contains yoghurt, some gluten from oats.

You Need

Cookware –2 mixing bowls, chopping board, knife, small saucepan,300-400 ml jars to assemble the meal.

Ingredients

  1. Quick cooking oats – 4 tbsp
  2. Skim milk yoghurt – 400 ml ( 2 cups)
  3. Skinned and chopped mango – 1/2 cup
  4. Popped amaranth – 3-4 tbsp
  5. Dates – 6-8
  6. Golden raisins – 12
  7. Almonds – 6
  8. Walnuts – 2
  9. Honey – 2 tbsp+2 tsp

To Assemble

  1. Mix the measured oats into the yoghurt, stir in well, cover and rest in refrigerator overnight. Also place the pitted dates and raisins with 2 tbsp honey in a small bowl, cover and store in refrigerator.
  2. I popped the amaranth at home from amaranth seeds. To pop, you add amaranth seeds to a super hot wok, a tsp at a time, stir gently and watch them seeds merrily popping and dancing in front of your eyes! You could use store bought popped amaranth or omit it entirely too. Or attempt popping at home if you get hold of amaranth seeds.
  3. Chop the mangoes and almonds, keep aside.
  4. Take the serving bowls, or jar or tall glass to assemble the parfait. Rinse well and wipe dry.
  5. Layer the soaked oats at the bottom, 2 tsp should suffice. Place the chopped fruit on the oats. Next, add the popped amaranth, about 1 tbsp would do. Place the soaked and plump dates+raisins mixture over this and cover again with a couple of tsp of soaked oats. A drizzle of honey, then fruit, popped amaranth and finally topped with toasted nuts follow. Finish off with a good drizzle of honey.
  6. Enjoy for breakfast, or assemble in ajar with screw top lid, and carry to work. Ideal for mid-morning or 4 p.m. hunger pangs.

Meal in a jar


Bircher Muesli Parfait

Apr 8, 2014

Little Millet Khichdi


Weight loss is the most important reason people visit a dietician or nutritionist. People want to lose weight for many reasons. Some of them could include - to look good, be able to carry off several outfits, to feel more energetic and several other reasons too. It is not advisable, however, to attempt weight loss in an unhealthy, unscientific or haphazard manner. Many people adopt extreme measures to lose weight. We would have heard of several restrictive diets such as all fluid diets, cabbage diet, only fruit diet, only vegetable diet, only milk diet, and several other ‘only diets’. Pause for a moment and think: are these really nourishing, sustaining, or even feasible in the long term?

The big goal and focus should be on achieving good health and fitness. Weight loss should only be a part of the journey to fitness and better health. Weight loss and weight management should also be approached with common sense, moderation and with a long term goal in mind.  Changes in diet should be made gradually and systematically. Including healthy grains, increasing fluid and fruit intake, keeping an eye on what one eats/drinks through the day are all important points to be kept in mind when attempting weight loss.

Pack of the Organic Millet I bought

In a study published by the American Journal of Clinical Nutrition on Glycemic Index and Obesity, scientists found a strong correlation between the type of grains consumed, its glycemic index and the ability to lose weight and keep it off too. This means, by choosing grains intelligently, it is possible to feed the body maximum nutrition while keeping weight in check too. Millets are a valuable group of grains which most of us in India have forgotten in the last century or so. Millets pack complex carbohydrates,(hence low glycemic index), more fibre than polished rice/wheat, are high in several minerals like Calcium, Iron, Magnesium. They are easy to cook too and flavours are quite mild and palatable. It is time we undo this damage of ignoring such nutrient powerhouses and allow ourselves their benefits.

This recipe is part of my effort to include millets in my family’s meals in delicious and acceptable ways. Little millet, also called Saama rice, Saame, Koda, is slightly bigger than semolina in size. It cooks very quickly, has an unobtrusive flavour and lends itself to several dishes easily. I cooked up this delicious khichdi several times in the past few months altering the spices and vegetables used each time. It is now a family favourite.  Do use the recipe below as a broad guideline and feel free to make your own favourite version.

Bowls of goodness

You Need

  1. Saama millet – 1 heaped cup
  2. Mung dal – scant 3/4 cup
  3. Potato – diced, 1/4 cup
  4. Carrot – diced, 1 cup
  5. Fresh green peas – 1/4 cup
  6. Bay leaf – 1 large
  7. Cinnamon – 2 thin sticks
  8. Cloves – 3
  9. Black pepper corns – 1  tsp
  10. Cumin seeds ( Jeera) – 1 heaped tsp
  11. Butter – 1 tbsp + Cooking oil – 1 tbsp
  12. Salt – 1 heaped tsp + 1/2 tsp
  13. Fresh water – 4 1/2 cups

To Assemble

  1. Rinse the millet and mung dal together.Place them in a suitable large vessel along with the potato, carrot, green peas and bay leaf. Add measured water,( read notes) place inside pressure cooker and pressure cook as you would normally cook rice. I reduce the flame after the first whistle and let it simmer for 5 minutes before switching off and letting it cool naturally.
  2. To a small frying pan, add the butter + oil, heat and add all the other spices mentioned in ingredients. Do not burn the spices, let them sizzle gently until it just releases its aroma.
  3. Pour over the khichdi when aromatic, add salt, mix well.
  4. Serve steaming hot with plain curd and a salad or kadhi and salad.

Creamy millet khichdi

Notes

  • Water - Add 3 times the volume of grain+dal if you want a creamy mushy khichdi, or add lesser for a less gooey version. I prefer the former for ease of spooning and swallowing!
  • Add spices such as cardamom, saunf( fennel seeds) or omit bay leaf if you feel so.
  • Any combination of vegetables can be used. Or you can make it with no vegetables at all too.

Sending this recipe to the following event started by Pari and co-hosted by Shruti. I am so excited to participate in such a useful event where all can use the archives for several healthy recipes. Do check out the spaces of both these awesome bloggers.

Only Grains

Also linking dish to event run by Nupur of UK Rasoi and Priya’s Versatile Recipes.

Jan 25, 2014

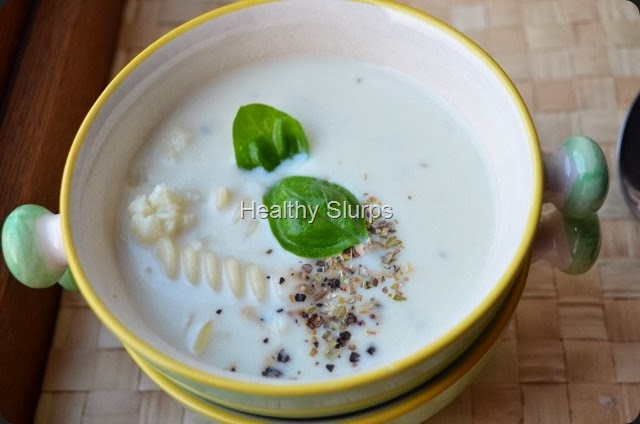
Cream of Cauliflower Soup


I am surprised that I have not posted a single recipe for a soup so far. Rather unexpected, because I do make soups so often. To make amends for that lapse, here is a recipe I made for my daughter. She is enduring a bout of viral fever and nothing like a hearty soup to perk her bored spirits up.

Soups are very versatile. They can be made with minimal ingredients, can range from clear to rich and creamy. A soup can stimulate appetite, can cure anything from cold, flu to heart breaks. Soups are especially welcome during chilly wintry evenings.

What are the benefits of eating soup during / before a meal?

  1. A soup combines dual advantage of being nutrient dense and not energy dense. In simple speak, soups offer more nutrients and less calories.
  2. Vegetable soups are a tasty way to include more vegetables to daily intake.
  3. Broth based soups help to lower hunger, manage food cravings, increase fluid intake.
  4. Having a soup before the main meal helps to decrease intake of calories by at least 20%.
  5. Homemade soups with fresh ingredients are the healthiest, most nourishing and wholesome.

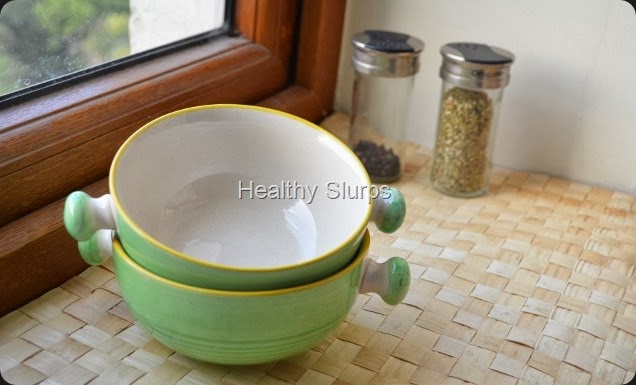
Soup Bowl waiting for the soup

You Need

  1. White cauliflower – 10 medium florets
  2. Cabbage –1/4 cup, shredded
  3. Onion – 1/8 of medium onion, sliced
  4. Skim milk – 1 cup
  5. Fresh water – 1 cup
  6. Butter – 3/4  tsp
  7. Salt – 1/2 tsp
  8. Black /White Pepper – 1/2 tsp
  9. Oregano powder –  1/4 tsp

To Assemble

  1. Blanch cauliflower florets for only 2 minutes ( to remove unwelcome guests such as worms)
  2. In a pressure pan, heat butter, fry onion to light pink, add cabbage followed by cauliflower. Toss until all vegetables are coated with butter. Add 1/2 cup skim milk, pressure cook till 1 whistle.
  3. Cool the contents, reserve a couple of florets for garnish and run in a mixer till it becomes a smooth puree.
  4. Return to pressure pan, rinse out mixer jar with freshwater, add that to the pan too. Add the reserved 1/2 cup milk to adjust consistency. Add salt, oregano.
  5. Simmer the soup until it just comes to a boil. Keep stirring to avoid scorching the base of the pan.
  6. Add crushed black / white pepper to taste.
  7. Grate the reserved cauliflower, divide among soup bowls, pour hot soup over that and serve piping hot.

Variations -

You may add rosemary or thyme instead of oregano if you prefer.

A pinch of grated nutmeg at the end will also be great.

A few pasta shells can also be boiled and added if serving to a sick child (for some calories and to make it more appealing).

Creamy Cauliflower Soup

Jan 2, 2014

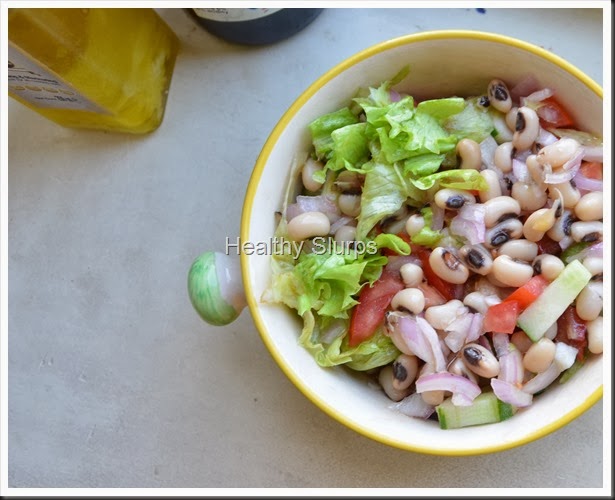
Black Eyed Bean Salad


A very Happy New Year to all readers of Healthy Slurps. There is something about the air during New Year which is very invigorating and refreshing. Goodwill, cheer, positivity abound in everyone’s heart during this season. Here is my first recipe for this year which has packed in it, all the love and cheer of this season.
To kick start this New Year with more healthy recipes, here is a salad that I assembled today. As I have mentioned earlier, salads are created with available produce at my home without sticking to any recipe. The reason I am documenting them here is to share the recipe with myself as much as with all of you. For I find myself at a loss to remember all ingredients when I want to recreate that last great salad.

Come, eat me
You Need
  1. Black eyed beans ( Lobia ) – 1 cup, soaked for at least an hour
  2. Cucumber – 1
  3. Red Onion – 1 medium
  4. Roma Tomato – 2 medium
  5. Iceberg Lettuce – Roughly torn and measure 2 cups
For Dressing
  1. Red Wine Vinegar – 2 tbsp
  2. Extra Virgin Olive Oil – 8 tbsp
  3. Crushed Black Pepper – 1 tsp
  4. Salt – 1 tsp
  5. Granulated Sugar – 1 tsp
To Assemble
  1. Whisk all ingredients for dressing together in a bowl.( I used a fork to whisk them,) quite simple really. Set aside.
  2. Peel the lettuce leaves from the head and immerse in ice cold water.
  3. Pressure cook the soaked beans until just done. I pressure cooked them by simmering the flame for 5 minutes after the cooker gave out the first whistle.
  4. Peel and chop the other three salad ingredients in the same shapes – go with dice, slice or cubes. The only rule is to be uniform. That does give the salad a good appearance.
  5. Drain the water from the cooked beans, if any. Do not discard but use in soup, sambar, or as cooking liquid for any vegetable too.
  6. Toss all the ingredients and the dressing together in a suitable large bowl.
  7. Chill for half an hour and serve.
Filling and Tasty Salad
Come, Eat me

Mar 5, 2013

Sprouts In Palak Gravy

Reposting the recipe as entry to Only Cooking with Legumes event at Nalini’s Kitchen. A great event started by Pari Vashisht at her blog Foodelicious

March is the season of winter in some places, spring in some parts of the world, and summer in several parts too! One season is common to all in India – March is the season of exam fever all over the country! Rising temperatures, portions to complete, revise, projects to submit, cramming before exams, and raging hormones no less, all add to the Indian teenager’s agony. Standing at an important crossroad of life, today’s teenager and the family have a lot of stress to face through these weeks.
At such stressful times, it goes without saying that a healthy body and healthy mind are very crucial to crack the tests and come through happily. Parents are eager to know what can help in improving their children’s health and will do all it takes to better their child’s chances at success. I have had several parents ask me about ideal diet for children during study holidays and examination - time. An ideal diet at these times should include plenty of fibre, vitamins and minerals and less of refined starches. Greasy, spicy foods are best avoided too. Fruits, fresh squeezed citrus fruit juice without too much sugar, other fluids like tender coconut water do wonders to keep the body and mind stable and calm. It also helps to spend some time in playing  a favourite game and / or doing breathing exercises like ‘Pranayama’ (after learning from a qualified teacher).
Let us begin with good food. Food that is nourishing, sustaining, and tasty too! Food that energises without being heavy, food that delivers maximum effect with minimum effort. What can fit this bill better than sprouts?
I am quite fond of sprouts for their power packed nutrient content. Sprouts are an invaluable source of protein in a vegetarian’s diet. Besides the protein punch, sprouts are also chockfull of Vitamins B (better digestion, stronger nerves), Vitamin C ( better immunity, healthier gums). Also present are Minerals like Zinc, Copper, Iron – These are needed for a growing teen for stronger muscles, more blood cells and hence more oxygen to body and brain! Sprouts are low on glycemic index too. They are the perfect food for holistic health – of mind and body.
While it is true that raw sprouts give all the benefits of vitamins, fibre, minerals, yet it is not an easy task to coax children to chew on them frequently.If you can get your teen to chew on a tbsp of raw mung bean sprouts daily, it would be wonderful. However. do not despair if she does not agree. I often choose the middle path – steam the sprouts, or microwave them for a brief while to take the raw offensive flavour out. Steaming sprouts also is good to help elderly or people with compromised immunity to digest it easily.
Eating cooked sprouts is better than not eating them at all. Eating cooked sprouts in a smooth flavourful palak gravy is even better. What say?
Parathas made with multi grain dough flavoured with ajwain paired well with this sprouts in palak gravy. It was school lunch fare and I am so glad to say that other kids at school liked it too. This is an ideal meal for children working hard at their academics at this time of the year.
Bowl of Sprouts in Palak
You need
  1. Mixed sprouts or mung bean sprouts – heaped, 1 cup
  2. Palak leaves – wash in several changes of water, drain, chop and measure – 3 heaped cups
  3. Onion – chopped, 1/4 cup
  4. Garlic – 1 clove, crushed
  5. Tomato – chopped, 1/2 cup
  6. Green chilli – 2
  7. Root ginger – chopped – 1 tbsp
  8. Salt – 1 heaped tsp
  9. Garam masala powder – 1 tsp
  10. Oil – 1 tbsp + 1/2 tsp
  11. Jeera – 1/2 tsp
To Assemble
  1. Pressure cook mixed sprouts or mung bean sprouts for as much time as needed to be just cooked. The cooking time will depend on the bean. Set aside, for pressure to release. Alternately, if you are using only mung bean sprouts, just steaming them for 3-4 minutes would be good too.
  2. Heat 1 tbsp oil in a non stick pan or kadhai.
  3. Add in this order, each at a 30 second interval   – garlic, ginger, green chilli, onion and tomato. Add salt, let the tomatoes mush up. Fry ingredients in oil
  4. Add chopped palak leaves. Toss the palak well in the pan, let it wilt and cook for about 2 minutes. Add chopped palak
  5. Cool and grind to a smooth paste.
  6. To the same pan, add 1/2 tsp oil, Sizzle jeera in it.
  7. Tip in the palak puree and the cooked sprouts, add garam masala. Check for salt, add more if needed. Mix palak puree and cooked sprouts
  8. Simmer for 3-4 minutes, switch off cover and let flavours mingle for 10 minutes or more. DSC_0042
  9. Serve warm with a lime wedge if you like, as accompaniment to hot phulkas or steamed rice. Yum. SmilePower Packed Meal