Showing posts with label coriander. Show all posts

Apr 2, 2015

Baby Corn and Capsicum Masala Curry – Indian Cuisine

While Indian food may be very appealing, cooking it at home may seem daunting to most non-Indians. Here is a masala curry which does not burn your tongue with heat, nor ask for too many ingredients. A quick fix recipe that will suit weeknight dinners too. Helpful when sudden guests arrive, or when you have little time before hunger strikes you down.

Fry ingredients for gravy and grind. Fry chopped baby corn and capsicum, simmer with gravy, add seasonings and finish off! All under 15 minutes. And did I mention low fat as well? Now is that good? Or great? Well, try it out and tell me which one, will you?

Quick Baby Corn and Capsicum Masala Curry

ALLERGY INFORMATION

  • Does NOT contain gluten, nuts, corn, soya, eggs.
  • *Contains dairy in yoghurt. Yoghurt is usually tolerated by lactose intolerant people. Substitute with soya or nut milk + more tomatoes if you cannot use yoghurt.

YOU NEED

COOKWARE – Fry pan, ladle, mixer grinder, knife, chopping board

INGREDIENTS-

  1. 20 baby corn
  2. 1 cup chopped capsicum
  3. 1/2 cup chopped onion
  4. 1 cup chopped tomato (can substitute with 2 tbsp tomato paste, or 1/2 cup tomato puree)
  5. 1 tsp ginger garlic paste
  6. 2 handfuls coriander leaves with stem
  7. 1/2 tsp red chilli powder (optional)
  8. 2 tsp Pav bhaji masala (I used Phalada Organic brand)
  9. 1 cup thick curd/yoghurt*
  10. 1 tsp salt
  11. 2 tsp Cooking oil
  12. 1/2 tsp cumin
  13. 1/2 tsp Saunf (fennel)

Notes on yoghurt – Use skim milk yoghurt for low fat curry. Also use fresh curd that is not too sour. Else it may make the curry too tart. You can also add 1 tsp brown sugar or jaggery to cut the acidity if the final curry is too tangy.

METHOD -

  1. Take 1 tsp oil in fry pan. Fry chopped onion, tomatoes, ginger garlic paste. After tomatoes have turned mushy, add the coriander leaves and switch off flame. Cool and grind to smooth paste.
  2. In the same fry pan, add cumin and saunf to 1 tsp oil. When they sizzle, tip in chopped baby corn. Fry on high flame for 4-5 minutes, stir and toss to avoid it getting burnt. Add chopped capsicum after 4 minutes, toss again on high heat for 1-2 minutes. When capsicum is glistening and has lost its raw aroma, pour in the ground mixture.
  3. Add salt, red chilli powder, and pav bhaji masala. Whisk the curd well and pour that in too. Add 1 cup water and simmer for 4-5 minutes until the gravy and vegetables come together in a fragrant medley.
  4. Serve piping hot with kulcha, phulka, or peas pulao, steamed rice. I served it with fragrant peas pulao, baingan bharta and this tasty baby corn and capsicum masala curry.

Platter of Peas Pulao, Baby Corn and Capsicum Curry, and Baingan Bharta

Jan 8, 2015

Mysore Pepper Rasam

The nippy afternoons and cold nights are a great time to warm the innards of body and soul with steaming hot soups. A few days ago, I had two people in the family with a running nose and cough. Just the right time to stir up some peppery, tangy, rasam. Every region has its own signature soup. Rasam is ‘the go-to soup’ of most South Indians when nursing a fever or cold. It features prominently in the menu for convalescents and nursing moms too. Well, even if you do not belong to any of these categories, you can still enjoy a hot mug of this delicious ambrosia.

I learnt this recipe for Mysore Rasam from my sister in law, Geeta. She is as creative in the kitchen as with her poetry. A truly inspiring person. We had this hot rasam at their home paired with steamed rice and a runner beans stir fry. Fond memories of that meal still linger, long after. Special people and some meals have that effect on us, don’t you agree? Well, I just had to recreate this at our home. Here, I have added extra pepper to suit our requirement. Everything else remains the same as Geeta’s rasam. Balmy, soothing, tangy, fragrant, instant comforter of stuffed noses and reliever of misery. Go on, make some for yourself.

Mysore rasam is unique in that it uses dry coconut apart from regular spices. Besides, the spices are always freshly roasted and ground. The effort of roasting fresh spices, grinding them and adding that magical powder to the rasam makes the end result so worth it.

The magic potion that cures all ills!

ALLERGY INFORMATION

  • Does NOT contain gluten, soya, lactose, corn, nuts.

Preparation time –10 minutes, Cooking time – 35 minutes, Serves - 4-6

You Need -

Cookware - Pressure cooker of 2 or 3 litre capacity, 1 Sauce pan/stew pot/steel pot of at least 5 litre capacity, 1 smaller steel pot, mixer grinder/coffee grinder, colander, Small ‘tadka’ pan or fry pan.

Ingredients -

FOR POWDER  Ingredients for Rasam Powder

  1. 1 tbsp Coriander seeds (Dhania/Sabut dhania/Malli verai/Kothambri beeja)
  2. 1/2 tbsp Cumin seeds (Jeera, Jeerige, Jeeragam, Jeelakara)
  3. 1 tsp heaped Black Pepper
  4. 1/2 tsp heaped Fenugreek seeds (Methi dana/Menthulu/Menthiam/Menthya)
  5. 1/4 tsp heaped dry coconut (copra) grated
  6. 5-6 Curry leaves
  7. 1/4 tsp ghee (clarified butter) OR 1/4 tsp cooking oil for vegan

FOR RASAM

  1. 1/4 cup Tuvar dal (split pigeon peas)
  2. 2 tbsp Tamarind paste OR pulp and juice extracted* from 3 tbsp packed tamarind
  3. 2 medium Roma or Vine tomatoes
  4. 1/2 tsp turmeric powder
  5. 1 tsp salt (more if needed)
  6. 1 tsp jaggery/sugar/brown sugar (optional)
  7. a pinch of asafoetida
  8. 2 tbsp chopped coriander

FOR SEASONING

  1. 1 tsp ghee (clarified butter) OR 1 tsp cooking oil for vegan
  2. 1/4 tsp mustard seeds
  3. 1/4 tsp cumin seeds
  4. 1/4 tsp fenugreek seeds
  5. a few curry leaves
  6. a pinch asafoetida

Method

  1. Rinse the tuvar dal, place in a suitable container that fits inside the pressure cooker. Top the dal with double the volume of water, and pressure cook for 4 whistles. Let the pressure release on its own. If you do not have a pressure cooker, rinse the dal, place in a saucepan with 3 times volume of water. Bring to boil and simmer for 20-25 minutes. Check if it is cooked. The grains should be mash-able between 2 fingers. Else, top up with more water as needed and cook until done.
  2. * To extract tamarind water, soak 3 tbsp packed tamarind in 1 cup warm water. After 10 minutes, rub the tamarind with fingers to extract juice. Sieve the juice into another container. Repeat once or twice more with half a cup of water each time. Collect this tamarind juice and use in recipe. Discard the pulp and fibre or seeds.
  3. Measure all ingredients for the Powder. Fry with the ghee over a medium to low flame. Keep stirring to avoid burning. Remove to a mixer when they are golden brown in colour and begin to smell fragrant. Powder to a fine texture.
  4. Chop tomatoes. Place all the ingredients (except tuvar dal and chopped coriander) mentioned under ‘Rasam’ in a saucepan, set to boil on stove top. Once it comes to a boil, simmer for 10 minutes.
  5. Mash the cooked tuvar dal well. You could use a potato masher, or electric churner for this. Mix this into the simmering rasam. Add water  to thin down if needed. We are looking for a thin soup consistency.
  6. Add ghee to a small saucepan. Heat with the ingredients for ‘Seasoning’. When mustard splutters, pour over the simmering soup. Add the chopped coriander and remove from stove. Cover and set aside for the seasonings to infuse.
  7. Pour into mugs and enjoy warm/hot with a piece of crusty bread. Or ladle onto steamed rice and eat with a crunchy papad or a crispy stir fried vegetable curry.

Piping hot Mysore Pepper Rasam with crunchy papads

,,

Jun 21, 2014

Five minute Three Pepper Paneer Curry

Check-out Allergy Information.

Every parent with school-going kids has to face the morning or the night before with a very important question – what to pack in the school lunch box? What’s there in my pantry? Also, when you have to feed more than one kid, the agony is doubled, believe me!

If my older one wants muesli for breakfast, the younger one fancies ‘Chocos’. The day the older one thinks of a sandwich for lunch, the younger one would like rice. If one feels like some thing sweet, the other wants a savoury treat right then! The Universe connives with my kids such that, they have exactly opposite moods at any time. At such times, nothing helps - not requests to adjust with each other, not promises to make it tomorrow, not threats, nothing! Trust me.

And, I have an hour to make breakfast for them, make acceptable (read different gourmet meals) lunches, pack them, fill their water bottles, make sure they have brushed, showered, prayed (yes, that is important in my home), combed, attired in mandatory school regalia!, find random books/papers/assignments/stationery that they have forgotten to stuff into their school bags, find their socks, salvage their shoes from the chasm between the shoe racks and the wall, and make sure they reach the school bus on time!

I know I am not alone. Most mothers/parents in my city and maybe, the world over, go through some variation of this vertigo-inducing routine in the morning! Well, after going through this rigmarole for more than 15 years, I have a few tricks up my sleeve. Some recipes which help me assemble quick, hearty, nourishing home-made lunches for my children.

This paneer curry is one such easy-peasy life saver on such insanity-causing weekday mornings!

If you have paneer ready, that is.

And coloured capsicum (bell peppers), and a couple of sauces.

It is versatile, easy to put together, can be used to partner with chapatis, filled into a sandwich, rolled into a kathi roll, or add pizzazz to some fried rice. Most important, when packed in a lunch box, it will come back home empty. Hopefully your child got to eat some of it Smile

Preparation Time – 10 minutes; Cooking time – 5 minutes; Serves – 4-5.

ALLERGY INFORMATION

  • Does NOT contain egg, nuts, corn.
  • Has dairy and lactose. Can be made dairy- and lactose-free by substituting paneer with extra-firm tofu.
  • Has MSG. Not suitable for children below 2 years.

The 3 pepper paneer sandwich

You Need

Cookware – Cutting Board, Knife, Colander, 9” Diameter frying pan / Wok.

Ingredients

  1. Paneer (Or extra firm tofu) – 200 gm
  2. Green, red and yellow capsicum, chopped – 1/3 cup each
  3. Red Onion – 1 big, or measure 1 cup, finely diced
  4. Fresh coriander leaves (Cilantro), chopped fine – 1/4 cup
  5. Schezwan Sauce (any brand) -  2 tsp
  6. Tomato Ketchup – 3-4 tbsp
  7. Salt – a couple of pinches ( if needed)
  8. Any vegetable oil – 2 tsp
  9. Saunf ( fennel seeds) – 1 tbsp*
  10. Honey – 1 tsp OR Sugar – 2 pinches (Optional)

*Do not omit the saunf in this recipe. It adds a unique flavour to the dish.

To Assemble

  1. Rinse paneer or tofu in drinking water. Carefully place it in colander to drain. Then, you can choose to either dice the paneer (or Tofu) or roughly crumble it. I prefer to dice, as then, the diced vegetables and the paneer all look similarly proportioned.
  2. Rinse, and finely dice all the capsicum into the same size. Peel, rinse and finely dice the onion too. Happy day with happy veggies
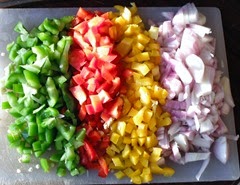
  3. Set frying pan/wok on fire and heat the oil in it. Add saunf, let it sizzle and release its’ aroma. Inhale - the aroma of saunf
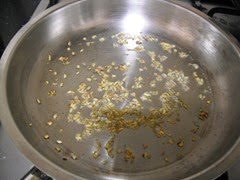
  4. Tip in the onion before the saunf browns. Sauté for a minute. Add a pinch of salt to speed things up.
  5. As soon as the onion looks pink,  tip in the diced capsicum, toss. Sauté for another two minutes.Veggies in a merry sizzle
  6. Now the sauces can go in. The sight of these liquids hitting the hot pan and then the aroma around – I’ll leave you to savour in your kitchen!
  7. A quick mix of the sauces and veggies, and now it is the turn of diced paneer followed by chopped coriander to hit the pan. Switch off flame, mix all contents well, taste and add more salt now if needed. Some paneer will get crumbled while mixing, that is fine. Add the (sugar /honey if you are using), now. Mix through, taste again to make sure the flavours satisfy your palate.*Tri-colour glory
  8. The 5 minute 3 pepper paneer curry is now ready. Use it as filling in whole wheat chapatis – spread 2 tbsp of curry per chapati, roll up, cover in foil and pack for lunch. Or, use as filling for sandwiches. it is a great accompaniment to Chinese fried rice too. Sandwiches in the making

* My family found the play of texture and flavour in this recipe to be very appealing! You could add more or less of the sauces, or add more seasonings as you prefer. Add red chilli paste instead of Shezwan sauce, omit the sugar, try the dish with any one type of capsicum – all these are variations you could try.

Pick-me-up Sandwiches for anytime of the day

We are enjoying these filling, healthy and absolutely lip-smacking sandwiches at our home, in our lunch boxes and as after-school snacks too! Go ahead, make some for yourself, enjoy and let me know if you liked them.

Apr 1, 2011

Power Pesarattu

Pesarattu is a much loved dish of Andhra or Telugu region of India. I have adapted the ingredients to suit my family’s taste. The use of sprouts and herbs in the batter create a unique power packed combination, easy and amazingly tasty.The herbs helped in masking a slight bitter flavour that sprouts develop. This dish works just right for breakfast in our home. I hope you find it great too! The measures used here serve 5-6 people.
Power Pesarattu
You need   
  1. Mung bean sprouts – 4 cups, heaped
  2. Raw rice – 1/2 cup, rinsed and soaked for 1/2 hour
  3. Ginger – 1 tbsp, chopped fine
  4. Green chillies – 2
  5. Coriander leaves – 1 cup, chopped
  6. Mint leaves – 1 cup, loosely packed
  7. Cumin seeds – 1 tsp
  8. Garlic – 1 pod (optional)
  9. Salt – 1 tbsp ( or more)
  10. Fresh water – 1 cup
  11. Vegetable oil / sesame oil  - 4-5 tbsp, for drizzling over dosas
mint, cumin, ginger, chillisprouts, rice, and coriander


To assemble
  1. Grind all ingredients mentioned under ‘You need’ except oil, to a real smooth batter. I used a mixer grinder. Using garlic gives a ‘kick’ to the final taste, but omitting it does not take away the pleasure either.
  2. Use water sparingly for grinding. The batter should be thinner than usual dosa batter but not too runny.smooth, frothy batter
  3. Hereon, writing the recipe is fairly simple, but creating a good dosa / pesarattu does need some practice!
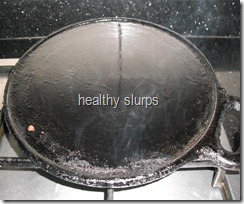
  4. Heat up a dosa griddle real hot. You can see the griddle all smoked up in this picture. Season the griddle with a tsp of oil.
  5. smokin hot
  6. Dribble a ladleful of batter around the griddle, fill up the centre with more batter, and spread very gently to form a circle. Drizzle 1/2 tsp of oil around the dosa, let it sizzle.Mummy look, a green dosa!
  7. Allow to cook through and brown around the sides, ease out the dosa carefully with a sharp spatula and flip over. flip over
  8. Cook this side over medium heat, ease out and remove to a plate when done.
  9. Check the dosa for salt and flavours before proceeding with the rest of the batter. To  salvage a runny batter or too much salt, you could add up to a couple of tbsp of rice flour to the batter. Rice flour will also help the Pesarattu become more ‘flippable’ and less clingy to the dosa griddle.
I did ruin a couple of dosas before I got it right. It helped to have the griddle smoking hot, waiting for the first side to really brown before attempting to loosen it and thereon, cooking over medium heat.
Pesarattu is traditionally served with ginger chutney. I usually serve with a peanut chutney which is a great favourite with my kids.
power pesarattu
Notes
  • Soak, drain, rinse whole mung bean and tie up in a muslin cloth, leave in a moist dark place for 10-12 hours, by which time the seeds would have sprouted and you have super healthy sprouts ready.
  • Mung bean sprouts have been used in Ayurvedic approach and Chinese cuisine for several centuries.
  • Consuming raw sprouts is not advised for toddlers, pregnant women, and in any gastrointestinal disturbance. The ideal way to consume for these people would be to use home  grown sprouts, rinse well, steam or lightly stir fry them.
Nutri notes
  • The sprouting process increases the beans’ enzyme content which means, complex carbs are converted to simpler starches, proteins to amino acids and fats to simpler lipids. As a result sprouts are more easily digested.
  • Sprouting increases sodium and Vitamin C content, both of which add to protein digestibility in the body.
  • Sprouts are 'live' food. They contain active RNA, DNA, in addition to being a veritable enzymes and antioxidants storehouse. They help cell regeneration and can rightly be called ‘fountain of youth’.
  • Dry beans do not have any vitamins or minerals, but we get almost magical amounts of Vitamins A, B, C, Calcium, Sodium, Potassium, Iron, Phosphorous, Manganese, from sprouts. Thus they are very handy in winters when fresh fruits or vegetables are in short supply. Sprouts can be eaten the whole year through too, for the whole host of amazing benefits.
  • Sprouts decrease the oligosacharides in the beans – this means, beans lose their gas producing quality.
  • Sprouting also increases fibre and water content of the beans, thus helping in avoiding or easing constipation.
  • For benefits of pudina and coriander, please do read up my earlier posts.

Feb 12, 2011

Tomato Herb Chutney


Luscious red tomatoes paired with fragrant coriander, the result is a flavourful chutney. My younger one wanted tomato chutney and the elder one wanted a green chutney; I was running short of time and threw both together – result was something all of us liked !
tomato herb chutney
You need
  1. Ripe red tomatoes ( any variety) - 2 big or 3 medium
  2. Green chillies – 3 (can add or reduce according to taste and heat)
  3. Coriander leaves – chopped roughly, 1 cup
  4. Fresh Coconut – grated,  1/4 cup
  5. Salt – 1/2 tsp
  6. Vegetable oil – 1/4 tsp
For seasoning
  1. Vegetable oil – 1/4 tsp
  2. Mustard seeds – 1/4 tsp
  3. Urad dal – 1/4 tsp
  4. Hing powder – a tiny pinch
  5. Curry leaves – 4-5 torn up
quartered tomatoes
 To assemble
  1. Wash and pat dry tomatoes. Quarter them.
  2. Wash green chillies and chop up.
  3. Remove roots of coriander, rinse thoroughly, drain and chop roughly.
  4. Grate coconut, measure out 1/4 cup.
  5. Heat up oil in a small frying pan, add green chillies, step aside.
  6. Tip in chopped tomatoes, toss to coat oil evenly.fried ingredients
  7. Add the salt now, and fry for  a minute more.
  8. When the tomatoes are squishy, (in a minute or two) add the chopped coriander and switch off flame.
  9. Let it cool, add grated coconut and grind to get a fragrant chutney.
  10. Heat oil, add ingredients for seasoning in order and pour over chutney.
  11. Serve with flair as accompaniment for idli, dosa, paratha, steamed rice, sandwiches, well, just about anything!
 tomato herb chutney
Nutri notes
  • Coriander (both leaves and seed) help regulate blood sugar levels by stimulating insulin production.
  • Volatile oils found in the leaves seem to have antimicrobial properties.
  • Coriander reduces lipid peroxides in cell membranes, thus inhibiting free radical formation.
  • In a study conducted on rats fed with high fat diet, adding coriander to the diet increased the HDL and lowered levels of LDL cholesterol.
  • Besides these benefits, coriander is also good source of dietary fibre, magnesium, manganese and fair source of iron.
  • A compound called dodecenal isolated from coriander, has been found to be more effective than antibiotics in fighting salmonella infection.
  • A drink of coriander seeds boiled with water  (in the proportion of 2 tbsp seeds per litre of water) cures urinary tract infection rapidly.
  • Apart from these amazing uses of coriander, it is also a flavanoid and phytonutrient dense food. I guess all this information will prompt us to use more of coriander in our daily foods.
  • Benefits of tomatoes have been discussed earlier, hence I am not repeating it here.
  • Addition of coconut, though minimal, will increase the fat content of the chutney. One alternative is to use chutney dal in place of coconut. The taste does differ, but provides a healthier alternative.