Showing posts with label keerai. Show all posts

May 22, 2014

Keerai Masyial

 
Few dishes can beat the simplicity of Keerai Masiyal. However, as a child, this was not my favoured dish. I have pretended every ailment to escape eating this ‘ green paste’. Now I am better able to appreciate it’s subtlety of flavour, the health benefits, ease of preparation, and the brilliant hue of this humble dish. When the summer heat is making cooking a painful chore, I urge you to try this out. Can be put together in under 15 minutes, needs very few ingredients, and supremely healthy, what’s not to like?
Steaming Keerai Masiyal
I have used Palak in this dish, but Amaranth, Arai Keerai, Siru Keerai, can also be used. In fact, using different greens in rotation brings each one’s unique health benefits to the table.
  • Agathi Keerai has more than 12 times the Calcium found in Palak and more than 3 times that found in Methi leaves.
  • Radish Leaves, Siru Keerai, Arai Keerai, Manathakkali Keerai and Paruppu Keerai are all very rich in Iron. They have more than 3 times the Iron found in Agathi Keerai or Palak .
  • Amaranth and Agathi Keerai lead in Vitamin C while Palak, Mint and Amaranth lead in Folic Acid content.
  • Paruppu Keerai and Palak have a low Sodium and high Potassium combination which makes it ideal for people with high BP or kidney ailments or gout.
In a survey conducted by the National Nutrition Monitoring Bureau (NNMB), Indians were found to consume far lesser (average - 48gm/day) than the recommended 300 gm vegetables per day.Of this RDA of 300 gm, The National Institute of Nutrition, recommends at least 100 gm greens per person per day.
Here is the Food Pyramid picture as released by the National Institute of Nutrition, 2011. It helps to form a visual idea of what should be on our plate everyday!
 
Pic Courtesy - Dietary Guidelines for Indians, NIN
Finally to the recipe of the day -
You Need-
  1. Palak or any other greens – 4 packed cups of leaves.
  2. Salt – 1/2  tsp to 3/4 tsp ( use as needed)
For seasoning -
  1. Oil – 2 tsp
  2. Mustard seeds – 1/2 tsp
  3. Urad Dal – 2 tbsp
  4. Red Chilli – 2, broken into halves
  5. Grated fresh coconut – 1/2 tsp (optional)
To Assemble -
  1. Pick leaves and tender stems. Discard stems that are thick. Measure 4 packed cups.
  2. Wash well in a colander in several batches. Or fill water in the kitchen sink and submerge the greens in the sink tub. This is a great way to wash quickly and effectively.
  3. Drain well. Chop roughly. Any size and shape will do. It needs to be blended anyway.
  4. Place a large wok on heat, add the greens and let it cook in it’s own juices. If it looks like it is sticking to the bottom of the pan, add half a cup of water. stir through a couple of times so that the greens get cooked uniformly. After 5-7 minutes, the greens should be just cooked enough. Cool and grind to smooth paste with any water that may be left over in the pan.
  5. Return the puree to the wok, place wok over fire, rinse the blender jar with 1/4 cup water, add that too to the wok. Add salt, mix well, taste and add more as/if needed.
  6. To a small seasoning pan, add oil, place over heat, add mustard seeds, urad dal, red chillies. When you hear happy crackles, enjoy the sizzle and the aroma, pour it into the Masiyal before it chars! Smile If using grated coconut, add it to the seasoning pan last, stir around until the coconut turns a golden hue and pour over the Masiyal.
  7. Enjoy hot with steamed rice, sambar and a cucumber carrot salad with lemon dressing.  Vitamin C in the lemon juice helps in better iron absorption.
NOTES -
  • For local and botanical names of all the Greens mentioned in this post, please refer to Glossary of Ingredients Page.
  • To retain nutrients in greens cook in just enough water until just cooked. Do not discard the water, use it up in the recipe.
  • To retain the colour of greens, add half a tsp sugar while cooking, leave pan uncovered, cook quickly over high heat instead of low flame for a longer time.
  • Add a sliced onion and couple of crushed garlic cloves to the seasoning for a twist in flavour.
Enjoy Masiyal with Steamed Rice
 

Jan 9, 2014

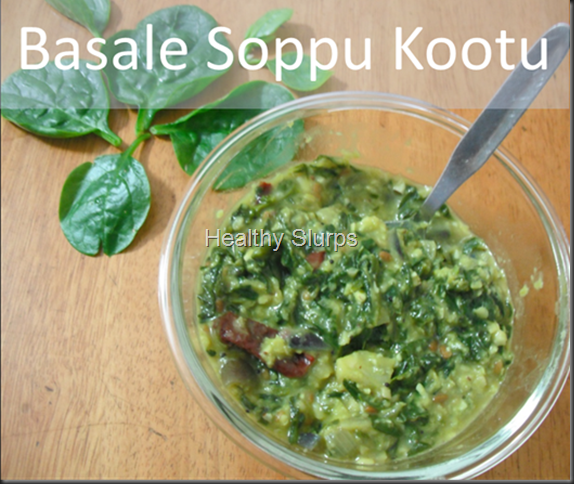
Basalle soppu Kootu


kootu pic


Basella alba or Basale soppu as it is known in Kannada, is a very nutritious green leafy vegetable. It grows up to a height of even 10 metres! This green leafy vegetable has amazing uses.

Health Benefits of Basella alba
  1. Topical anti inflammatory, anti fungal – helps to reduce freckles, treat acne, heal skin ulcers and reduce skin inflammation. Leaf juice mixed with butter used to heal burns, wounds.
  2. Decoction of leaves used as mild laxative, cooked roots used to control diarhoea
  3. Used to treat Pelvic inflammatory disease, sterility, threatened abortion, false labour
  4. In Africa, roots and leaves used for reducing stomach pain after childbirth, and to increase mother’s milk.
  5. The mucus from leaves if applied as a pack on forehead removes headaches and improves sleep, so used in Ayurveda for insomnia.
  6. To treat Vitamin A deficiency and iron deficiency anaemia
  7. The leaf has anti-oxidants - Beta Carotene, Xea Xanthin. This helps in free radical scavenging, hence has benefit on ageing or cancer cure.

It lends itself to a delicious stir fry or ‘bhaji’, or tambli in Marathi cuisine,or to basale soppu saaru in Kannada cuisine. Here is my attempt to make a Tamil style kootu with these very healthy greens. You Need
  1. Baselle Soppu – trimmed leaves, 4 heaped cups
  2. Red Onion – 3 medium or 2 big, peel and chop fine
  3. Tuvar dal – 3/4 cup, pressure cooked until soft
  4. Turmeric powder – 1/2 tsp
  5. Grated fresh coconut – 1 tbsp
  6. Green chilli – 1 or 2 depending on heat preference
  7. Salt – 2 heaped tsp
  8. Sugar – 2 big pinches
  9. Fresh water – 1/2 cup
For seasoning
  1. Any vegetable oil – 2 tbsp
  2. Mustard seeds – 1 tsp
  3. Urad Dal – 2 tbsp
  4. Dry red chilli – 1 –2 torn into halves
To Assemble
  1. Wash the greens in several  changes of water until no trace of grits, sand or mud remains! I dunk the trimmed greens into my kitchen sink. This way, I can wash them very quickly. Drain for 10 minutes in a large colander. Chop them coarse. We do not want a slimy paste while chopping them fine.
  2. Pressure cook the tuvar dal with turmeric powder until soft and mushy.
  3. Whiz the fresh coconut with the trimmed green chilli to a coarse mixture. Do not add any water while blending, just dry whiz.
  4. Heat oil in a wok / kadhai / fry pan.
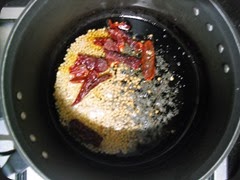
  5. Sizzle the mustard and urad dal; when dal browns, add the torn red chilli.Add seasonings to oil
  6. Tip in the diced onions, fry well for several minutes over high flame, keep stirring to avoid burning. Foggy Onions!Fry them onions well
  7. When the onions have changed from pink to translucent and light brown, toss in the chopped greens. Toss the pan well to incorporate the seasoning oil into the greens. After you see some wilt, add  sugar, half a cup of water and cook uncovered.Onions + soppu                Soppu under a haze
  8. The greens are usually done in 7-10 minutes depending on flame and quantity. Now add the cooked dal, coconut mixture, and salt. Mix well over medium flame to blend all components together.
  9. Best served with steamed rice and a spicy sambar or tangy rasam.
Kootu ready!


Oct 12, 2010

Pudina chutney

I was looking for a zesty pick me up to brighten up a usual rice-dal routine.As I rummaged though the fridge,this bright dark green bunch of pudina invited me with it's lovely aroma-this was exactly what could fit my need!I could not wait to convert it into this chutney below; once you have separated leaves from stalks, go ahead and make this quick, delicious pick me up!

You need
  1. Pudina leaves-1 1/2 cups packed
  2. Green chillies-3-4 big
  3. Root ginger-2 tsp chopped
  4. Garlic-7-8 cloves,peeled
  5. Fresh coconut-grated-1/4cup or chopped-1/2 cup
  6. Juice of 1 lemon (can add more if you feel the need for a super tangy taste)
  7. Salt-1/4 tsp
  8. Vegetable oil-1/4 tsp
To assemble
  1. Remove stalks,clean and wash pudina leaves under several changes of water,drain and keep aside.
  2. Take a flat bottomed pan,heat oil in it.
  3. Add chopped green chillies, ginger, garlic to the pan, swirl the pan and let sizzle.
  4. After a minute you can add the washed pudina leaves, toss in the oil for a quick coating.Do not fry for more than a minute-you will lose the flavor and colour if you do.
  5. Take a fresh coconut halved, and grate or chop out the white flesh (use quantity, as given in ingredient list)
  6. After the fried ingredients have cooled, place these and the coconut in a mixer grinder, add the salt and grind to a smooth paste.Use the lemon juice instead of water,midway through the grinding.You can add another tsp or two of water after adding the juice,(if required).
  7. Your tangy bursting-with -good-health-pudina- chutney is ready!
Notes
  • This chutney can be stored in the fridge for a couple of days,and upto 10 days in a freezer box in the freezer;thaw only as much as you would use up each time.
  • The chutney works great to perk up a meal,as a sandwich spread,or a tangy spread for rotis-fill up with salad veggies,roll and eat!
  • You can use fresh raw mango in season instead of lemon juice-it adds body to the chutney too.
  • Can avoid ginger and garlic and use only green chillies for a slight change in flavour.
  • Can make the same chutney using fresh coriander (cilantro) leaves too,use 1 1/2 cup of chopped leaves to substitute for every cup of pudina leaves.
  • Take care-Do not  fry the leaves for more than a minute.
Now for the nutri notes
  • Ginger, garlic and pudina are known to be excellent digestive aids, they relieve gas, distension, and improve digestion.
  • At a good 15mg of iron per100g of pudina leaves, mint packs in good punch!
  • Combining lemon juice or raw mango in the chutney makes Vitamin C readily available.Vitamin C improves iron absorption in the body.
  • Pudina also adds to the fibre content of the meal.
  • With virtually no sodium, it is a good choice for both hypertensive (blood pressure) and some renal patients, who need to control sodium intake.Of course, adding salt to the dish increases the sodium content.You can use low sodium salt insted of regular table salt in case of sodium restriction.
Here follows the visuals


    frying ingredients
    toss pudina leaves in oil

     fresh coconut
    pudina chutney 

    Oct 11, 2010

    Palak dal

    What could be healthy, filling, have a protein and veggies combined in a single dish and get cooked in less than half an hour? Well, this greens dal fits the bill just right! Of course, pressure cooking the rice along with the dal saved me cooking time and I had this soul food ready in under 40 minutes-quite a treat for hungry kids when served with homemade ghee! 


    You need
    1. Tur dal (red gram dal) -150ml
    2. Paruppu keerai (called kari cheera,pappu koora) /palak - chopped, 3 cups
    3. Onions-2 medium, finely chopped
    4. Tomatoes-2 medium, diced
    5. Green chillies-3 big, finely chopped
    6. Fresh root ginger-1 tsp chopped
    7. Curry leaves-1 tbsp, finely chopped
    8. Turmeric powder-3/4 tsp
    9. Salt-1 tsp (adjust to taste)
    For seasoning
    1. Vegetable oil-2 tsp
    2. Mustard seeds-1 tsp
    3. Jeera (cumin seeds)-1 tsp
    4. Saunf (aniseed)-1 tsp(optional)
    To assemble
    1. Wash the dal well.
    2. Add double the volume of water and pressure cook to a soft consistency.
    3. Wash the greens you are using well under several changes of water.
    4. Chop up medium fine.
    5. Place the chopped greens in a microwavable bowl, add some water and cook on high for 4-5 minutes.
    6. Heat oil in a deep pan.
    7. Add ingredients for seasonings in order.
    8. When they splutter, add green chillies, ginger ,curry leaves.
    9. Next to go in is the onions, followed by diced tomatoes.
    10. Toss in the turmeric and salt.
    11. Mix it well and let the veggies mush up a bit.
    12. Add the cooked greens, give a good mix, add about 100 ml of water, simmer for 2 minutes.
    13. Now is time to add cooked dal, mash with the back of ladle, simmer for 3-4 minutes, add more water if needed to avoid burning.
    14. Your lovely nutrient-packed greens dal is now ready!
    15. Serve with steamed rice, pudina chutney and carrot sticks.
    Here follows the nutri notes-
    • Combining a cereal and a pulse in a meal is the best way to get all amino acids.
    • The greens dal combines in itself the protein and vegetables needed in a meal.
    • The mint chutney packs-
    More of green leafy vegetable allowance.
    Adds zing,spice and hence improves satiety of a meal.
    Adding lime juice to the chutney provides vitamin C needed for better iron absorption(from the greens and pudina) in the body.
    • Serving with carrot sticks adds to the beta carotene in the meal(greens have them too).
    • Carrots also amp up the fibre quotient.
    • Preportioning the meal (as in the pic) allows you to eat sufficiently.
    • This helps weight watchers to prevent from reaching out mindlessly for extra servings.

    Here are the visuals-
    
    
    diced tomatoes


    chopped ingredients


    chopped greens
    cooked dal

    microwaved greens

    bubbling greens dal