Showing posts with label peanuts. Show all posts

Feb 21, 2017

Mirch ka Salan with Mishti Pulao

Mirch ka Salan is a famous Hyderabadi dish. The dish is said to have originated in the kitchens of the Nizams. I would believe that, as the dish uses tamarind as souring agent, a practise mostly used in South India. Also peanuts (local produce) and sesame are used instead of other nuts and dry fruits(more prevalent in Awadhi cuisine). Whatever be its origin, Mirch ka Salan always elevates the meal from a common to an exotic one. It finds a definite place in wedding feasts and other important festive meals.

At our home, Mirch ka Salan is a holiday favourite. The star of a luxurious, happy meal. The main dish when important guests come over. Almost always, Mirch ka Salan is paired with the most fragrant Mishti Pulao, a sweet, fragrant Bengali dish, also a festive treat. One Hyderbadi, one Bengali..but the pairing is made in heaven. A happy marriage which we relish down to the last morsel. The tango of the sweet and aromatic Mishti Pulao with the tart, hot, spicy Salan has to be experienced to be understood.

I was introduced to this very fragrant Mishti Pulao by my dear friend Deepasri Deb. I have followed her recipe to the T. It never fails to make the most perfect, heavenly, fit-for-Gods Mishti Pulao. Check out her treasure trove of recipes at www.hamareerasoi.com 

Here are the recipes for both the dishes.

Mirchi ka Salan

MIRCH KA SALAN

I have adapted Sanjeev Kapoor’s recipe for this. Changes to his recipe include chopping of the fat Bhavnagari Chilli into inch long batons, deseeding them, and not using any extra chillies in the recipe. This helps to scale down the heat in the Mirch ka Salan. I have also made a few changes in the preparation method. Here is how I made Mirchi ka Salan.

ALLERGY INFORMATION

  • Contains peanuts. NOT SUITABLE for people with nut allergy.
  • Does NOT contain gluten, lactose, corn, soya, egg. Suitable for people with gluten intolerance or lactose intolerance.

Preparation Time – 15-20 minutes, Cooking Time – 30 minutes, Serves – 4 as main course or 6 as side dish if used with other accompaniments in the meal.

YOU NEED

COOKWARE – Sharp knife, cutting board, 3-4 litre wok, long flat ladle, small bowl, Mixer-grinder

INGREDIENTS -

  1. 250 gms or 15-18 fat Bhavnagari chillies (bajji mirchi)
  2. A small lemon sized ball of Tamarind
  3. 1/4 heaped cup raw peanuts with skin
  4. 1/4 level cup white sesame seeds
  5. 1/4 level cup fresh grated coconut
  6. 1 tablespoon coriander seeds
  7. 1/2 teaspoon cumin seeds
  8. 3-4 cloves garlic
  9. A thumb size knob of fresh ginger root
  10. 1 medium red onion, finely chopped (1/4 cup finely chopped red onion)
  11. 1/2 teaspoon black mustard seeds
  12. a few curry leaves
  13. 2 tablespoons cooking oil
  14. a pinch turmeric powder (add upto 1 teaspoon if you want a yellow coloured Salan)
  15. 1 heaped teaspoon salt

METHOD

  1. Wash and wipe down the fat chillies. Remove the stem, cut into inch long thick batons, and scrape out the seeds from within.
  2. Soak tamarind in half cup warm water. Squeeze out tamarind juice from it. Repeat with some more warm water. Set tamarind extract aside.
  3. Heat the wok over medium flame. Dry roast the peanuts first. As they begin to brown, tip in sesame. Roast until the sesame begins to crackle. Add the coriander and cumin seeds and roast until aromatic. Do not burn. Keep stirring. Remove to mixer grinder jar.
  4. Return wok to heat, add a drizzle of oil. Fry the ginger and garlic for a minute. Remove this to mixer jar too.
  5. Add the fresh grated coconut to the mixer jar, add some water and grind to smooth paste. Set aside.
  6. Add the rest of the oil to the wok, temper with mustard seeds and curry leaves. When this crackles, add the finely chopped onions and keep stirring over medium flame. When onions turn pink and shiny, add the chopped chilli batons. Saute over high heat for 5 minutes. Keep stirring to avoid charring.
  7. Pour tamarind juice into the wok, add salt, turmeric, cover and cook for 5-7 minutes over medium flame, until the chilli just softens.
  8. Pour in the ground mixture, add half a cup of water, and simmer covered for another 15 minutes.
  9. Switch off flame. Rest for half an hour for flavours to develop. Serve warm or hot with fragrant, sweet, Mishti Pulao.
Royal Feast - Mirch ka Salan with Mishti Pulao

MISHTI PULAO

ALLERGY INFORMATION

  • Contains Cashew nut. People with nut allergy can avoid adding cashew nuts to the recipe.
  • Does NOT contain gluten, corn, soya, egg, or lactose. Suitable for people with gluten or lactose intolerance.

Preparation time – 15 minutes, Cooking Time – 30-35 minutes, Serves – 4 as main course

YOU NEED-

COOKWARE – 3-4 litre wok with fitting lid, ladle, colander

INGREDIENTS -

  1. 1 heaped cup Gobindobhog rice, or Jeera rice, or Basmati rice
  2. 1/4 cup fresh/frozen green peas
  3. 1 teaspoon turmeric powder
  4. 2 tablespoon ghee
  5. 1/2 teaspoon salt
  6. a fistful each of broken cashews and raisins
  7. 1’' piece of cinnamon bark broken into two
  8. 2 bay leaves
  9. 3-4 cloves
  10. 2 green cardamom
  11. 2 black cardamom
  12. 1 mace flower
  13. 5-6 black peppercorns
  14. 3 tablespoon sugar
  15. 2 cups drinking water

METHOD -

  1. Rinse the rice well under running water. Set to drain in colander. Rub in the turmeric powder into the rice and spread the rice in the colander to drain well.
  2. Heat ghee in the wok, add cashews and raisins. Fry over medium flame until golden brown and raisins plump up.
  3. Add spices – cinnamon, bay leaves, mace, peppercorns, cloves, green and black cardamom.
  4. When the spices release aroma (about a minute or two over medium flame) add the rice and sugar. Stir well continuously over medium heat. Add the green peas midway and continue stirring until rice gets a sheen from the ghee. (About 7-10minutes)
  5. Add salt, 2 cups water. Increase flame to highest and bring water to boil.
  6. After water has come to a boil, set wok on your smallest burner, turn down heat to minimum, cover and cook for 10-12 minutes. Switch off flame.
  7. Let it rest for 5-10 minutes. Then, open wok, fluff up rice.
  8. Serve along with tangy, spicy Mirch ka Salan.
Fit for Gods - Mishti Pulao

Dec 2, 2014

Peanut and Potato Salad

It is the season of peanut harvest in and around Bangalore. There is an interesting story around peanut harvest in our city.
Legend has it that a bull would roam over the fields every full moon night destroying the peanut crops. Flustered farmers offered their first harvest at the Bull temple and the roaming of the bull ceased!Local farmers offer their first crop to Nandi, the bull devotee of Lord Shiva at the Bull temple in Bangalore to this day. The temple vicinity wears a festive look during these two days. A village fair unfolds in the middle of the city. This annual fair is known as ‘Kadalekai Parishe’.
I love the earthy aroma of freshly dug up peanuts here. Call me biased, but the aroma and incredible, sweet, nutty flavours of peanuts that I buy from this fair every year beats all other. I cook the peanuts in their shells in salted water. All of us then gather around the steaming hot bowl of boiled peanuts, shell them and gobble them before some one else grabs it! Warm bonding  during chilly evenings over hot boiled peanuts!
Mostly I have no peanuts left over to include in any dish. However, I managed to make this peanut-potato salad from some that survived the onslaught. Even if the salad was made up from simple, readily available ingredients, it was bowl-scraping, finger-licking, slurp-worthy good. Ok, I’ll stop now.
I am documenting this recipe as much for myself as for sharing with all of you. Fresh seasonal ingredients. A good mix of crunch, soft, and crisp textures. A tongue tickling interplay of flavours. No fried ingredients. Healthy carbs and protein with a giant dose of fibre and vitamins. Do you need any more reasons? Just try it once. I am sure you’ll be hooked.
Peanut Potato salad served with baguette
ALLERGY INFORMATION
  • Does NOT contain gluten, lactose, corn, soya, eggs.
  • Suitable for lactose or gluten intolerant people
  • Contains peanuts.
  • NOT SUITABLE for people with nut allergy.
Preparation time – 30 minutes + 30 minutes optional chilling time, Cooking Time – 30 minutes, Serves – 3-4.
You Need
Cookware - Pressure Cooker with 2 containers that fit into it, Metal/Glass Bowl, Colander/Salad spinner, Knife, Chopping Board
Ingredients
  1. 2 cups peanuts in their shells
  2. 2 medium potatoes, chopped with skin into quarters. 
  3. 3 heaped cups Iceberg/Romaine Lettuce
  4. 1 big Tomato
  5. 2 tsp salt
  6. 2-3 cups fresh water
  7. a big bowl of ice water
For Salad Dressing
  1. 2 tbsp Apple Cider Vinegar
  2. 1/2 a red onion
  3. 8-9 tbsp Extra Virgin Olive oil (EVOO)
  4. 2 generous pinches crushed black pepper
  5. 1/4 tsp salt
To Assemble
  1. Dunk the peanuts in shells into a huge bowl of water. Let it sit for a few minutes. Rub the shells vigorously with both hands to loosen the dirt on them. Drain the water and repeat with 2 more changes of water. You can omit this step if using shelled peanuts. Just rinse peanuts once in water is enough.
  2. Now place in a container, pour enough water to cover all the peanuts,  scatter 2 tsp salt over it. Place the rinsed and chopped potatoes also in another container. Place both containers in pressure cooker and pressure cook for 3 whistles.
  3. Rinse the lettuce first under tap water, then place in ice water.
  4. Peel and dice/slice the red onion. Place in a bowl, add 1 tbsp apple cider vinegar to it and let steep.
  5. Meanwhile, whisk the remaining vinegar, EVOO, salt and crushed pepper into an emulsion.
  6. Shell the peanuts and peel the potatoes. You can dice the potatoes into smaller size if you wish. Chop the tomato finely. Place all these together in a bowl.
  7. Drain the lettuce, use a salad spinner if you have one. Else just drain in a colander and shake it well. Tear up the large leaves into bite size ones by hand. Add to the other vegetables.
  8. Combine the onion and dressing from step 4 and 5. Drizzle over the salad vegetables. Mix well.
Combine the dressing with salad ingredients
The salad tastes best if allowed to chill for half an hour before serving. But, if you are in a hurry, just dig in and enjoy! We coupled it with 2 slices of warm toasted baguette for an after school snack.
A complete meal -warm toast and chilled salad

Jan 17, 2014

Peanut Chutney

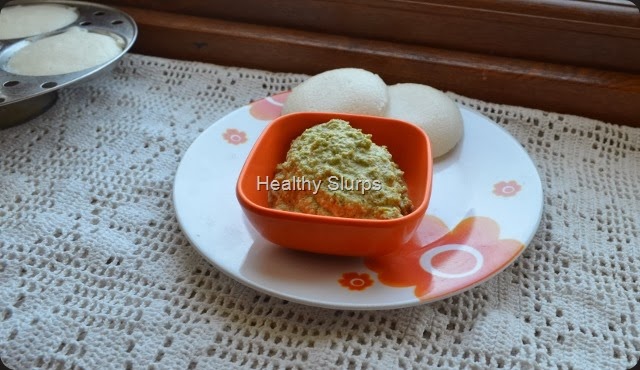
Peanut chutney and idli - power breakfast

My daughter is a total peanut fan.  She eats peanuts roasted, fried, boiled, in salads, asks for them in lemon rice, or if I am not looking, she gobbles them even raw! A jar of peanuts are never safe around her. To the extent that she is called the ‘ Li’l monkey’ of the house. She pouts and sulks when called so, and that tickles her big brother. So he runs her insane by chanting ‘monkey, monkey monkey’. Her dad calls her his fav  cute Li’l monkey – that did not seem to appease her either.
And then one day, I made this peanut chutney. Obviously, you cannot see the peanuts in them cos they are ground! Guess what? Her dad loved the chutney so much, he asked me, “What chutney is this? It pairs so well with idli” . My daughter was delighted. She ran to her dad, and told him “You are my favourite big monkey now, cos you like peanuts too! This is peanut chutney!” All of us had a hearty laugh. And peanut chutney came to stay forever at our home.
There are many versions of peanut chutney made, here is my unique combination of ingredients. I often add some coriander leaves, or mint leaves, a clove of garlic or even curry leaves to the mixture and then blend it up. You could try those variations too.
You Need
  1. Raw peanuts with skin – 1/2 cup
  2. Coconut, grated – 2 tbsp
  3. Onion – 1, medium sliced
  4. Green chilli – 4, cut in halves
  5. Tamarind pulp – 1 tsp
  6. Salt – 1/2 tsp
  7. Vegetable Oil – 1/2 tsp
  8. Drinking water – 1/4 to 1/2 cup for grinding
For Seasoning -
  1. Vegetable Oil – 1/4 tsp
  2. Mustard seeds – 1/4 tsp
  3. Urad dal – 1/4 tsp
  4. Curry Leaves – 4-5
Fry ingredients for chutney
To Assemble
  1. Take oil in a fry pan / wok / kadai, Heat it.
  2. Add whole peanuts to it, fry for 2 –3 minutes.
  3. Next, tip in green chilli cut in halves, followed by onion slices, last comes the tamarind.
  4. Fry well over medium to high flame, for 2-3 minutes more. Do not burn the ingredients. Stop frying when the peanuts look golden brown and the onions turn translucent.
  5. Add salt and grated coconut to this mixture, switch off flame ( cool it if you have time) and blend in a mixie to a coarse-ish smooth paste. You may need to add some water, say 1/4 cup while grinding to get a thinner chutney.
  6. Heat ingredients for seasoning, when the dal gets a warm golden hue, pour on top of chutney.
  7. Enjoy with idli, dosa, use as sandwich spread, or even with hot steamed rice.
Tasty tangy peanut chutney
Please do read the allergy information before trying out this recipe, especially if you have never eaten peanuts in any form before or if you have noticed any other food allergy symptoms too.
IMPORTANT ALLERGY INFORMATION
Some people develop an allergy to several nuts including peanuts. Symptoms may range from itching around mouth or throat, skin reactions, digestive disturbances, or more serious symptoms like breathing trouble too. In such situations, please stay away from peanuts in all forms – whether raw, boiled, roasted or fried. However, refined peanut oil seems to be tolerated even by people with peanut allergy. Still, do consult with your doctor before attempting to include peanuts in your diet.
PEANUT NUTRITION INFORMATION
Peanuts are a high energy food, most of the energy coming from fats and protein. As we know, all fat is not bad fat, peanuts are cholesterol free, have omega 3 and Omega 6 fatty acids.
To give a better picture, the total fats in 100 gms of raw peanuts is 49 gms, of which monounsaturated fats are 24 gms and polyunsaturated fats are 15 gms, while the saturated fats in peanuts are only 6 gms. They also have a high content of Omega 6 fatty acids – 15 gms / 100 gms.This makes it a valuable ‘good fat source’ in vegetarian diets.
Peanuts are also known to prevent cancer, help in weight control in moderate amounts and also have very valuable anti oxidants which have the heart health benefits and also prevent stroke. Regular consumption of peanuts also helps in preventing Alzheimer’s.
Peanuts are an inexpensive, ready to eat protein source, go ahead and enjoy it’s benefits.
Peanut chutney up close!

Dec 3, 2013

Peanut and Peanut Butter


Peanuts / Groundnuts have been used in several cuisines in India and we do have a rich repertoire of dishes with peanuts. Who does not like Sabudana khichdi topped with roasted peanuts? Or peanut sundal or peanut chutney? Or what can beat the joy of munching on a peanut chikki square?

Peanut butter, on the other hand, is a recent entrant in India. United States leads in peanut butter production. Interestingly, India is the second largest producer of peanuts in the world and United States grows just a third of India’s peanut crop!

Health benefits of Peanuts

  • Peanuts have high protein content (highest among nuts). It is a valuable source of protein.
  • Peanuts are good for your heart. They contain anti-oxidants (even more than in fruits) and zero cholesterol.
  • According to a popular myth “peanuts have too much fat.” The fact is more than 75% of the fat in peanuts is “good fat”,(MUFA and PUFA) needed for body functions, keeps heart healthy and maintains normal body weight.
  • Roasted or boiled peanuts are great. However, fried peanuts are not. Fried peanuts have trans fats, hence not advised.
  • High in fibre, higher than other edible nuts such as almond, cashew, pistachio, and walnuts. Also has Vitamins B & E, Manganese, and Magnesium.

Benefits of Peanut Butter

Peanut butter has both health and convenience benefits.

  • Given the health benefits of peanuts, it is healthier than other table spreads such as cheese spread, butter, margarine, and jam.
  • In a vegan / vegetarian diet, peanut butter can help fill in the gap of protein requirement.
  • In a person who has normal body weight and is physically active, peanut butter is a healthy option as part of balanced meal.
  • For sports people, peanut butter is a great energy-protein-fat source.
  • Peanut butter was promoted as a super food in the United States about 100 years ago to feed starving people.

It is convenient in multiple ways. With its creamy spreadable consistency, it satisfies hunger with minimum bulk to a meal. It is a ready-to-eat food available in a jar. It has a long shelf life and needs no refrigeration. Hence it can be used on road trips, outdoor camping, etc. Peanut butter lends itself to several sweet or savoury meal options such as PBJ sandwiches, or as dip when combined with condiments, or as satay sauce, or salad dressing.

Caution before consuming peanuts and peanut butter

! If you are allergic to peanuts or any nuts, DO NOT consume peanuts or peanut butter. It can have mild to serious health consequences.

! If you are on a weight loss diet or on a special diet for kidney ailments, peanut consumption has to be carefully monitored.

! Presence of aflatoxins in peanuts can cause serious digestive disorders. Hence, always purchase peanuts and peanut butter from reliable sources.

Afterword

Recently I attended the “Health Workshop on Peanut Butter” conducted by Agro Tech Foods (makers of Sundrop brand of food products) at Bangalore . Dr. Swarupa Kakani, well-known nutritionist and head of Dietetics Department at Sagar Hospital, Bangalore led the workshop.

This inspired me to independently research nutritional value of peanuts and peanut butter. This post presents my views along with some of the material presented at the workshop.

Here are some recipes shared by Agro Tech foods with us at the workshop.

Apple, peanut butter, Granola sandwich

Ingredients

Any variety apple – 1 cored and sliced horizontally

Peanut Butter – 2 tbsp

Low fat Granola – 1/2 cup

Method

Spread1 tbsp peanut butter over an apple slice. Sprinkle some granola over the peanut butter.Top with another apple slice or serve as open – faced sandwich.

Peanut butter, apple, granola sandwich

Peanut Butter Milk shake

Ingredients

Peanut Butter – 1 tbsp

Jam – 2 tsp (optional)

Milk – 1 cup

Vanilla Ice cream – 1 scoop

Method

Add all ingredients except ice cream to a blender. Whip until frothy.

Transfer to a glass. Top with Ice cream and serve.

Peanut Butter Milkshake

Apr 1, 2011

Power Pesarattu

Pesarattu is a much loved dish of Andhra or Telugu region of India. I have adapted the ingredients to suit my family’s taste. The use of sprouts and herbs in the batter create a unique power packed combination, easy and amazingly tasty.The herbs helped in masking a slight bitter flavour that sprouts develop. This dish works just right for breakfast in our home. I hope you find it great too! The measures used here serve 5-6 people.
Power Pesarattu
You need   
  1. Mung bean sprouts – 4 cups, heaped
  2. Raw rice – 1/2 cup, rinsed and soaked for 1/2 hour
  3. Ginger – 1 tbsp, chopped fine
  4. Green chillies – 2
  5. Coriander leaves – 1 cup, chopped
  6. Mint leaves – 1 cup, loosely packed
  7. Cumin seeds – 1 tsp
  8. Garlic – 1 pod (optional)
  9. Salt – 1 tbsp ( or more)
  10. Fresh water – 1 cup
  11. Vegetable oil / sesame oil  - 4-5 tbsp, for drizzling over dosas
mint, cumin, ginger, chillisprouts, rice, and coriander


To assemble
  1. Grind all ingredients mentioned under ‘You need’ except oil, to a real smooth batter. I used a mixer grinder. Using garlic gives a ‘kick’ to the final taste, but omitting it does not take away the pleasure either.
  2. Use water sparingly for grinding. The batter should be thinner than usual dosa batter but not too runny.smooth, frothy batter
  3. Hereon, writing the recipe is fairly simple, but creating a good dosa / pesarattu does need some practice!
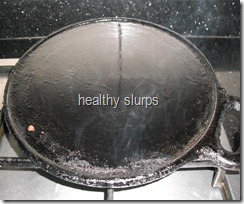
  4. Heat up a dosa griddle real hot. You can see the griddle all smoked up in this picture. Season the griddle with a tsp of oil.
  5. smokin hot
  6. Dribble a ladleful of batter around the griddle, fill up the centre with more batter, and spread very gently to form a circle. Drizzle 1/2 tsp of oil around the dosa, let it sizzle.Mummy look, a green dosa!
  7. Allow to cook through and brown around the sides, ease out the dosa carefully with a sharp spatula and flip over. flip over
  8. Cook this side over medium heat, ease out and remove to a plate when done.
  9. Check the dosa for salt and flavours before proceeding with the rest of the batter. To  salvage a runny batter or too much salt, you could add up to a couple of tbsp of rice flour to the batter. Rice flour will also help the Pesarattu become more ‘flippable’ and less clingy to the dosa griddle.
I did ruin a couple of dosas before I got it right. It helped to have the griddle smoking hot, waiting for the first side to really brown before attempting to loosen it and thereon, cooking over medium heat.
Pesarattu is traditionally served with ginger chutney. I usually serve with a peanut chutney which is a great favourite with my kids.
power pesarattu
Notes
  • Soak, drain, rinse whole mung bean and tie up in a muslin cloth, leave in a moist dark place for 10-12 hours, by which time the seeds would have sprouted and you have super healthy sprouts ready.
  • Mung bean sprouts have been used in Ayurvedic approach and Chinese cuisine for several centuries.
  • Consuming raw sprouts is not advised for toddlers, pregnant women, and in any gastrointestinal disturbance. The ideal way to consume for these people would be to use home  grown sprouts, rinse well, steam or lightly stir fry them.
Nutri notes
  • The sprouting process increases the beans’ enzyme content which means, complex carbs are converted to simpler starches, proteins to amino acids and fats to simpler lipids. As a result sprouts are more easily digested.
  • Sprouting increases sodium and Vitamin C content, both of which add to protein digestibility in the body.
  • Sprouts are 'live' food. They contain active RNA, DNA, in addition to being a veritable enzymes and antioxidants storehouse. They help cell regeneration and can rightly be called ‘fountain of youth’.
  • Dry beans do not have any vitamins or minerals, but we get almost magical amounts of Vitamins A, B, C, Calcium, Sodium, Potassium, Iron, Phosphorous, Manganese, from sprouts. Thus they are very handy in winters when fresh fruits or vegetables are in short supply. Sprouts can be eaten the whole year through too, for the whole host of amazing benefits.
  • Sprouts decrease the oligosacharides in the beans – this means, beans lose their gas producing quality.
  • Sprouting also increases fibre and water content of the beans, thus helping in avoiding or easing constipation.
  • For benefits of pudina and coriander, please do read up my earlier posts.

Sep 19, 2010

Stuffed brinjals-my style


Stuffed brinjal-my style

You will need-
  1. peanuts-200ml
  2. dhaniya-150ml
  3. chana dal-100ml
  4. urad dal-75ml
  5. white til-100ml
  6. jeera-1 heaped tsp
  7. mustard seeds-1/2tsp
  8. red chillies-15-20
  9. tamarind-size of orange
  10. jaggery- approx half the amount of tamarind
  11. onions- finely chopped 2cups
  12. salt-as per taste(approx 2tsp)
  13. violet brinjals-1kg
  14. vegetable oil-2tbsp
  15. mustard seeds-1/2 tsp
  16. urad dal-1 tsp
To assemble the stuffing-
  1. Soak tamarind in a cup of warm water.squeeze out juice, set aside.
  2. Roast items for masala powder(from 1 -8),separately,in a drop of oil each.Roast the red chillies last.when cooled powder them together.
  3. Saute the chopped onions lightly.
  4. In a large bowl,combine the masala powder,sauted onions,jaggery,tamarind juice,salt.Blend well with hand/ladle to get uniform mixture.
  5. Wash whole brinjals wipe clean.You may slice off the stems.
  6. Cut them into quarters or sixes keeping the base of the brinjal intact.
  7. Use a spoon to fill in the stuffing mixture well into the cut brinjal.(I enjoy getting dirty with my hands at this stage!!).Reserve any left over stuffing.
To assemble the stuffed brinjal-
  1. Heat a large heavy bottomed pan/pressure cooker.
  2. Add all the oil,temper with mustard seeds,urad dal.
  3. Gently place the brinjals stuffed side up into the pan.Tip in the remaining stuffing with 1 cup water(add more water if using a pan).
  4. Cover lid of pan/cooker.Cook till 1 whistle if using cooker.Check for doneness in a pan,after 7-8 minutes,add more water if needed,cook till done.
  5. Your gooey,heavenly smelling stuffed brinjal is now ready.
  6. Serve warm with hot steamed rice and tadka dal.
Notes-
  • Pressure cooker works best for me.
  • Roast each ingredient for powder patiently until just golden brown.
  • Omit jaggery if you dont fancy a hot-sweet flavour.
  • Cut brinjals carefully after getting the stuffing ready,they get discolourd if left cut for too long.
  • Optional-Add chopped coriander to stuffing or after cooking,as a garnish.

   
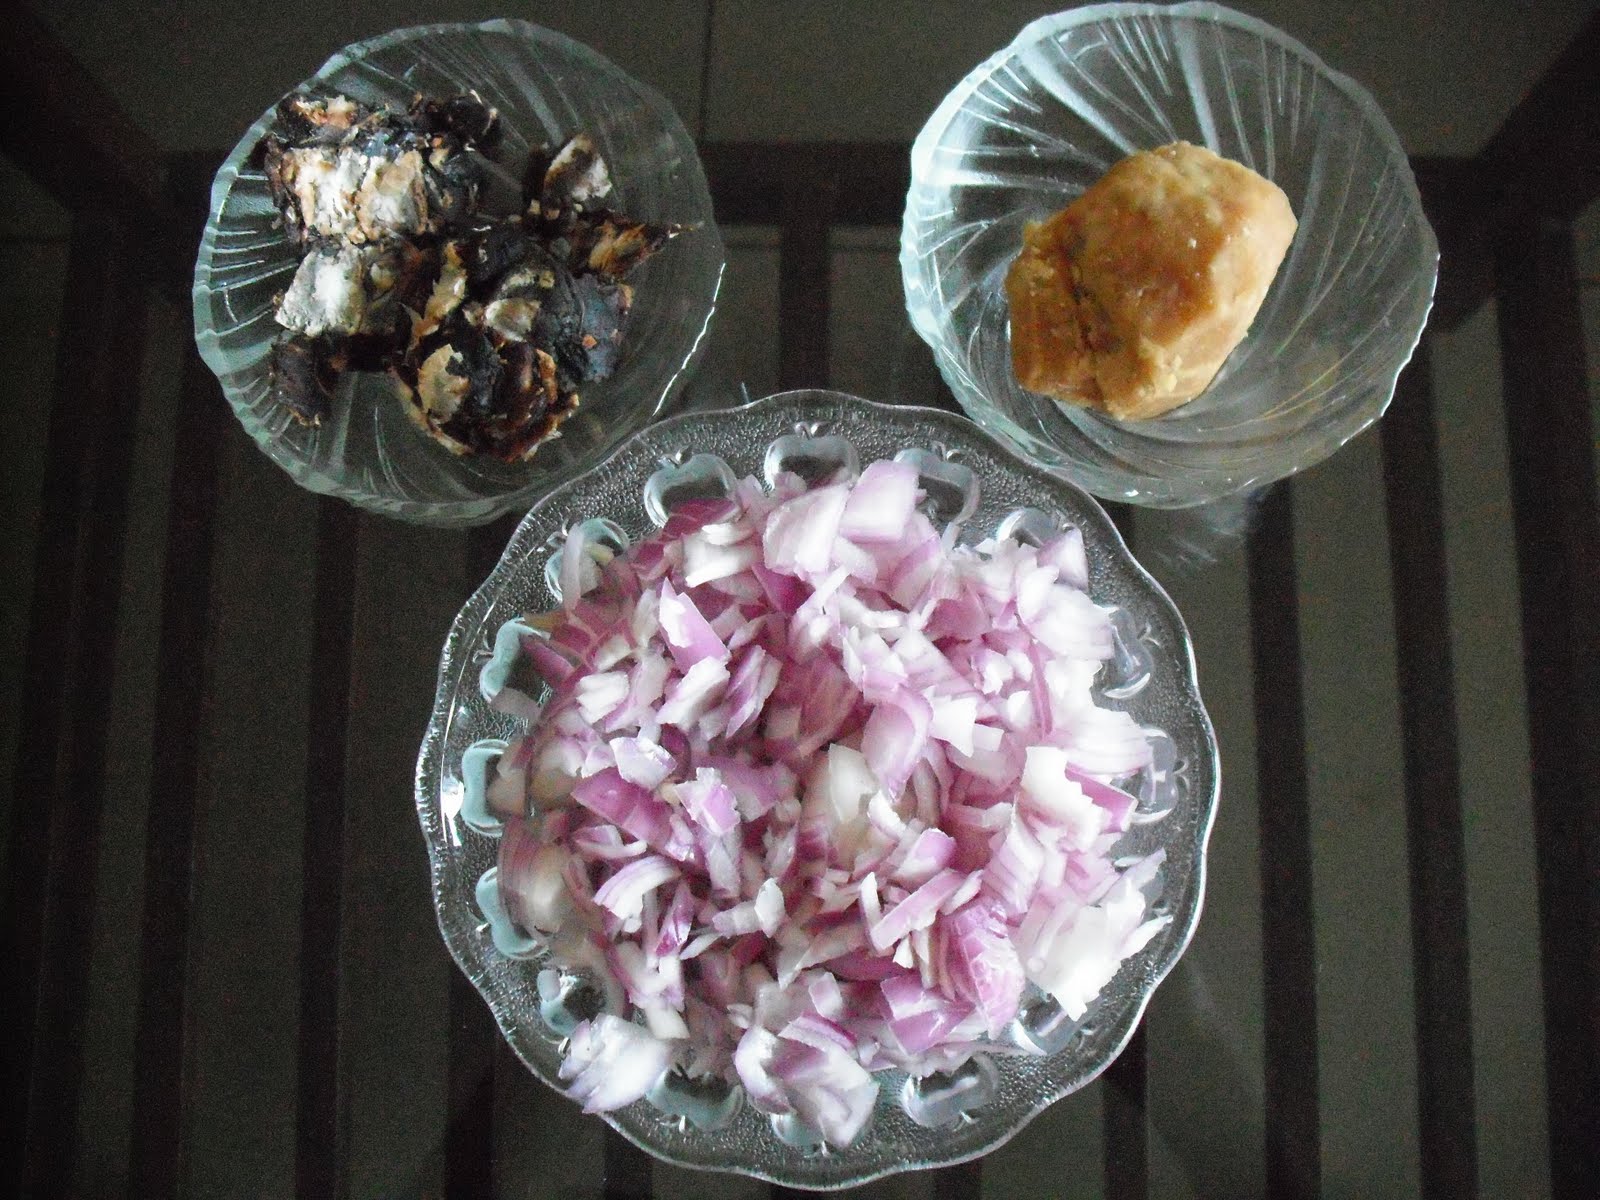
ingredients
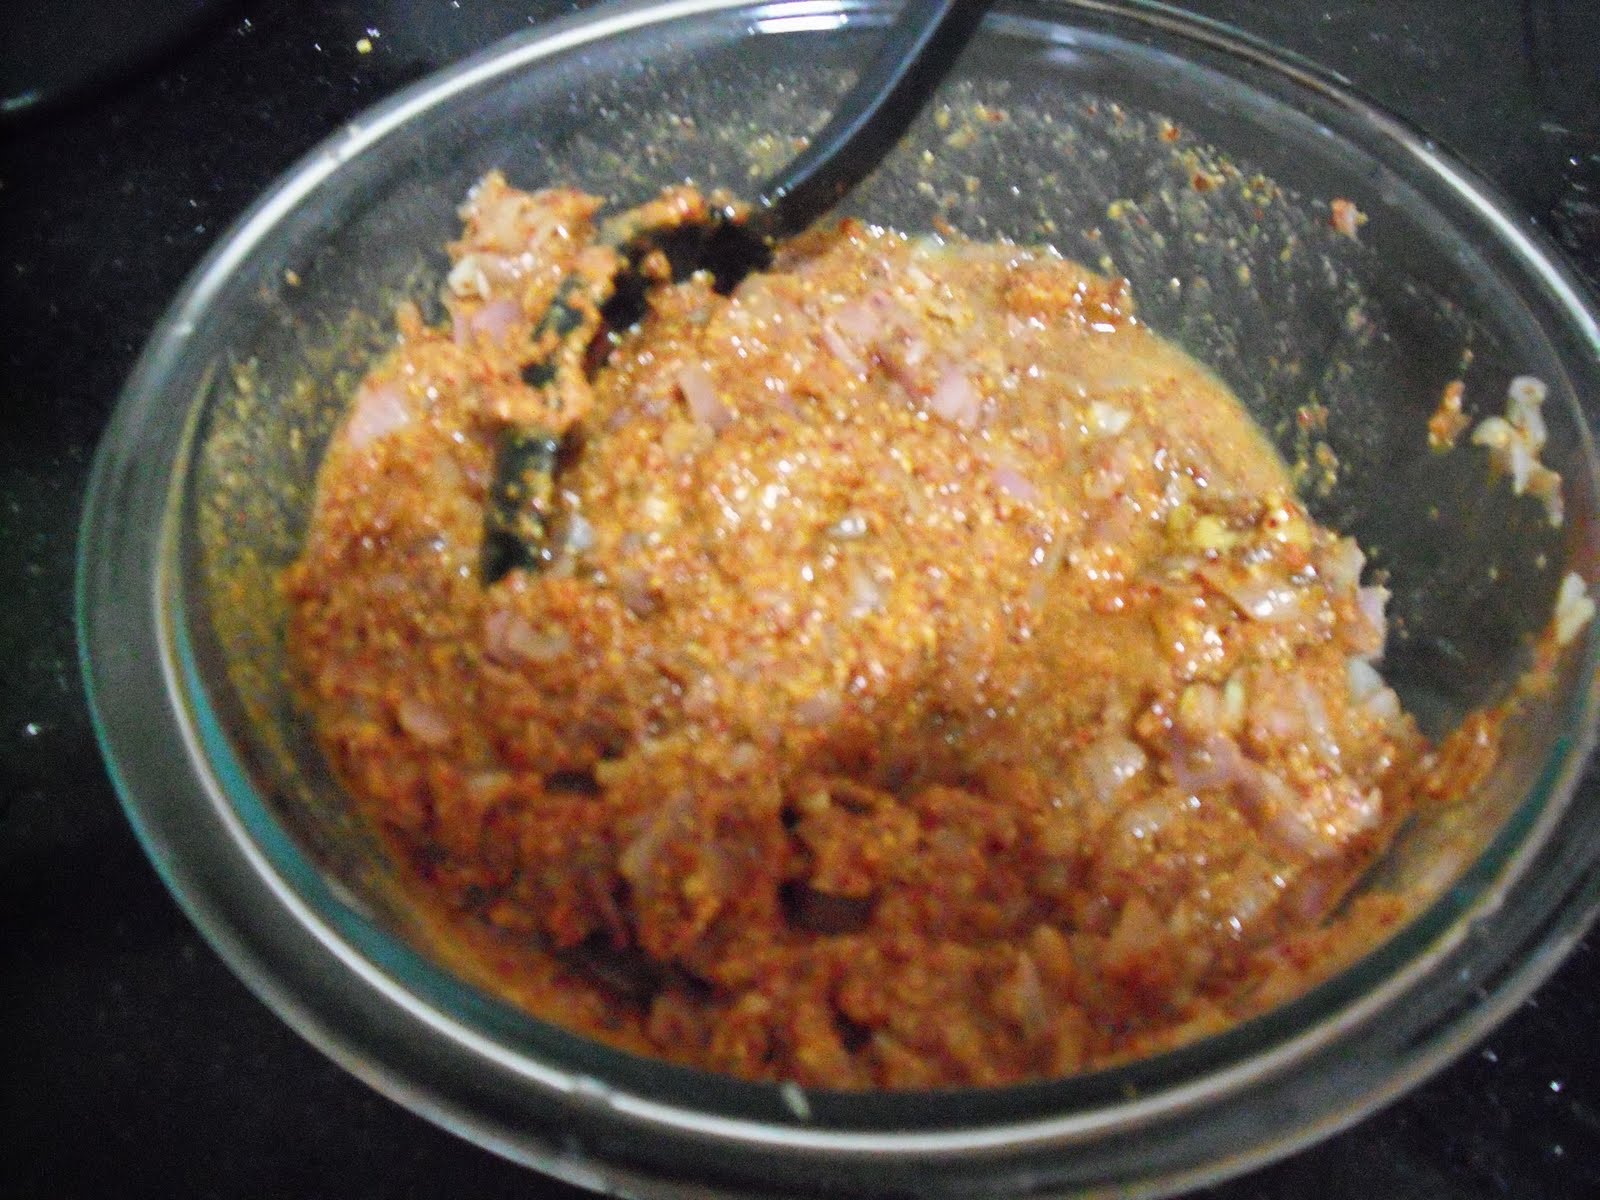
fried onions with powdered jaggery,masala and salt.
stuffing mixture
slit brinjals stuffed with paste

Serve with steamed rice and dal.