Showing posts with label lunch box menu. Show all posts

Jul 31, 2017

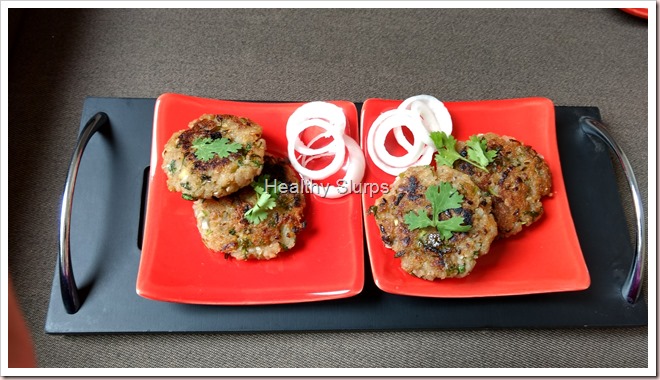
Poha Alu Tikki

Finding myself with a big bowl of leftover Kanda Poha, I was wondering what to upcycle it as. It seemed such a shame to throw away such precious organic red poha. Thus was born Poha Alu tikki. Since rice flakes (Poha) is so quick to soak, and because the tikki is easy to put together with readily available ingredients, I am sure you will enjoy making and savoring this simple Poha Alu Tikki as much as we did.

You can use either Red or White Poha for this Poha Alu Tikki. Or you can use up leftover Aval upma/Kanda Poha like me! Just add a boiled potato for binding, some herbs and seasonings, and the Poha Alu Tikki is ready to be pan fried and gorged upon.

Here is how I made Poha Alu Tikki.

Tikki platter

ALLERGY INFORMATION

  • Does NOT contain lactose, nuts, soya, corn, egg.
  • Suitable for people with gluten allergy or lactose intolerance,

Preparation Time -  15-20 minutes, Cooking Time –  25–30 minutes, Makes – 12 –14 medium size tikkis. 

YOU NEED

COOKWARE – colander, 5 litre mixing bowl, chopping board, knife, potato masher, non-stick tawa/griddle

INGREDIENTS

  1. 1 heaped cup Red/ White rice flakes ( poha). I used *Red Poha. OR 1 heaped bowl leftover aval upma/Kanda Poha
  2. 1 medium potato boiled, or half cup boiled mashed potato
  3. 1/4 cup finely minced red onion
  4. 2 green chillies, finely minced
  5. a handful of fresh coriander leaves,finely minced
  6. 1/2 teaspoon salt
  7. 1/2 teaspoon amchur powder
  8. 1/2 teaspoon garam masala powder

METHOD

  1. If using fresh rice flakes(Poha), cover with fresh water, soak for 5 minutes. Then place in a colander and rinse under running water. Set to drain.
  2. Clean and mince finely onion, green chilly, and coriander leaves.
  3. Add the above to the drained poha, mashed potato, salt, amchur and garam masala in a mixing bowl. Mash them together using a potato masher. Mix well to a homogenous mixture.
  4. Make big lemon size balls, flatten slightly, and shallow fry on a heated non-stick tawa. Drizzle as little oil as possible while shallow frying. Flip to other side, and cook till browned. Take care to brown both sides evenly.
  5. Remove to serving plate. Serve with onion rings and mint chutney.

Tikki close upTikki close up 2


Jun 3, 2015

Idli – The Ultimate Guide to Softest Idlis.

Idli. Enough said. That spongy, light as air, uber healthy, steamed breakfast of millions in India. It is every idli lover’s dream to make the fluffiest, softest, ‘malli poo’ idlis (as soft as jasmine flower) at home. Idli is the stuff of  culinary dreams. The perfect idli seems so much in reach and yet, so elusive. As my friend put it, “Idli is the cause and weapon of marital fights at our home.” If you want Idli to be the cause of marital harmony rather than distress, or if you are looking for a healthy breakfast recipe, read on..

Much has been written about how to grind the perfect idli batter. Family and friends who have tasted my idlis have been reminding me to document my recipe at the blog. So here I am, with my method of making idli batter. Do share what works for you as well. It would be great to hear from everyone.

The key to good food begins with good ingredients. I use Salem idli rice. I use the best quality whole white urad that I can find. In Bangalore, Salem idli rice and whole white urad can be bought at most wholesale rice and grain shops. (rice mandi) Some supermarkets like Nilgiris, Spar, Star Bazaar, Towness also carry them. “Can I use idli rava instead of the rice?” You can. But the texture of idli will be different. Don’t tell me I did not warn you.

The next step is correct technique. For fermentation, timing is key! I soak the grains overnight, grind it the next morning and leave it to ferment through the day. By evening, the batter is ready. I store the fermented batter in the fridge and use it for up to a week without any loss of flavours.

Idli topped with two chutneys 

If you are eager to make the perfect idlis for your family, follow these steps carefully. Please read the method thoroughly before trying. As with other recipes, perfection comes with practise. If you have any doubts, write to me and I can try to sort it for you.

YOU NEED

COOKWARE – Wet grinder, big bowls, spatula, idli steamer 

INGREDIENTS

  1. 4 cups Salem Idli Rice
  2. 1 cup Whole white urad
  3. 1 tsp Fenugreek seeds – (optional)
  4. 2 tsp Salt
  5. 5-7 cups chilled drinking water for grinding.

METHOD

  1. Measure out rice and urad in two separate bowls. Add fenugreek seeds, if using, to rice bowl. Rinse in enough changes of water till water runs clear. Soak in fresh drinking water. Water level should be 1 inch above the grains. Soaking time can range from minimum of 4 hours to maximum of 8-9 hours. I soak overnight. (about 8 hours)
  2. Measure out 2+1/2 cups of drinking water. Drain the soaking water from urad and grind in wet grinder. Keep sprinkling a quarter cup of water every 8-10 minutes. Use all of the 2 cups of water. Add as much of the 1/2 cup as needed. I grind for 40-45 minutes. Remove to a deep bowl when the batter looks doubled in volume and is silky smooth when you feel between your fingers.
  3. Measure out 3+1 cups of chilled drinking water. Drain out the soaking water from rice. Grind in wet grinder with 1 cup of water to begin with. Sprinkle just enough water to keep the grinder running smoothly. Keep checking every 4-5 minutes while grinding. Add water as necessary. I grind rice for 20 minutes. I stop grinding when the rice feels a little coarse and before the rice becomes a very smooth paste. That is not to say a semolina texture. Rather, between fine semolina and paste….
  4. Remove to same bowl as urad batter. Add salt and mix well with your hand. Yes, I dip most of my forearm into the batter to mix it up. This is vital to good fermentation. Have you not heard?
  5. Set this covered bowl of batter to rest in a warm place. Make sure to fill you bowl only half way to give room for rising. You can divide the batter into two bowls too. At my home, the batter takes about 8 hours to ferment. If your room temperature is below 20C, set to ferment inside your cold oven. Or cover the bowl with a beach towel/blanket. And pray that the batter does not attach itself to your blanket!
  6. The batter is completely fermented when it rises to double in volume, has a sour-sweet fragrance. Stir it lightly. Pour into greased idli moulds.
  7. Steam for 10-12 minutes over a medium flame. The idlis are done when a knife inserted through the centre comes clean.
  8. Serve hot with assorted chutneys, or molaga podi or sambar. Or all of them!

Mini idli served with love

Apr 16, 2015

Jowar dosai

Why millets? Why so much brouhaha over these pseudo cereals? Why is it important in a modern urban diet? Are they good at all? Who should eat millets? Who should not? These and many more facts set out for you here. Read on to know more.

Millets are not cereal grains, so they are called pseudo grains. Millets are smaller grains. They belong to five (or more) different botanical families, but are classified under one name as millets. Millets are grown for bird, animal and human consumption. Factors that go in favour of their cultivation are that they have a short growing season, grow in semi arid regions, (they need very little water) need very little attention. Different countries across the world have been growing and consuming millets for thousands of years. Unfortunately, urban diets have not included millets for about 50 years now.

So what is the good and bad about eating millets? Here, I split it up into its constituents and make it simple for all to understand.

The Carbohydrates -  Millets have complex starches in form of amylose and amylopectin. Such a starch can only be digested in cooked form by humans. Since they not easily digestible, they have a low glycemic index. That means they release their sugars into the blood stream in a slow steady fashion. Much like how a sustained release medicine works. There are no highs and lows in blood sugar when you are eating such starches. And yes, you guessed it right: this is great news for diabetics and pretty much everybody else.

The Proteins – After carbohydrates, proteins form the major part of millets. Egg and human milk are considered perfect proteins because they have the best combination of amino acids that the human body needs. When compared to these proteins, most millets are found to have insufficient amino acids to provide all nutrients for infants and growing children. Millets have been found to be deficient mainly in lysine, an essential amino acid. What are amino acids?

Amino acids are the building blocks of proteins. There are 21 amino acids that form all the proteins ever known. Several of these amino acids are made in the human body. These are called non-essential amino acids because the body can make it on its own. Some of these are called essential amino acids. Why are they called so? Because they are necessary for growth and cell repair but cannot be synthesised in the human body. So they have to come from the food we eat. Lysine is one of these essential amino acids.

Does this mean that millets are not good enough for weaning food? Or to feed growing children? No. Millets are very good for children, when cooked well and when paired with a legume such as mung bean or tuvar dal. Legumes are naturally rich in lysine and by combining them in the same meal ensures that the meal gives complete protein for the growing body. Besides, millets are gluten free as well. So they are a safe bet for all, children, older people or those with gluten allergy.

Look forward to more information and recipes with millets in my forthcoming posts.

Meanwhile, here is a recipe for Jowar Dosai. This recipe is good for beginners who are not sure about how to begin including millets. Millets are great for people who need a gluten–free diet as well. Besides, here, the ground batter is fermented which increases the food’s digestibility as well as increasing the availability of several vitamins and minerals from the grains.

The initial trouble of soaking, grinding and fermenting is well worth the effort. The batter keeps well in the fridge for up to a week. When you have batter ready in the fridge, making dosai for a meal takes only a few minutes. You can choose to make regular size dosai for breakfast, dinner or coin-sized ones for your child’s lunch box.

Coin Dosai platter dotted with molaga podi

ALLERGY INFORMATION

Preparation Time – 8 hours soaking+1 hour grinding+8 hours fermentation, Cooking Time – 10-15 minutes, Makes – about 20 dosais.

YOU NEED -

COOKWARE - Wet grinder or mixer grinder, Iron skillet/griddle, Big deep dish mixing bowls, ladle, sharp metal spatula

INGREDIENTS -

  1. 1 cup Jowar grains
  2. 1 cup salem idli rice/boiled rice/raw rice
  3. 2 tbsp fenugreek seeds
  4. 2 tbsp urad dal
  5. 1 heaped tsp salt
  6. Sesame oil for drizzling over dosais, about 1/4 cup oil

METHOD -

  1. Measure out all ingredients except salt and oil. Rinse the grains well, Soak overnight. To do this, steep in enough water to cover the grains plus an inch higher.
  2. The next morning, grind the soaked grains. If using wet grinder, keep sprinkling water every 7-10 minutes. You can use up to 3 cups water for grinding. I grind my batter in a wet grinder. When using jowar grains, it takes longer to grind. About 1 hour of grinding gives me a smooth batter. When the batter looks smooth, add salt, mix well and remove to a deep bowl. Allow plenty of head room for fermentation. Leave overnight for fermentation.
  3. The batter is ready when it has risen to double volume.
  4. Heat up an iron skillet/dosa tawa. Smear oil all over to grease.
  5. Pour a ladleful batter in the centre of skillet. Spread with back of ladle in concentric circles. Drizzle few drops of oil around the sides. When brown at edges, loosen the edges, flip over with a sharp spatula and cook on other side. Repeat for the next ladle of batter.
  6. Alternately, pour tiny spoonfuls of batter all over the skillet to make ‘coin dosais’. Drizzle oil around the sides, flip over to cook briefly on other side. Remove to serving platter when done.
  7. Serve with any chutney of choice or with dosai molaga podi!

Coin dosai topped with molaga podi

Crispy or soft - fragrant Jowar Dosai

Dec 22, 2014

Potato and Sorakayi Kurma

An unusual combination of vegetables. Brought about by necessity. That and the early morning rush. I found just a few vegetables in the fridge and had to create some packed lunch out of these in 30 minutes. So here is how I managed to pull it off.

In case I need to ‘repeat this accidental success’, I may need a recipe the second time. So I am documenting it here. Also thought of sharing it with my friends: harried moms who have to churn out delicious food, in school lunch boxes every morning, that too in record time.

Aromatic Potato and Sorakayi Kurma

ALLERGY INFORMATION

  • Does NOT contain lactose, gluten, nuts, soya, eggs.

You Need

Cookware

Knife, chopping board, pressure cooker, saucepan

Ingredients

  1. 1 large potato
  2. 1 heaped cup diced lauki/sorakayi/bottle Gourd
  3. 1/4 cup diced carrot (optional)
  4. 1/4 cup fresh/frozen green peas
  5. 1 small onion
  6. 2 tomatoes OR 2 tsp tomato paste
  7. 1/2 tsp garlic paste
  8. 1/2 tsp Garam Masala Powder
  9. 1/4 tsp turmeric powder
  10. 1/4 tsp red chilli powder (optional)
  11. 1/2 tsp salt or more if needed
  12. 1/4 tsp cumin seeds
  13. 1/4 tsp mustard seeds (optional)
  14. 1 tsp cooking oil

Method

  1. Rinse, peel skin and chop/dice vegetables(from 1 to 3) to similar size. Place along with peas directly in a small pressure cooker or in a suitable container inside a pressure cooker. Add 1/2 cup water, and cook for 2 whistles. Let cool on its own.
  2. While the veggies are cooking, set a sauce pan over flame. Heat oil, season with cumin and mustard seeds. (if using)
  3. Add finely chop onion. When it begins to brown, in a couple of minutes, add the garlic paste, let sizzle for minute. Keep stirring, lest it burns.
  4. Add in the tomato paste, the powders. Sprinkle a few tbsp of water. Stir and simmer for 4-5 minutes for all flavours to blend well.
  5. Combine the cooked vegetables (along with cooking water) and the simmering gravy. Check for salt and other seasonings. Mash the potato chunks roughly with the back of a ladle.
  6. When you have simmered this mixture for a couple of minutes, the kurma is ready. Can be packed along with rotis, bread or steamed rice for school lunch.
  7. TIP – If you find the gravy too salty or spicy, add quarter cup water, some chopped coriander leaves and squeeze half a lemon into it too. Hopefully you can retrieve it this way. Another way to salvage, is by adding another boiled potato to this gravy. But yes, you need time to boil another potato if you don’t have one handy.

Phulkas with Kurma for lunch

Lauki and peas doing a happy tango  

Nov 25, 2014

Cabbage and Carrot Thoran

Cabbage does grow all year round, but acquires its best flavours only in winter. Since cabbage is quite sweet and less pungent in these months, it is easy to include it in several dishes. I often make a cabbage soup in this chilly weather too. It actually tastes much better than we would imagine. None of the bitter, sulphurous, menacing notes to it – just some crisp sweetness and heart warming honesty. Well about the soup, later. About cabbage first.

Cabbage has most of the vitamins and minerals we need daily. It has a high content of vitamin B and C. Besides, it is also high in fibre, potassium as well as low in sodium. It is also a fair source of Omega 6 fatty acids. These point to it being an excellent vegetable for people with high blood pressure, or are pregnant, or suffering from constipation too. Cabbage has small amounts of an ‘anti nutrient’ called as ‘protease inhibitor’. This prevents proteins from being digested well in the body. Hence it is better to cook cabbage lightly and then eat. Cooking deactivates the inhibitors and improves digestion of the vegetable and the entire meal.

Stir frying cabbage is the best way to cook it. The vegetable is stripped of its anti nutrients through minimal cooking, yet, the vitamins lost by heating are reduced too. Adding carrots to this recipe is optional. I’ve just added them for extra colour.

Select cabbage that has a compact oblong head vs a flat-ish round shape. Also, if a smaller cabbage weighs more than a larger one, then you can be sure the smaller dense cabbage will taste better.


Cabbage Thoran


Now I’ll walk you through one traditional Kerala recipe. It is as simple as it gets. Thinly shredded cabbage is tossed in a seasoning of oil, mustard and curry leaves. It is salted, stir fried and finished off with fragrant coconut and green chillies. A worthy accompaniment to tangy spicy sambar or kadhi/ moar kuzhambu and steamed rice. Can be tweaked a little to work as side dish to bhakri or phulkas too.


Dal and Cabbage stir fry vying for attention

ALLERGY INFORMATION

  • Does not contain egg, gluten, soya, corn, nuts, lactose or dairy.
  • Suitable for people with lactose intolerance or gluten sensitivity, or nut allergy.

Preparation Time – 15 minutes, Cooking Time – 15 minutes, Serves – 4.

You Need

Cookware – Knife, Cutting Board, Wok/Fry pan of about 4 litre capacity, metal spatula, mixer grinder,

Ingredients

  1. 1 whole cabbage weighing 800-1000gms
  2. 1/4 kg Orange/Red Carrots (optional)
  3. 2 tsp cooking oil
  4. 1 tsp salt
  5. 1/2 tsp mustard seeds
  6. 1/2 tsp urad dal
  7. 10-12 curry leaves torn up
  8. 1/4 cup grated fresh coconut
  9. 2-4 green chillies depending on heat preference
  10. 1/4 tsp cumin seeds
  11. 1-2 cloves garlic(optional)

To Assemble

  1. Remove outer bruised leaves of cabbage, if any, and shred/chop finely.
  2. Peel carrots and grate on the large hole of grater.
  3. Heat up oil in a wok. Season oil with mustard seeds and urad dal. Add curry leaves when the mustard crackles, and tip in the chopped vegetables.
  4. Stir fry over high heat for a couple of minutes. Sprinkle a few tablespoons of water, cover and let cook for 3-4 minutes. Open lid and mix well a couple of times in between for uniform cooking.
  5. Meanwhile, whizz the grated coconut with chillies, cumin, and garlic (if using) in a mixer to a coarse mixture. Do not add any water while grinding this.
  6. After 3-4 minutes, when the cabbage feels cooked through, yet retaining some crispness, add salt and then add the coconut mixture and fold through the stir fry well. Keep stirring over high heat, especially if using garlic, to eliminate raw odour. Remove from flame. Cover and let flavours mingle for 5-10 minutes.
  7. Serve warm with steamed rice, and tomato dal, or sambar, or kadhi. I served it with a ‘Basella greens’ and tomato dal and steamed rice.

The red chilli in the dal does not taste as sinister as it looks!

A complete meal

Nov 9, 2014

Chole Kachumber Salad

Hearty, nourishing, vibrant, colourful. These are the descriptions that come to my mind as I think of the salads we make often at our home. And I am talking about vegetarian salads here. No, we do not miss the meat in salads or in anything else for that matter. Actually nobody would.
If we know how to bring together a medley of textures, colours, aromas and flavours, we can create amazing fresh, healthy salads for ourselves with just about as few or as many ingredients.
Salads such as these can be rustled up and forked down with guilt-less relish. At any time of the day. As part of a meal. As a meal in itself. As a filler between meal times. As a post workout snack. As an after school snack. …
Which is why I stock some soaked and cooked beans such as mung, brown or green chana (varieties of chickpeas), rajma (red kidney beans) or lobia (black eyed beans) in my freezer. They come in handy to spruce up a salad like this one.
I am calling this as chole – kachumber salad. It also closely resembles ‘Balilah’, a salad from Middle Eastern or Moroccan cuisine which is centred around chickpeas too. Here is the recipe for my chole – kachumber  salad.
Luscious colourful salad
ALLERGY INFORMATION
  • Does NOT contain lactose, soya, gluten, nuts.
Preparation Time* – 15-20 minutes + 30 minutes chilling, Cooking Time – nil, Serves – 4-6.
You Need
Cookware – Steel/glass mixing bowl, Knife, Grater
Ingredients
  1. 1 cup of cooked chickpeas/kabuli chana
  2. 1/4 cup finely diced red onion
  3. 1/2 cup chopped tomatoes
  4. 1/2 cup diced/grated cucumber**
  5. 1/2 cup grated  carrots
  6. 1/2 cup pomegranate arils
  7. A few lettuce leaves torn by hand (optional)
  8. 1 tbsp chopped parsley OR 2 tbsp chopped coriander leaves
  9. 1 tbsp lemon juice
  10. 1 tsp sesame oil
  11. Salt and pepper to season
To Assemble
  1. To make the dressing, mix salt, pepper, oil and lemon juice. Whisk well and set aside.
  2. Prepare all the vegetables as mentioned for the salad.
  3. **Peel and core the cucumber if you find it has big seeds. Then chop or grate as preferred.
  4. Mix all the ingredients in a bowl, drizzle the seasoning. Add salt and pepper. Toss well.
  5. Chill for half an hour before serving.
* The preparation time is lesser only if you have cooked chana ready. Else, you may have to soak and cook ahead to use for the salad.  In that case, allow for 8 hours Soaking Time + 1 hour Cooking Time.
Single serve bowls of salad
High protein snack - chole kachumber salad

Oct 4, 2014

Sprouted Mung Bean Sagu

A sensible diet does not mean fasting for most part of the day. Rather it means eating smart, deriving maximum nutrition for every bite, making the right food choices. For vegetarians, a healthy diet also means an intelligent blend of cereals and proteins. You may ask why?

Egg is called a complete protein source because it contains all the 20 amino acids needed by the body.

Does that mean you lose out on the proteins if you follow a vegetarian or a vegan diet? NO!!

Nature has provided so much variety that we can easily make every meal a complete protein meal simply by smart pairing of a cereal and a legume. This is because, cereals and legumes have complementary amino acid profiles. In simple speak, cereals will supply the amino acids found missing in legumes and vice versa. By consuming both at the same meal, every time, we can compensate for the amino acids missing in each of these grains and make the meal a nourishing and strengthening one.

Power Breakfast - Idlis and Sprouts Sagu

Enter - a favourite South Indian breakfast. Rava Idlis are made with wheat semolina unlike usual idlis which are made from a rice based batter. Rava Idlis are always paired with Potato Sagu in homes and restaurants in Bangalore. In Tamil Nadu or other Southern states, the dish is usually paired with a mixed vegetable ‘kurma’, or chutney. All these dishes are great spicy accompaniments to the bland, soft rava idli.

However, I wanted to take this meal a notch up in the nutrition ladder. Looking for a protein ingredient to accompany the ‘rava’, I felt the best one would be mung bean sprouts. Several reasons for this – mung beans are a pantry staple in most homes, they sprout with little effort, are quick cooking, and lend character to any meal. Still, with great trepidation, I waited to see the reaction on my family’s faces when I served this up for breakfast. One look at them all, and I was satisfied we have a winner at hand.

I urge all of you to try this out too. Enjoy it for breakfast, brunch or even dinner. And let me know your thoughts. Here is how I made our weekend breakfast.

ALLERGY INFORMATION

  • Contains gluten from rava. NOT suitable for celiacs, or people with gluten sensitivity.
  • Contains buttermilk. Usually suitable for people with lactose intolerance.
  • Does NOT contain egg, corn, soya, nuts. Suitable for people with nut allergy.

Preparation Time – 30 minutes, Cooking Time – 30 minutes, Serves – 4-6.

YOU NEED

Cookware – Idli steamer, Pressure Cooker, Mixer Grinder, Sauce Pan

Ingredients

For the Rava Idlis – I used an Instant Mix of Soulfull Rava Idli Mix. This was part of the goodies we received at the IFBM. Quite fresh and convenient. Mix the contents of the packet with enough sour buttermilk to make a thick pouring batter. Grease idli moulds, pour in batter and steam in a pressure cooker/idli steamer for 10-12 minutes until done.

Spongy soft Rava Idlis

For the Mung Bean Sprout Sagu

  1. 1 heaped cup Mung Bean Sprouts
  2. 1/2 cup finely chopped Onions
  3. 1/2 cup diced Tomatoes
  4. 1 tsp Ginger garlic Paste OR make a paste of a thumb size ginger piece and 2 cloves garlic
  5. 2-4 green chillies depending on your heat preference
  6. 1 tbsp khus khus (poppy seeds) soaked in hot water for half an hour
  7. 2 tbsp fresh grated coconut
  8. 1/4 cup roughly chopped green coriander leaves with stem
  9. 1/2 tsp salt
  10. 1 tsp Cooking Oil
  11. 1/4 tsp Mustard seeds
  12. 1/4 tsp Cumin seeds

To Assemble

  1. Set the khus khus to soak in 1/4 cup very hot water.
  2. Rinse the sprouts, place in bowl, add 1/2 cup water and pressure cook for 2 whistles.
  3. Rinse, dice, prepare all vegetables as mentioned in ingredient list.
  4. Grind these ingredients into a smooth paste – khus, fresh coconut, green chillies, fresh coriander leaves, ginger and garlic. You can add some water to help grind too.
  5. Set a sauce pan over heat, add oil, tip in mustard and cumin to season.
  6. When they crackle, add the onions, fry till soft, then add tomatoes. Add salt, fry till tomatoes are pulpy.
  7. Pour in the cooked sprouts, add the ground paste, mix well, and simmer for 5 minutes. Do not boil on high heat. Add 1/2cup water to thin down if needed. We want a liquid dipping consistency. Check for salt. When the sagu is well blended, remove to serving bowl and enjoy with hot steaming rava idlis.

Enjoy hot breakfast with a view

Bowl of fragrant sagu

Jul 6, 2014

Using Leftovers–Veg Cutlets


This recipe is about leftover-makeover. Celebrating the nifty, resourceful cook, who I guess most of you are! What would you do when faced with small bowls of random curries in the fridge? Make parathas? Or some fried rice and toss in those veggies, perhaps? We made these cute cutlets last week.

Even if we discovered the combination quite by chance, it had a great balance of protein, tubers and vegetables thrown in. Our kids could not find any fault with the textures and flavours in this melange. After polishing off several of them at their post-school snack time, they asked for it at dinner too! It was then I realised we had a killer combo in hand. Quite versatile too, for they can be devoured as such, can be sandwiched between buttered bread and packed for school lunch, or get converted to burger patties, or get drenched in the very Indian ragda pattice.

After-school deliciousness

Since we made them with whatever was in the fridge, I am not sure as to how to record a recipe. Here is what we threw together -

Preparation time – 20 minutes + 8 hours soaking time, Cooking time – 40 minutes pressure cooking + 20 minutes, Serves – 4 - 6 

Allergy Information

  • Does NOT contain egg, dairy, lactose, corn, soya.
  • Can be made gluten free by substituting bread crumbs with rice flour or corn flour for dusting.

You Need

Cookware – Pressure cooker, electric mixer, colander, mixing bowl/basin, non-stick skillet / any other skillet.

  1. Boiled* and mashed potato -  1/2 cup
  2. Cooked* kala channa / Brown channa (Garbanzo beans)– 1/2 cup
  3. Raw plantain* –peeled, chopped and cooked till just done -  1/2 cup
  4. Beetroot* – peeled and boiled, 1/4 cup
  5. Onion – finely chopped – 3/4 cup
  6. Chopped Coriander leaves – 1/4 cup
  7. Chopped green chillies – 2 tbsp
  8. Garam masala / Pav bhaji masala / Chole masala – 1 heaped tbsp
  9. Salt – 1+1/4 tsp
  10. Bread crumbs – 3 - 4 tbsp ( Use rice flour or corn flour to make it gluten-free)
  11. Oil – for sautéing, about 2-3 tsp

To Assemble

  1. Peel, rinse and chop onion, green chillies, and the coriander leaves as finely as possible. Set aside in a colander.
  2. *To save time, you can place the soaked channa in a container topped by another with all the other veggies (add 1/2 tsp salt to the vegetables to avoid getting mushed up) and cook in the same pressure cooker. I normally pressure cook the channa on a low flame for 20 minutes after the cooker’s first whistle. We want a just cooked texture without being mushy.
  3. After the pressure has released, drain all the cooking water into another bowl, place all the cooked contents in a mixer, pulse until coarsely mashed.
  4. Take a mixing bowl. Transfer the contents of the mixer into it. Also add the chopped onions, chillies, green coriander, add 1/2 tsp salt, the masala powder you are using, bring them all together using your fingers. It should feel like a moist coarse mixture (not paste), but should not ooze water or extra fluid. Shape balls into flat cutlets
  5. Make lemon sized balls, flatten slightly using your palm, dredge in bread crumbs and set aside. You can keep these in the fridge for half an hour to stabilise the texture. (Or prepare ahead till this stage, store them in a suitable air-tight container in the freezer. Thaw and fry as many as needed each time.)Dredge in bread crumbs
  6. Heat a skillet, season the skillet with a few drops of oil, place as many cutlets as the surface of the skillet holds, and fry over high heat first and medium flame later on both sides till well browned.Shallow fry both sides in skillet
  7. Remove to kitchen paper.
  8. Serve warm with mustard and tomato ketchup as accompaniments. Or make it into a sandwich filling. Or make thicker pattties, shallow fry on both sides and use to assemble burgers along with some onion, tomato rings and crisp lettuce. Whichever way you choose to gorge on it, you will find it delicious!

Hot cutlets - ready for snacking!

Jun 21, 2014

Five minute Three Pepper Paneer Curry

Check-out Allergy Information.

Every parent with school-going kids has to face the morning or the night before with a very important question – what to pack in the school lunch box? What’s there in my pantry? Also, when you have to feed more than one kid, the agony is doubled, believe me!

If my older one wants muesli for breakfast, the younger one fancies ‘Chocos’. The day the older one thinks of a sandwich for lunch, the younger one would like rice. If one feels like some thing sweet, the other wants a savoury treat right then! The Universe connives with my kids such that, they have exactly opposite moods at any time. At such times, nothing helps - not requests to adjust with each other, not promises to make it tomorrow, not threats, nothing! Trust me.

And, I have an hour to make breakfast for them, make acceptable (read different gourmet meals) lunches, pack them, fill their water bottles, make sure they have brushed, showered, prayed (yes, that is important in my home), combed, attired in mandatory school regalia!, find random books/papers/assignments/stationery that they have forgotten to stuff into their school bags, find their socks, salvage their shoes from the chasm between the shoe racks and the wall, and make sure they reach the school bus on time!

I know I am not alone. Most mothers/parents in my city and maybe, the world over, go through some variation of this vertigo-inducing routine in the morning! Well, after going through this rigmarole for more than 15 years, I have a few tricks up my sleeve. Some recipes which help me assemble quick, hearty, nourishing home-made lunches for my children.

This paneer curry is one such easy-peasy life saver on such insanity-causing weekday mornings!

If you have paneer ready, that is.

And coloured capsicum (bell peppers), and a couple of sauces.

It is versatile, easy to put together, can be used to partner with chapatis, filled into a sandwich, rolled into a kathi roll, or add pizzazz to some fried rice. Most important, when packed in a lunch box, it will come back home empty. Hopefully your child got to eat some of it Smile

Preparation Time – 10 minutes; Cooking time – 5 minutes; Serves – 4-5.

ALLERGY INFORMATION

  • Does NOT contain egg, nuts, corn.
  • Has dairy and lactose. Can be made dairy- and lactose-free by substituting paneer with extra-firm tofu.
  • Has MSG. Not suitable for children below 2 years.

The 3 pepper paneer sandwich

You Need

Cookware – Cutting Board, Knife, Colander, 9” Diameter frying pan / Wok.

Ingredients

  1. Paneer (Or extra firm tofu) – 200 gm
  2. Green, red and yellow capsicum, chopped – 1/3 cup each
  3. Red Onion – 1 big, or measure 1 cup, finely diced
  4. Fresh coriander leaves (Cilantro), chopped fine – 1/4 cup
  5. Schezwan Sauce (any brand) -  2 tsp
  6. Tomato Ketchup – 3-4 tbsp
  7. Salt – a couple of pinches ( if needed)
  8. Any vegetable oil – 2 tsp
  9. Saunf ( fennel seeds) – 1 tbsp*
  10. Honey – 1 tsp OR Sugar – 2 pinches (Optional)

*Do not omit the saunf in this recipe. It adds a unique flavour to the dish.

To Assemble

  1. Rinse paneer or tofu in drinking water. Carefully place it in colander to drain. Then, you can choose to either dice the paneer (or Tofu) or roughly crumble it. I prefer to dice, as then, the diced vegetables and the paneer all look similarly proportioned.
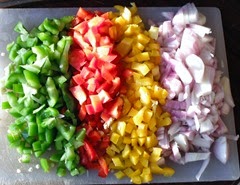
  2. Rinse, and finely dice all the capsicum into the same size. Peel, rinse and finely dice the onion too. Happy day with happy veggies
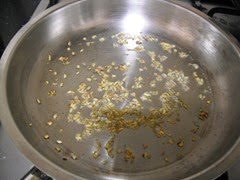
  3. Set frying pan/wok on fire and heat the oil in it. Add saunf, let it sizzle and release its’ aroma. Inhale - the aroma of saunf
  4. Tip in the onion before the saunf browns. Sauté for a minute. Add a pinch of salt to speed things up.
  5. As soon as the onion looks pink,  tip in the diced capsicum, toss. Sauté for another two minutes.Veggies in a merry sizzle
  6. Now the sauces can go in. The sight of these liquids hitting the hot pan and then the aroma around – I’ll leave you to savour in your kitchen!
  7. A quick mix of the sauces and veggies, and now it is the turn of diced paneer followed by chopped coriander to hit the pan. Switch off flame, mix all contents well, taste and add more salt now if needed. Some paneer will get crumbled while mixing, that is fine. Add the (sugar /honey if you are using), now. Mix through, taste again to make sure the flavours satisfy your palate.*Tri-colour glory
  8. The 5 minute 3 pepper paneer curry is now ready. Use it as filling in whole wheat chapatis – spread 2 tbsp of curry per chapati, roll up, cover in foil and pack for lunch. Or, use as filling for sandwiches. it is a great accompaniment to Chinese fried rice too. Sandwiches in the making

* My family found the play of texture and flavour in this recipe to be very appealing! You could add more or less of the sauces, or add more seasonings as you prefer. Add red chilli paste instead of Shezwan sauce, omit the sugar, try the dish with any one type of capsicum – all these are variations you could try.

Pick-me-up Sandwiches for anytime of the day

We are enjoying these filling, healthy and absolutely lip-smacking sandwiches at our home, in our lunch boxes and as after-school snacks too! Go ahead, make some for yourself, enjoy and let me know if you liked them.